Layer change Event
Layer change Event: This video contains how to shift from one layer to another using custom visualization..
- Create dashboard.
- After creating dashboard, create multiple layers from Top-left corner, click on Add New Layer button, as shown in figure below:
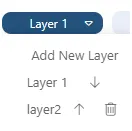
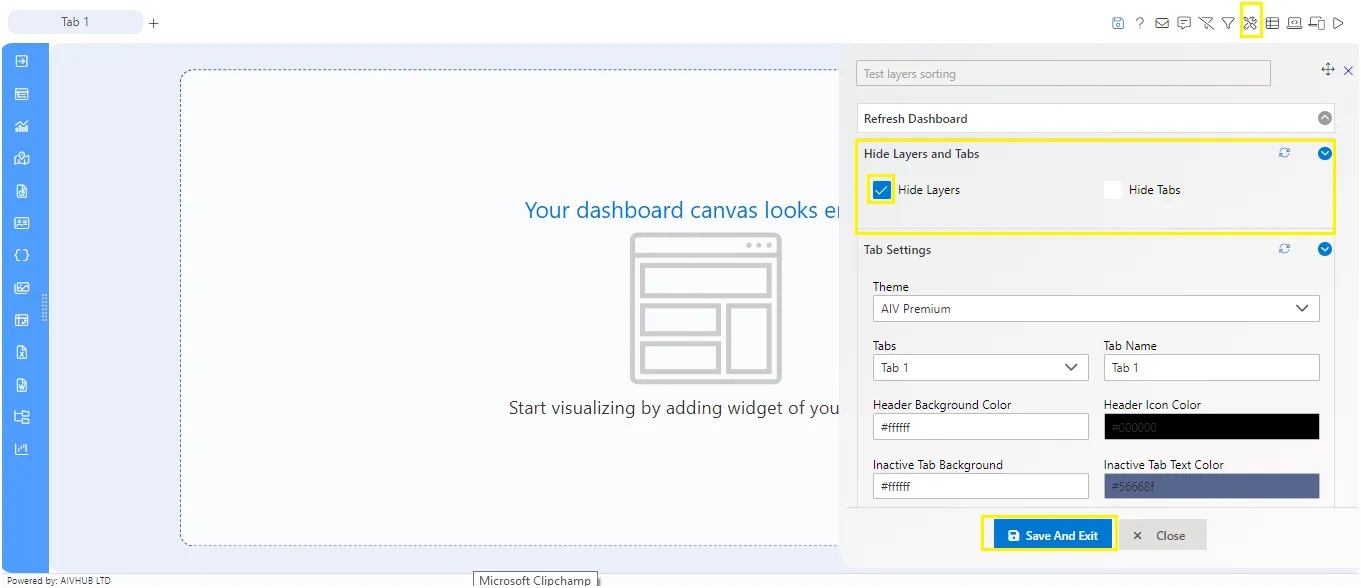
Note: If you’re not able to see the layer button from top-right corner then disable the Hide Layers Checkbox, for that go to Dashboard Settings & open Hide Layers and Tabs as follows:
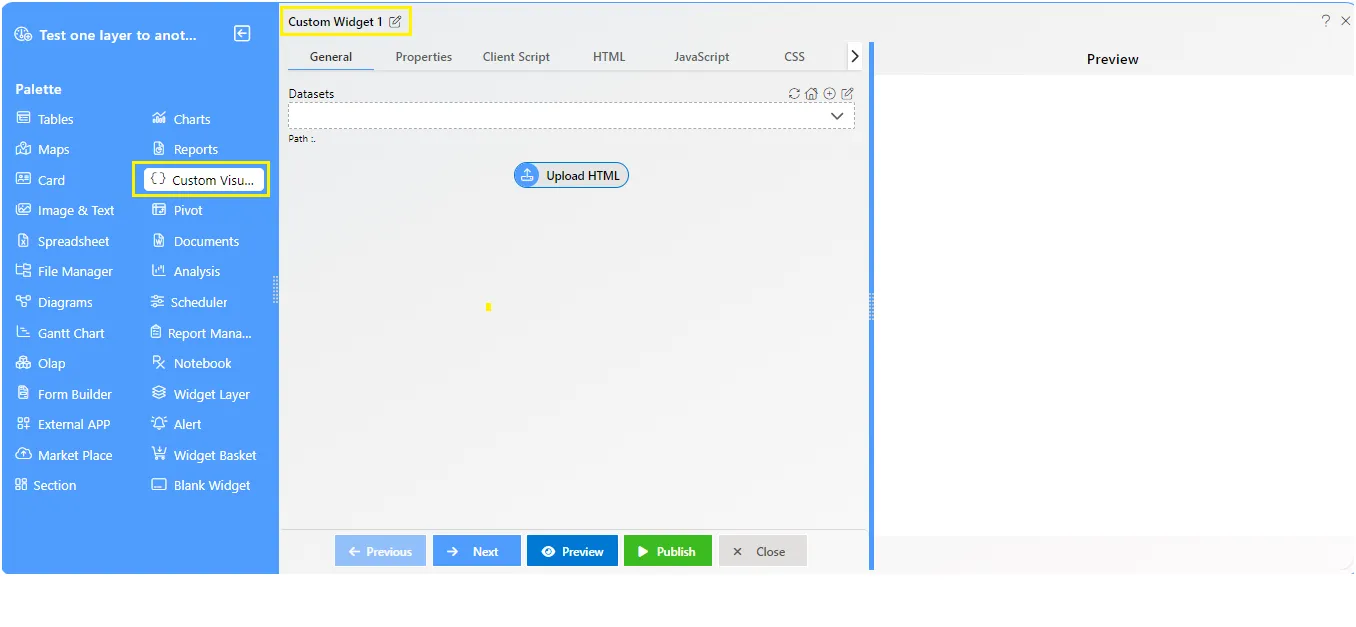
- Go to layer 1 & Click on Custom visualization widget icon from the left Vertical Menu bar, as shown in figure below:
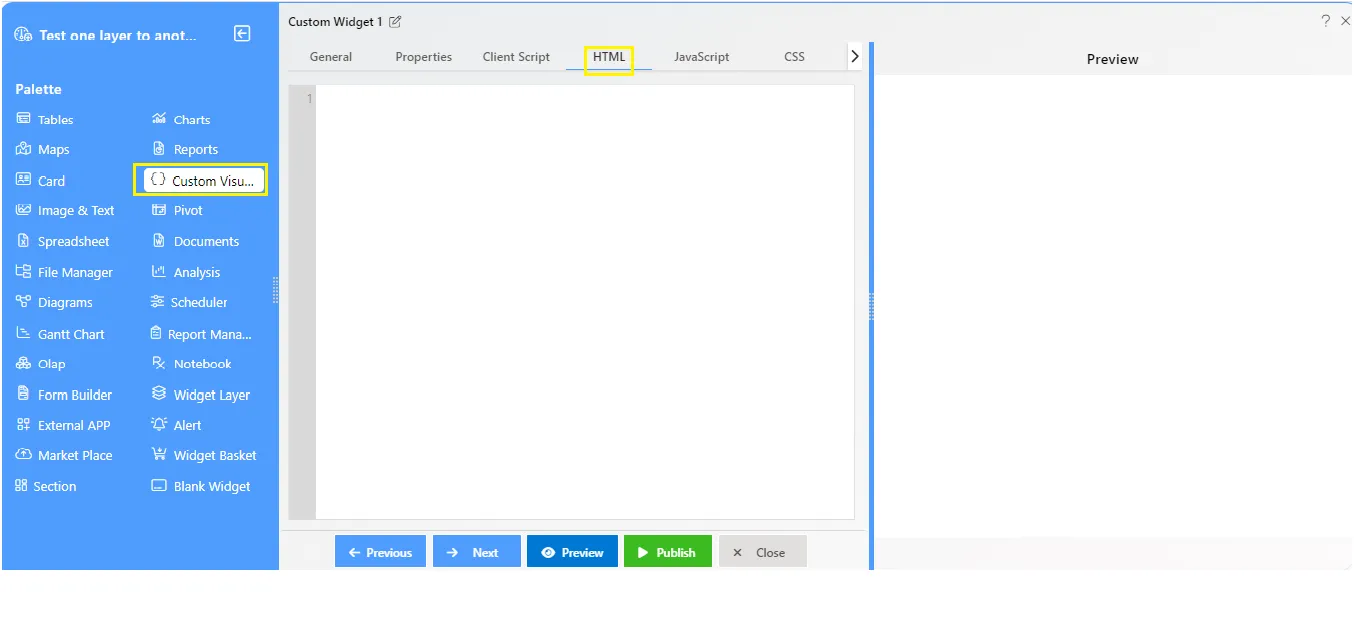
- Go to HTML tab of the custom visualization widget to apply the layer-change-event code, as shown below:
- Create buttons for multiple layers, as shown in figure below.
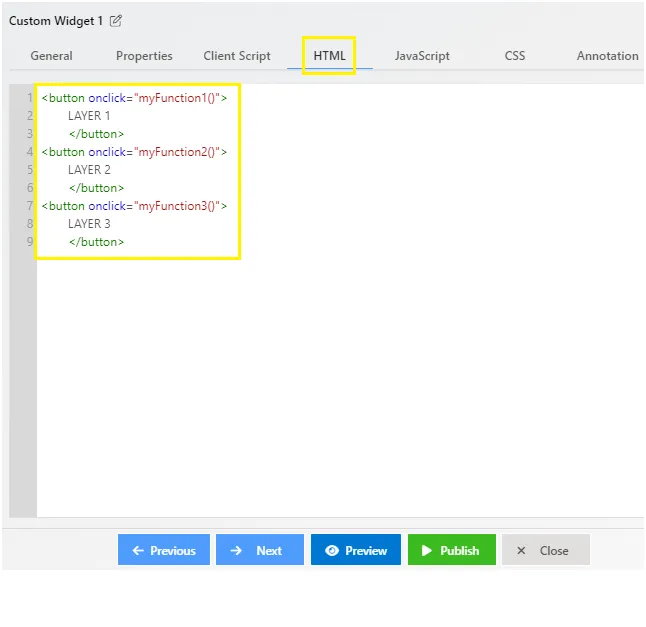

- Now apply code for Layer-change below the buttons using function, as shown in figure below:
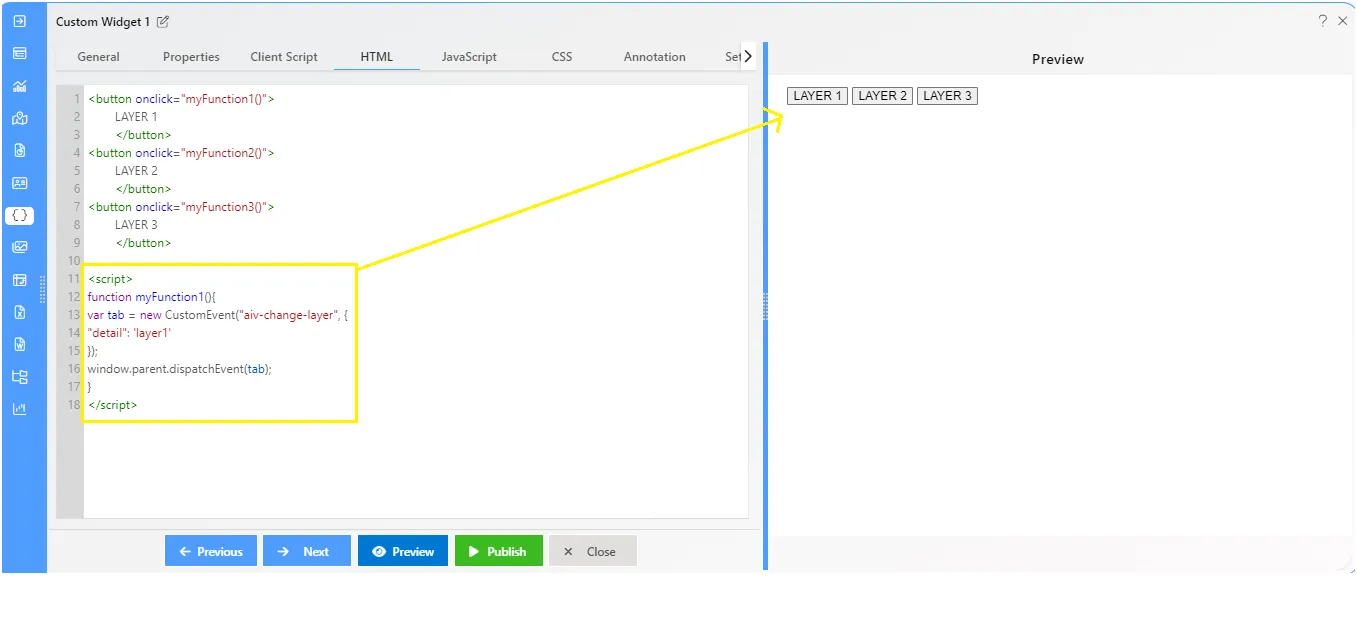
Example Code:
<script>
function myFunction1(){
var tab = new CustomEvent("aiv-change-layer", {
"detail": 'layer1'
});
window.parent.dispatchEvent(tab);
}
</script>- Now click on Save and exit button and go to preview screen to see the output, as shown in figure below:
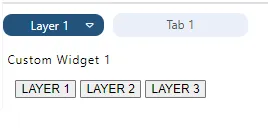
- Click on Layer2 button, it will reach to the Layer 2 in dashboard.

Example Code:
<div>
<button onclick="myFunction1()">
LAYER 1
</button>

<button onclick="myFunction2()">
LAYER 2
</button>

<button onclick="myFunction3()">
LAYER 3
</button>
</div>

<script>

function myFunction1(){
var tab = new CustomEvent("aiv-change-layer", {
"detail": 'layer1'
});
window.parent.dispatchEvent(tab);
}

function myFunction2(){
var tab = new CustomEvent("aiv-change-layer", {
"detail": 'layer2'
});
window.parent.dispatchEvent(tab);
}

function myFunction3(){
var tab = new CustomEvent("aiv-change-layer", {
"detail": 'layer3'
});
window.parent.dispatchEvent(tab);
}
</script>
</div>