Scheduler widget
Introduction
To try it out, please download the sample dataset from the link below:
-
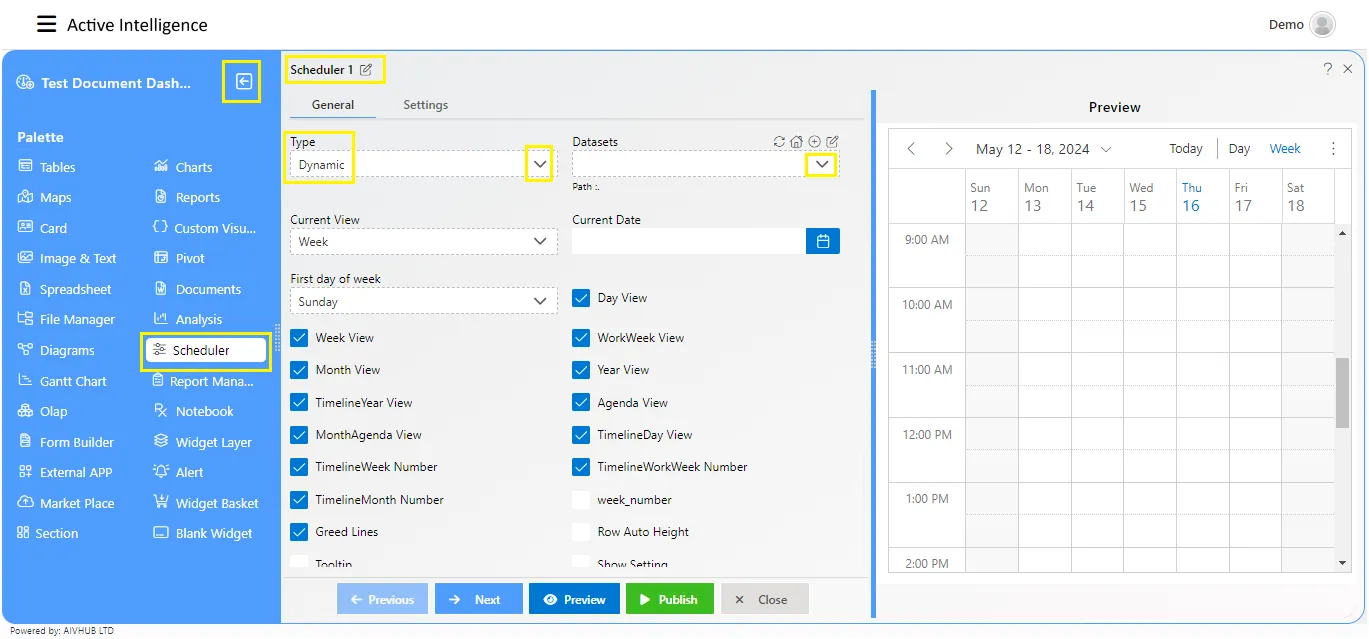
Select the scheduler widget from the right vertical menu bar.
-
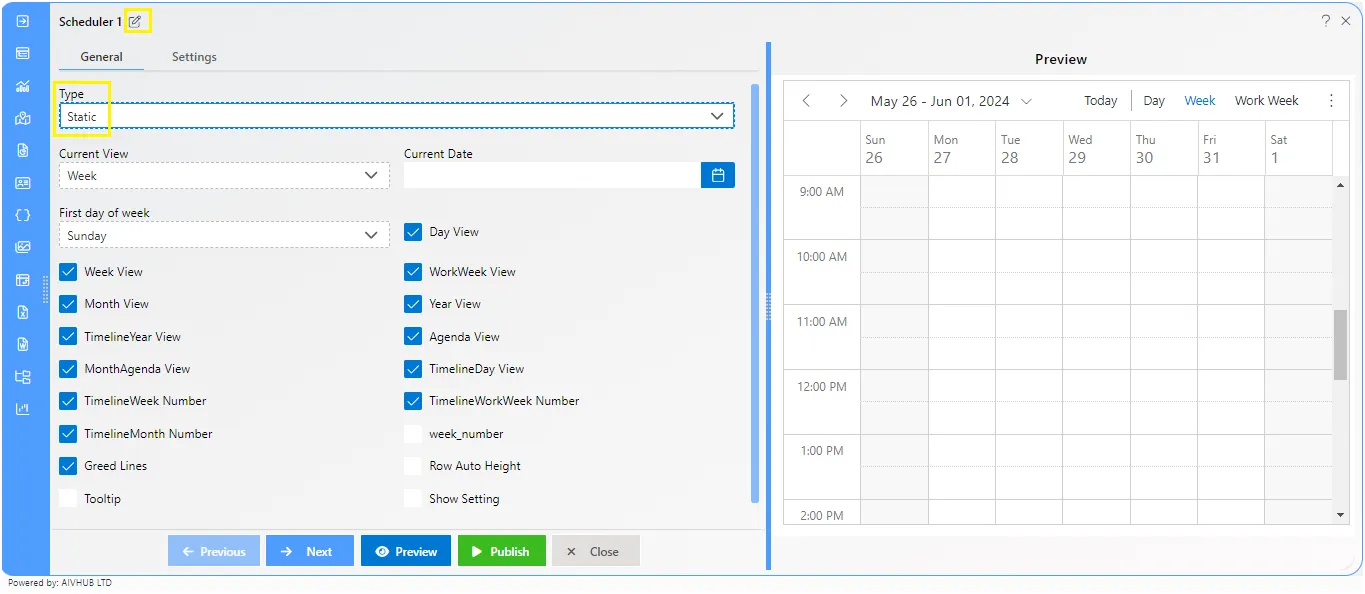
After the scheduler is added to the dashboard, it will look like the figure below:
-
A description of the scheduler’s functions is provided below:
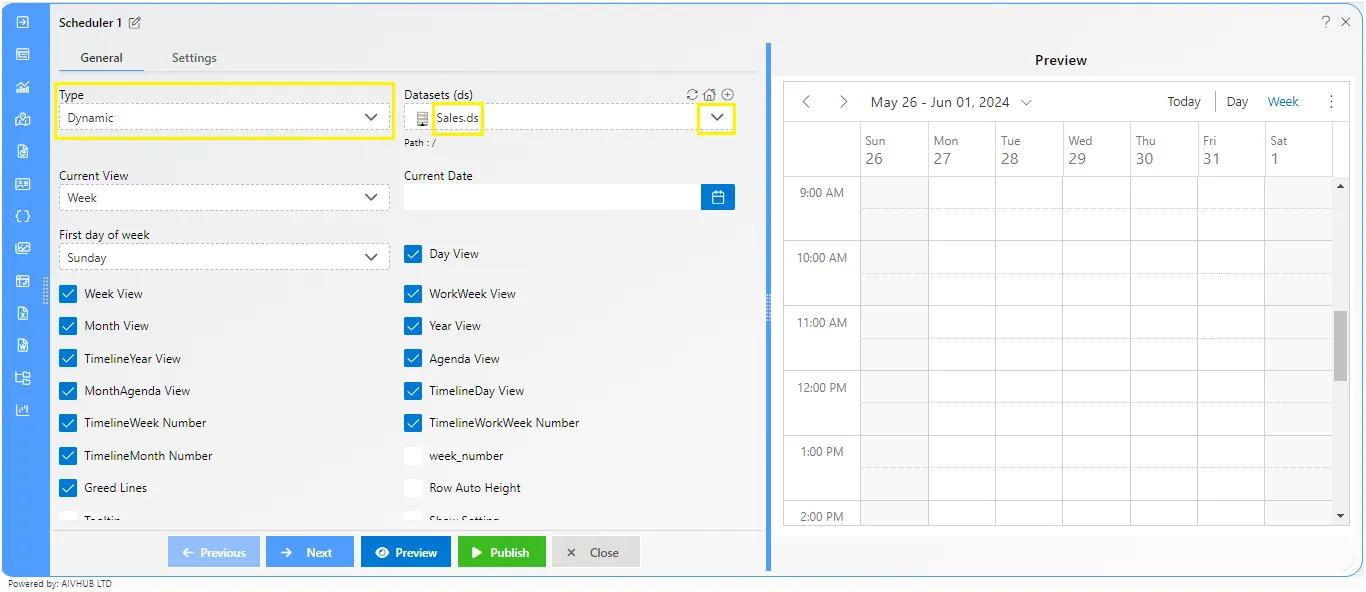
Types of Schedulers
-
Static: The static scheduler allows you to manually add events.
-
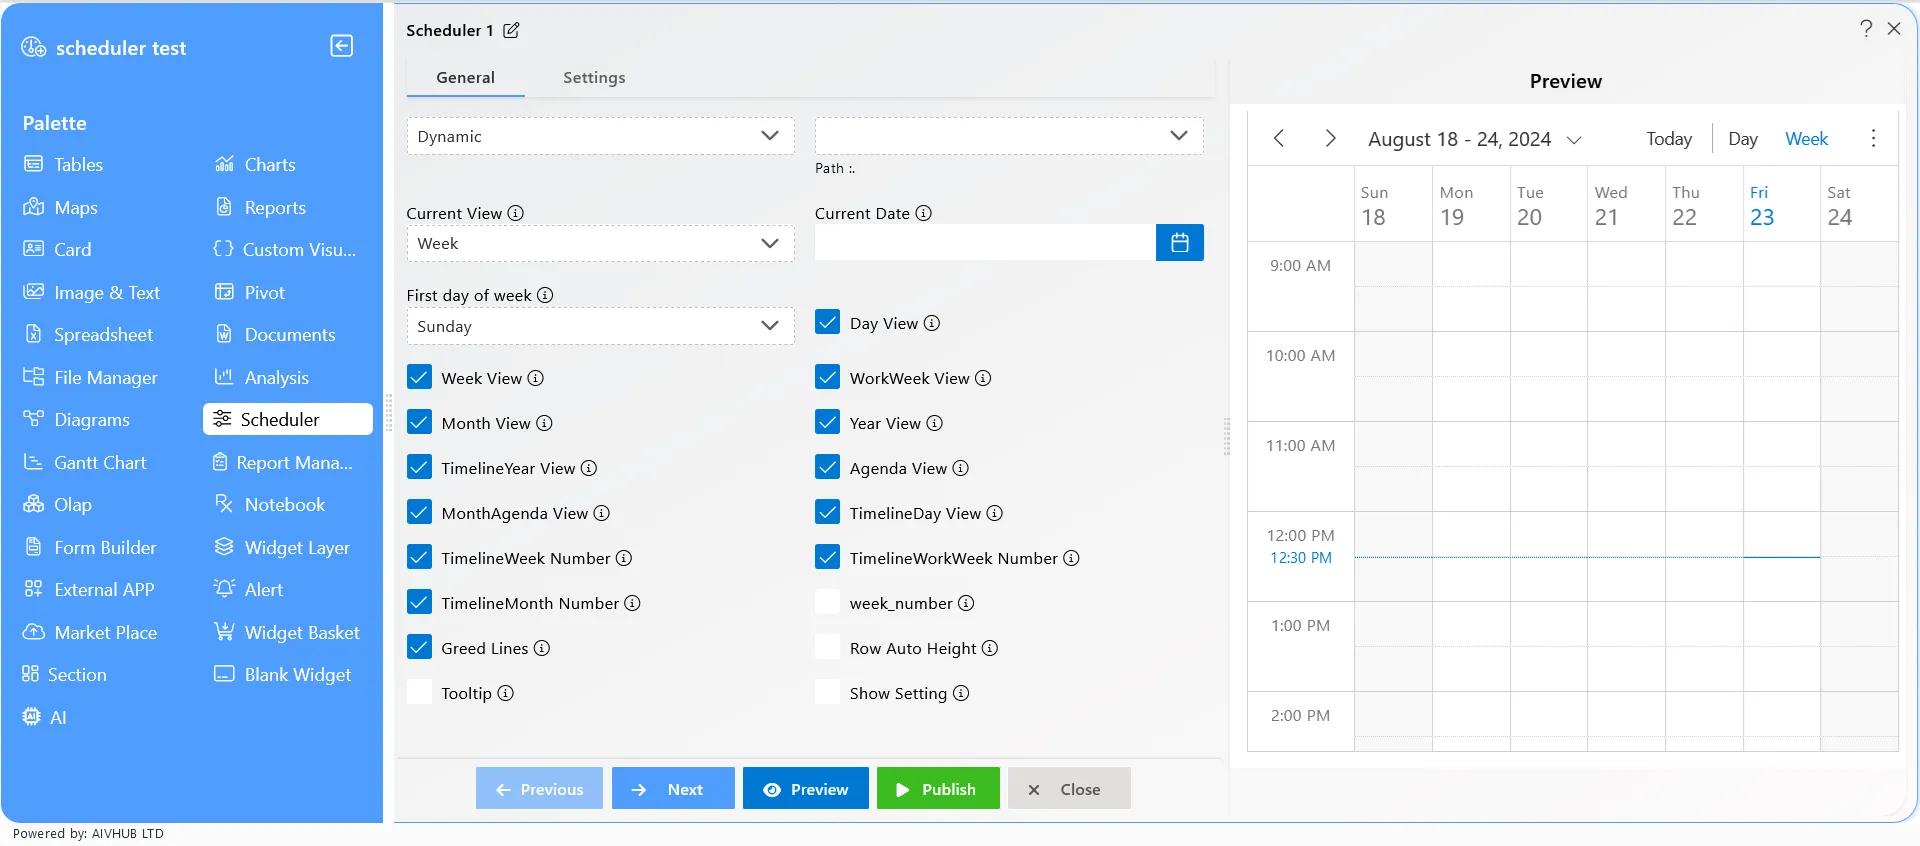
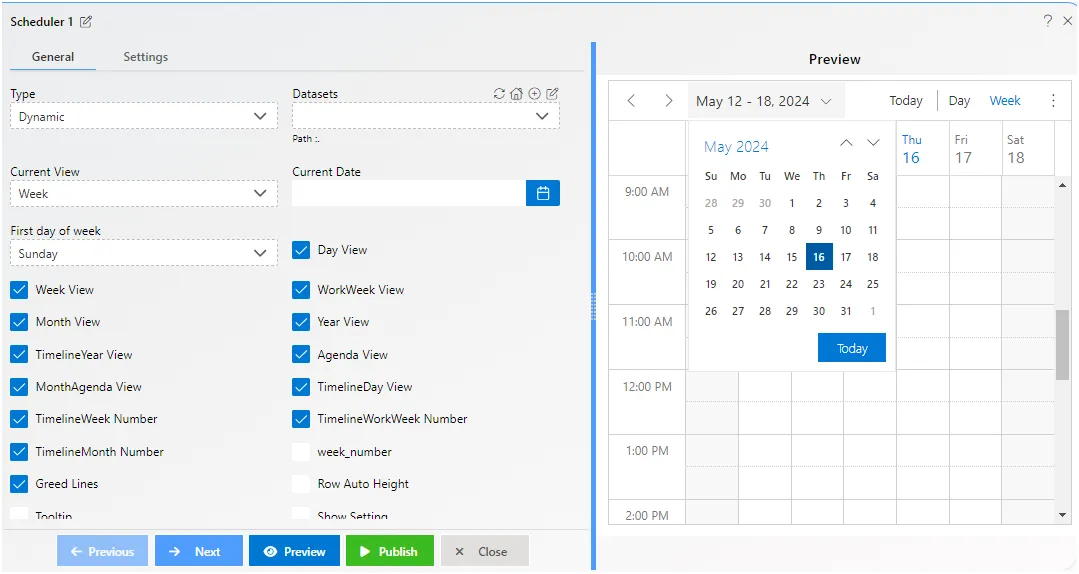
Dynamic: The dynamic scheduler enables you to add events using datasets, allowing multiple events to be added to the scheduler simultaneously.
Dataset Format
The dataset should be in the following format, with fields: [Id, Subject, Location, StartTime, EndTime, CategoryColor].
Current View
You can set the view of the scheduler using the available options: Day, Week, Month, Year, Agenda.
Current Date
You can add the current date to the scheduler.
Checkbox Options
The checkbox options represent the available views in the scheduler widget.
The list of checkbox options:
-
Day View: Displays events and appointments for a single day, allowing users to focus on detailed scheduling for that day.
-
Week View: Shows a full week of events at a glance, making it easy to schedule and reschedule events across multiple days.
-
WorkWeek View: Focuses on working days (typically Monday through Friday), excluding weekends, to streamline business and work-related scheduling.
-
Month View: Provides a broad overview of all scheduled events within the entire month, ideal for long-term planning and management.
-
Year View: Offers a yearly perspective, displaying events across all months, useful for high-level planning and reviewing annual schedules.
-
TimelineYear View: Similar to the Year View but displayed in a timeline format, giving a linear perspective of events over the course of a year.
-
Agenda View: Lists events in a simple, sequential format, perfect for reviewing upcoming tasks or appointments at a glance.
-
MonthAgenda View: Combines the Month and Agenda views, showing a monthly overview alongside a detailed list of events for easy access.
-
TimelineDay View: Presents a single day in a timeline format, allowing users to manage events in a linear sequence within the day.
-
TimelineWeek Number: Displays the week in a timeline format along with the week number, helping users easily track which week of the year they are scheduling.
-
TimelineWorkWeek Number: Similar to the TimelineWeek Number but focuses on the workweek, displaying workdays in a timeline format with corresponding week numbers.
-
TimelineMonth Number: Shows a month’s events in a timeline format with the corresponding month number, facilitating month-over-month planning.
-
Week Number: Displays the current week number in the calendar, aiding in aligning schedules with specific weeks of the year.
-
Grid Lines: Enhances visual organization by displaying grid lines in the calendar, helping users clearly differentiate between time slots.
-
Row Auto Height: Automatically adjusts the height of rows based on the content within them, ensuring that all event details are visible without manual resizing.
-
Tooltip: Provides additional information about events when users hover over them, offering quick insights without needing to open the full event details.
-
Show Settings: Allows users to customize the scheduler’s display settings, including views, time intervals, and more, to tailor the calendar to their preferences.
Single Click Functionality
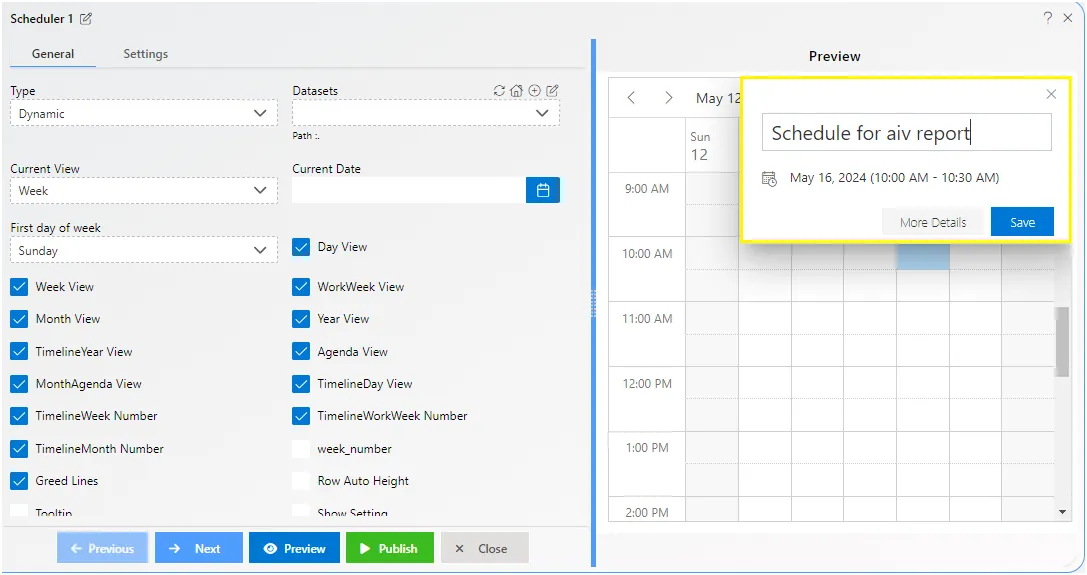
When the user single-clicks on the calendar, it allows them to add an event.
- After adding the event title, click the Save button to add it to the calendar, as shown in the figure below:
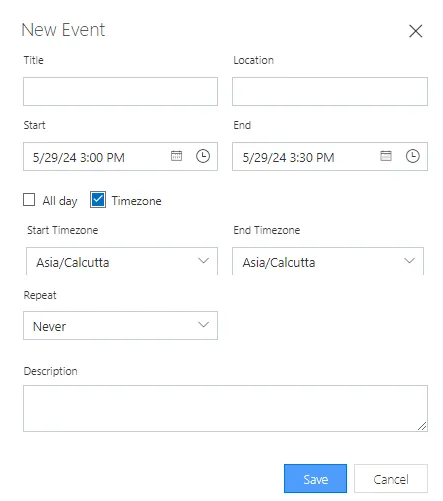
Double Click Functionality
When the user double-clicks on the calendar, it allows them to add an event with the title, location, date & time, and description.
- If you want to repeat the event multiple times on the scheduler widget, click on the Repeat dropdown and select from options like daily, weekly, monthly, or yearly.
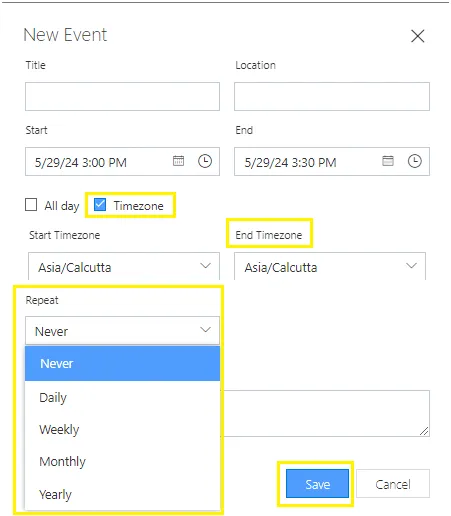
-
Daily: If you select the daily option, the event will appear daily. You can also set the event’s end date. See the example below to view the daily option properties.

-
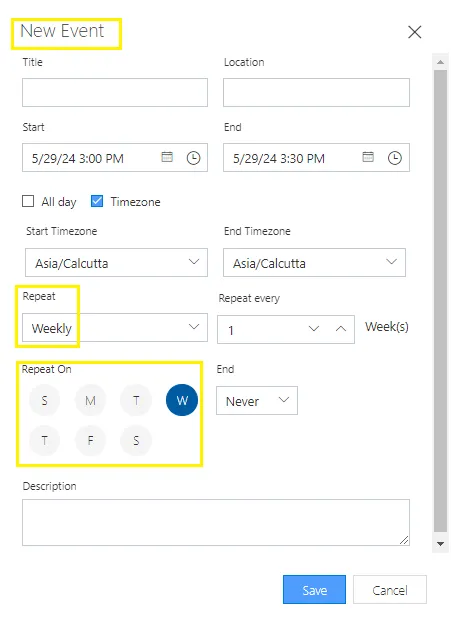
Weekly: When you select the weekly option, it will prompt you to choose the day you want the event to occur, as shown in the example figure below:
-
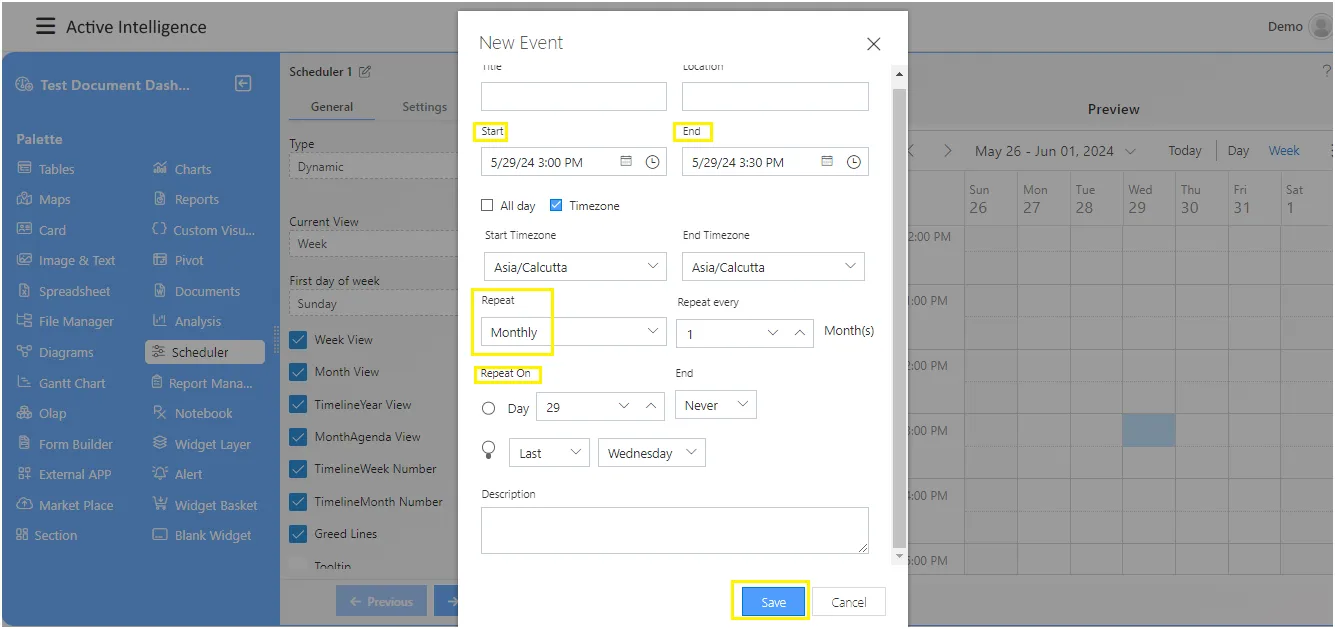
Monthly: The monthly repeat option allows you to repeat the event on a specific date, from the 1st to the 31st of the month. You can also select the day of the week from Monday to Sunday for the task to repeat.
-
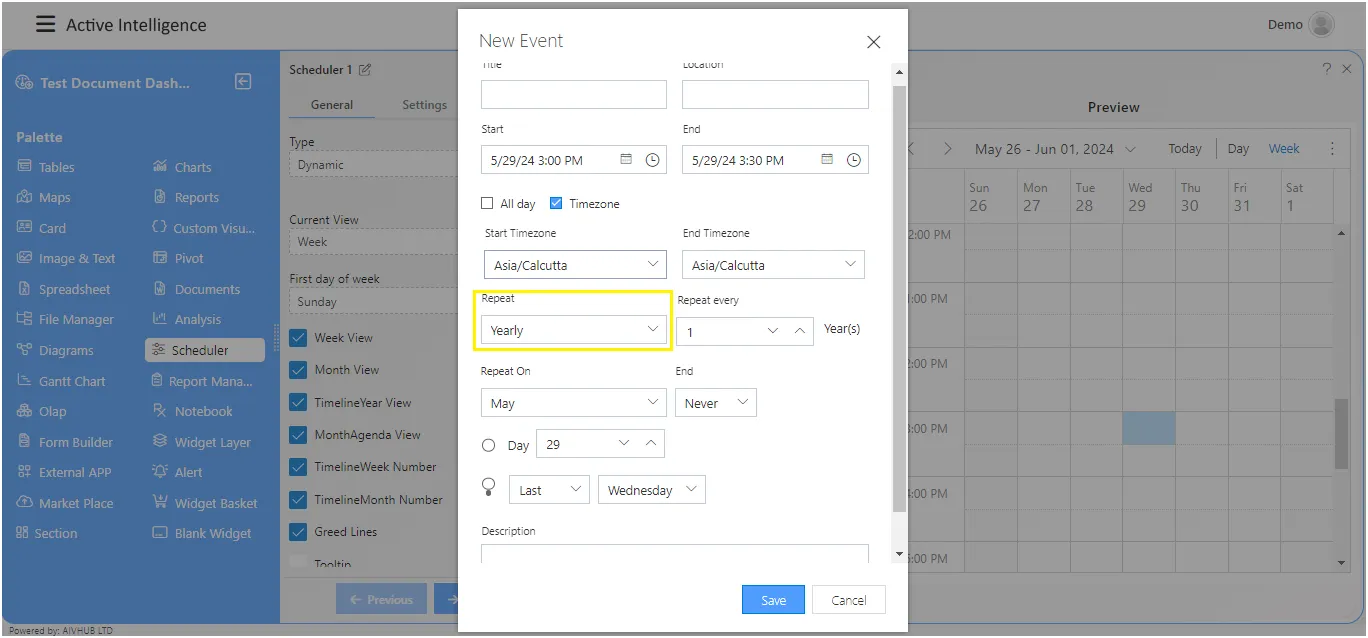
Yearly: By selecting the yearly repeat option, the user can schedule the event for a specific month and date.
-
After adding all the details, click the Save button to add the event to the calendar.
Dynamic Schedule
The dynamic scheduler allows the user to add a dataset, enabling the addition of multiple events to the scheduler in bulk.
The dynamic scheduler provides all the same features as the static scheduler. The dataset format is as follows: