Selected Column Functions
In this document, you will learn about the features available in the selected column area of the table widget. We will explore each feature along with various use cases.
Objective
The objective of this document is to guide you through the Selected Column Feature of table widget. There are many features within the selected column section of the table widget.
Steps to apply the General properties on table widget
-
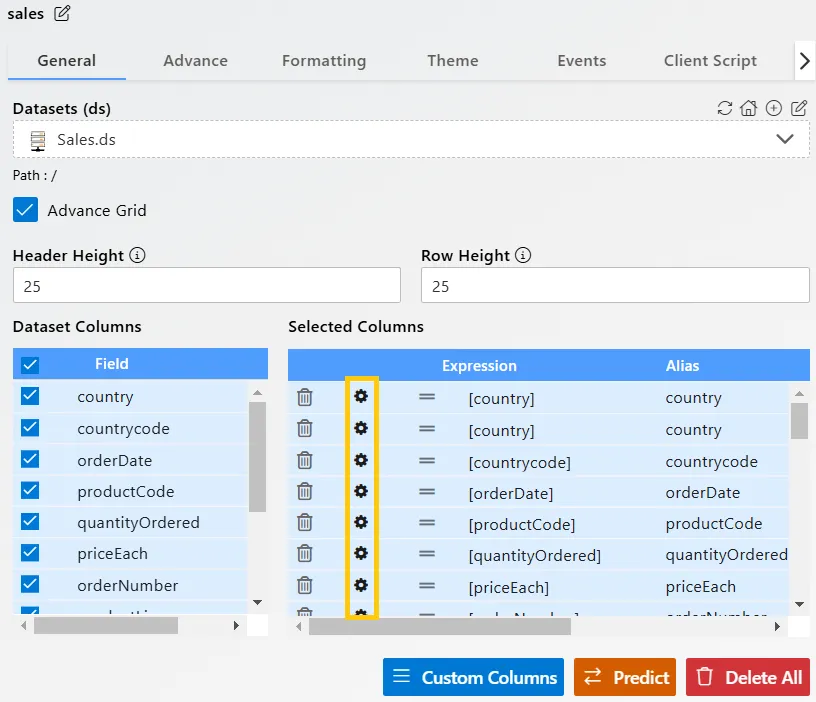
Open the Table widget and click on the Settings icon from the Selected Column grid, as shown below.
-
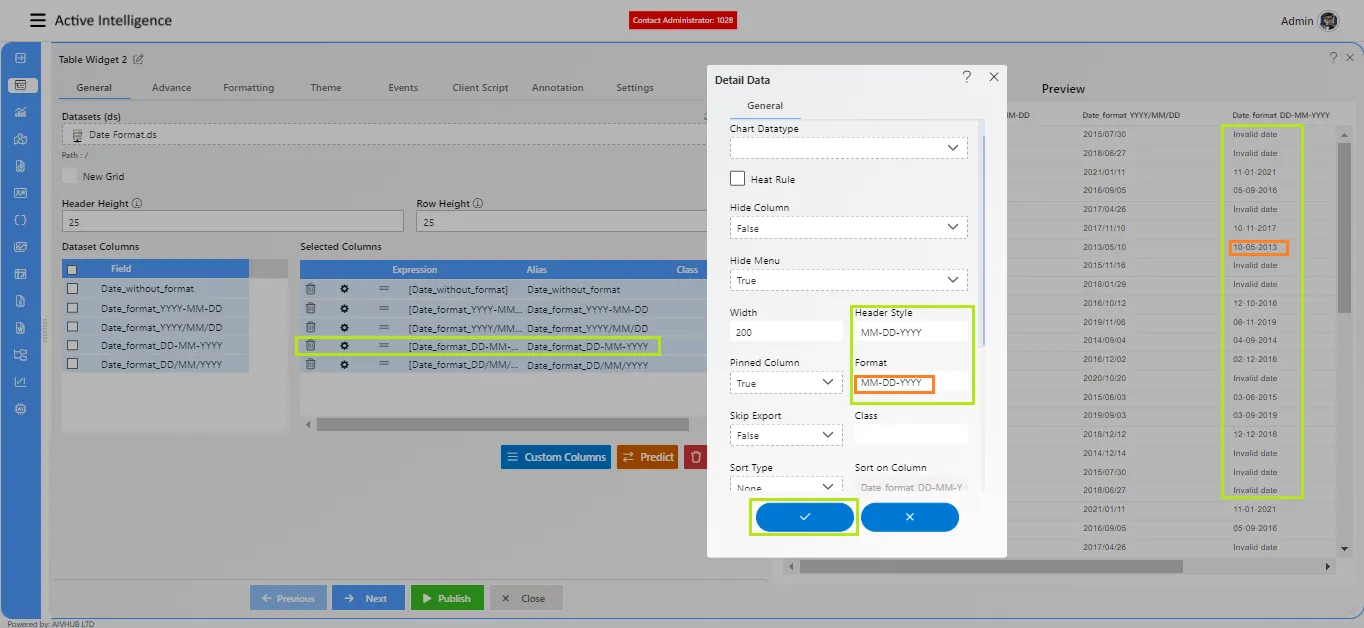
The Detailed Data dialog box will appear on the screen, where you can apply the following general properties:
- Expression
- Alias
- Class
- Width
- Hide Menu
- Hide Column
- Header Style
- Pinned Column
- What’s Format
Alias
An Alias is essentially the display name that end users interact with, which, by default, is the same as the column name in the database.
When developers create databases, they often use technical naming conventions that make sense for the system but can be confusing for everyday users. Take, for example, a column named product_code, which stores unique codes for each product. The use of an underscore instead of a space between words is a common practice in databases, as spaces aren’t allowed. While this works perfectly for developers, it’s not always appealing or intuitive for business users who need to understand the data quickly. This is where an Alias comes in handy. By allowing you to customize the display name, it transforms a technical label into something more user-friendly, making the data clearer and easier to work with.
To provide a display name, open the Edit Properties of the table widget, and you will see the selected column in the Selected Column field.
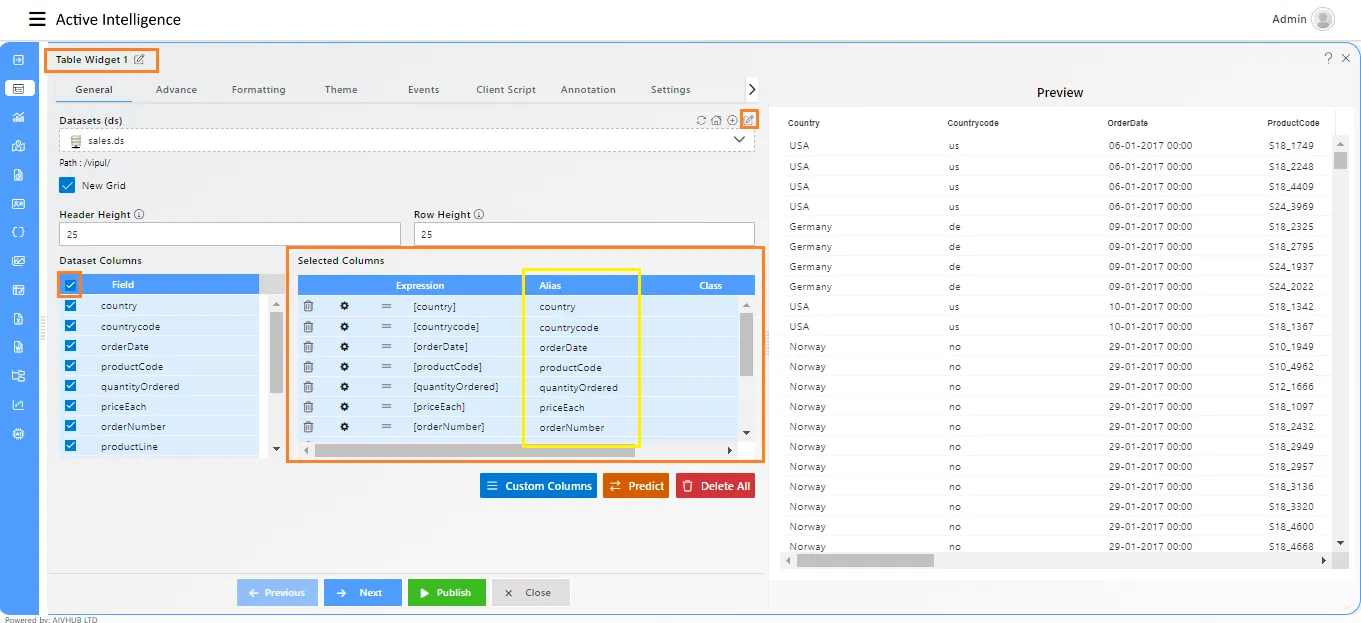
Double click on any alias name you want to change and it will open a edit box where you can change or apply new display name.

Provide name here and hit enter to close this edit box.
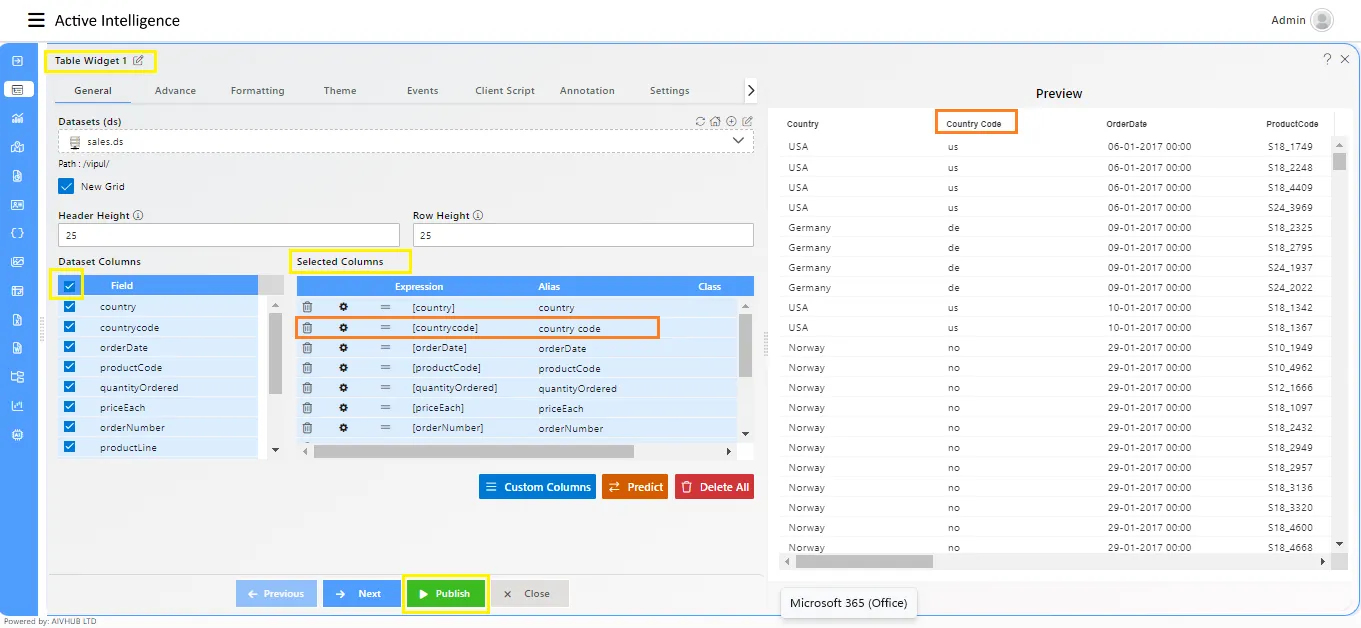
As soon as you hit enter, you can see changes are refelcted in table column name instantly.
Click on save and exit to save the changes and click on preview button to go in dashboard preview.
Likewise user can change display name as per his requirement using alias feature.
Width
This feature allows you to set a static width for the columns selected in the table widget. By default, the width of each column is set to 200 pixels.
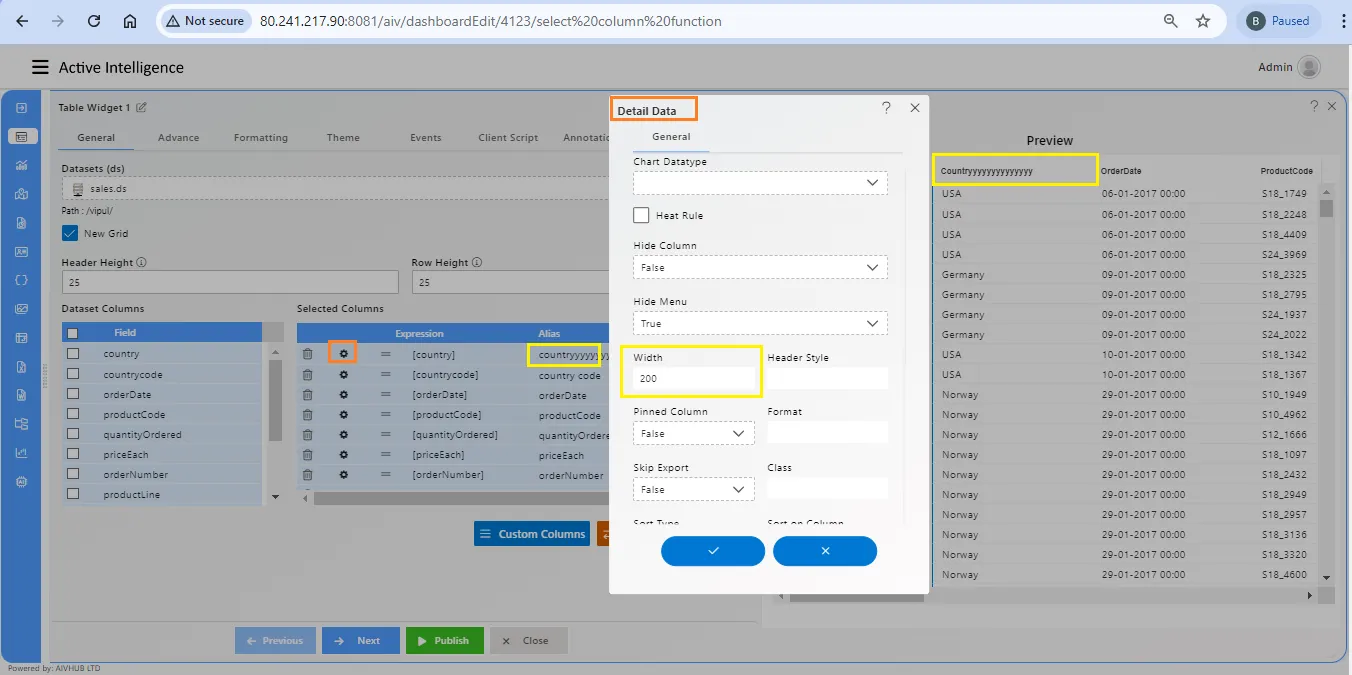
If your column name exceeds 200 pixels in width, the table widget will not display the full name, truncating the remaining characters. To show the full name, you can adjust the column width using the Width option. Simply double-click the width field for the desired column, edit the value, and press Enter. Once you hit Enter, the column width will increase accordingly.
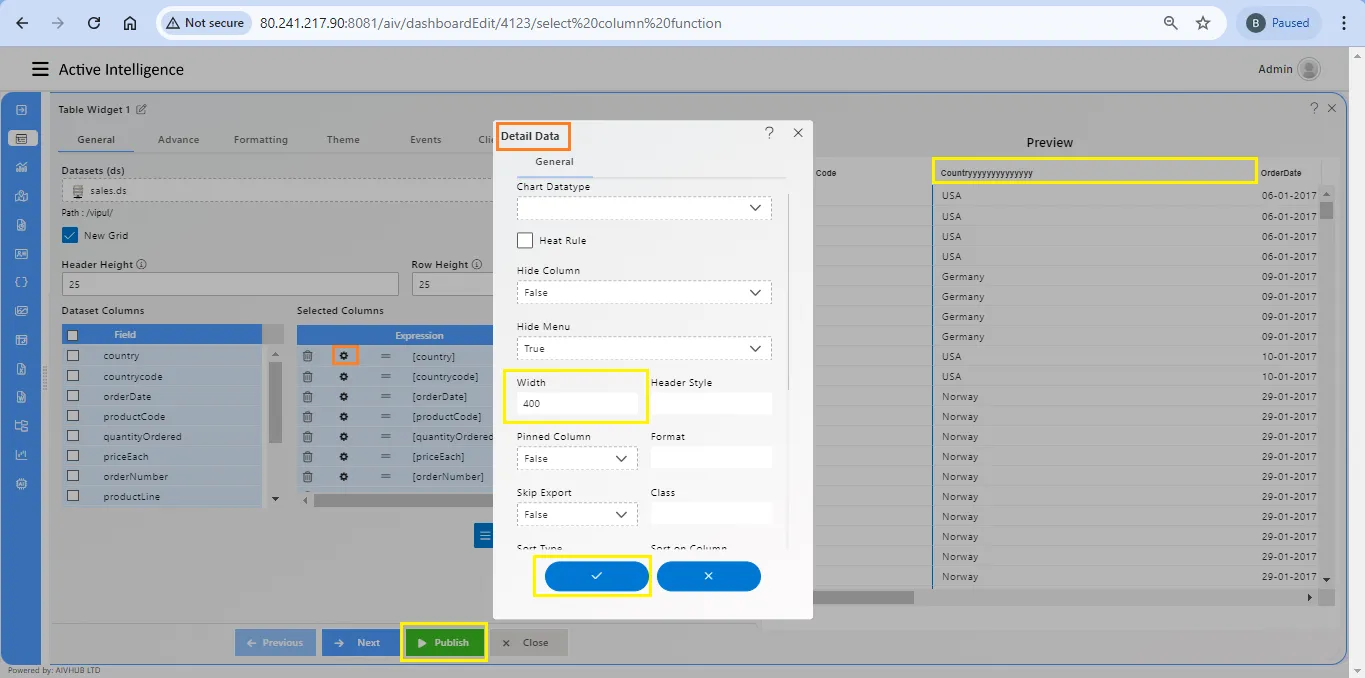
click on publish and exit to save the changes.
Hide Menu
Work in progress..
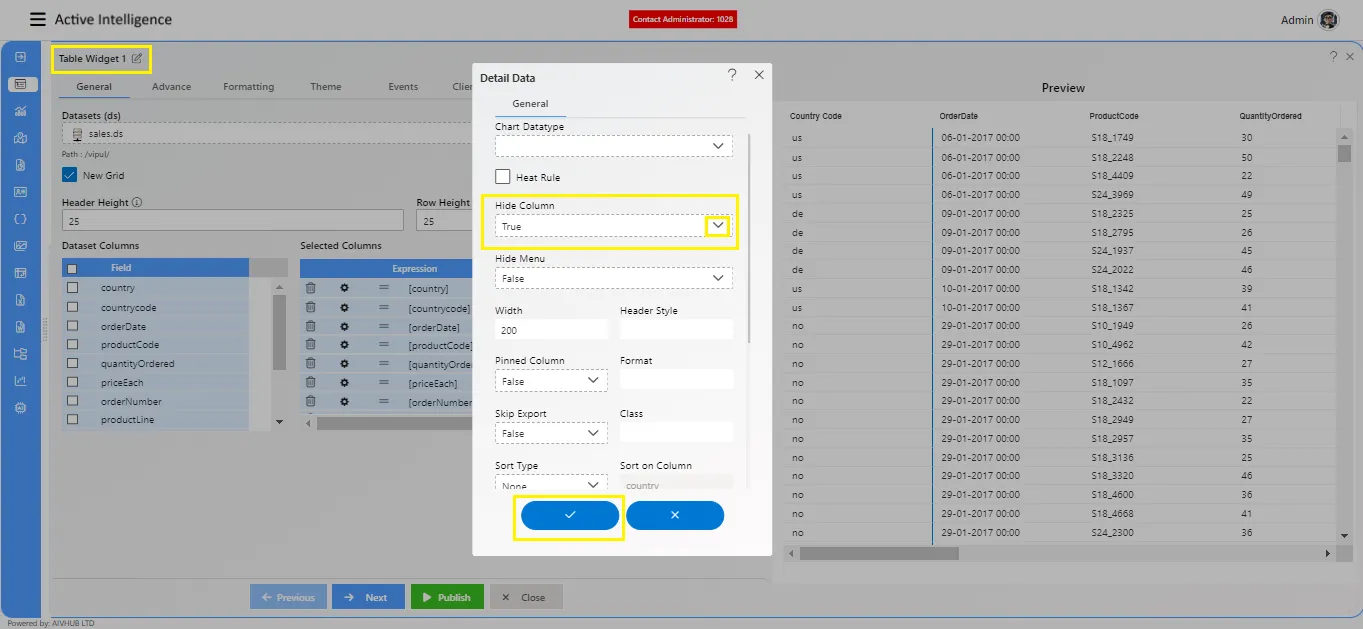
Hide Column
This feature will be used to hide column displaying in to table widget. In certain cenario when user want to do certain kind of filtering or calculative operations on perticular column but user do not want to display this column to end users. One way to hiding column from diaplaying is by not selecting column from list of columns or delete column from selected columns area of the table. but by doing so, user will not be able to perform calculations and filtering operations as user haven’t selected column. to overcome this limitation, aiv has provided a feature to hide column from end user and user wil be able to do operations on that column.
In table widget edit properties, scroll to right side and user will see hide column property for each column selected. by default, all column marked as false in hide column so all selected columns will be displayed.
To hide specific column, double click on hide column option against specific column and field becomes editable.
Remove false , type true and hit enter. as soon as you hit enter, you will notice, that column is now hidden in table widget.
Here we have first column of country and applied hide column setting true for this column. and you can see in below image, column country is hidden and first column displayed here is Country Code column.
Header Style
This feature is not yet released in aiv.
Pinned Column
Pinned column feature is used to pin required column on the left most or right most side of a table widget. By default this feature has blank value.
In order to pin a column to left side, double click against required column in Pinned column area and type left in small case. hit enter to apply chages and you can see required column is pinned to left side of a table widget.
In order to pin a column to right side, double click against required column in Pinned column area and type right in small case. hit enter to apply chages and you can see required column is pinned to right side of a table widget.
What’s Format
This Feature is introduced for column having data type Date. In a table widget, AIV supports date format of ISO standard which represents date and time by starting with the year, followed by the month, the day, the hour, the minutes, seconds and milliseconds. ISO format date can be sorted easily in table widget but if user has date format other than ISO format, it can not be sorted ascending and descending order. To overcome this problem, What’s Format feature can be useful.
Prerequisites
To get hands on this feature, user will need following dependency files.
Dataset : date format test.cds
Download this dependecy file from Here..
Upload File
Upload this dataset in to dataset section of AIV. To know more about how to upload files in AIV click here..
Create Dashboard
Once dataset is successfully uploaded in dataset section, next step is to create a dashboard from dashboard section.
Follow below steps to create dashboard
-
Login to AIV application with valid system credentials.
-
Click on AIV menu and you will see dashboard option on the top.
-
Click on the + icon to create a new dashboard.
-
Provide dashboard name and click on create button to create new dashboard.
-
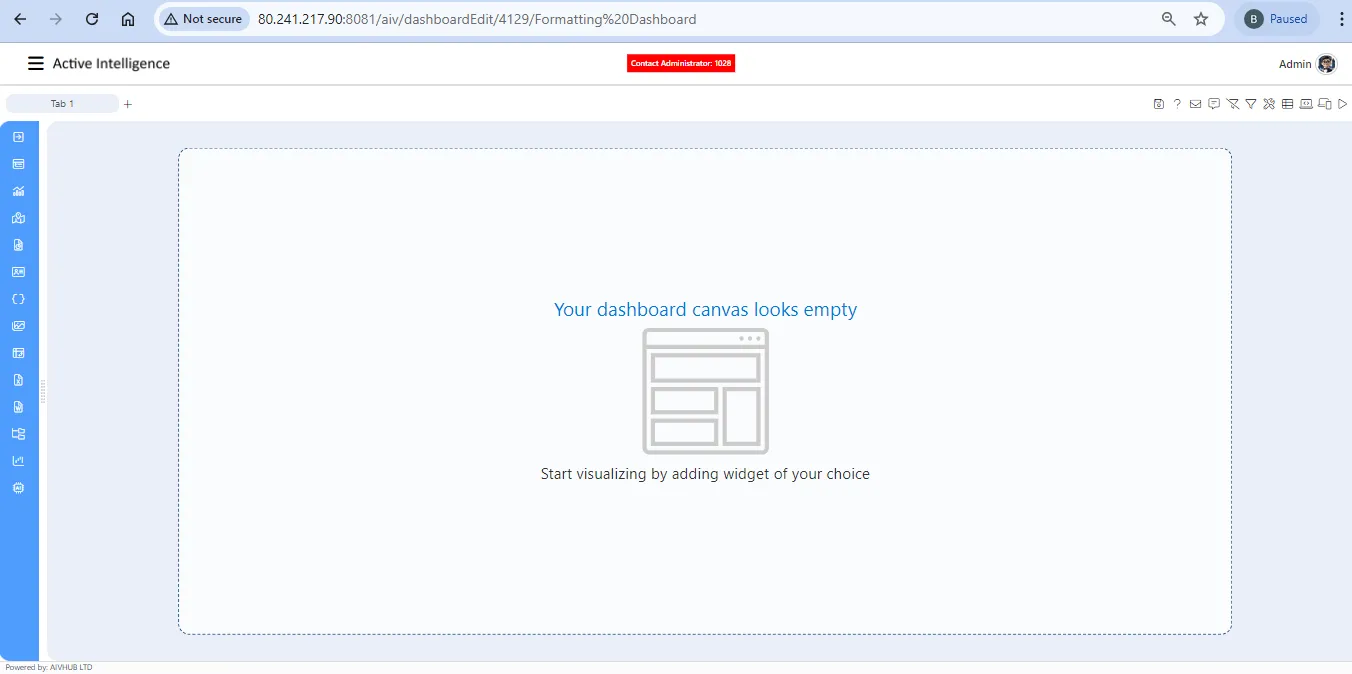
You will landed on dashboard edit mode by default as shown in below image.
-
Add a table widget from the widget library by clicking on table widget icon.
-
Select uploaded dataset from dataset list, select all comumn from select all checkbox.
-
After selecting all column you can see all column are available in selected column area in the bottom side of table widget.
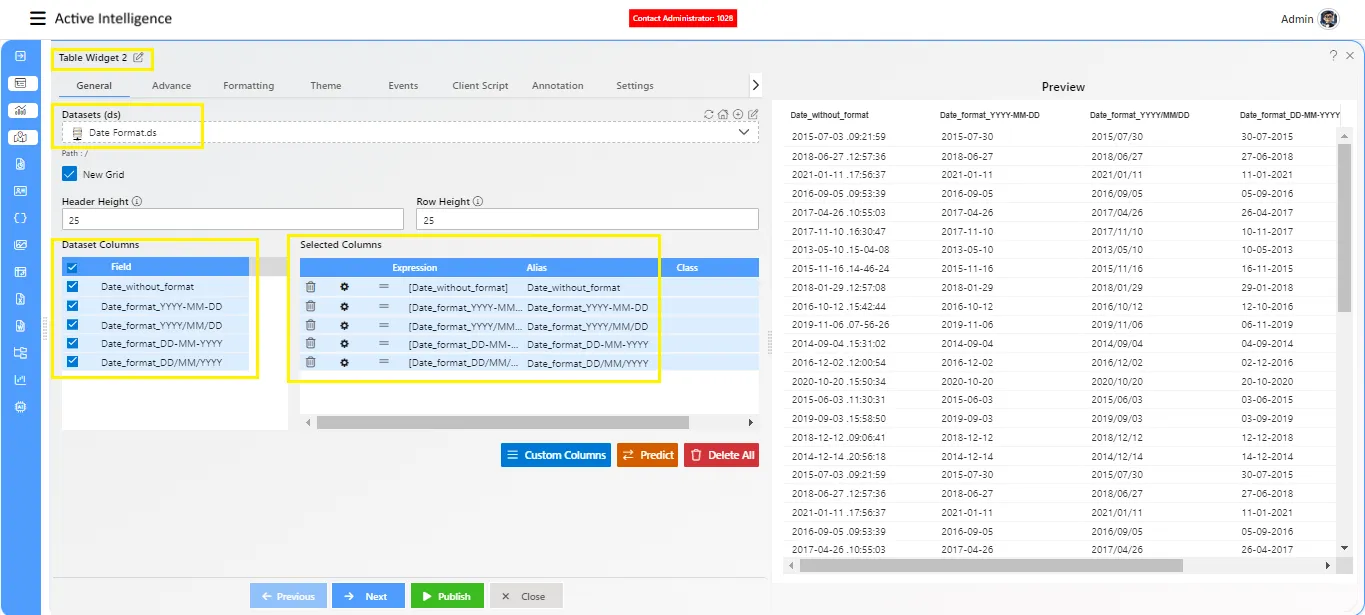
-
At the same time, you will see data in the table widget.
-
Remove the checkbox of new grid to load table widget with old grid options.
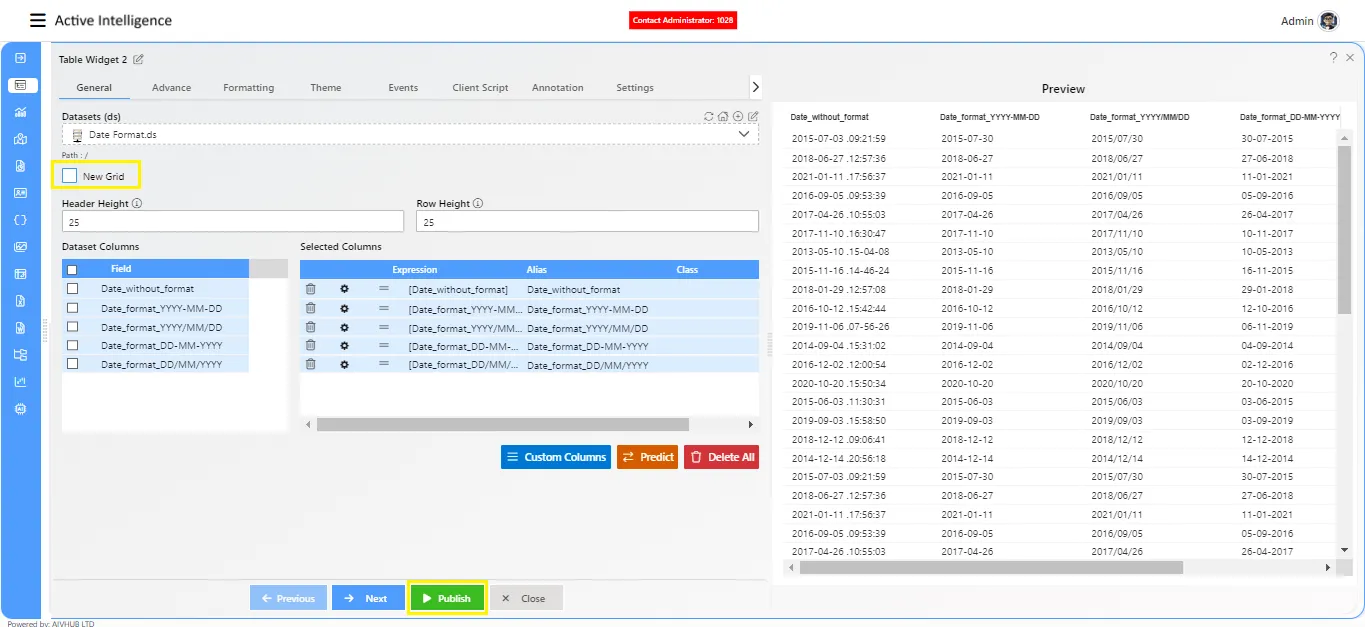
-
Click on save and exit button to save the changes.
-
Click on preview button and go to dashboard preview mode.
-
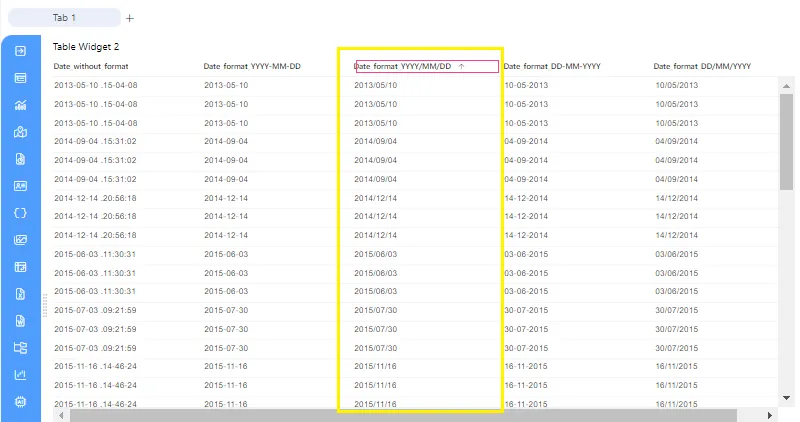
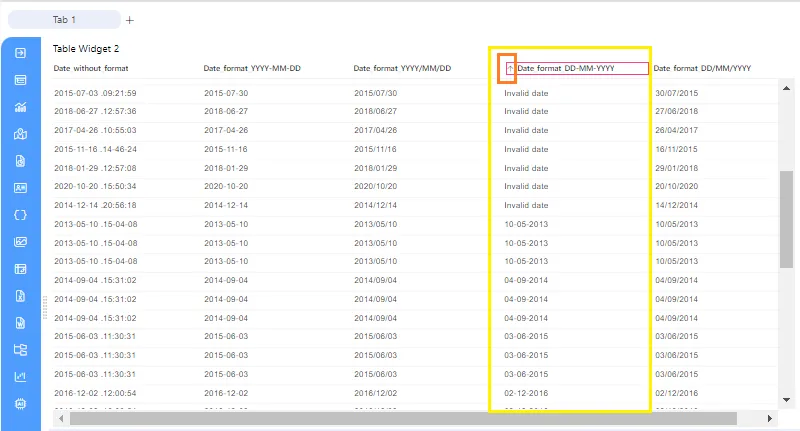
You can see different columns representing different date format in table widget.
In order to sort table data by date, click on column header name and you will see up arrow on the right side of the column name. this means clicked column data is sorted in acending order. If you click again on column name, you will see a down arrow which shows column data is sorted in descending order. To remove sorting, click again on column name again and sorting will be removed.
-
But if you have observed, when you click on column name having date format
DD-MM-YYYYdate is sorted by first 2 digit of the date format which is by Date. This is expected behaviour as we support only ISO date formats. -
But here is a work around to overcome this sorting issue. Go back to dashboard edit mode and edit the table widget. you will see a hirizontal scroll bar in selected column section of the table widget.
-
Using this scroll bar, scroll right side to see option named What’s Format as shown in below image. Using this feature we can eliminate the sorting limitation of Non-ISO date format.
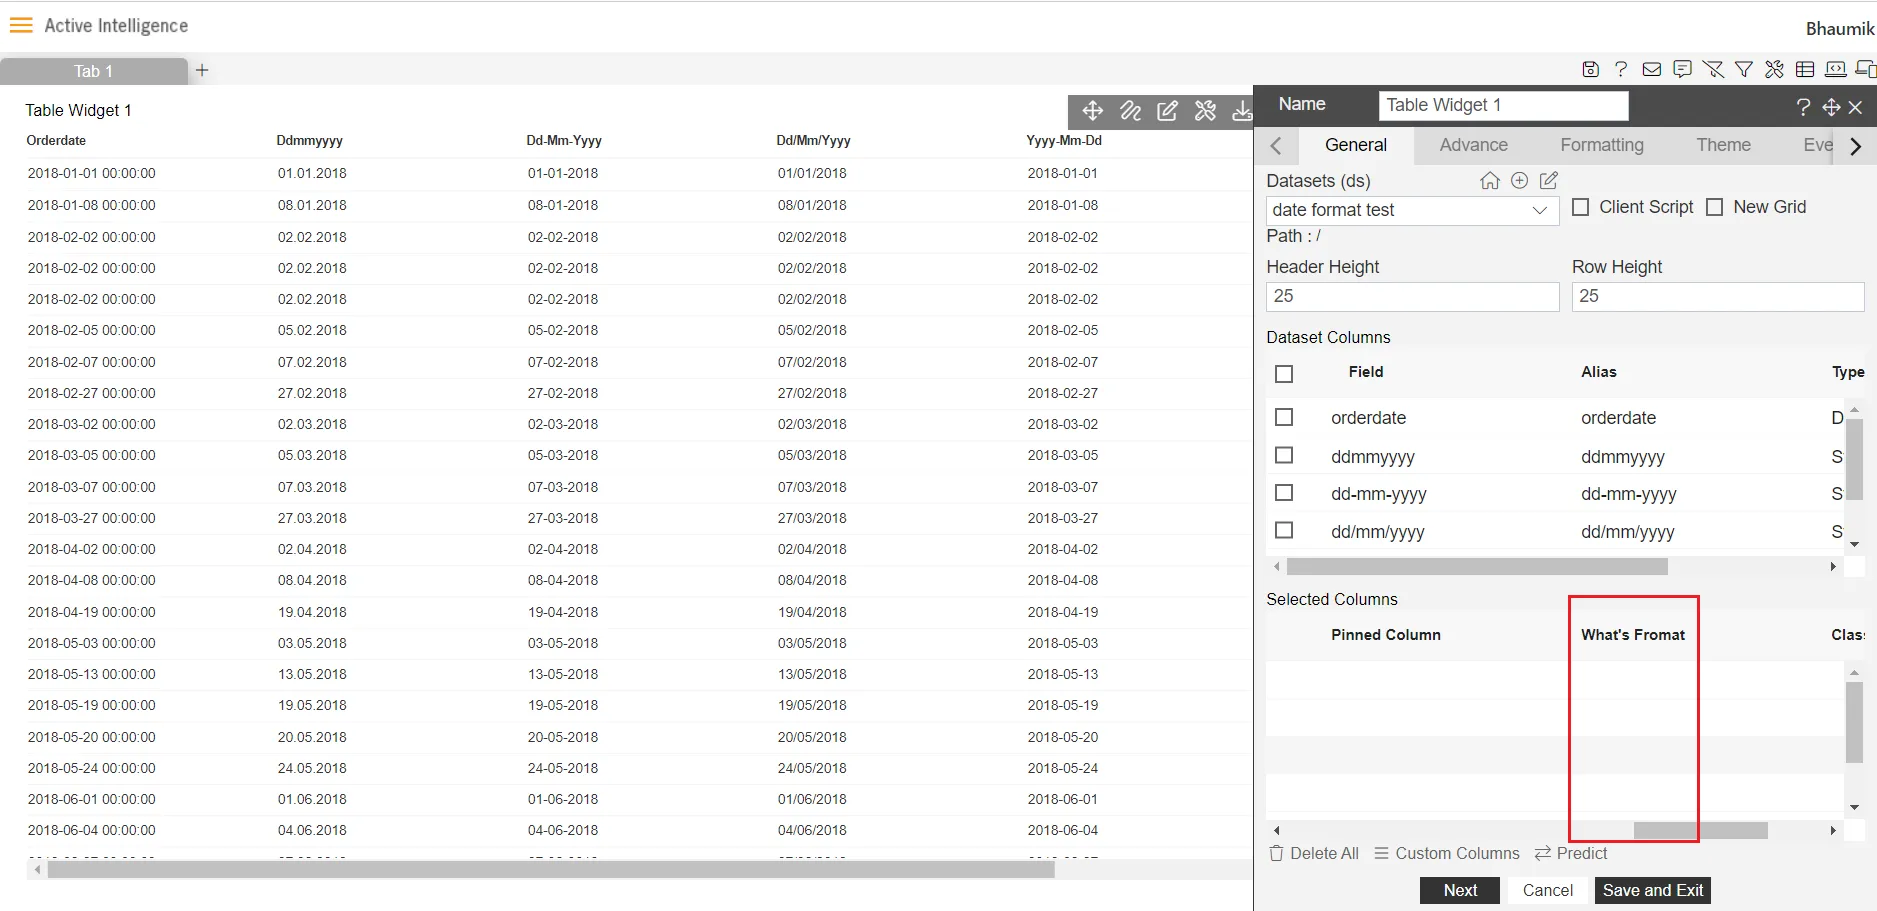
-
Select column on which sorting is not working and double click to open edit box for that column.
-
Here, provide date format in which your date column data is available. Here we have data comming in format of
DD-MM-YYYYso here i am writing this format in what’s format column against selected date column and hit enter to save it.
-
click on save and exit to save this changes and go to dashboard preview mode again.
-
Now when you click on column having
DD-MM-YYYYdate type, now you notice, acending and descending operations are working correctly.
Same way you can sort other date columns by providing date format in **What's Format** field.Class
Work in progress..
To know more about table widget features click on below links.
Create Table
Advance Tab
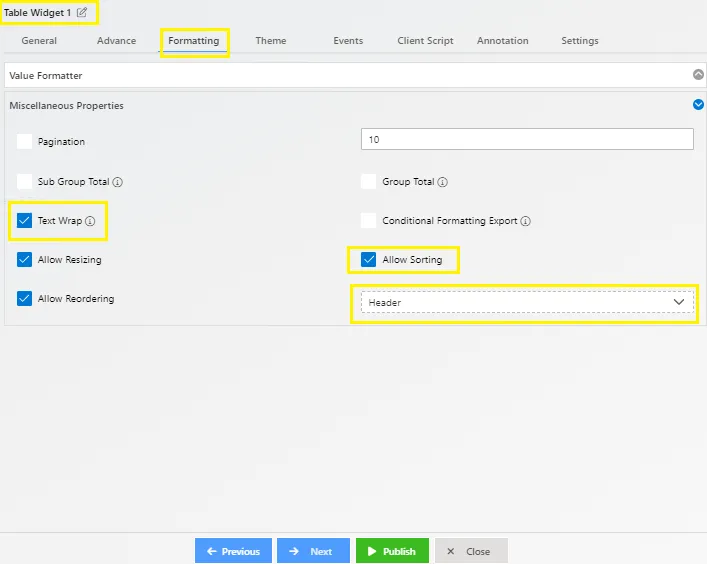
Formatting Tab
Theme Tab
Event Tab
Annotation Tab
Widget Setting
To know more about advance feature of Table Widget click on below links.
Custom Column Table Hyperlink
Custom Column Table Widget Icon
Custom Column MicroChart
Custom Column Table Widget
Skip Widget Event Filtering