Create a Dataset Using Parquet
This guide walks you through creating datasets using Parquet files in AIV. Parquet is ideal for large-scale analytics and integrates seamlessly with your existing data pipelines.
What You’ll Learn
- Create a dataset from CSV, JSON, or Excel and schedule it to output Parquet
- Create a new dataset from a generated Parquet file
- Preview, validate, and save your Parquet dataset
Overview
Parquet is a columnar storage format optimized for analytical workloads, offering efficient compression and fast query performance. This workflow consists of two phases:
- Phase 1 — Create a dataset from your source file and schedule it to export as Parquet.
- Phase 2 — Use the generated Parquet file as the data source for a new dataset.
Prerequisites
Before you begin:
- Have a CSV, JSON, or Excel file uploaded in AIV
- Create a dataset from that file (see Dataset using CSV — Method 1: Simple, Dataset using Excel, or Dataset using JSON)
Using the sample workflow?
- Download csv.zip
- Extract the zip archive
- Upload
retail_sales.csvto AIV (see Upload guide for help) - Follow the CSV guide to create the initial dataset
Phase 1: Create a Dataset and Schedule Parquet Output
Step 1: Create the Initial Dataset
Create a dataset from your CSV, JSON, or Excel file by following the guide for your source format:
| Source Format | Guide |
|---|---|
| CSV | Dataset using CSV — Method 1: Simple |
| Excel | Dataset using Excel |
| JSON | Dataset using JSON |
Step 2: Schedule the Dataset to Produce a Parquet File
-
Locate your dataset in the Dataset Grid view.

-
Click the Schedule icon (
 ) to schedule it.
 -
In the scheduling window, open the Output tab.
-
Select Parquet from the Format dropdown as the Output Type.
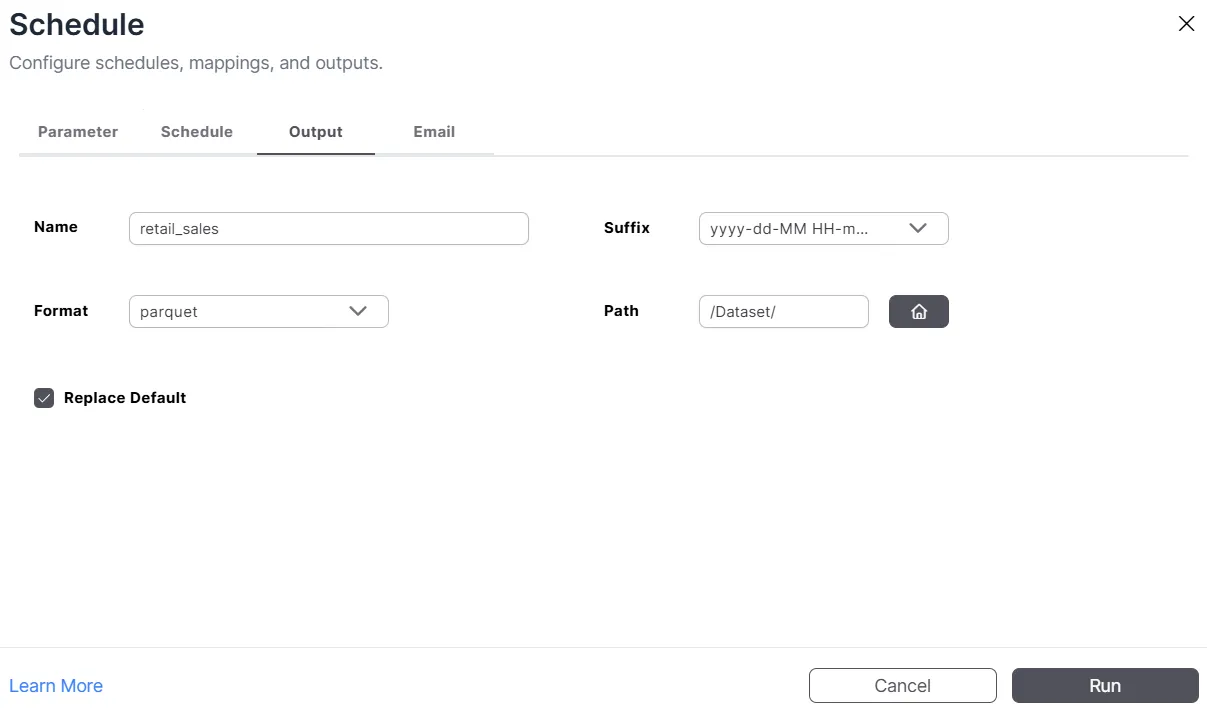
-
Click Run to confirm. A popup message will appear displaying Schedule Successfully.

Phase 2: Create a Dataset from the Parquet File
After the Parquet file is generated, refresh the Dataset Grid to see it listed. For connection behavior and terminology, see Connection Selection — Parquet.

Step 1: Create a New Dataset and Select Parquet
Complete Step 1 (Navigate to the Dataset Section) and Step 2 (Create a New Dataset) from the Create Dataset guide.
Step 2: Choose Parquet as the Data Source
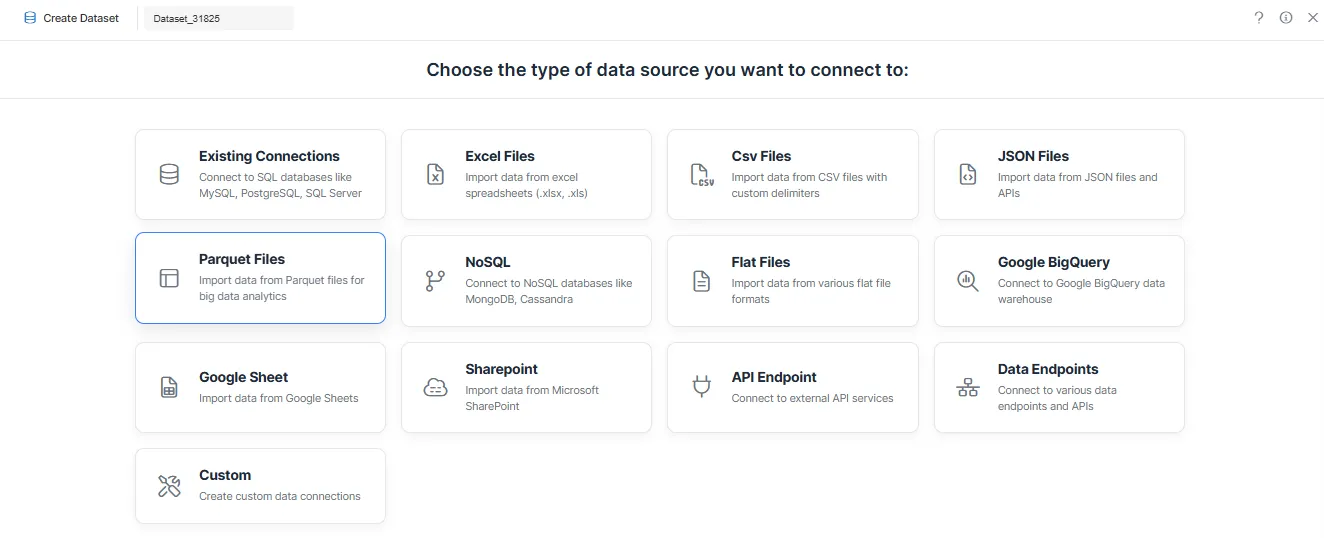
-
Select Parquet Files as the data source type.
Step 3: Connection Selection
-
Click Select Existing Files.
-
Search for your Parquet file (for example,
retail_sales.parquet). -
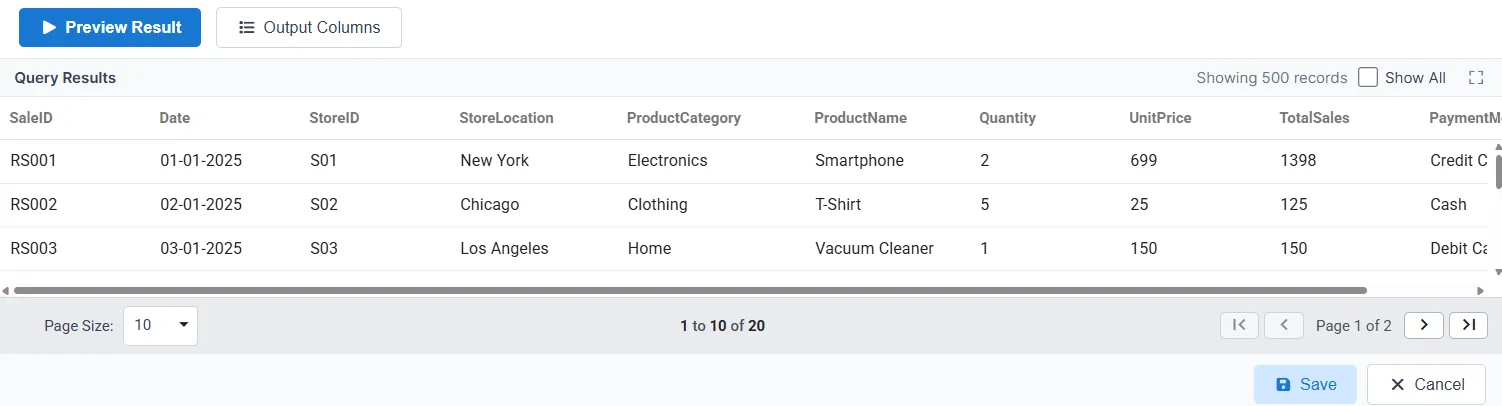
Select the file from the list. An automatic query will be generated.
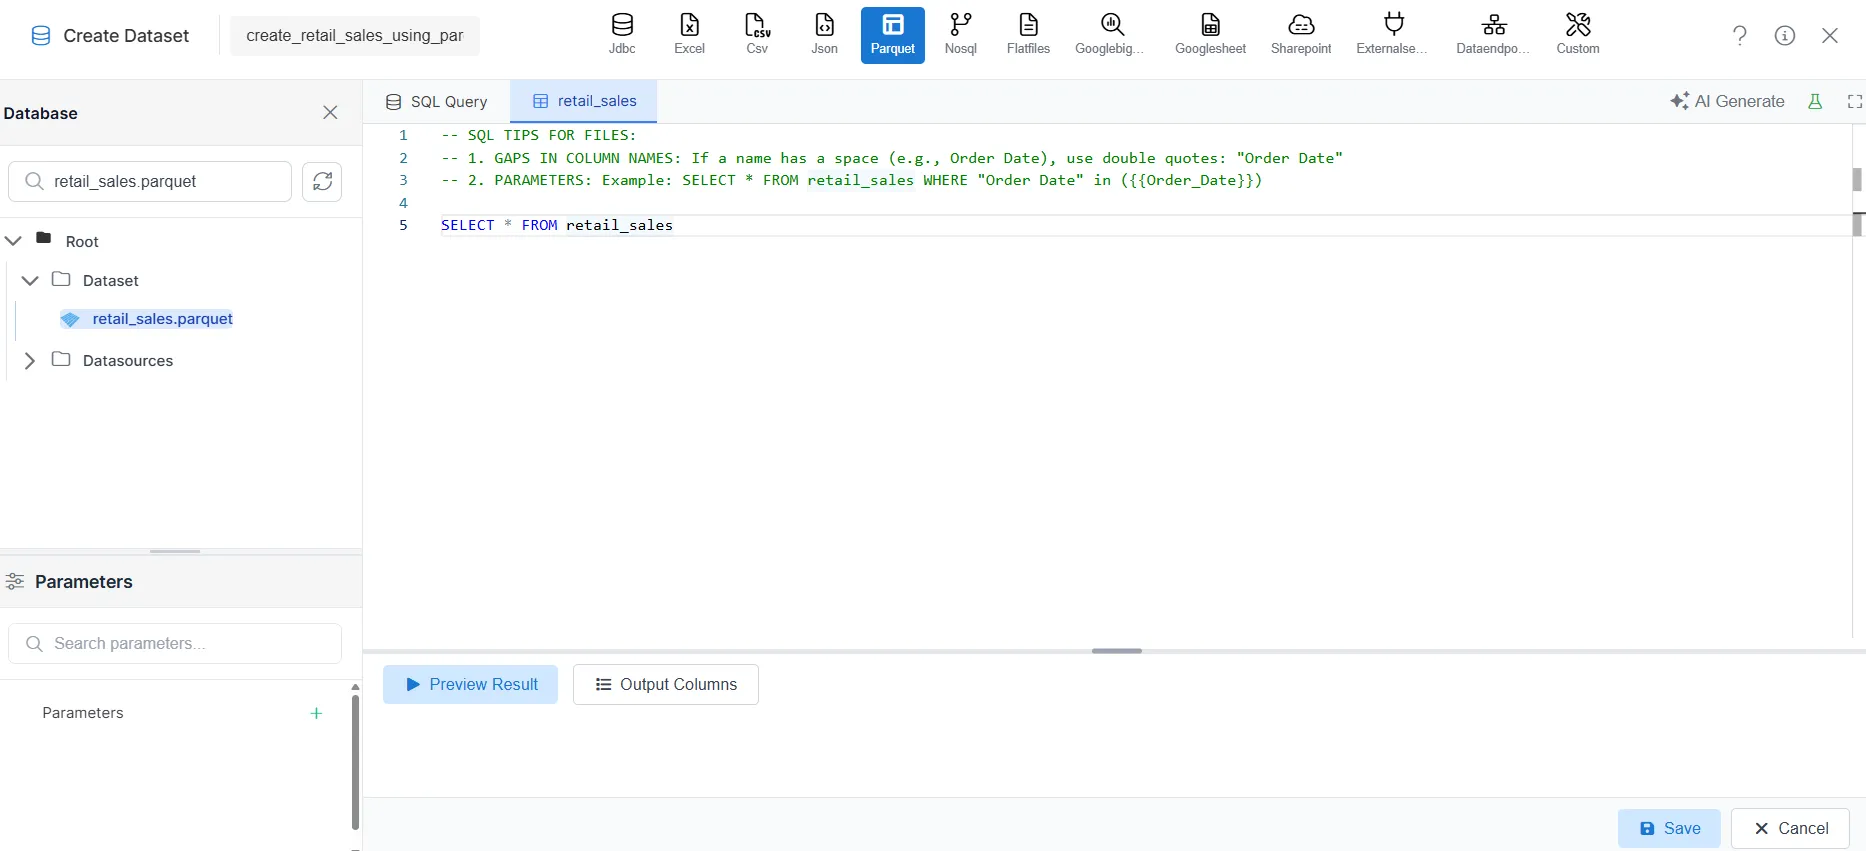
-
Open the Output Columns tab to review column names and data types.
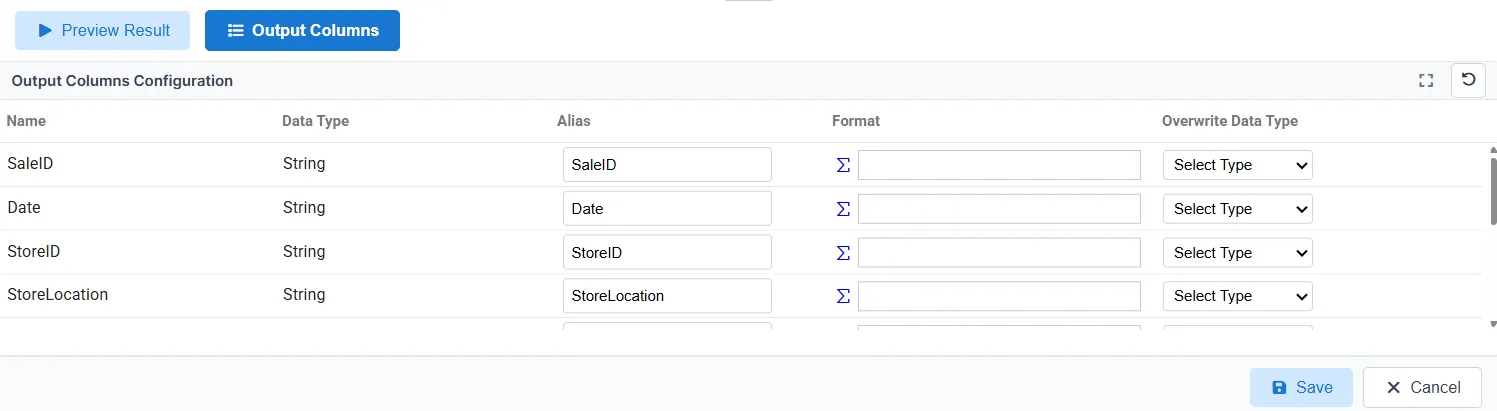
-
Open the Preview Results tab to verify the data.
Step 4: Save Dataset
- Click Save.
- In the Save Dataset dialog, optionally rename the dataset and select the destination folder.
- Click Save Dataset to confirm.
Step 5: View Your Dataset
- Go to the Dataset Grid view.
- Search for your dataset by name.
- Your dataset is now available for use in dashboards, reports, and visualizations.
With Parameters (Dynamic Filtering)
Use this method when you want users to filter Parquet data at runtime—for example, by store location, product category, or date range. The steps below build on the standard workflow above.
Step 1: Select Parquet as the Data Source
Follow Step 2: Choose Parquet as the Data Source above. Select Parquet Files as the data source type.
Step 2: Connection Selection
Follow Step 3: Connection Selection above. Click Select Existing Files, search for your Parquet file (for example, retail_sales.parquet), select it, and enable SQL Query.
Step 3: Add Parameters to the Query
-
Update the SQL query to include a parameter placeholder:
SELECT * FROM retail_sales WHERE ProductCategory IN ({{ProductCategory}})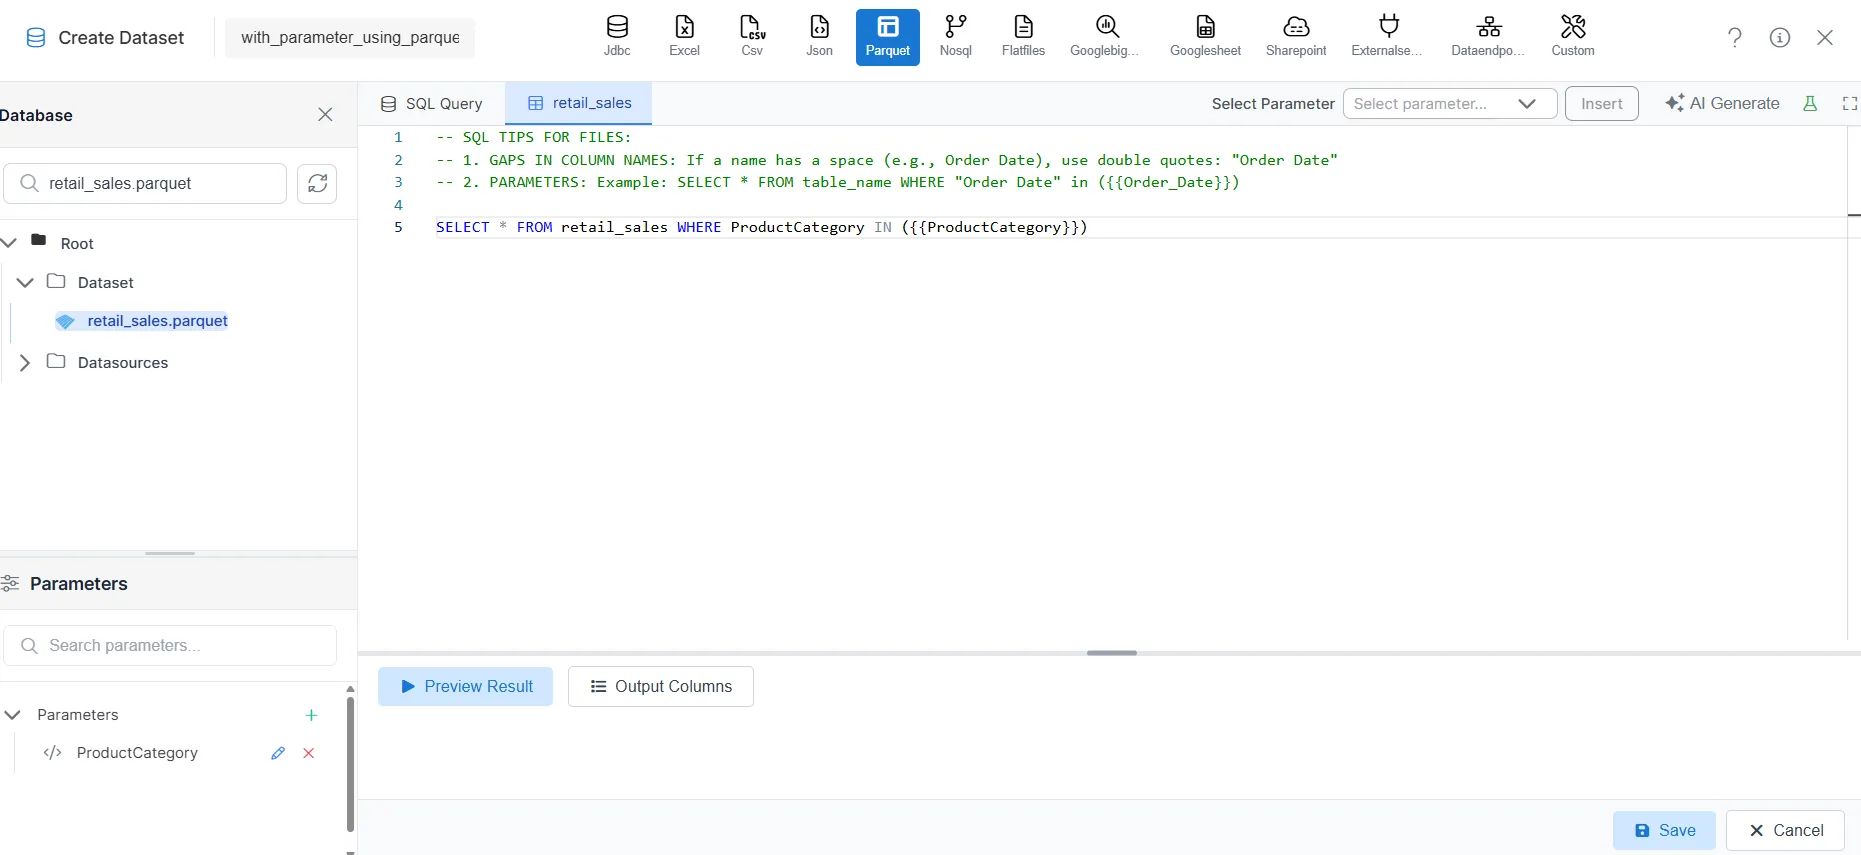
-
Click Preview Results.
-
When prompted, enter a test value (for example,
Home) for the parameter. -
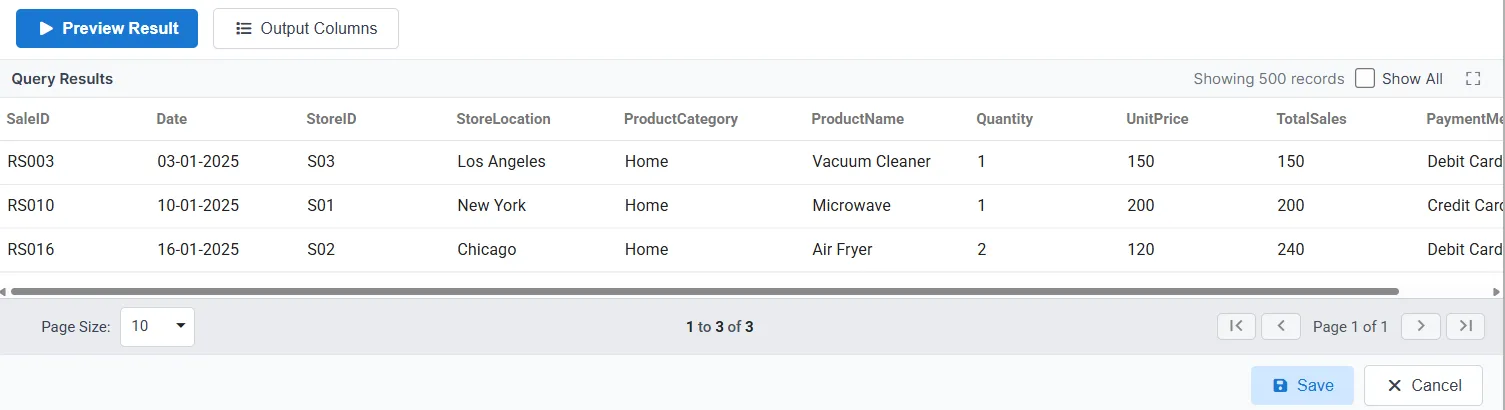
Click Submit to view the filtered data.
-
Verify the output in Preview Results.
Step 4: Save Dataset
Same as Step 4: Save Dataset above. Click Save, optionally rename and select the folder in the dialog, then click Save Dataset to confirm.
Step 5: View Your Dataset
Same as Step 5: View Your Dataset above. Go to the Dataset Grid view and search for your dataset. When used in dashboards or reports, users will be prompted to enter parameter values to filter the data dynamically.
Related Guides
Explore other ways to create datasets in AIV:
| Data Source | Guide |
|---|---|
| Drag & drop | Create Dataset |
| Excel | Dataset using Excel |
| CSV | Dataset using CSV |
| JSON | Dataset using JSON |
| NoSQL | Dataset using NoSQL |
| Flat files | Dataset using Flat files |
| Google BigQuery | Dataset using Google BigQuery |
| Google Sheet | Dataset using Google Sheet |
| External sources | Dataset using External sources |
| Stored Procedure | Dataset using Stored Procedure |
| View | Dataset using View |