change Alias of column
How to change/Apply Alias of column in Pipeline.
What is an Alias?
Users have the capability to modify alias datasets or table columns through an alias. This feature proves beneficial when users wish to present a different column name in the graphical user interface (GUI) as opposed to the name provided by the database. Such customization becomes necessary particularly when business users prioritize their preferred naming conventions over those used in the development process, allowing them to display names differently.
By allowing users to define aliases, they can customize the display of column names in the GUI to better match their understanding and requirements. This flexibility ensures that the user interface is user-friendly and aligns with the terminology and conventions familiar to the end users, improving overall usability and user satisfaction.
Prerequisites
-
Existing (.ds) Datasets having at least 1 matching column.
-
Database tables have at least 1 matching column.
Login to the AIV application with valid user credentials.
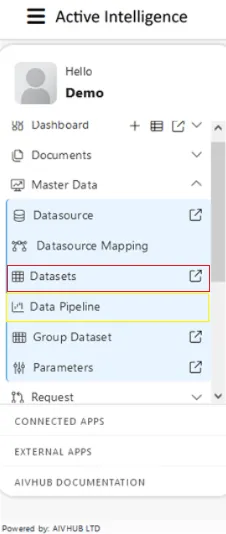
Go to Master Data > Dataset section from the Hamburger menu.
Go to the Dataset section, Click on Create Pipeline from the bottom menu bar. As shown in the figure below:
![]()
Once you click, you can see a blank create pipeline window as in the below image:
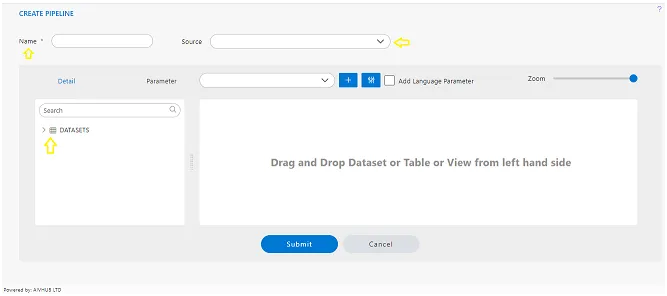
Enter the Following detail in the Pipeline dialog box:
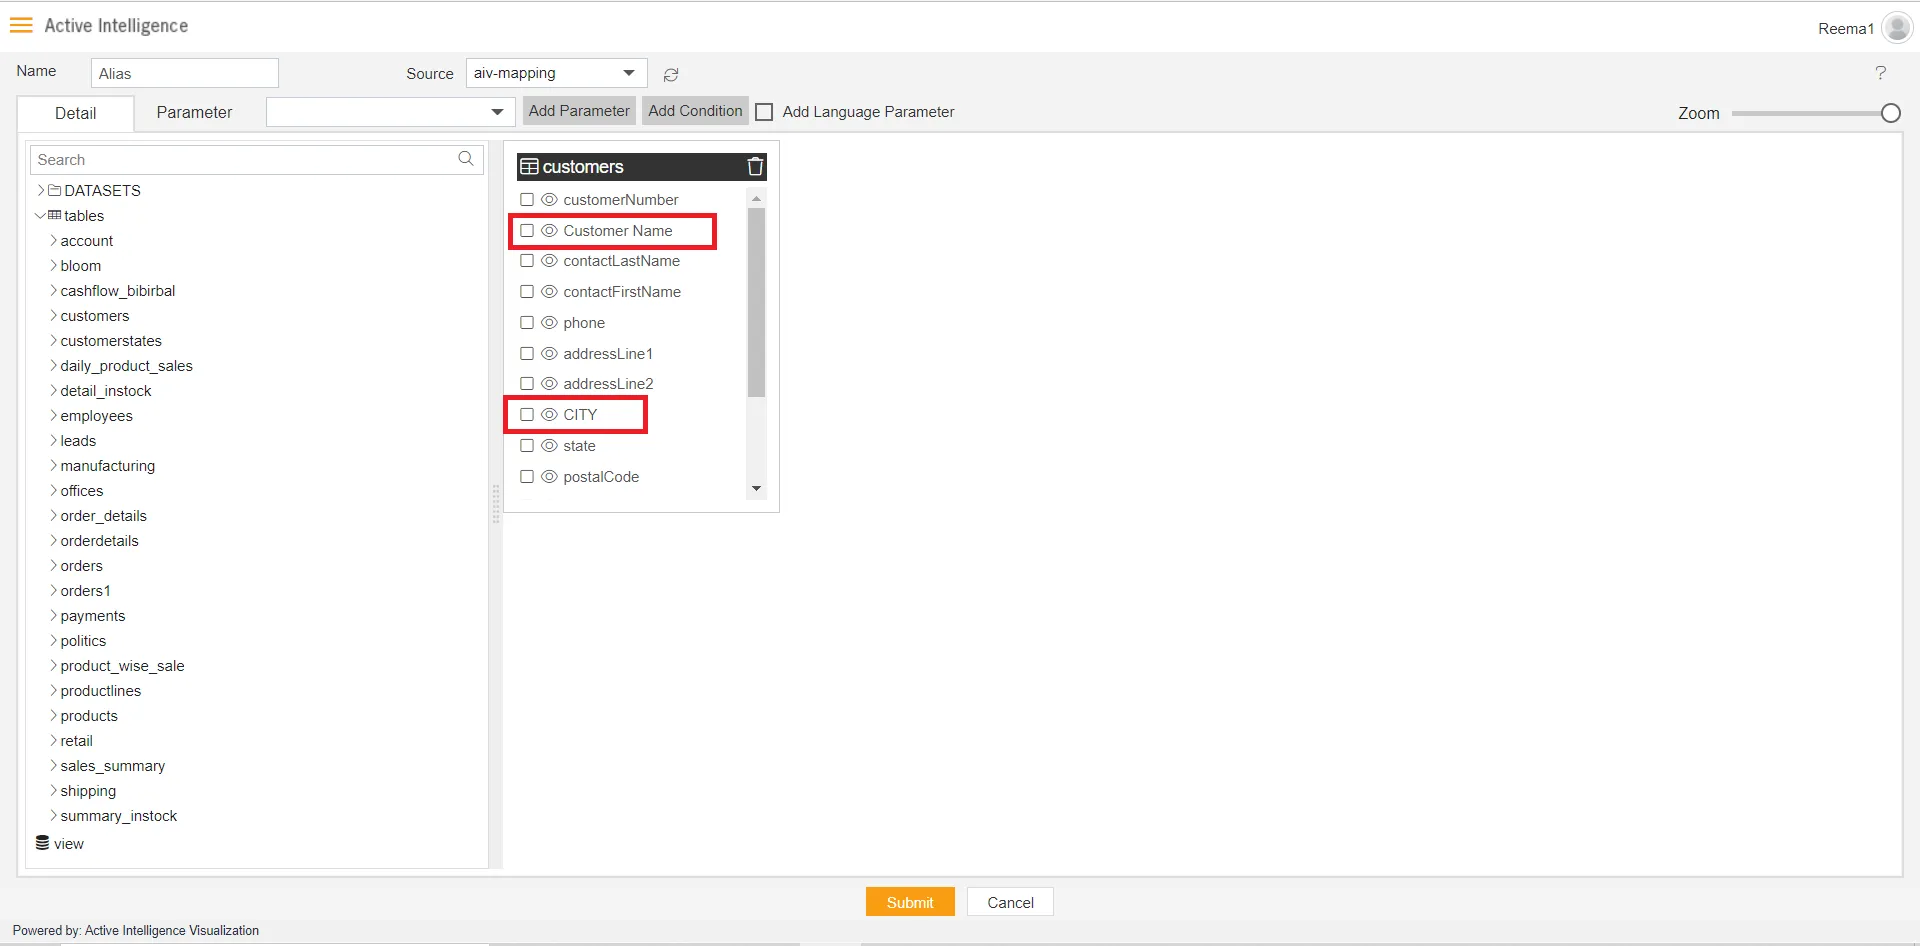
Name: Alias
Source: aiv-mapping
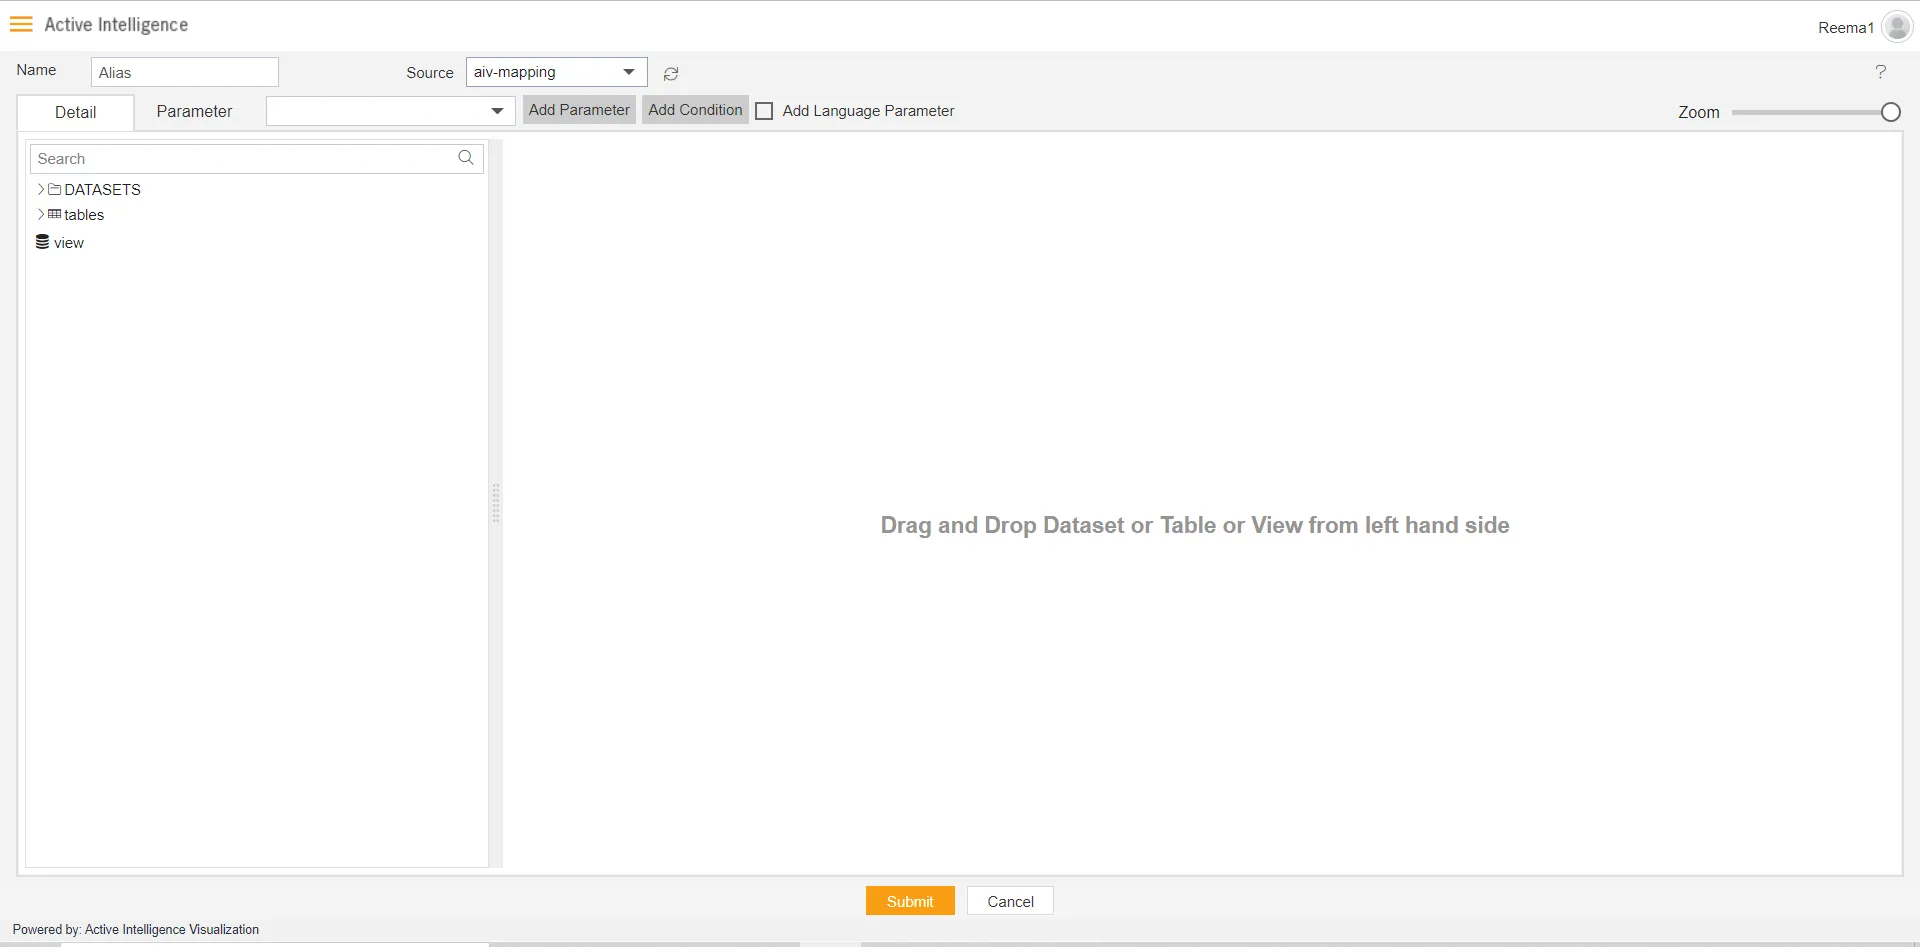
Expand tables from the left side table view, As shown in the figure below:
Drag and Drop the CUSTOMER table from the table list box to the diagram box, as shown in the figure below:
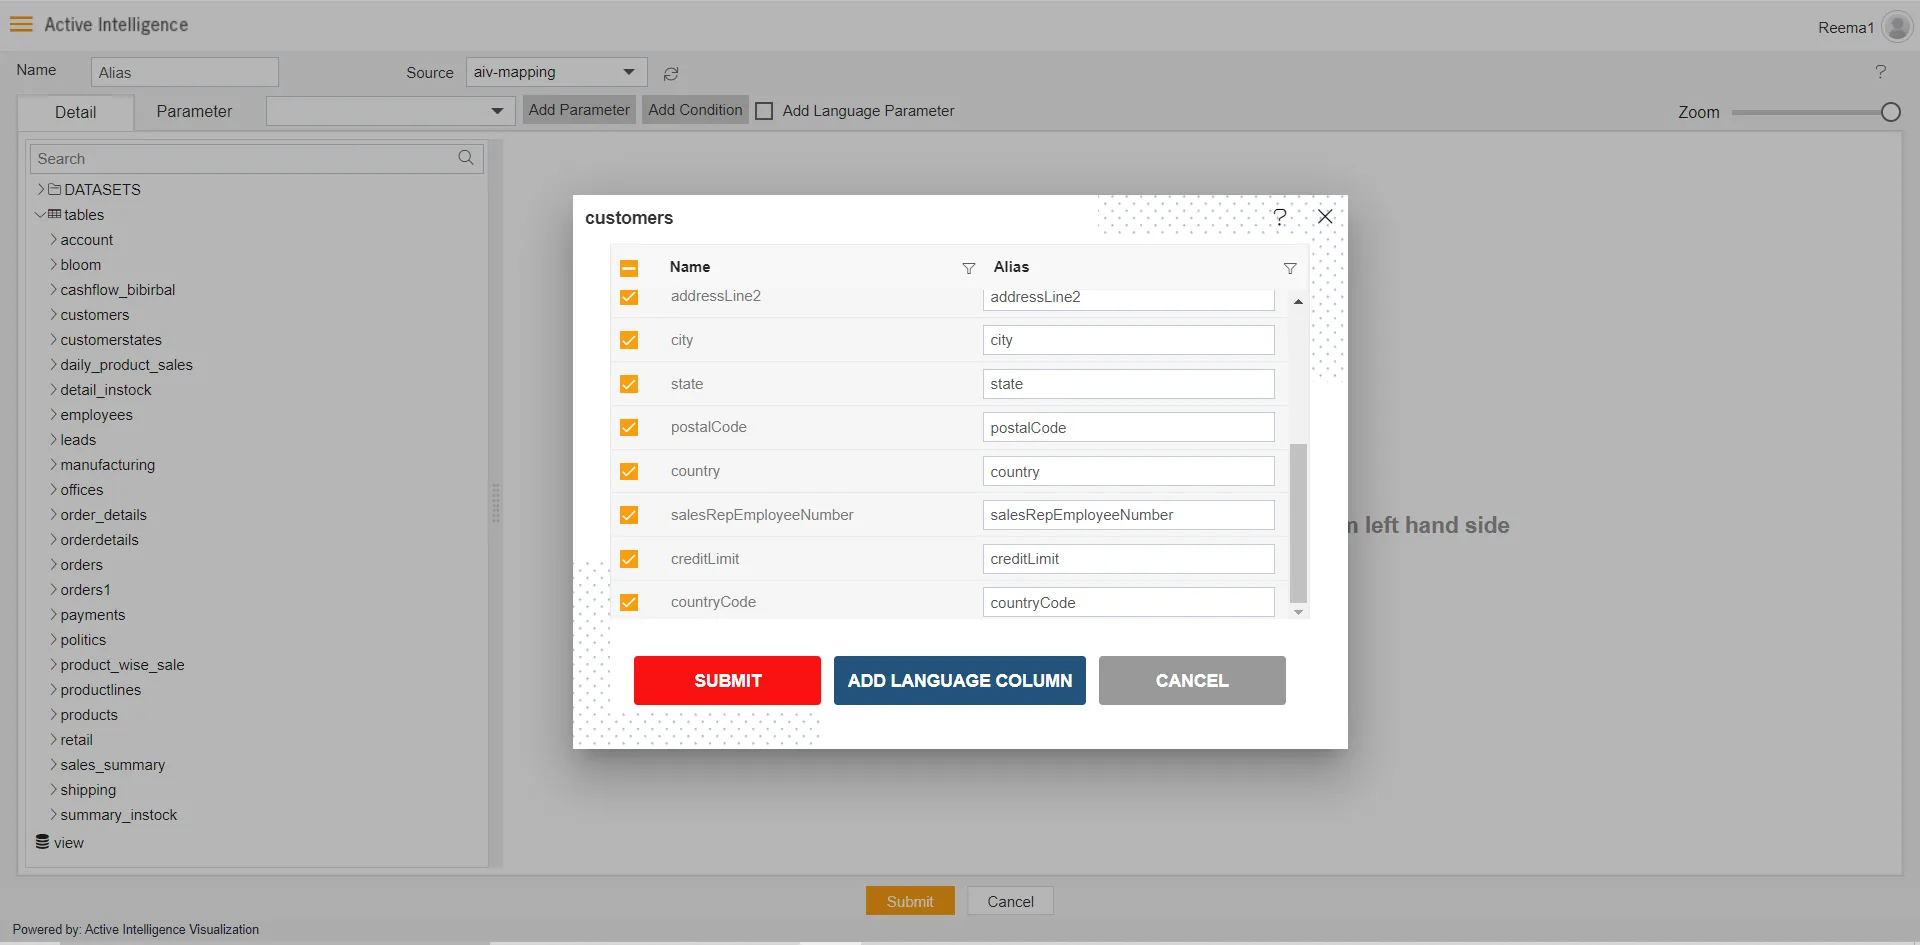
In this window you can see the Alias option displayed in the second column, as shown in the figure below:
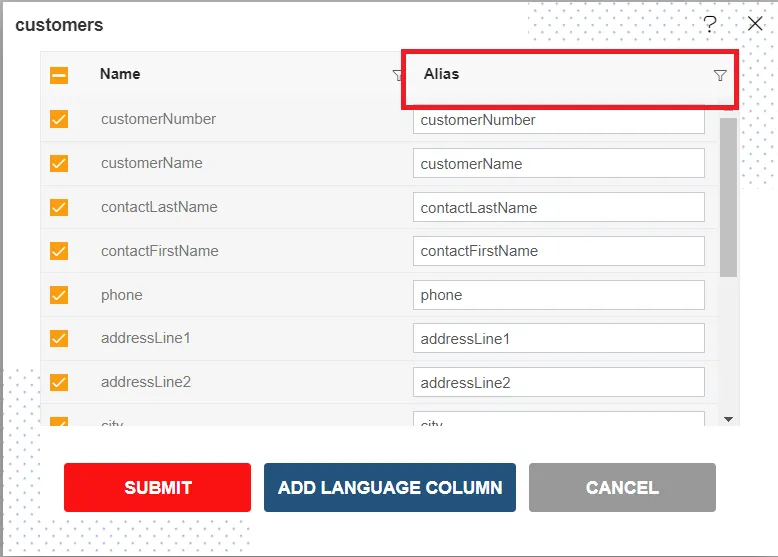
Here you can see by default, the alias name is set the same as the column name and all field in the alias is in a text box. That means you can edit/Type the required name of the column here by removing the default name.
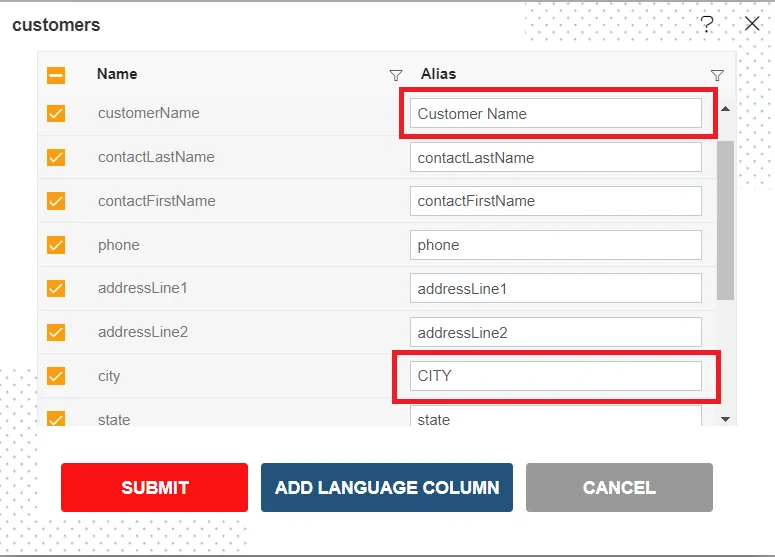
For example, for the demo let us change the alias of the customer name column to Customer Name, and city to CITY as shown in the figure below:
Click on submit, and you can see changes reflected in the node.
Click on Submit to save the pipeline.
The pipeline is run in the Adhoc Analysis.
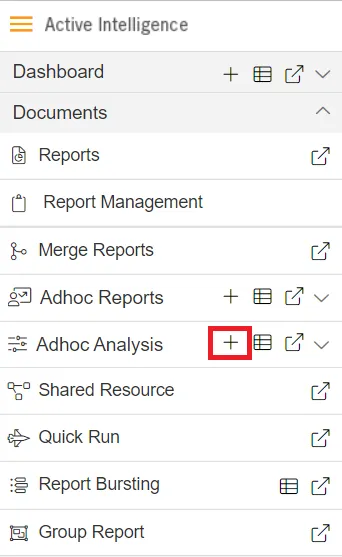
Go to Documents > Adhoc Analysis section from Hamburger menu.
In Adhoc Analysis click on the + icon to create a new Analysis, as shown in the figure below:
When you click on create Analysis then the Analysis Selection dialog box will open, as shown in the figure below:
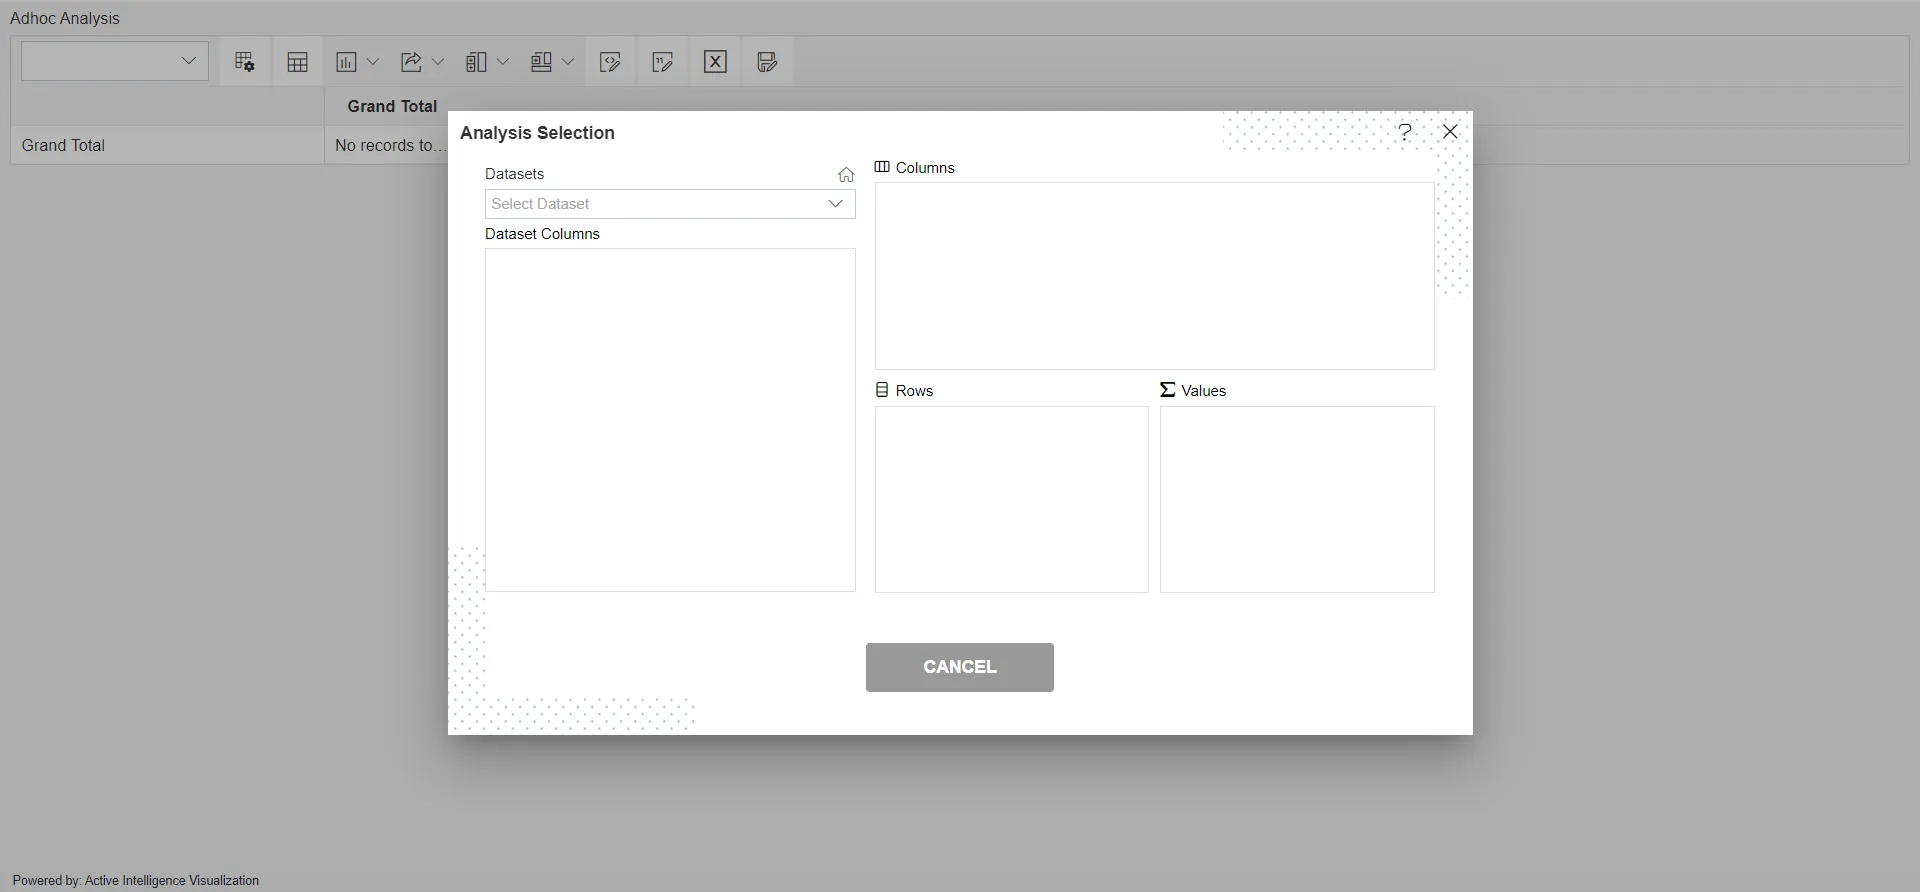
Enter the following details in Analysis Section:
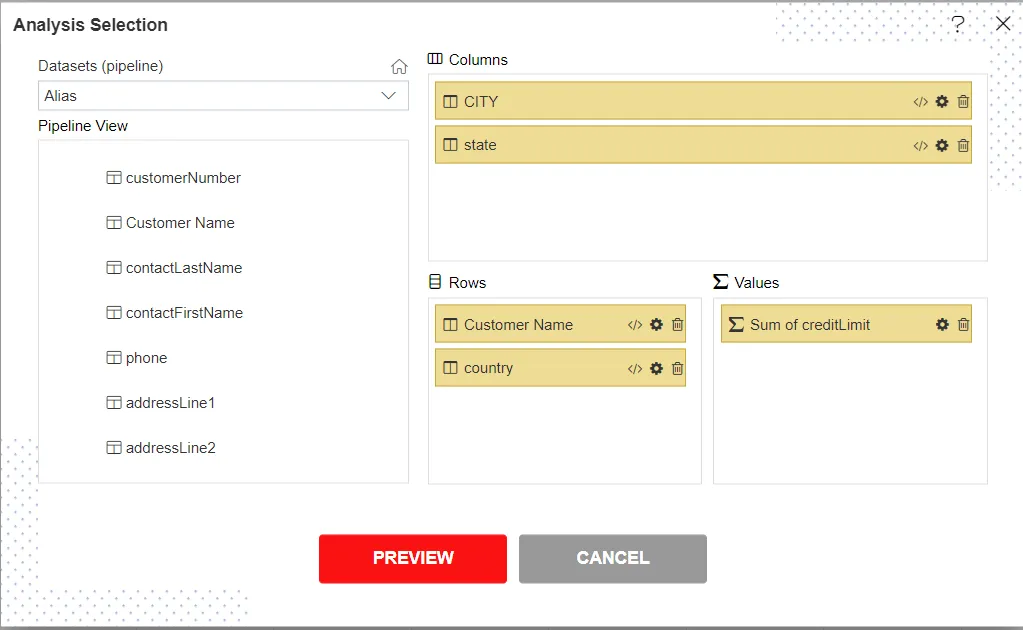
Dataset: Alias (select the Pipeline, which you are created)
The Customer table will get load the left side box of Pipeline view, Now expends the Customer table.
Drag and drop Customer Name, a country column from Customer to Rows, Drag and drop CITY, State column from Customer and Put it in Column box, Drag and drop the credit limit column from Customers to Values box (Select sum in Type), as shown in the figure below:
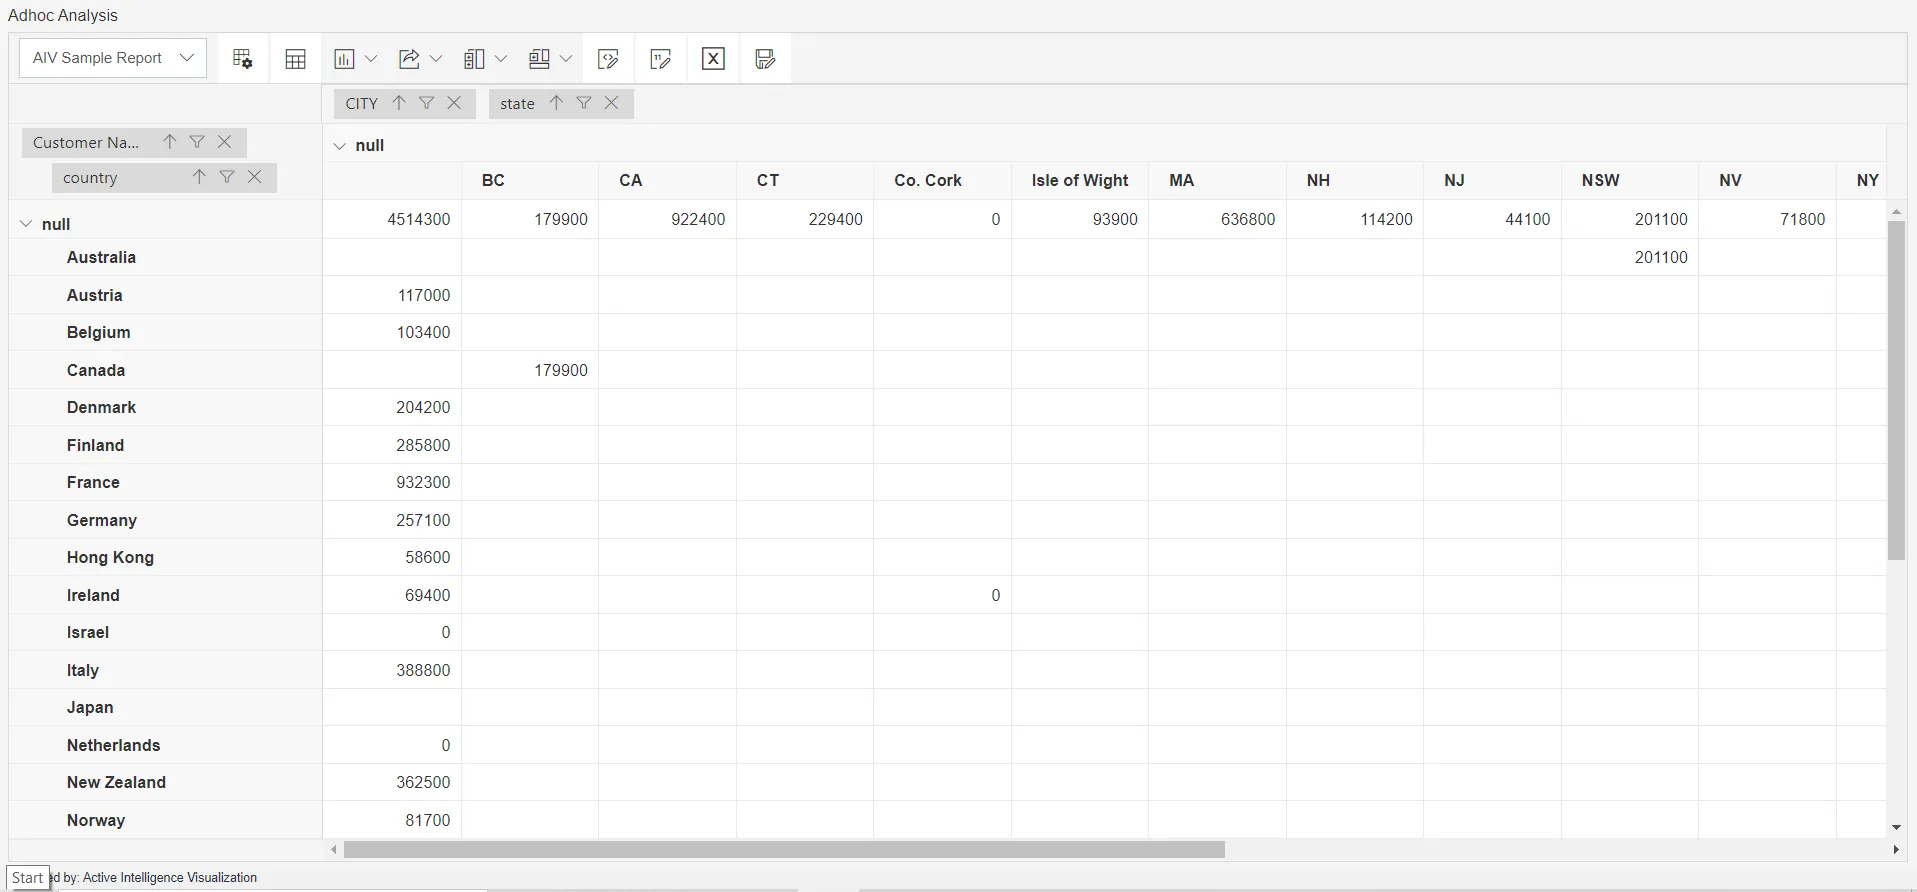
Click on Preview Button it will show the output and after the preview click on Cancel Button it will show the screen as follows:
Click on Save as![]() icon for saving the Analysis, it will show the screen as below:
icon for saving the Analysis, it will show the screen as below:
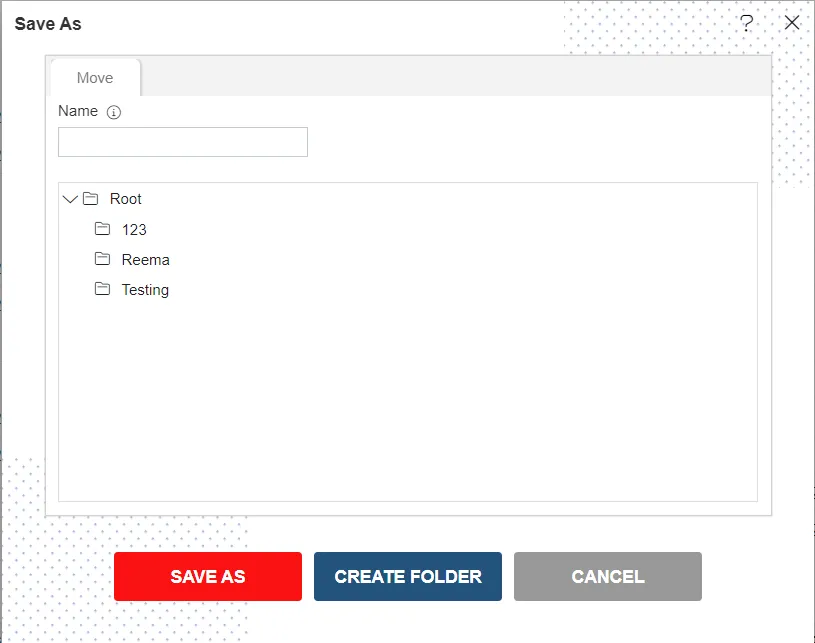
Give the name of Analysis.
Name: Alias Demo Pipeline and Select the folder where you want to save Analysis, as shown in the figure below:
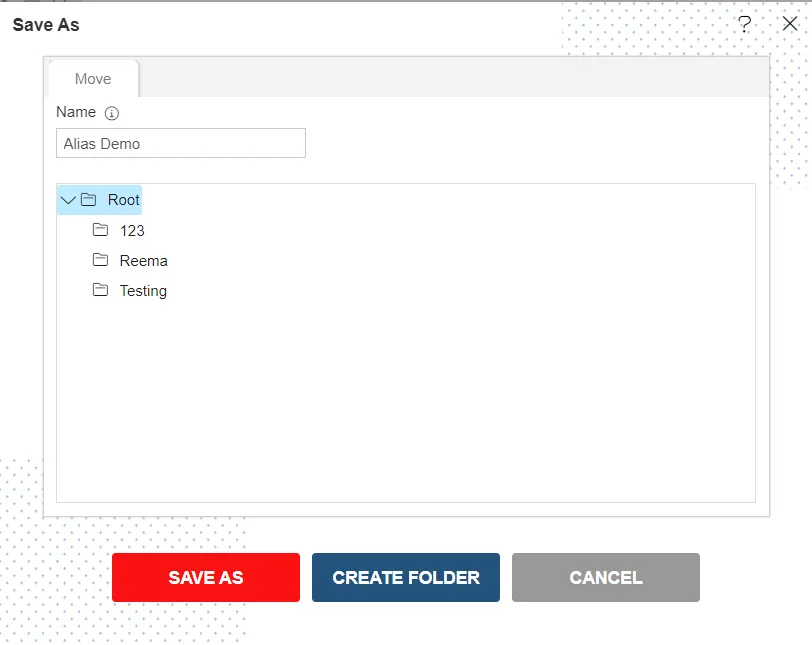
Click on Save As button to save Analysis.