How to Filter Node Columns
How to Filter Node Columns
This document contains information regarding the usage of column filters to filter / Add or remove columns from the Pipeline node.
Prerequisites
-
Existing (.ds) Datasets having at least 1 matching column.
-
Database tables have at least 1 matching column.
Download Pipeline.zip file from the link given PipelineDataset.zip
1. Create Pipeline with Existing Datasets.
Here, to demonstrate how to create a pipeline,
1.Customers.ds , which has information of customer details
Let’s get started with pipeline creation;
log in to the AIV application with valid user credentials
Go to Master Data > Dataset section from the Hamburger menu
From the footer menu, click on create pipeline button to create a new pipeline
![]()
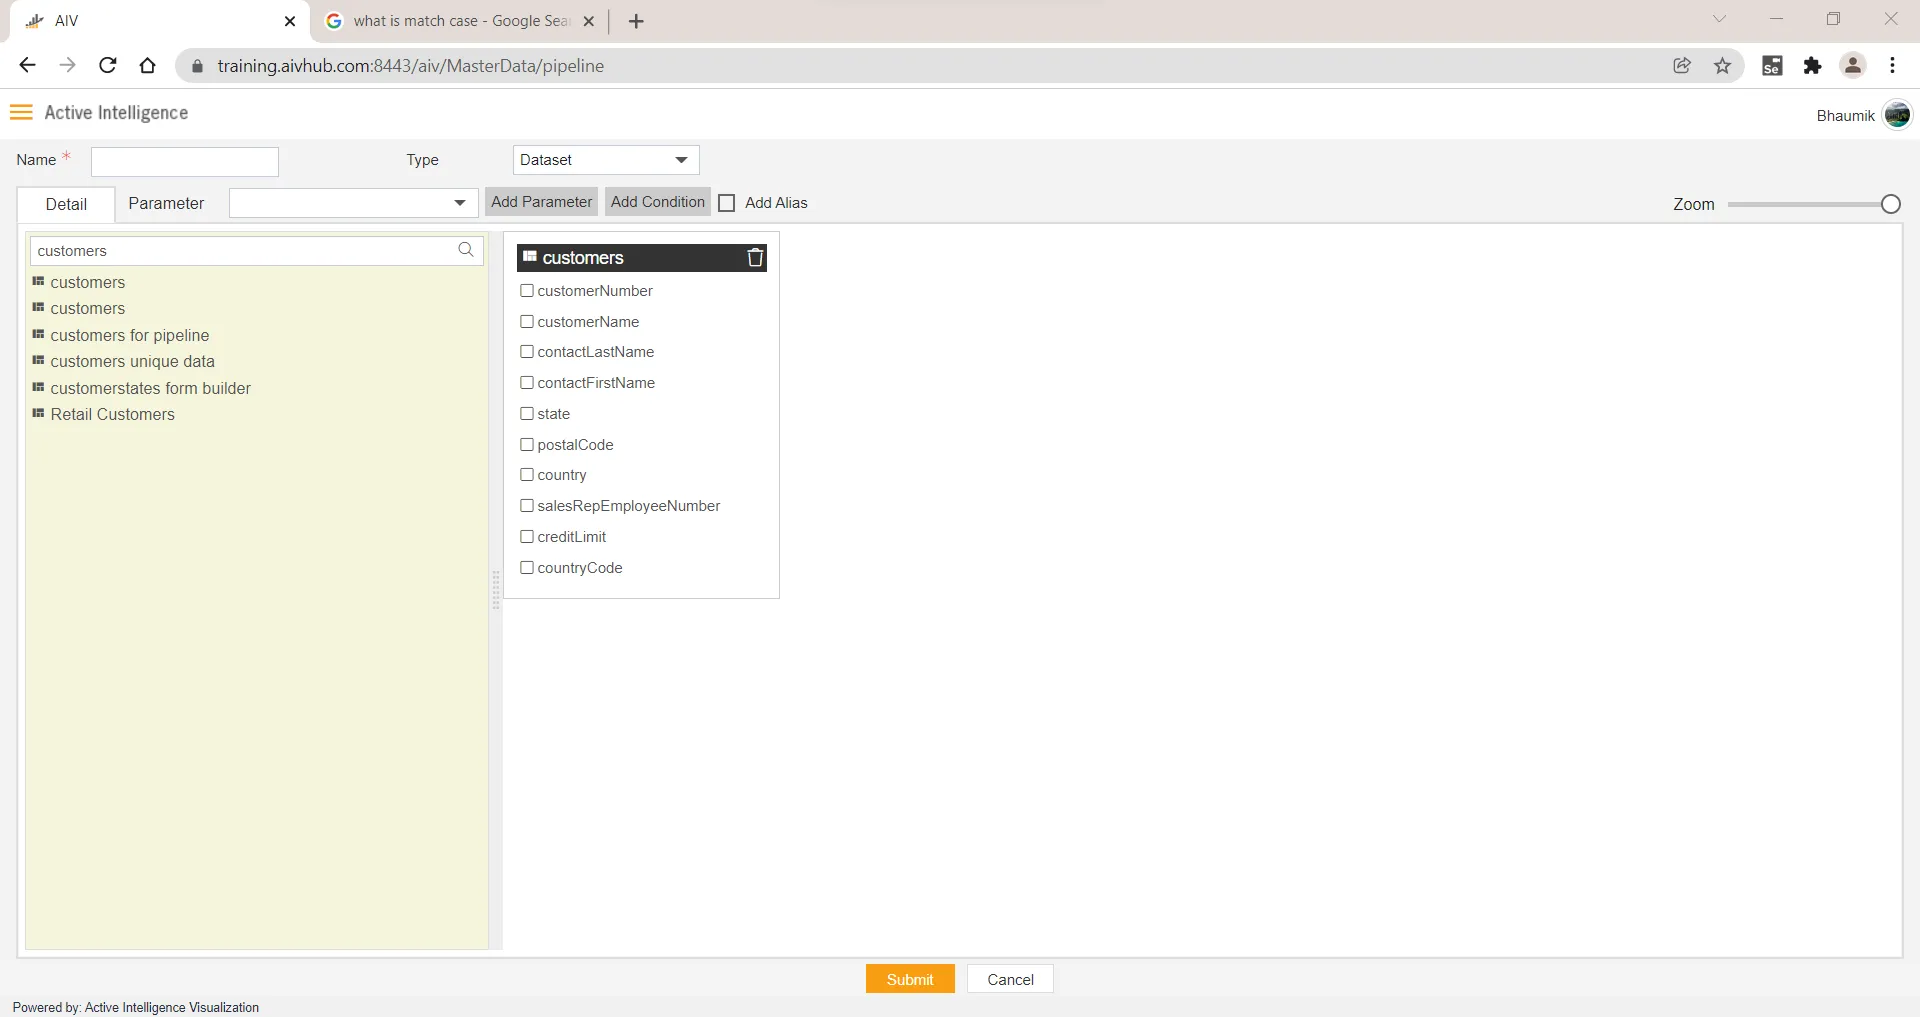
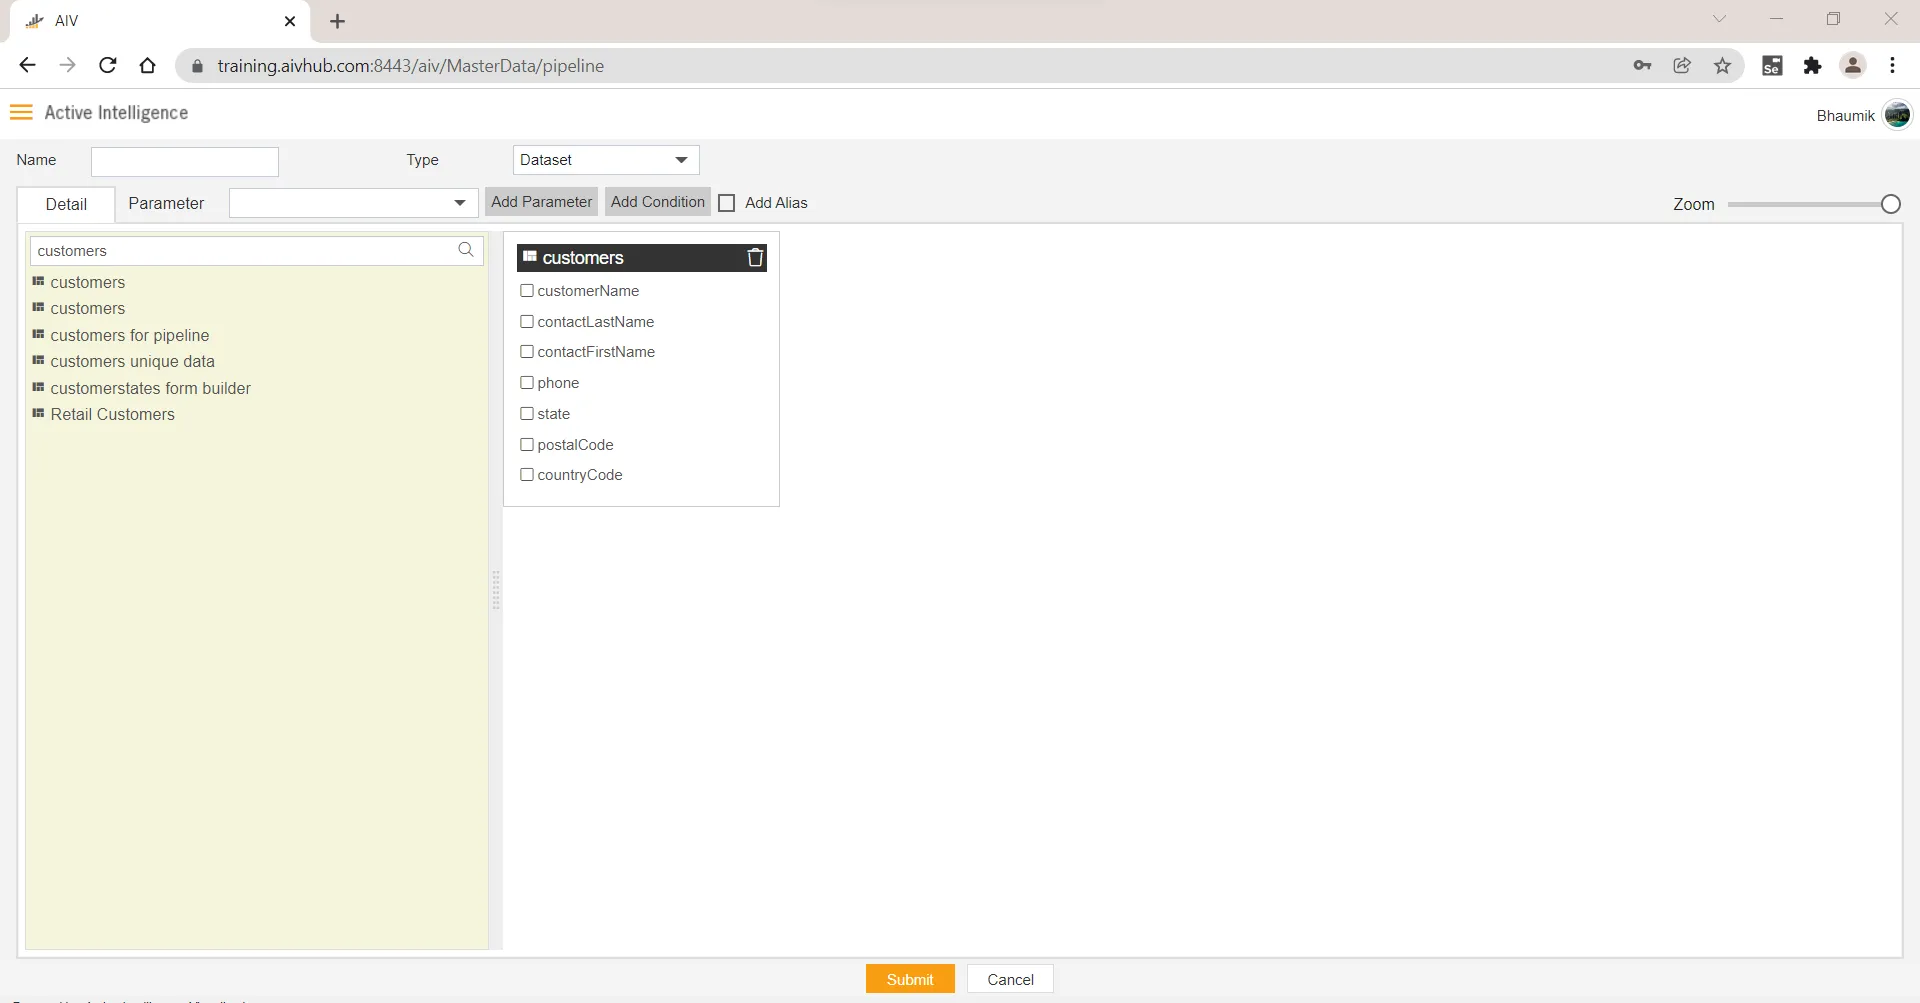
Once you click, you can see a blank create pipeline window as in the below image,
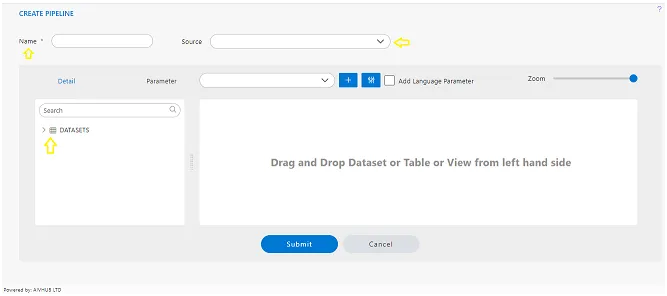
You can see in Type : Dataset is selected which means you can see a list of datasets in the details tab. form the list of dataset search for datasets we will require. First, we required a customer’s table so we will search for the customer’s dataset using the search box and drag and drop this dataset from list to playground.
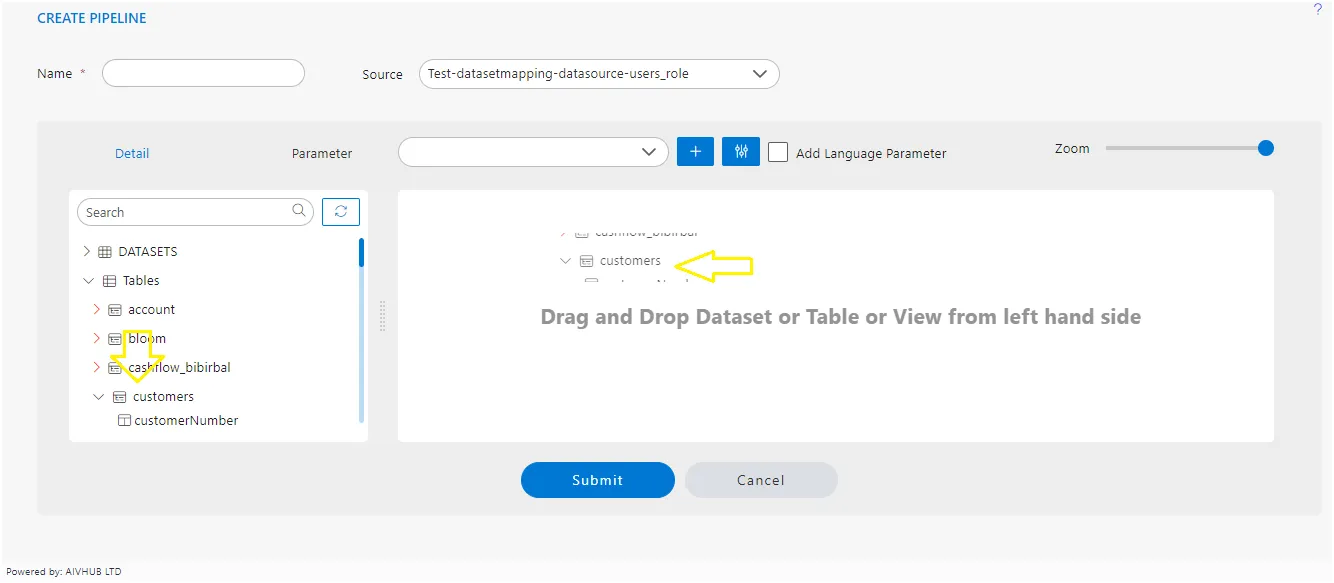
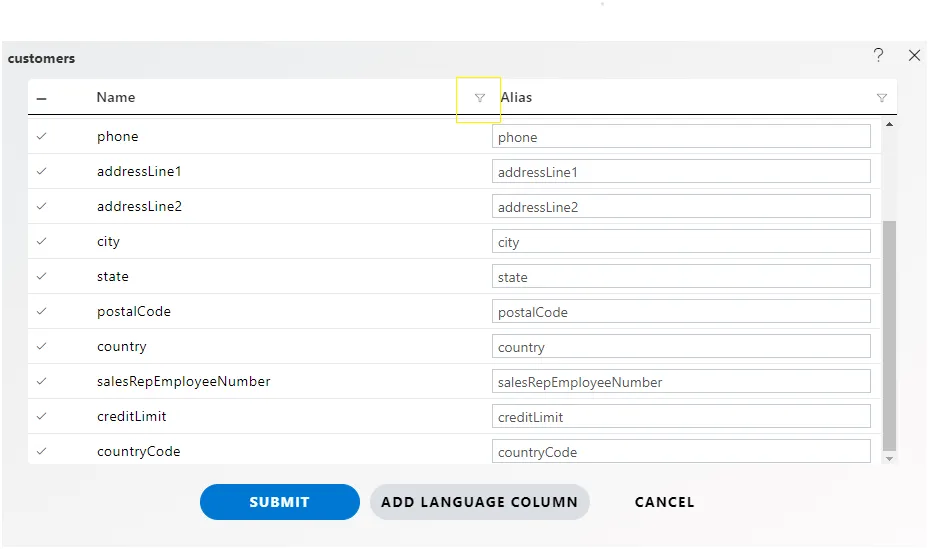
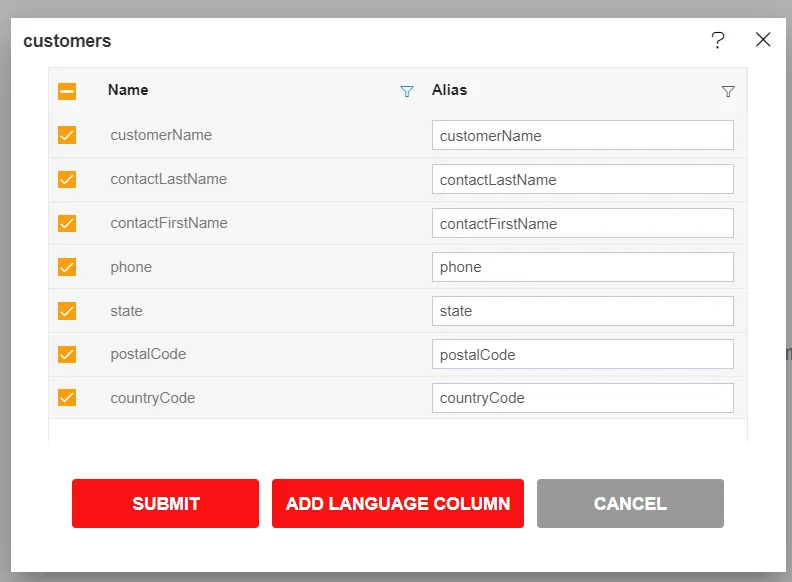
Once you drop the dataset, a list of columns will be displayed for that selected dataset.
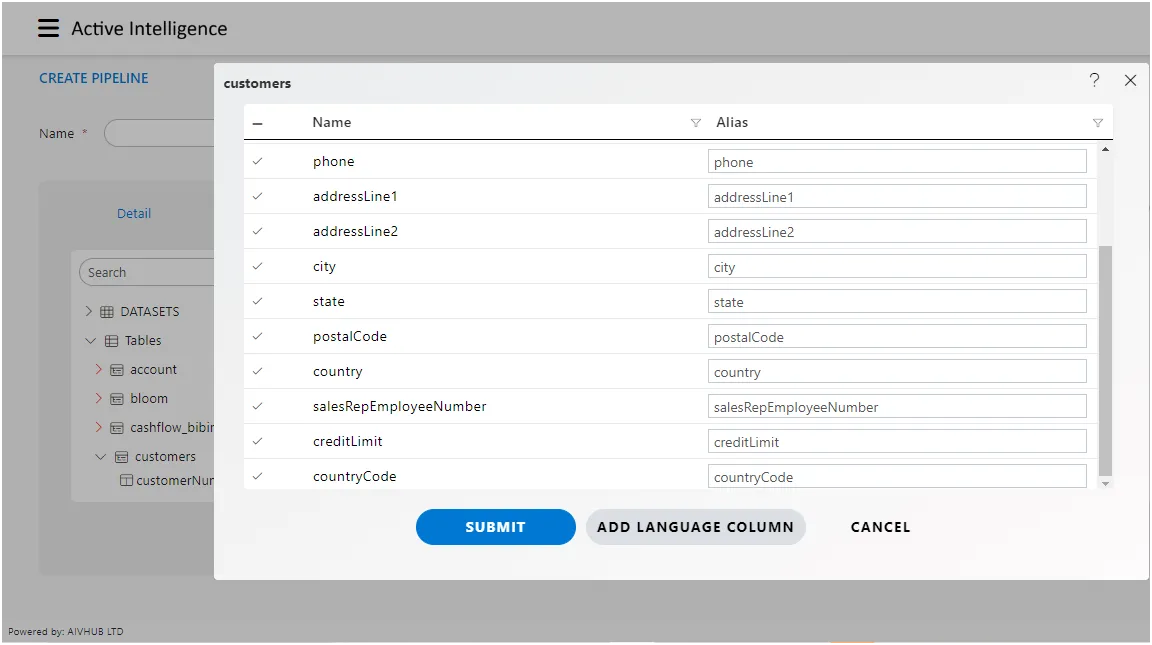
Here users can select or de-select columns to be added to the playground with a checkbox provided with each column name. By default, all columns will be selected.
You can see 3 buttons in this window,
-
Submit : After selecting/De-selecting required columns, click on submit to add this dataset to the playground. you can notice that only selected columns are added to the playground.
-
Add Language Column
- Cancel: If you want to cancel this dataset to be added to the playground, click on the cancel button.
Column filter
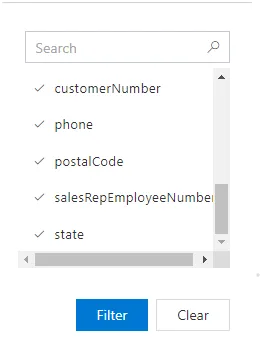
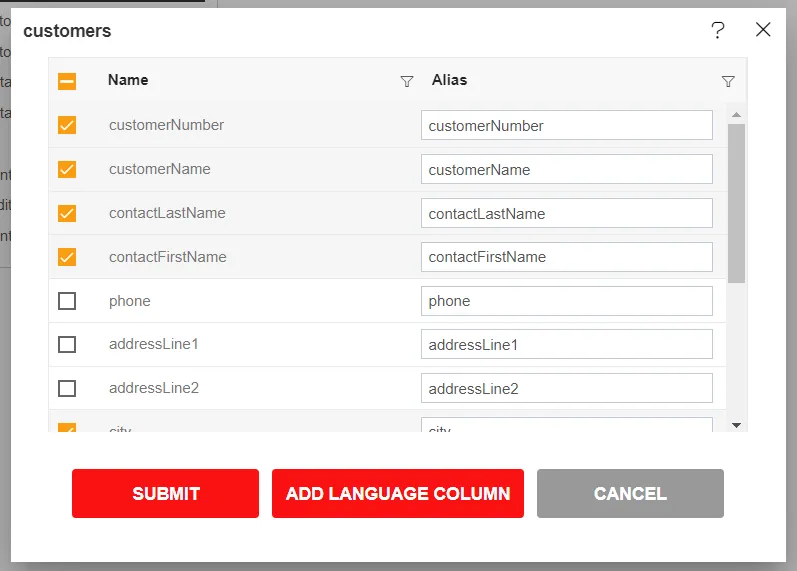
In this dataset window, you can find and filter column using the filter option available at just the right side of Name Header
When you click on this filter options as below screen;
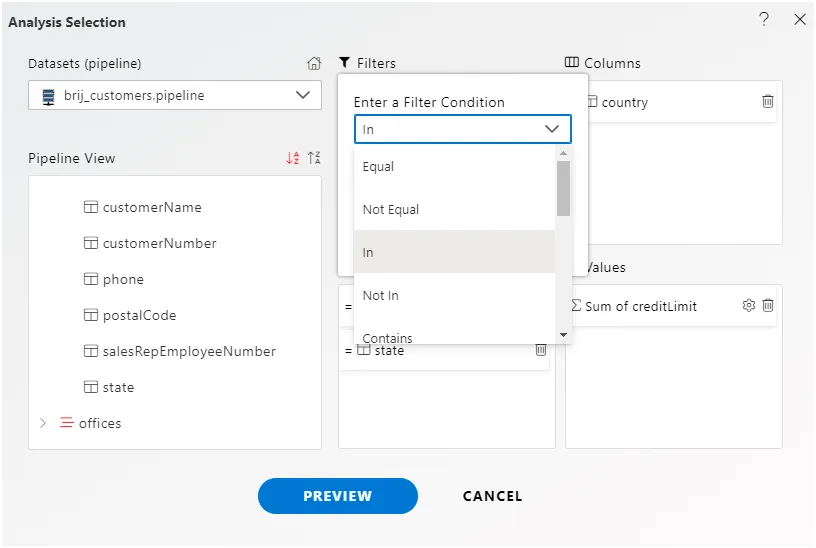
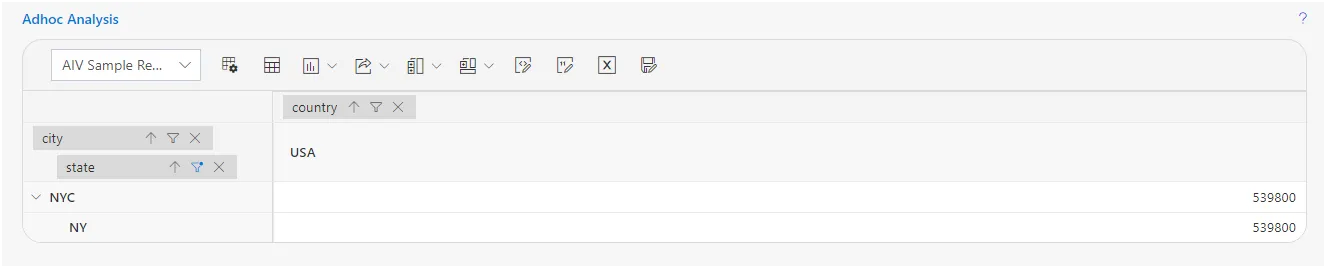
To apply a filter on the pipeline, start by navigating to the ad-hoc analysis section of AIV. Create an ad-hoc analysis of the created pipeline dataset, ensuring to include all required data in their respective positions. Once the analysis is set up, proceed to add the necessary filter criteria to refine the dataset according to your requirements.
Text Filters
- There are many options available to filter columns listed below;
- Equal
- Not Equal
- Starts With
- Ends With
- Contains
- Custom Filter
Let’s Understand every filter option one by one;
1. Equal To
This filter option is used to filter columns or columns by their name. when you click on the Equal option, the condition filter will be opened as shown below the screen;
In this window, you can see many conditions that you can filter with, and just provide the name of the column you want to filter.
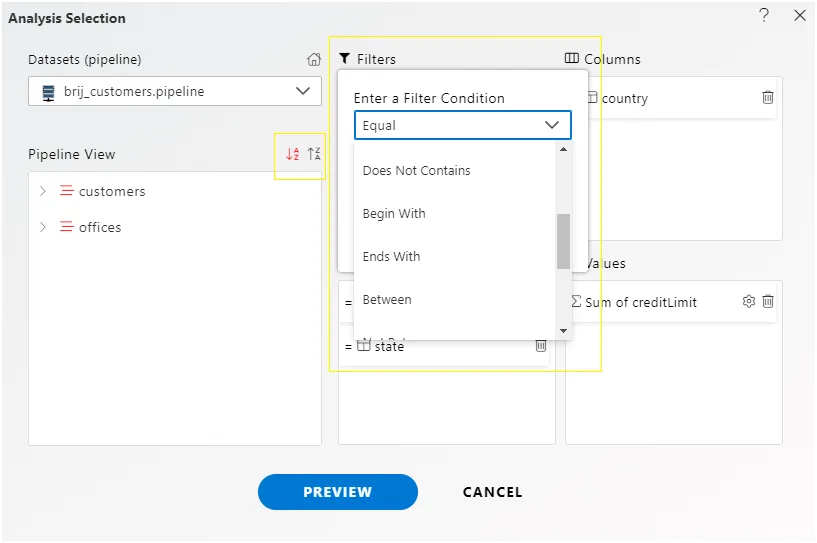
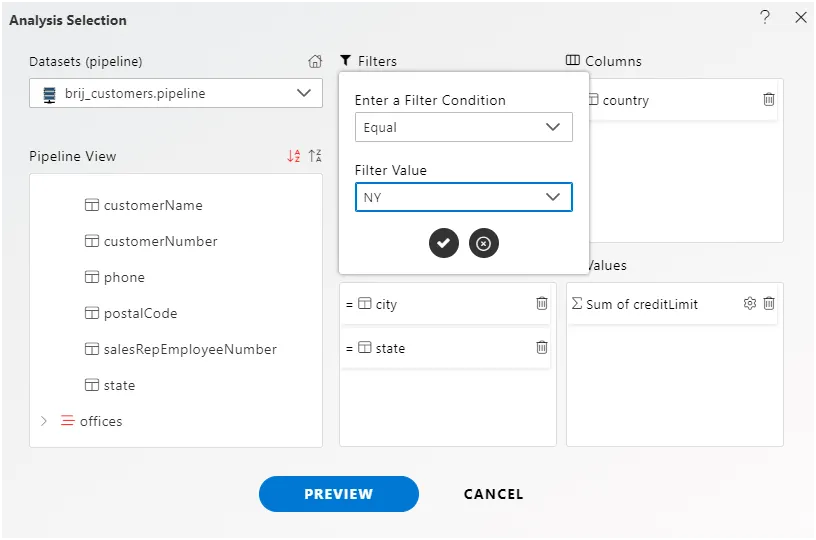
Here for the demo, we are selecting Equal option and typing column name as a city
If you want to filter out more columns, select the or checkbox and select the second filter condition and value as well.
for example, here we want to filter column city and also we want a list of columns whose names start with the latter c.
we have selected condition as or and filter condition as Starts With and applied value c here as shown in the below image,
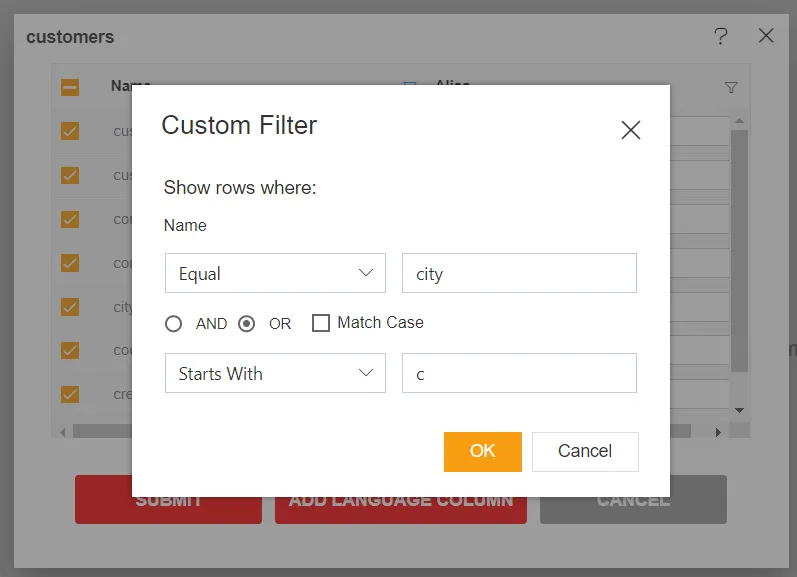
Click on ok to apply the changes
So now you can see the list of the column named city and other columns starting with latter c is displayed.
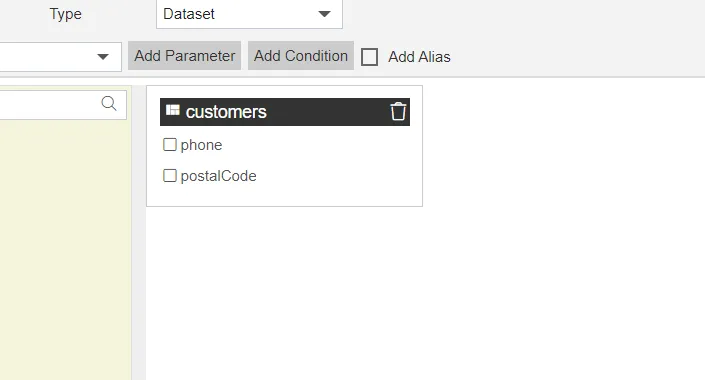
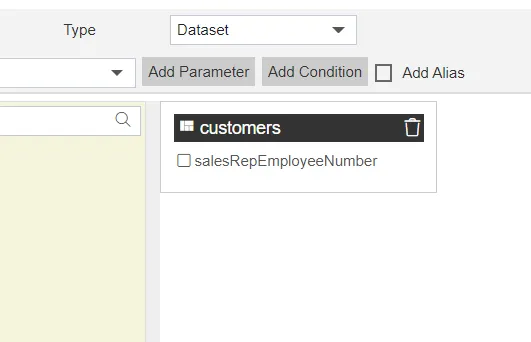
To add this in the playground, click submit button and node will be added as shown in the below image,

2. Not Equal
This type of filter will work just opposite to Equal to filter. In this Filter type, the condition and value applied will be skipped and the remaining values of the column will be displayed.
Let us take node added in the above example and double click on node name to open column list window,
You can see, some columns are selected and some are not as per the condition applied previously.
To see how not equal to filter works, click on filter icon > select Text Filters and from the menu select Not Equal option.
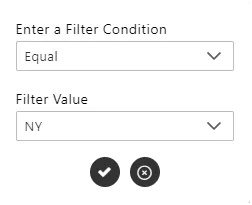
In the condition window, apply the conditions as shown below,
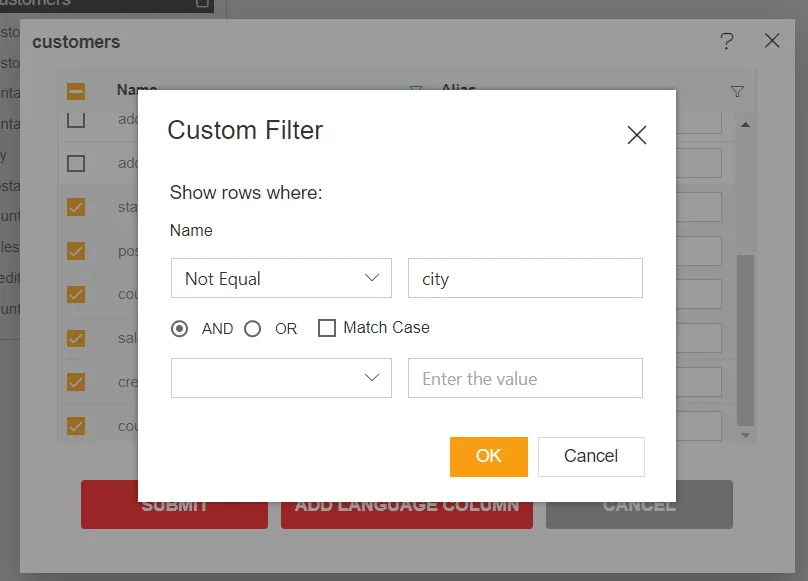
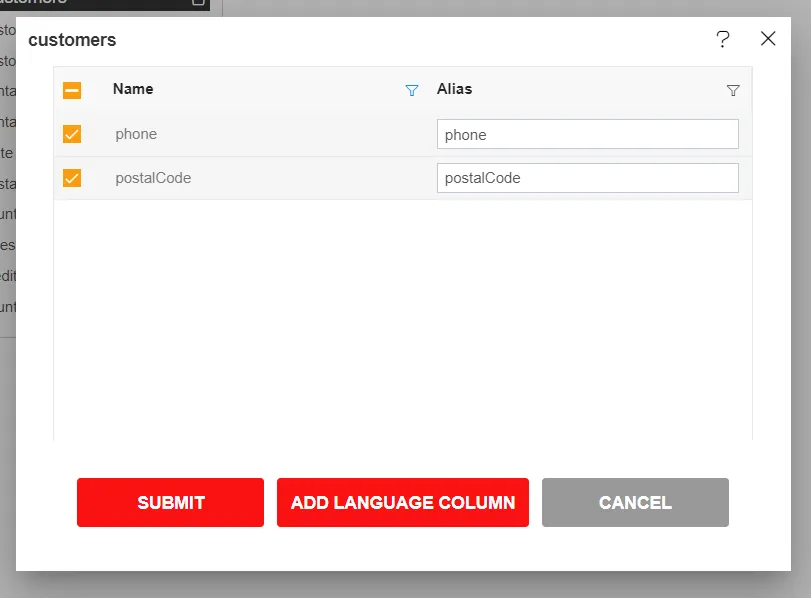
Click on ok to save filter changes and you can see in the list of columns city columns is not visible
Click on submit button to add these changes to the playground node. you can see in the node, the city column is not available as per the filter condition applied,
3. Starts With
This Text filter is used to find columns with name initials. Unlike Equal to filter, here we have to provide just starting letter of the column name and it will filter out all columns list accordingly.
To Demonstrate that, here we will filter the list of columns using the latter p
Just add a node in the playground using drag and drop, from the column list view click on the filter icon on the column header.
Click on Test Filters and select the Starts With option from the list.
In the Filter configuration window, you can see the Filter condition is selected as Starts With and in value field apply latter p.
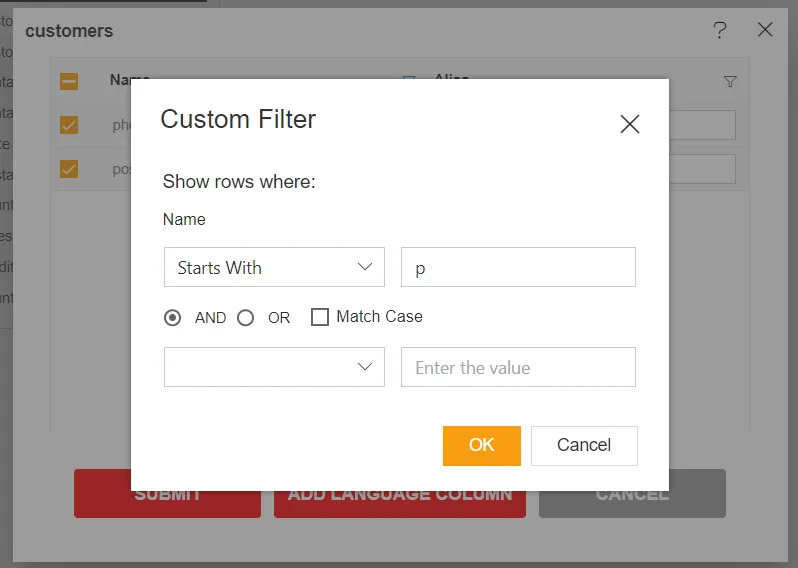
Keep remaining options as it is and click on the ok button to save the changes.
You can see here, columns whose name starts with pare displayed.
To add this column to the playground, click on submit and selected columns will be added to the playground.
4. Ends With
This text filter is used to find columns with ending characters. If you have a specific requirement to display columns which has specific letters at the end of the name then this filter is used.
To Demonstrate that, here we will filter the list of columns using the latter e
Just add a node in the playground using drag and drop, from the column list view click on the filter icon on the column header.
Click on Test Filters and select the Ends With option from the list.
In the Filter configuration window, you can see the Filter condition is selected as Ends With and in value field apply latter e.

Keep remaining options as it is and click on the ok button to save the changes.
You can see here, columns whose name starts with e is displayed.
To add this column in the playground, click on submit and selected columns will be added to the playground.
5. Contains
This text filter will be used to filter columns by some characters anywhere in name of the column.
Search value provided doesn’t need to the beginning the value the button this column to the the the the be at the beginning or the ending of the column name. Contains filter will search and find columns having filter value anywhere in the column name.
Here in customers.ds dataset we have a column named salesRepEmployeeNumber but the user does not remember the full name of it, he just remember there should be a column having Employee in between. in this case, the user can not apply filters with the filter types mentioned above. Here Contains filter will be useful. Let’s find out how to use this filter type in this case.
To Demonstrate that, here we will filter the list of the columns using Employee
Just add a node in the playground using drag and drop, from the column list view click on the filter icon on the column header.
Click on Test Filters and select the Contains option from the list.
In the Filter configuration window, you can see Filter condition is selected as Contains and in value field apply latter Employee
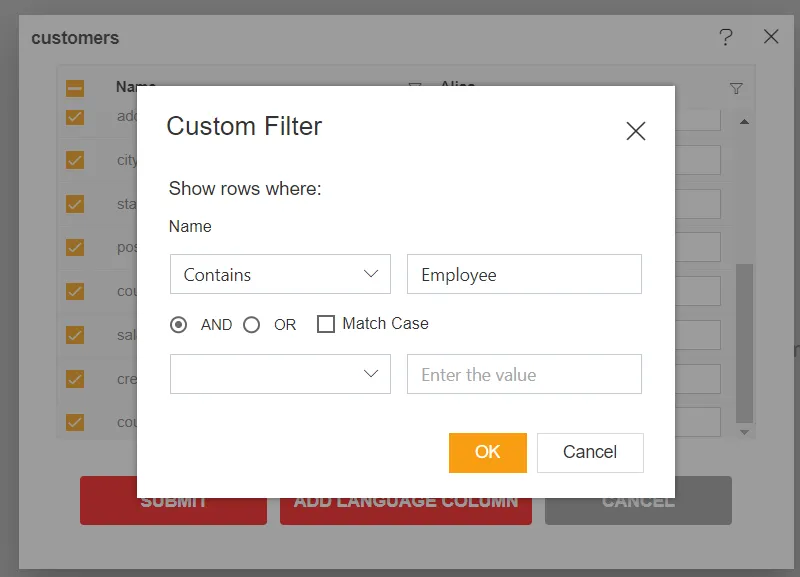
Keep remaining options as it is and click on the ok button to save the changes.
You can see here, columns whose name starts with Employeeare displayed.
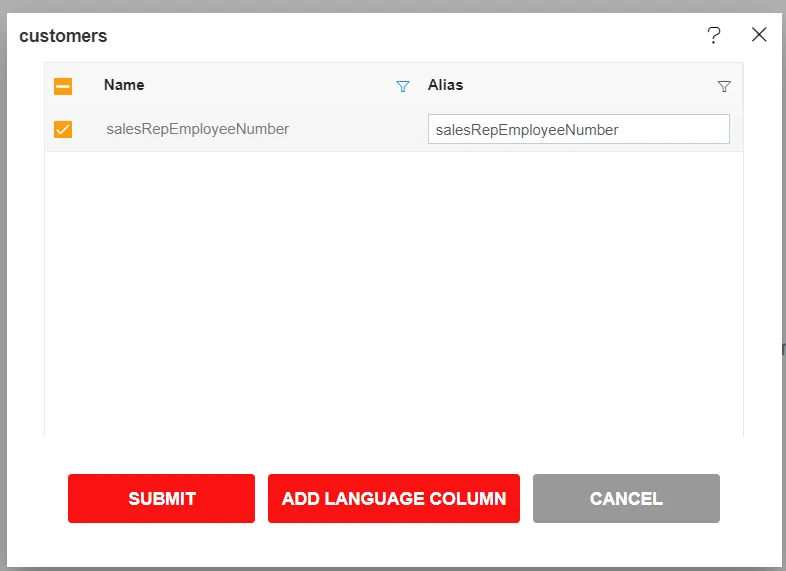
To add this column to the playground, click on submit and selected columns will be added to the playground.
6. Custom Filter
In this filter type, the user can define his conditions based on reg requirements.
For example, if we want to filter column having first character c end character is r
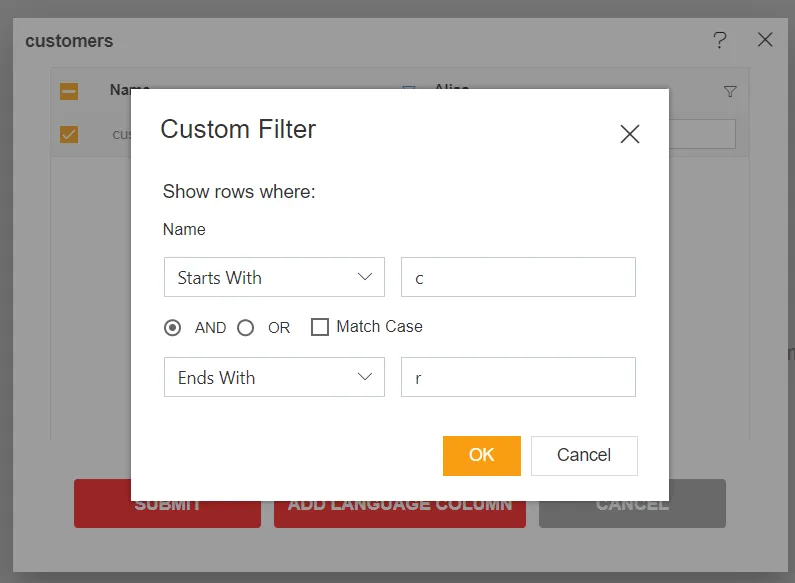
Click on the OK button and you will see column customerNumber is displayed as selected.
Click on Submit button to add this col to th th de.