Clone
The Clone feature allows users to create an exact copy of an existing item within the application.
This functionality is available in the following subsections:
- Reports → Merge Report and Report Bursting
- Master Data → Parameters
This feature helps users quickly duplicate and modify existing configurations without recreating them from scratch.
Clone: This video explains how to clone an item in the application.
Objective
To clone an existing item, such as a Merge Report, Report Bursting, or Parameter.
Prerequisites
- For this example, the report used is Demo Merge Report.merge.
- Download the required sample files from the link below:
merge_report.zip - Upload Demo Merge Report.merge to the Merge Report section.
- Refer to this link for detailed steps on uploading files in the application.
Steps to Clone
-
To clone a Merge Report, select the report you want to duplicate, and then click the
 icon located next to the
  icon in the bottom toolbar.
-
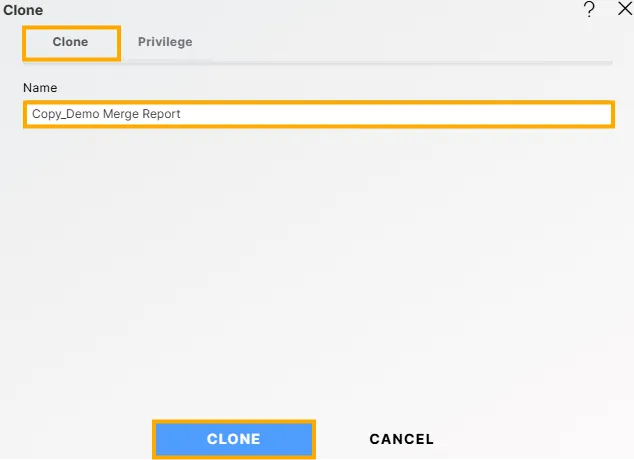
Once you initiate the cloning process, the Clone dialog box appears, as shown below:
-
By default, the system assigns the name Copy_Demo Merge Report, but you can modify this name as required before completing the cloning process.
-
Click the
 to save the settings for the cloned report. The system will display a confirmation message, as shown below.
-
The user will now be able to see Copy_Demo Merge Report.merge in the Merge Report list view.

Steps to Assign Privileges While Cloning
The Privileges feature allows users to control access and visibility of the cloned item within the application.
-
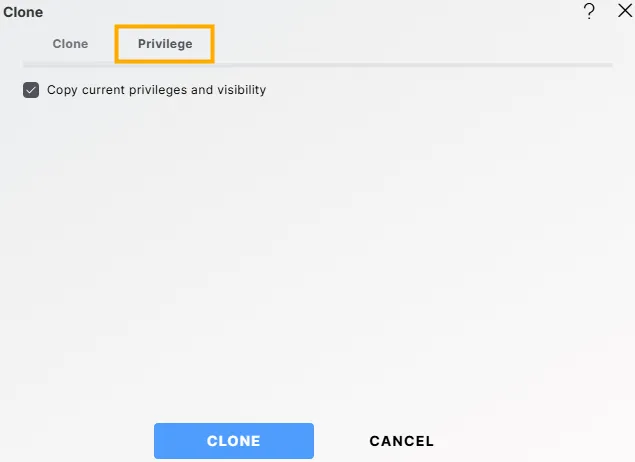
Click the Privilege tab, located next to the Clone tab, to assign privileges for the cloned item.
-
By default, the Copy current privileges and visibility checkbox is selected, which retains the same privileges and visibility as the original item.
-
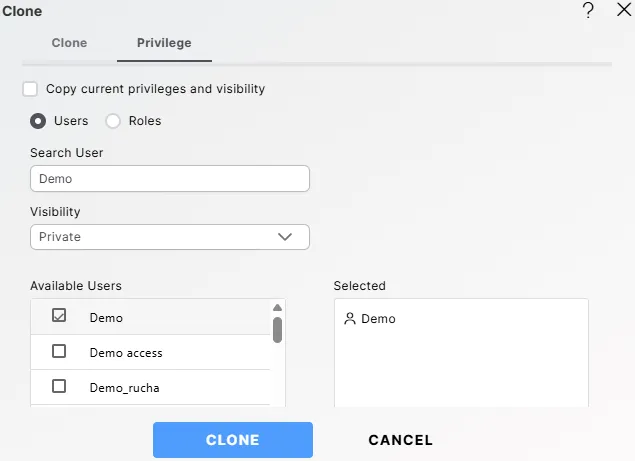
To assign new privileges, uncheck the Copy current privileges and visibility checkbox.
You can then select Users or Roles from the available list (or search using the Search User or Search Role option).
Ensure that the selected users appear in the Selected box. -
Visibility determines who can view the cloned item.
It is categorized into three types, which can be selected from the dropdown menu:-
Private: Only the current user or the report owner can view the cloned item.
-
Internal: All users within the organization can view the cloned item.
-
Public: Anyone, regardless of organizational affiliation, can view the cloned item.
-
-
For additional help, click the
 icon to access the help documentation.
 -
If you wish to cancel the cloning process, click the Cancel button next to Clone, or use the
 icon next to the icon.
::: Note
Although the example above demonstrates cloning for a Merge Report,
the same steps apply when cloning in other subsections such as Report Bursting (under Reports) and Parameters (under Master Data).
:::
To learn more about common functionality, click on the following links:
Audit
Create Folder
Copy
Delete
Download
Move
Properties
Save as Quicklink
Share
Upload
Version
Mark as Unarchive
Mark as Unpurge