Multitenancy
Overview
In modern organizations, protecting departmental data is critical to maintaining privacy, efficiency, and compliance. Multi-tenant access control ensures that users can only share and access files within their own departments. This approach eliminates risks of unauthorized access, reduces data mishandling, and supports seamless intra-department collaboration.
The application supports department-level data isolation by enabling organizations to create departments and restrict data sharing and access to users within the same group. This document outlines how to implement and benefit from department-level access control using the application.
Prerequisites
Before setting up multitenancy, you need to create a department. For detailed instructions on creating a department, refer to the Create Department guide.
Once you have created a department, you can proceed with creating users and managing data sharing within that department.
Steps to Create a User
-
Access the Users Section
-
Click on the
 (hamburger menu) icon in the top-left corner of the screen.
 -
Navigate to Administration.
-
Under the Administration section, click on Users.
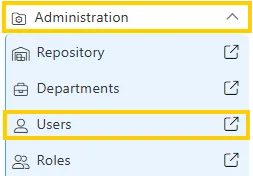
This will take you to the User Page, where existing users are displayed in a list view.
-
-
Open the Create User Form
-
In the bottom toolbar, click on the
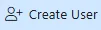 button.
 -
This opens a form where you can input details for the new user.
-
-
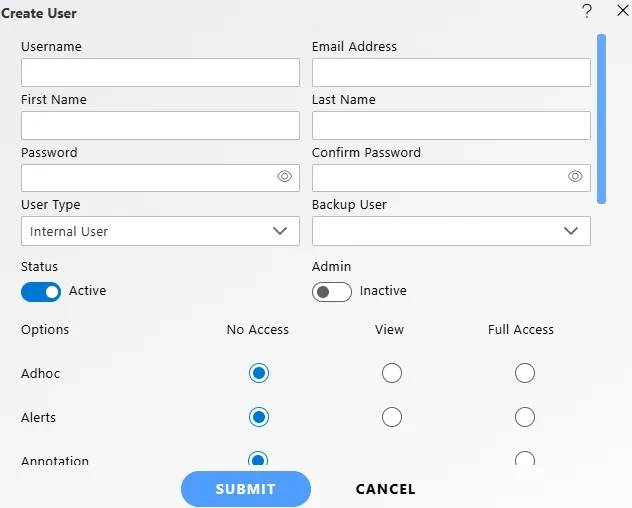
Fill Out the User Information
In the Create User form, enter the required details:
-
Username: Enter the desired username (e.g., jordan_lee).
-
Email Address: Enter the user’s email address (e.g.,
jordan@gmail.com). -
First Name: Enter the user’s first name (e.g., Jordan).
-
Last Name: Enter the user’s last name (e.g., Lee)
-
Password: Set a password for the user.
-
Confirm Password: Re-enter the password to confirm it.
-
User Type: Select the appropriate user type from the dropdown.
-
Internal User: Typically a member of your organization who requires full or regular access to the system.
-
External User: Often a third-party user such as a vendor, client, or consultant who may need limited or restricted access.
-
-
Backup User: Select a backup user if required (e.g., alex_morgan).
-
Status: Set the user’s status using the toggle switch (e.g., Active).
-
Admin: Set whether the user has admin privileges using the toggle switch (e.g., Inactive).
-
Options: For Adhoc, Alerts, Annotation, etc., select the desired access level by clicking the appropriate radio button.
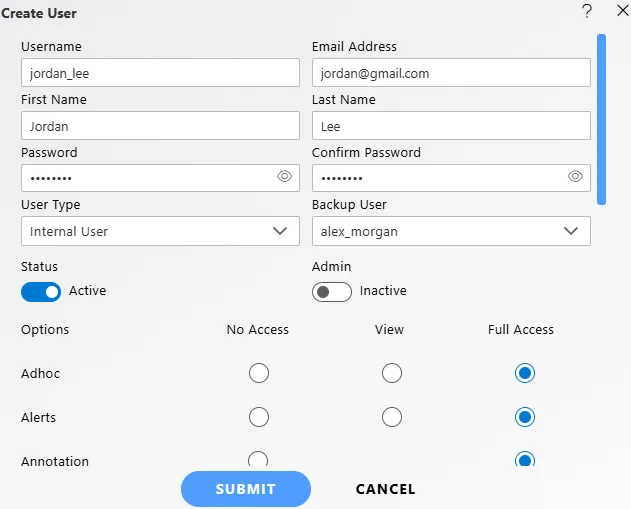
After entering the information, click the SUBMIT button to create the new user.
-
Verify the New Entry
-
After clicking the SUBMIT button, a pop-up message saying User Created Successfully will appear, confirming that the user has been added.
-
The newly created user will now be listed in the list view on the User Page.
-
Use the Search bar in the top-right corner to locate and verify the entry.

-
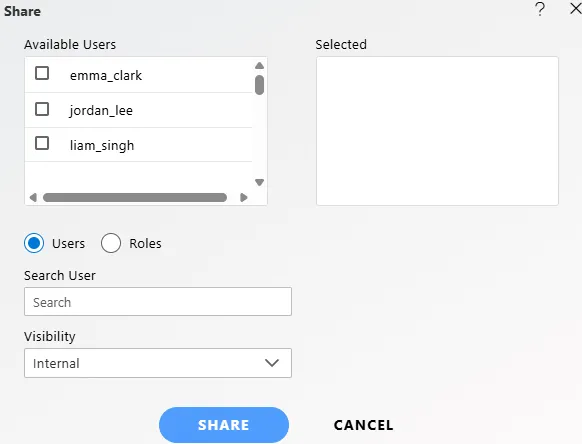
Sharing Data within Department
When sharing data (such as dashboards, reports, or files), you will only see users that belong to the same department. For example:
-
If you are sharing a dashboard, the Share option will only show the users you have created within the same department.
-
This ensures that you can securely share files or data within your team, without exposing it to other departments or unauthorized users.