Notebook
Introduction: The AIV Notebook widget is an integral component of the dashboard, designed to enhance the user experience by seamlessly integrating Jupyter Notebook functionalities into the dashboard environment. This widget offers users the flexibility to view, interact with, and analyze notebook model files directly within the dashboard interface, eliminating the need to switch between different platforms or applications.
Pre-requisite: Users should have a Notebook Model file (.ipynb) before using this Notebook Widget.
Notebook: This video demonstrates how to create an AIV Notebook:
This document provides guidance on using the Jupyter Notebook widget:
.ipynb files: Before you begin, ensure that you have your .ipynb files uploaded to the dashboard section. If not, you can easily drag and drop a file onto the dashboard grid view to upload it. Alternatively, use the upload button in the bottom menu bar to add the .ipynb file to the dashboard section. Once uploaded, the file will automatically become available in the notebook widget.
By following these steps, you'll be able to efficiently utilise the Jupyter Notebook widget for your tasks.
-
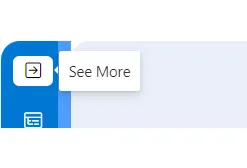
Navigate to the left widget menu and click on the Notebook widget. To access the menu options, simply click on the “see more” icon located at the top-right corner of the widget menu.
-
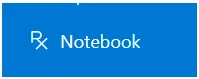
Click on the Notebook widget icon from the widget-menu, as shown in the figure below:
-
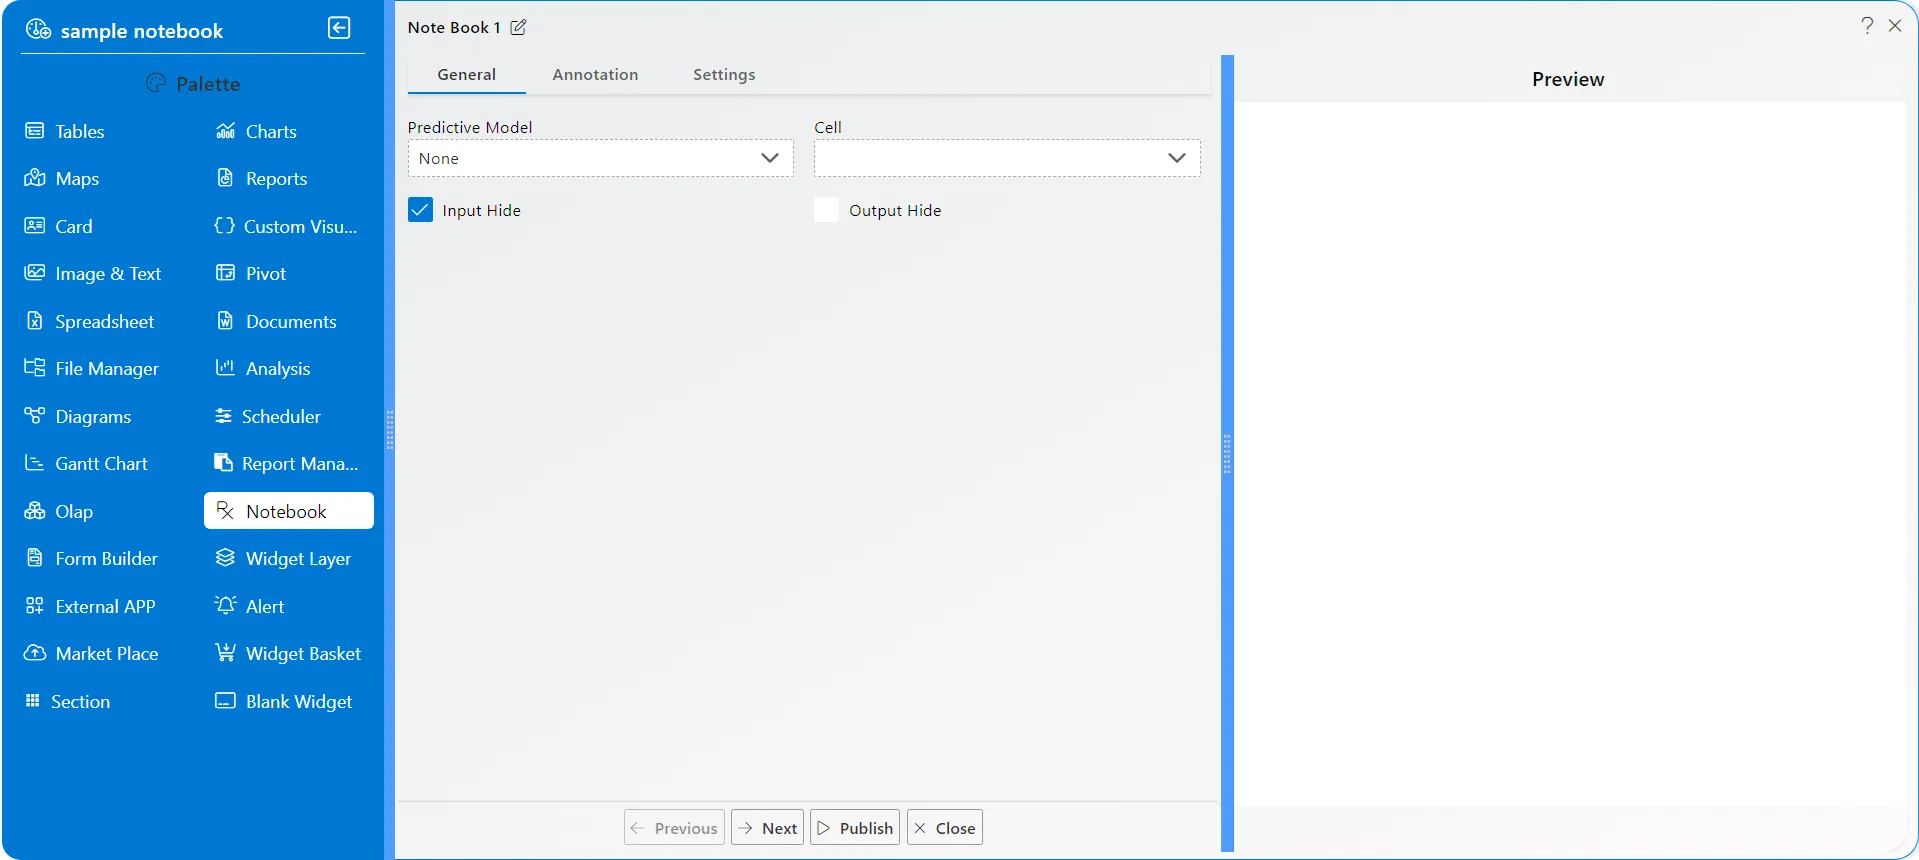
After that, the Notebook edit menu will open as shown in the figure below:
-
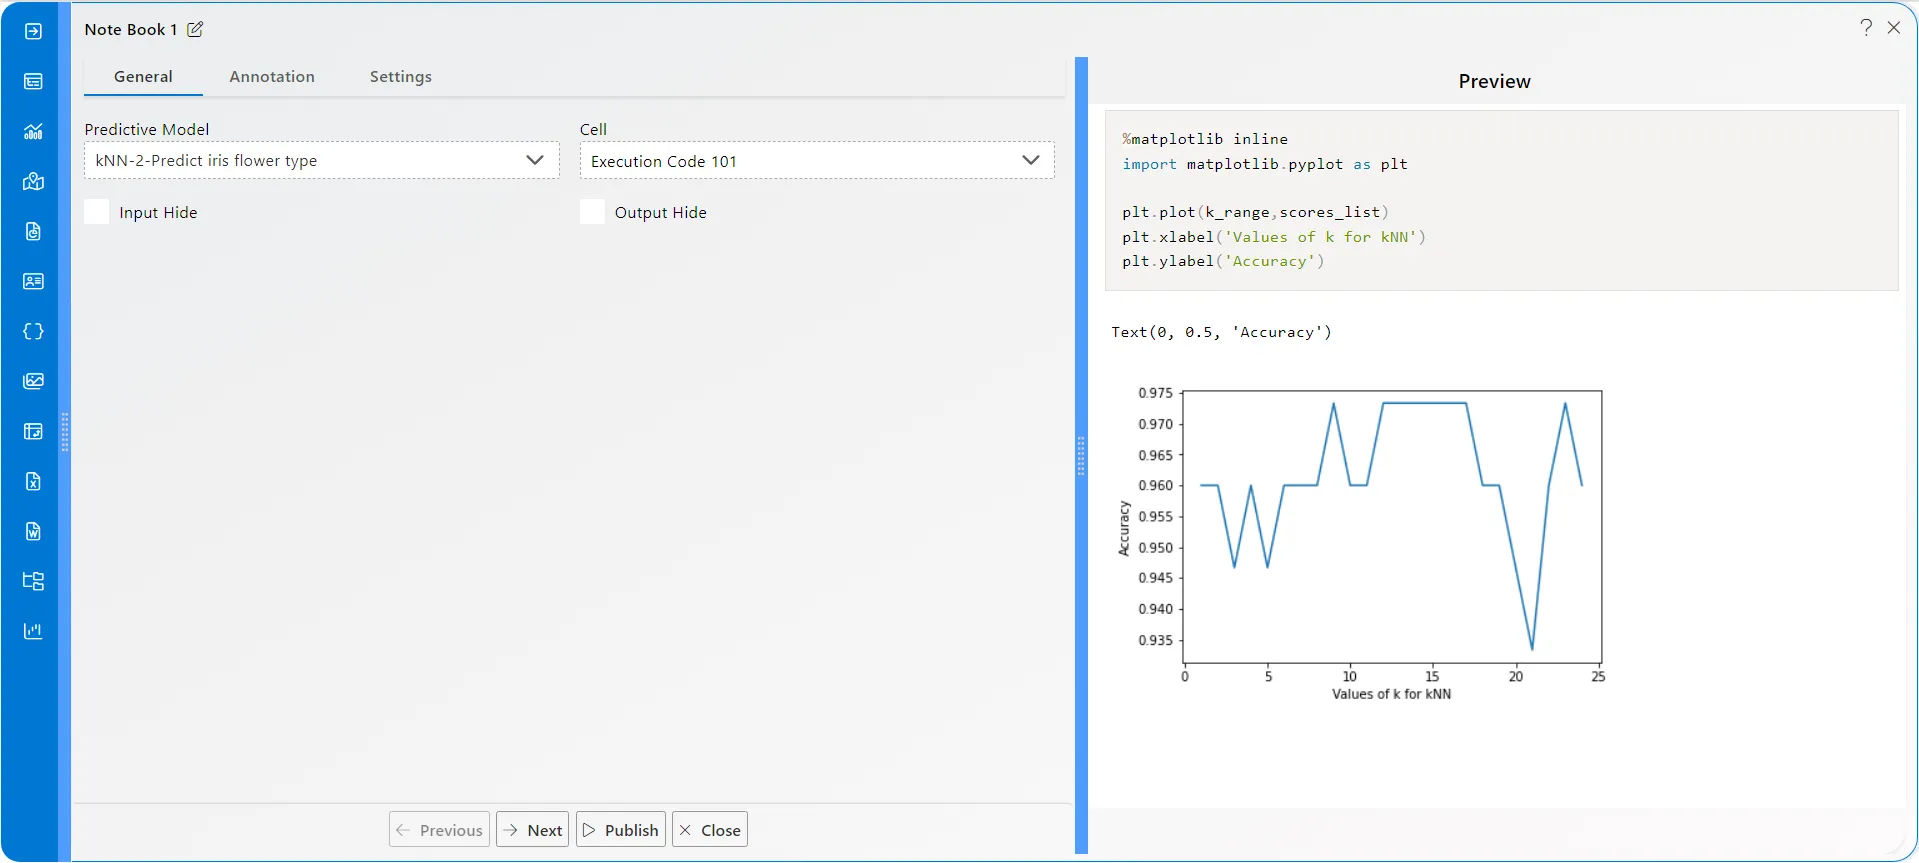
Under the General tab, The Predictive Model feature displays all the .ipynb files you have uploaded or that are available within your application. Select the .ipynb file of your choice from the edit menu of the widget, or you can follow the steps below:
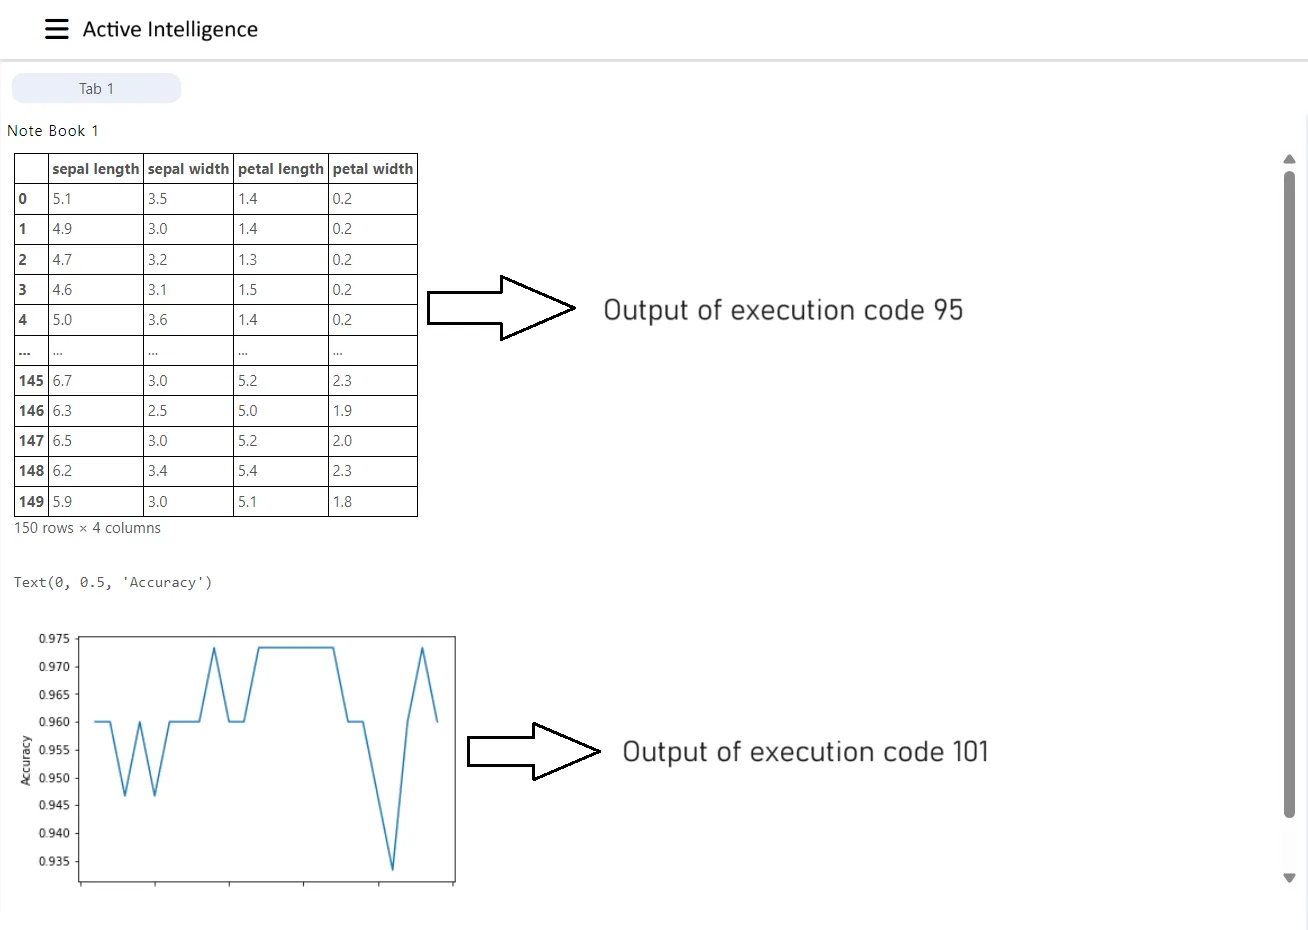
- Predictive Model: kNN-2-Predict iris flower type (ipynb file)
- Cell: Execution Code 101 (select from dropdown)
-
Click on the publish button to check the final output of the widget on the dashboard; the widget will look as shown in the image below:
-
To hide the Input-code, the user can select the Input Hide checkbox from the widget edit area; also, the user can locate the controls as shown in the figure below:

-
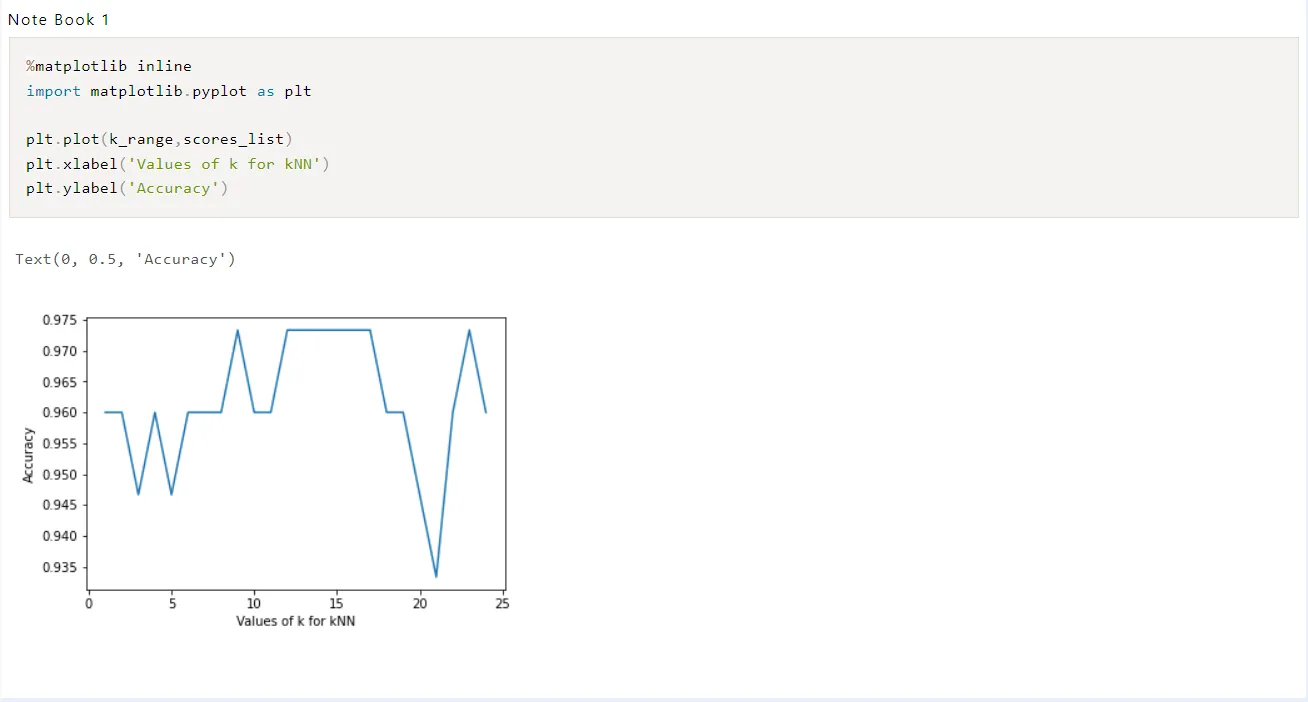
Click on the preview icon from the top right corner of the widget, as shown in the image above, and your screen will look as shown in the image below:
-
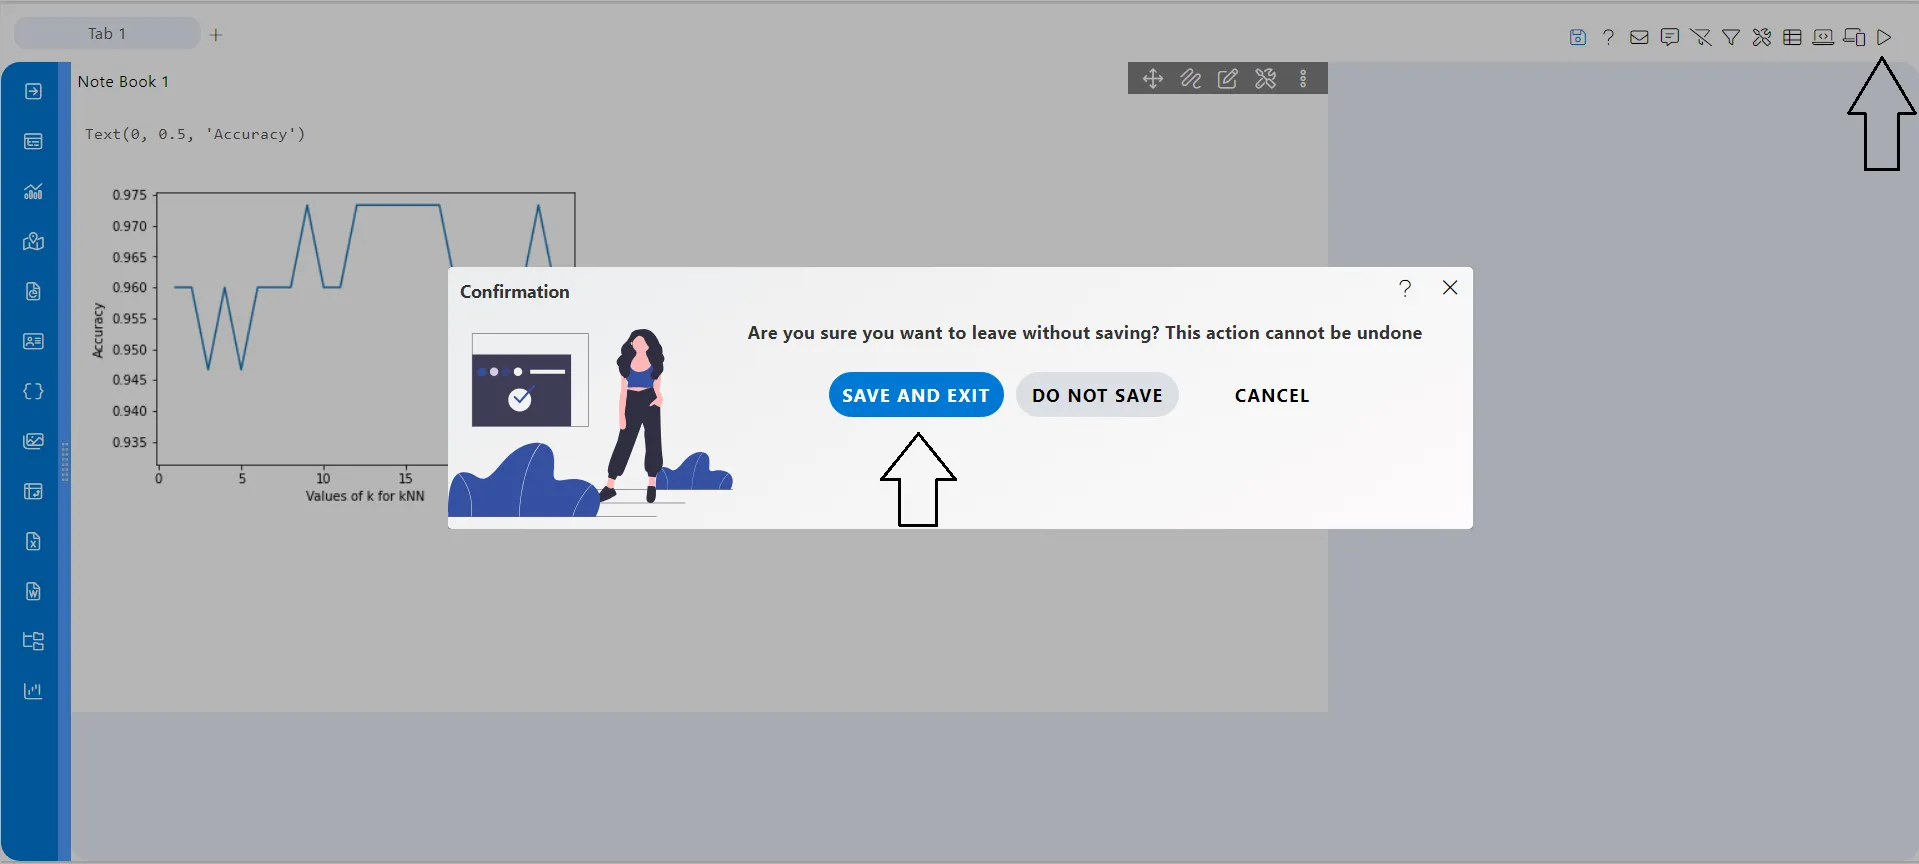
Click on the Save and Exit button to complete the edit, and the preview will appear on the screen.

-
Users can also select more than one execution code from the cell dropdown.
-
For example, when two execution codes are selected, the output will look as shown in the image below: (Execution codes 95 & 101 are selected)