Event Tab Table Widget
Overview
The Event tab enhances dashboard interactivity by enabling users to implement custom actions, such as switching tabs or layers when interacting with widgets and applying filters based on chart selections. This functionality allows for seamless navigation and dynamic filtering within the dashboard. To utilize these features effectively, users must insert the appropriate code and specify filter names from the widgets, ensuring smooth and responsive client-side interactions.
Table Event: This video explains how users can create events for a table in AIV.
Steps to Add an Event to a Table Widget
-
Navigate to the Event tab within the table edit dialog box, as shown below:

-
In the Event tab, you will see the code panel where you can add custom events. Below is an example of the code syntax.
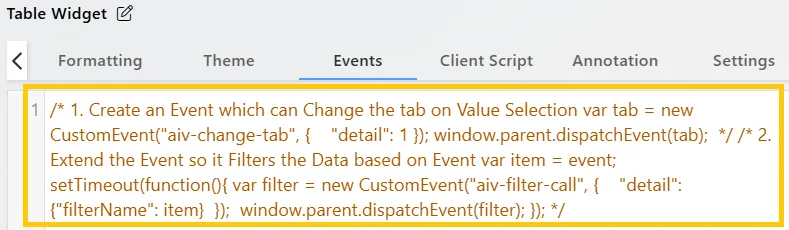
-
To add an event to your table, insert the following example code into the Event tab:
// Create an Event to Change the Tab on Value Selection
var tab = new CustomEvent("aiv-change-tab", {
    "detail": 1
});
window.parent.dispatchEvent(tab);

// Extend the Event to Filter Data Based on the Event
var item = event;
setTimeout(function(){
    var filter = new CustomEvent("aiv-filter-call", {
        "detail": {"filterName": item}
    });
    window.parent.dispatchEvent(filter);
});
Explanation of the Code:
Change Tab Event: The first snippet of code creates an event named aiv-change-tab, which will change the tab view when triggered. The “detail”: 1 specifies the tab to switch to (where 1 represents the tab index).
Filter Data Event: The second snippet extends the event by applying a filter to the data based on the value selected. It waits briefly and then dispatches a aiv-filter-call event, using the selected item to filter the data.
Make sure to customize the filterName and tab index according to your specific requirements. This setup will enhance the interactivity of your table widget by enabling dynamic tab switching and data filtering.
Steps to add and utilize an event on the table widget:
-
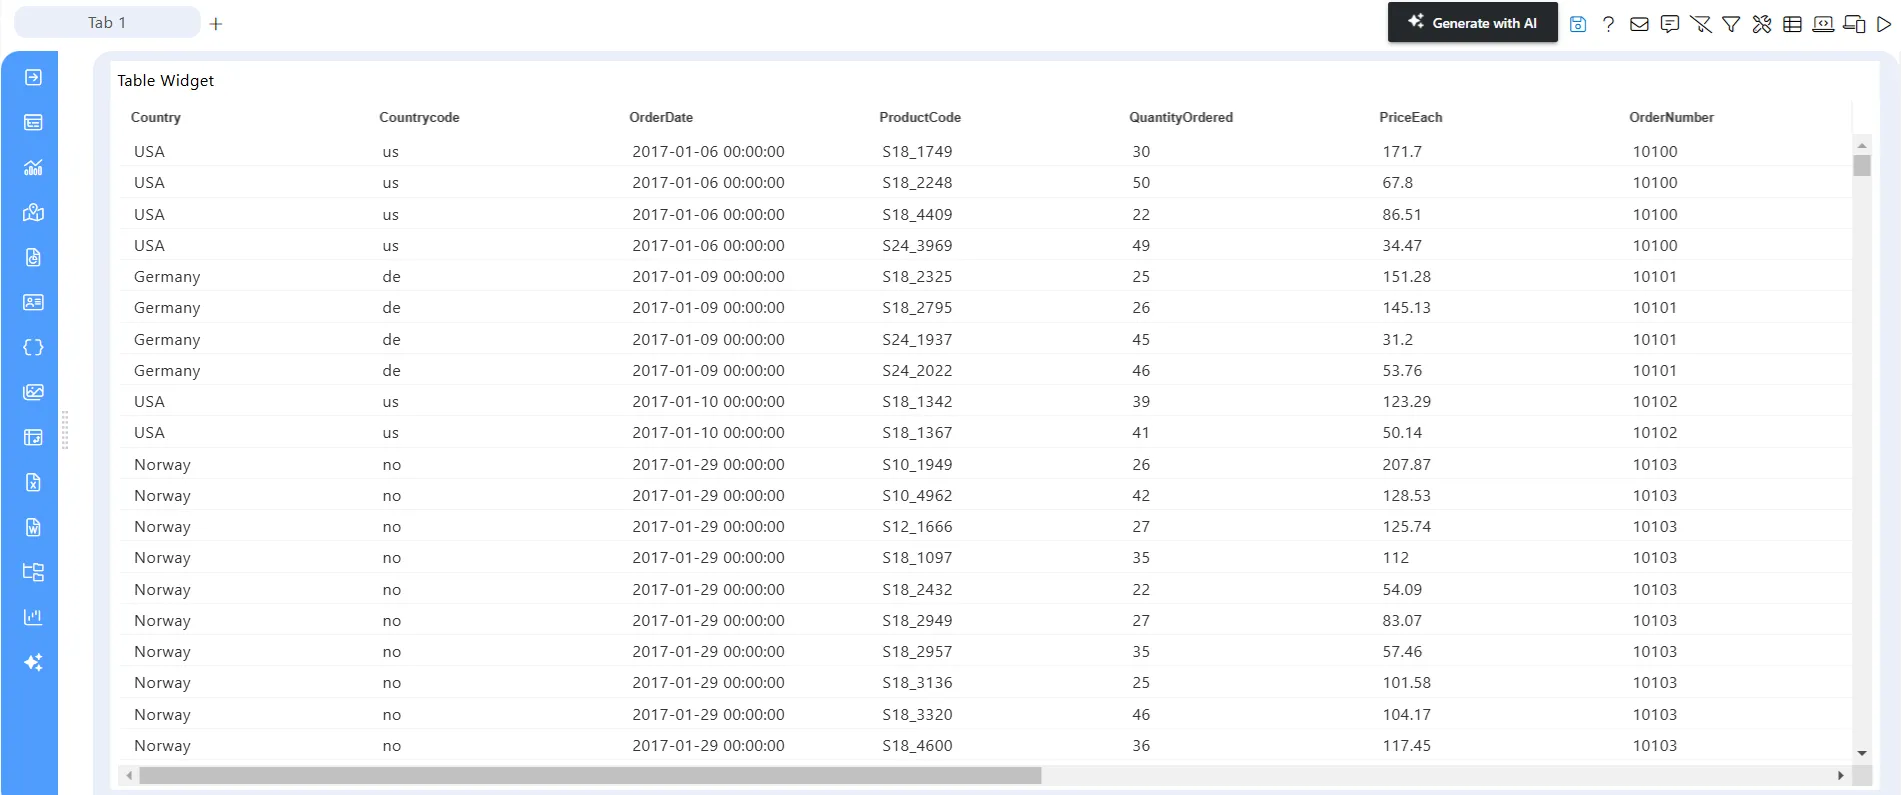
Prepare a table widget on your dashboard, as shown below:
-
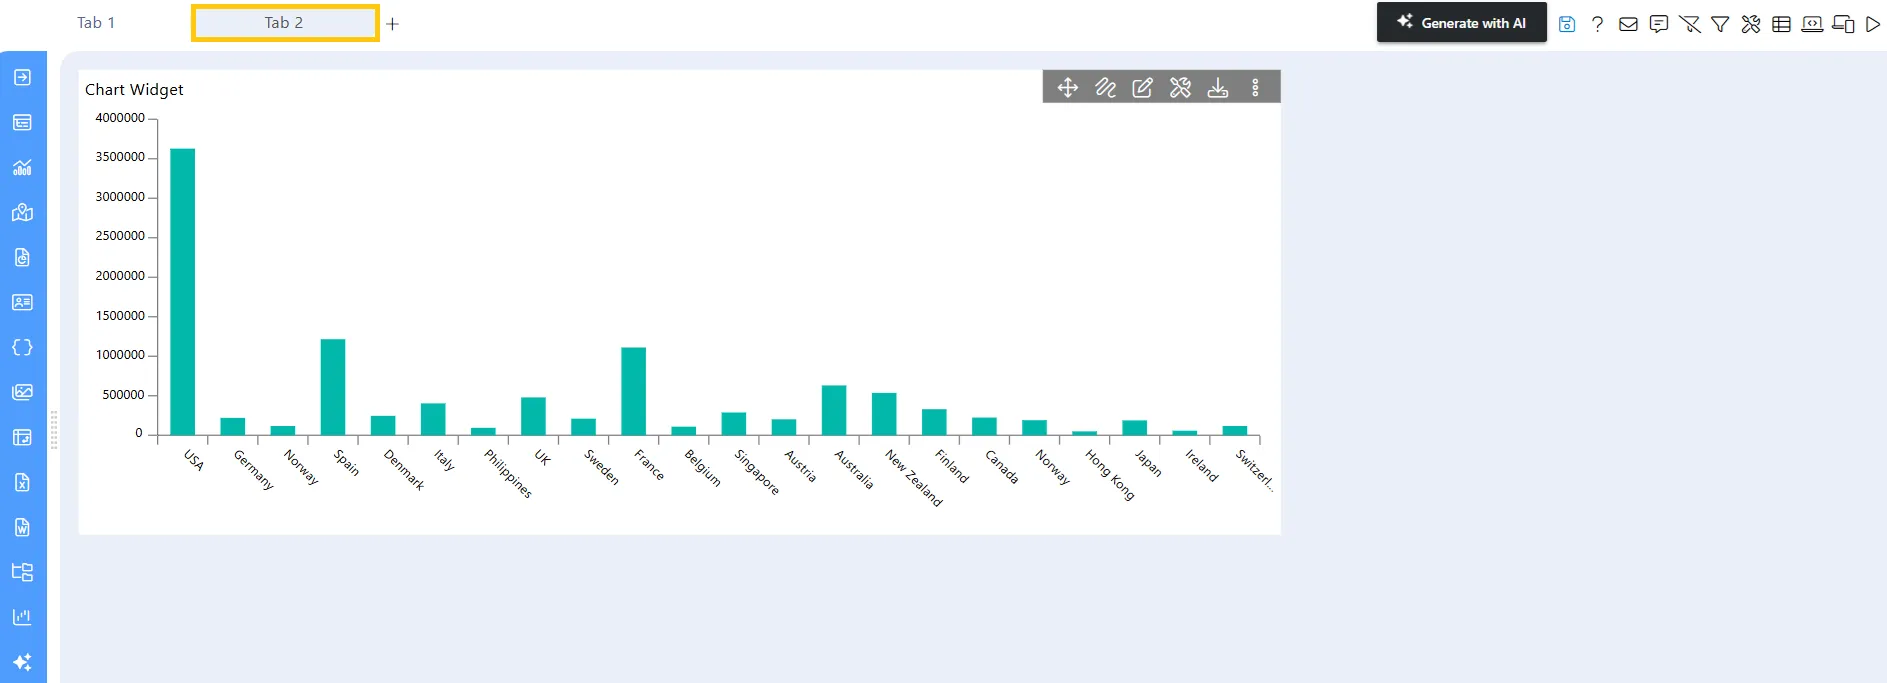
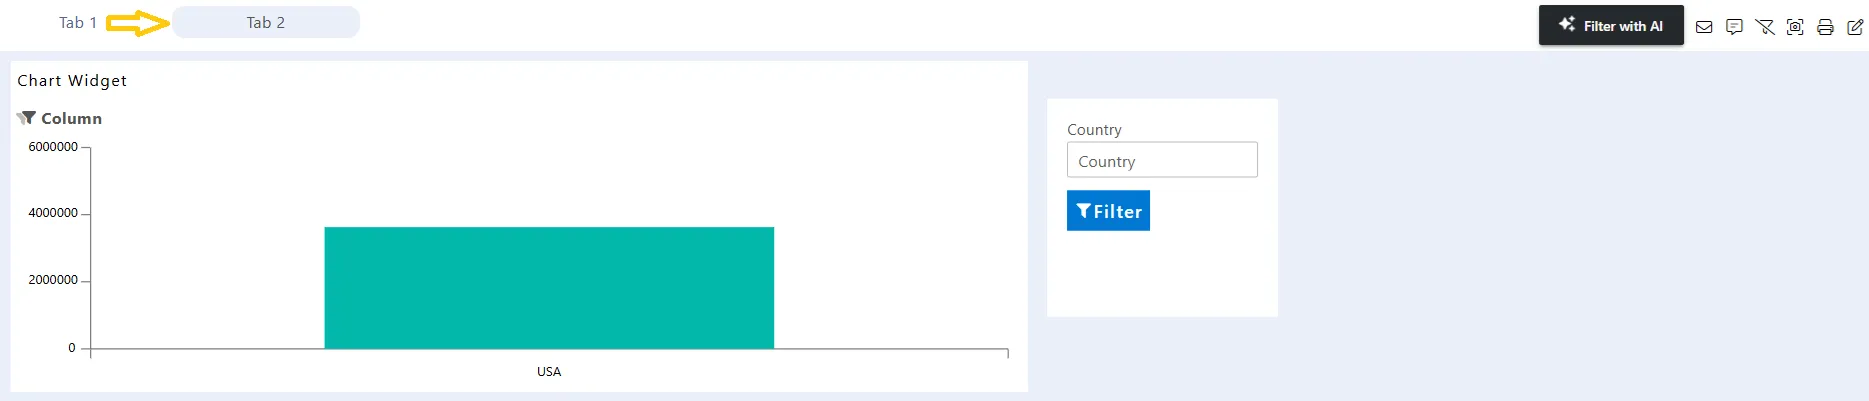
Add a tab2 and create a column bar chart, as shown below:
-
Add a text filter to tab2 to filter the country from the column chart widget, as shown below:

-
Now edit the table widget on tab1 and add the event. Then, add the below code in the event tab code panel:
var tab = new CustomEvent("aiv-change-tab", { "detail": 1 });window.dispatchEvent(tab);

var filter = new CustomEvent("aiv-filter-call", { "detail": {"COUNTRY": '{{country}}' }});window.dispatchEvent(filter);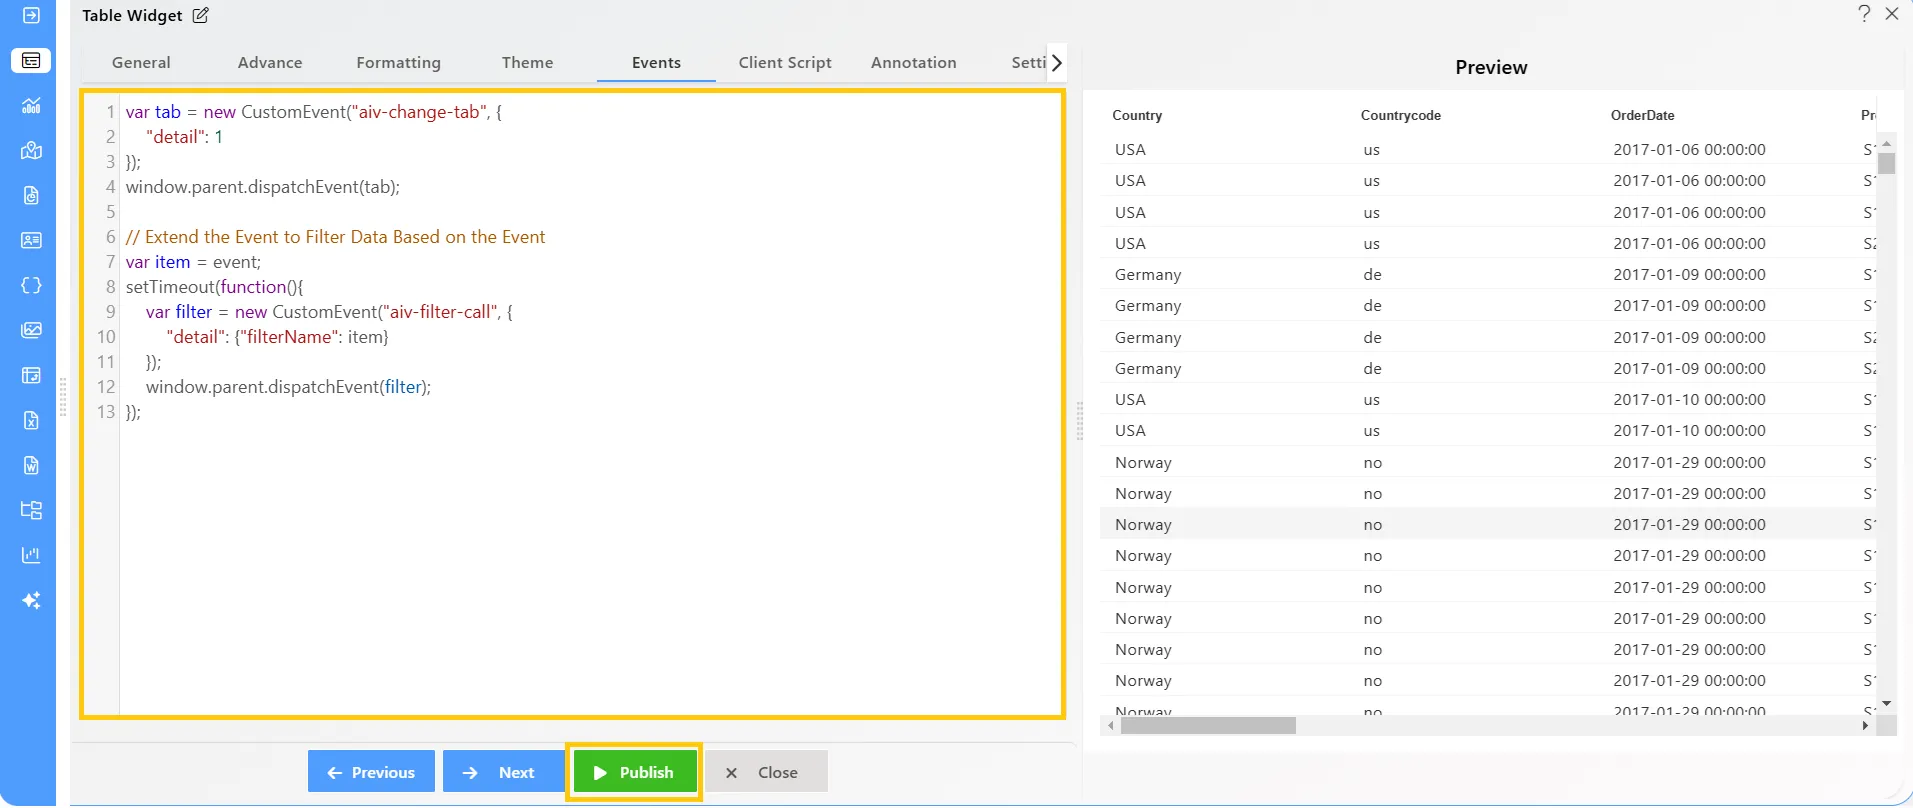
-
Click the Publish button, then the Preview icon, and finally click on the SAVE AND EXIT button to view the Table Widget.
-
To utilize the event, click on the country USA from tab1. This will redirect you from tab1 to tab2, as shown below:
-
By following these steps, you can add and apply events to the table widget to enhance interactivity.
To learn more about the features of the Table Widget, click on the links below:
Create Table Widget
Advance Tab Table Widget
Formatting Tab Table Widget
Themes Tab Table Widget
Annotation Tab Table Widget
Widget Settings
To learn more about the advanced features of the Table Widget, click on the links below:
Custom Column Table Widget
Custom Column Micro Chart
Custom Column Table Widget Icon
Custom Column Table Widget Hyperlink
Skip Widget from Event Filtering