Group Report
The Group Report feature allows you to bundle multiple reports into a single grouped output and schedule them together. It is useful when separate reports need to be generated for different recipients using a common dataset, where each report corresponds to a unique value in a selected column (such as Customer ID or Order Number). Users can also schedule the grouped reports and deliver them by email.
To use this feature, create or select the required dataset and ensure that both the dataset and the report contain the same column with unique values. Choose the desired download format, schedule the report with the preferred frequency, select the GBR format, and run it. After execution, the Group Report will be available in the Reports section as a ZIP file containing all individual reports.
Use Case
Consider a scenario where the user wants to generate a Group Report by scheduling the Customer Details Report. To generate this report, the user must ensure that the dataset contains a column that matches the parameter being passed from the report. This matching column is required so that the Group Report can split the output based on the unique values in that column.
When to Use Group Report
Use this feature when:
- You need to generate many similar reports, each filtered by a unique column value.
- You want to schedule grouped reports (hourly, daily, weekly, etc.).
- You want to email multiple personalized reports to users in one grouped package.
Output Format
Group Reports are saved in GBR format inside the application.
Use Case Example
A user wants to generate a Customer Details Report for multiple customers. They select a dataset containing customerNumber and map it to the report parameter. The system generates one report per customer, groups them, and allows the user to schedule or email the final grouped result.
Group Report: This video explains group report within the application.
Objectives
Generate a Group Report.
Prerequisites
-
For this example, the files used are orderDetails.ds and Order details.rptdesign.
-
Download the required sample files from the link group_report.zip
-
Upload Order details.rptdesign to the Report section and orderDetails.ds to the Dataset section of the application.
-
Refer to this link view detailed steps for uploading files in application.
Steps to create Group Report
-
Go to Hamburger
 icon > Documents > Group Report.
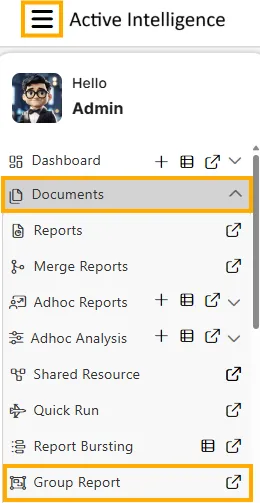
-
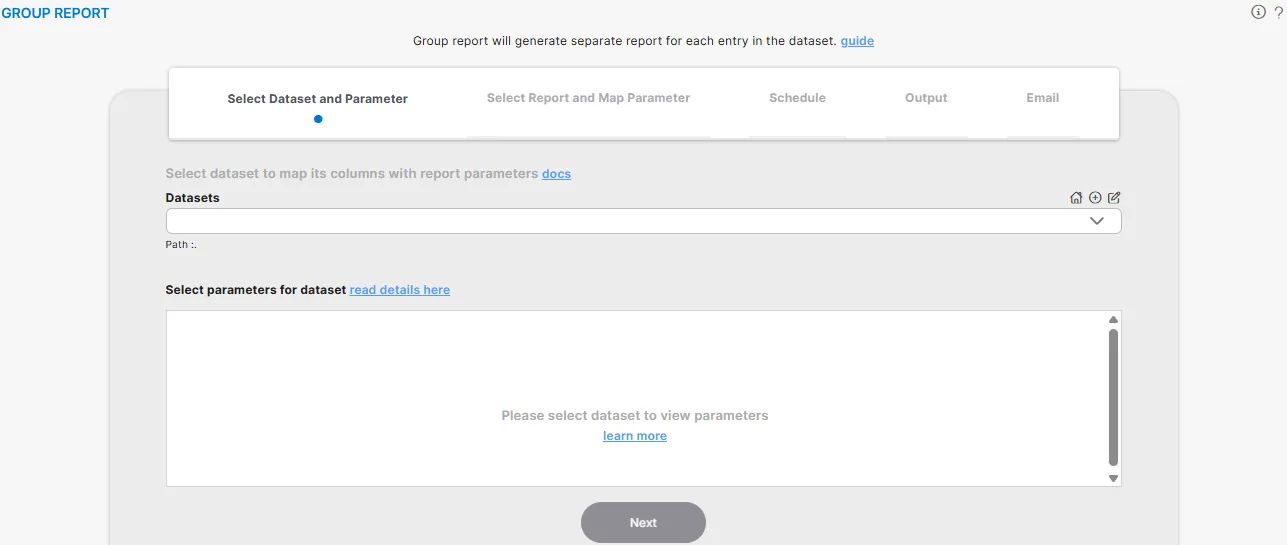
The Group Report screen will appear.
-
In the Select Dataset and Parameter tab, choose the required dataset from the dropdown. For example: orderDetails.ds.
-
If the selected dataset includes parameters, a dialog box will appear asking for the required parameter values. Example: orderNumber : 10100
-
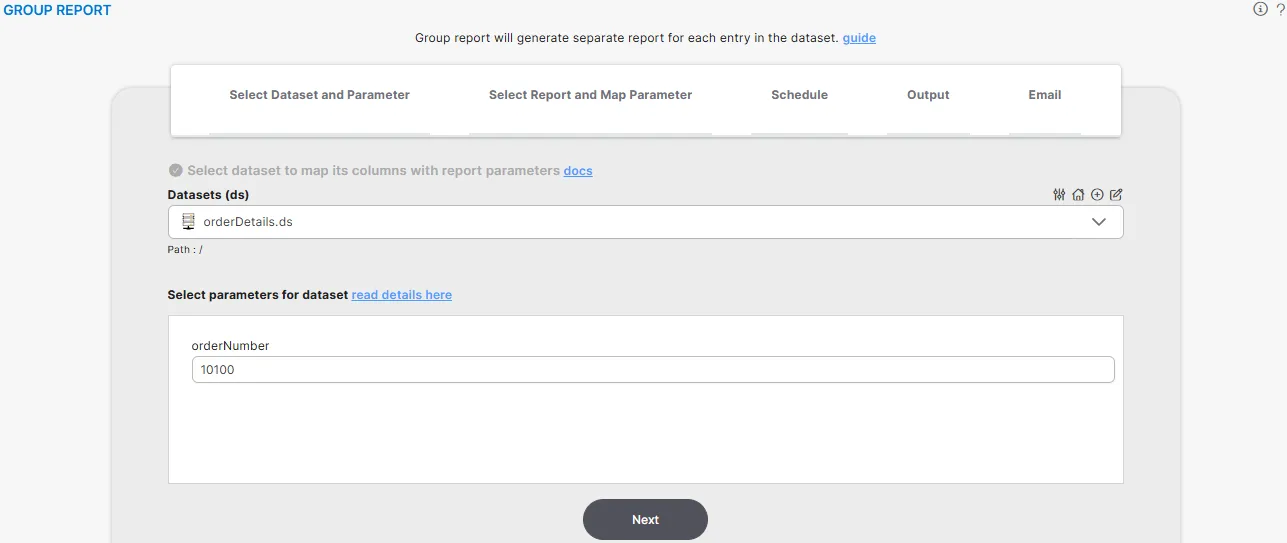
Click the Next button to proceed to the Select Report and Map Parameter tab.
-
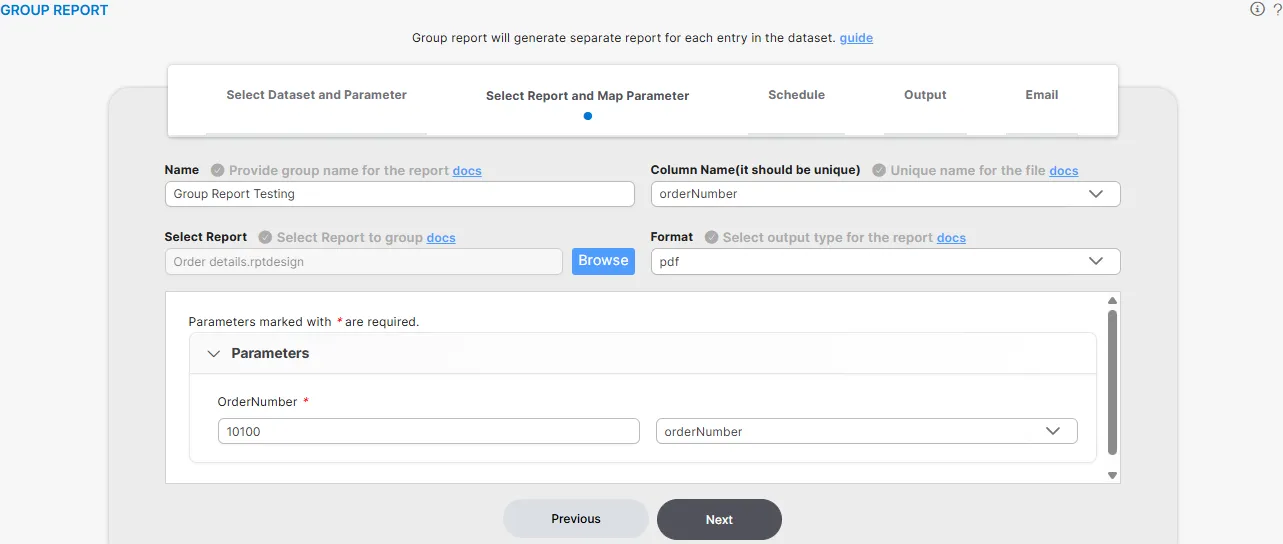
In the Select Report and Map Parameter tab, fill in the following details:
I. Name:
- Enter the name of the group under which all generated reports will be organized.
- Example: Group Report Testing
II. Column Name:
- Select a unique column that determines how individual files will be grouped.
- Example: orderNumber
III. Select Report:
- Click Browse and choose the report you want to group.
- Example: Order details.rptdesign.
- Under Parameters, map the column (e.g., orderNumber) to the report parameter.
IV. Format:
-
Select the output format in which reports will be generated.
-
The dropdown displays formats enabled in the report properties.
-
Example: pdf
-
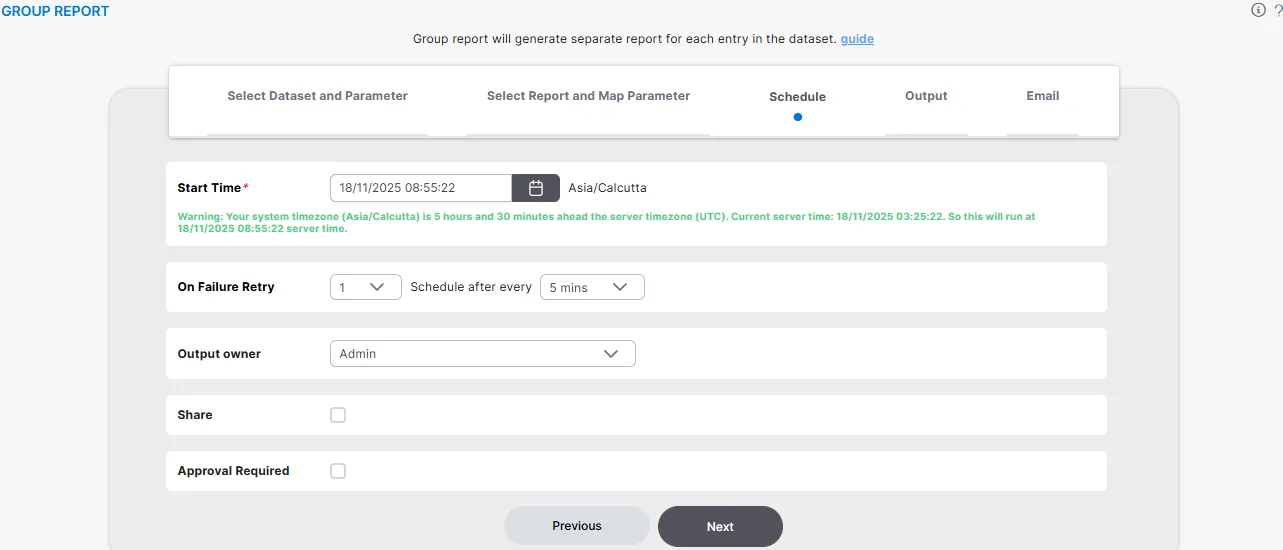
In the Schedule tab, fill in the following details:
I. Schedule Type – Select Time from the dropdown list to schedule the report based on time.
II. Frequency – Choose Right Now from the available options (Right Now, Once, Recurring).
- When you select Right Now, the system prepares the report for immediate execution.
- No additional date or time selection is required.
III. On Failure Retry – Define retry conditions in case the report fails to execute.
-
Retry Count – Number of times the system should retry (e.g., 1, 2, or 3).
-
Schedule After Every – Time interval between retries (e.g., 5 mins, 10 mins).
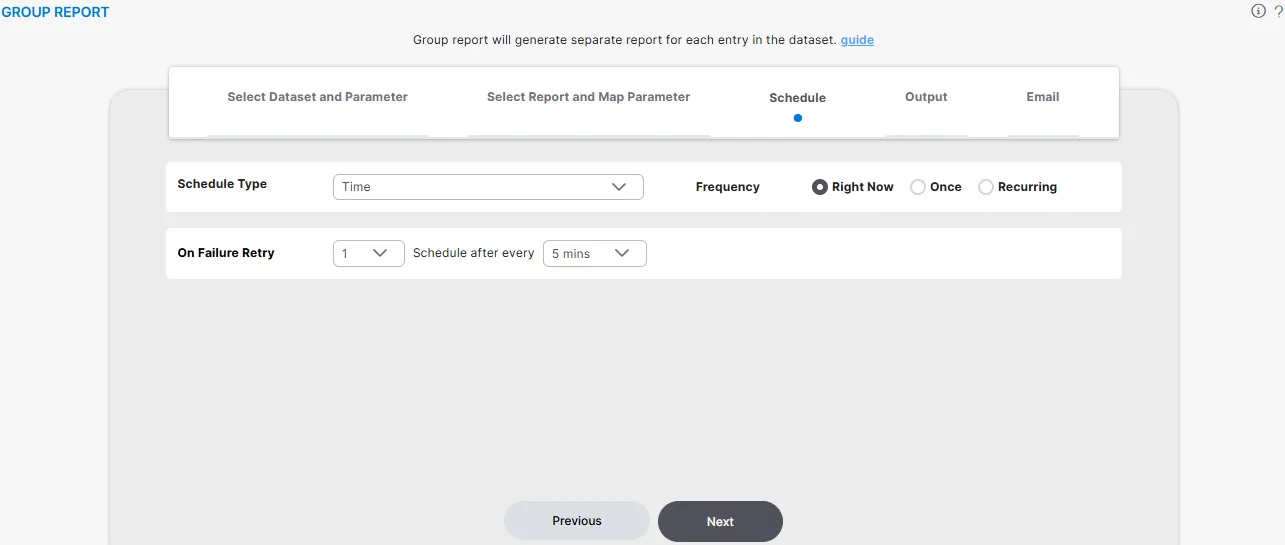
This ensures that even if a temporary issue occurs, the system automatically retries the execution.
-
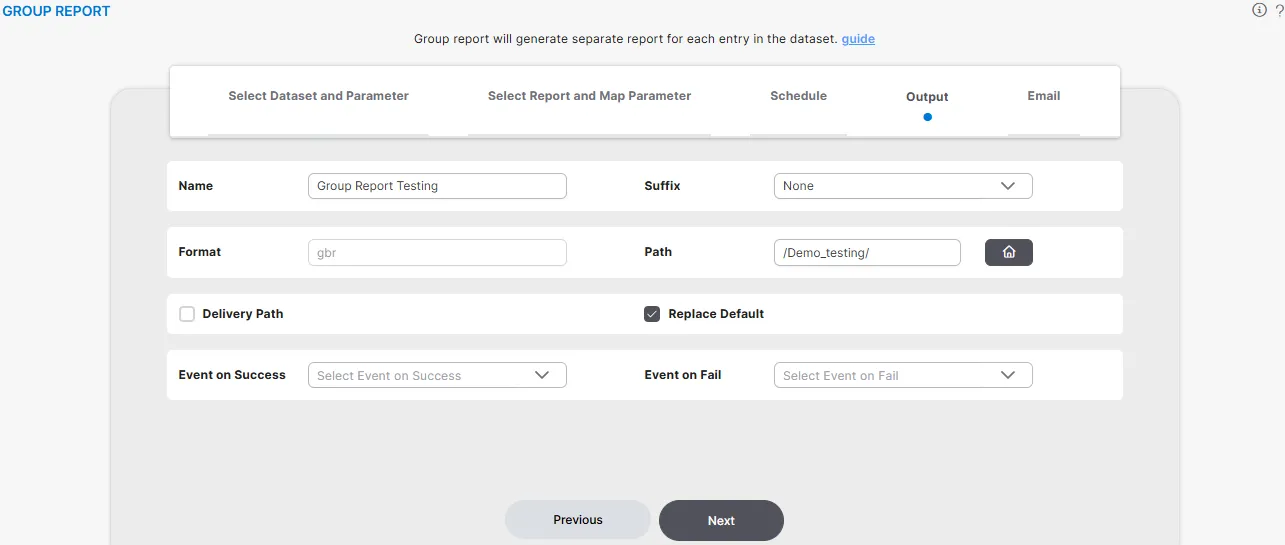
In the Output tab, fill in the following details:
I. Name – Enter the output file name (Group Report Testing).
II. Suffix – Add a suffix to the output file name for easier identification.
III. Format – Select the desired output format (gbr).
IV. Path – Specify the folder path where the generated report will be saved.
V. Delivery Path – Enable this option if you want the output to be delivered to the server delivery folder.
VI. Replace Default – Enable this option to overwrite the previous file instead of creating a new one.
VII. Event on Success / Event on Fail – Select events that should trigger automatically based on execution success or failure.
-
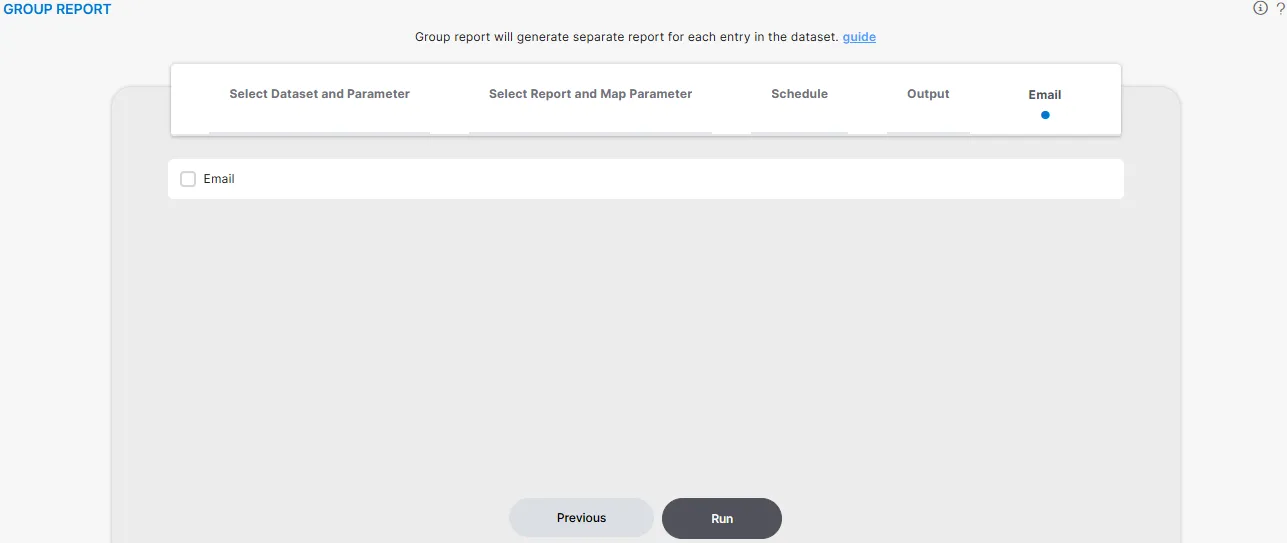
In the Email tab, fill in the following details:
I. Attach Report – Enable this option to attach the generated report to the email.
II. Users / Roles – Select the users or roles who should receive the report.
III. Enter Email* – Specify one or more recipient email addresses (comma-separated). This field is mandatory.
IV. Cc / Bcc – Optionally enter email addresses for Cc or Bcc recipients.
V. Email Template* – Select the email template to be applied.
-
None – No template applied.
-
Default – Uses the system’s default email layout.
-
Success – Uses a success message template.
VI. Subject – Enter the subject line for the email notification.
VII. Body – Add a custom message or instructions for the email content.
VIII. On Failure Retry – Select how many times the system should retry sending the email in case of failure (e.g., First, Second, Third, Fourth).
IX. After – Specify the retry interval (e.g., 5 mins, 10 mins, 15 mins, 30 mins, 60 mins).
-
-
Click the RUN button. A confirmation message will appear.

-
Now, go to Hamburger
icon > Documents > Reports. -
Search for gbr and click on Last Updated to view your group report.

-
Double-click the gbr report. A Group Column dialog box will appear. Enter Group Key and click the Submit button to view the final report.

Steps to Configure Approval in Group Report
-
Navigate to the Group Report section, select the desired dataset, and go to the Schedule tab. Set the frequency to Once.
-
Enable the Approval Required checkbox in the Group Report dialog box.
-
Use the Send Reminder option to set the interval After Days (in days) for reminder notifications.
-
Select the users or roles, along with their names, who will approve the request.
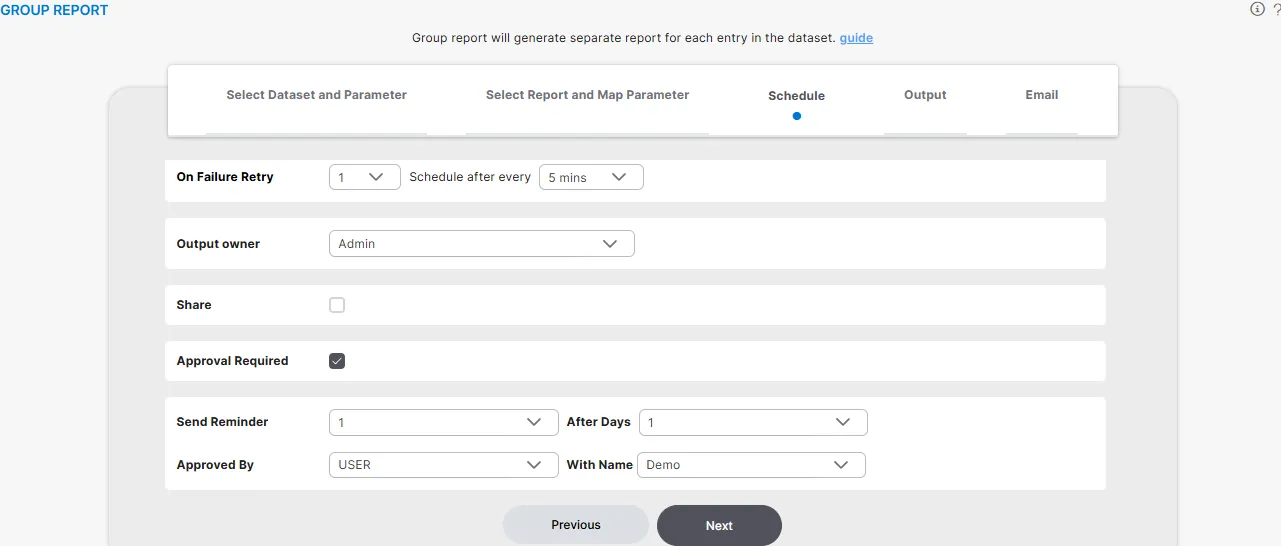
-
Wait for Approval
- Once configured, the request will require approval from the selected users or roles before proceeding.