Introduction
Merge Reports allow users to select multiple files to create a single PDF for easy sharing. This functionality helps save time by combining associated files and reports into one consolidated PDF file.
Merge Report: This video explains how to merge a report in the application.
Objective
To create a Merge Report.
Prerequisites
-
For this example, the reports used are Order details.rptdesign and Orders Payment.rptdesign
-
Download the required sample files from the link below:
-
Upload Order details.rptdesign and Orders Payment.rptdesign to the Report Section under the Root folder.
-
Refer to this link for detailed steps on uploading files in the application.
-
Use the same procedure to upload both reports.
Steps to Create a Merge Report
-
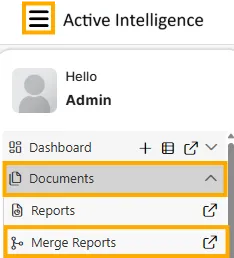
Go to Hamburger icon -> Documents -> Merge Report.
-
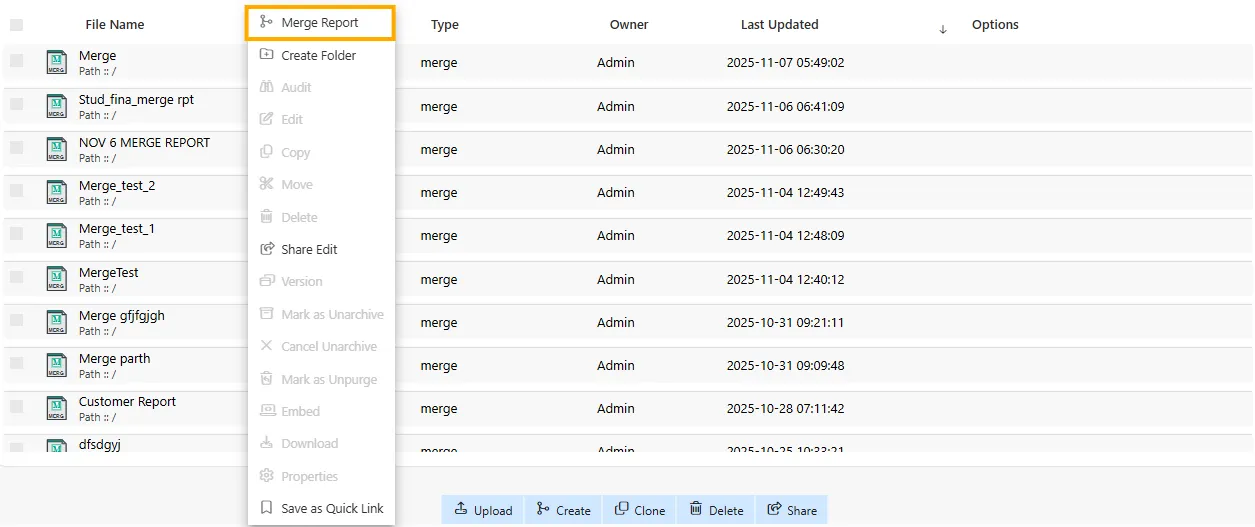
There are two ways to create a Merge Report in the application:
I. Click on the
 icon next to the upload icon in the bottom toolbar.
II. Right-click on any empty space on the Merge Report screen and select the Merge Report option.
-
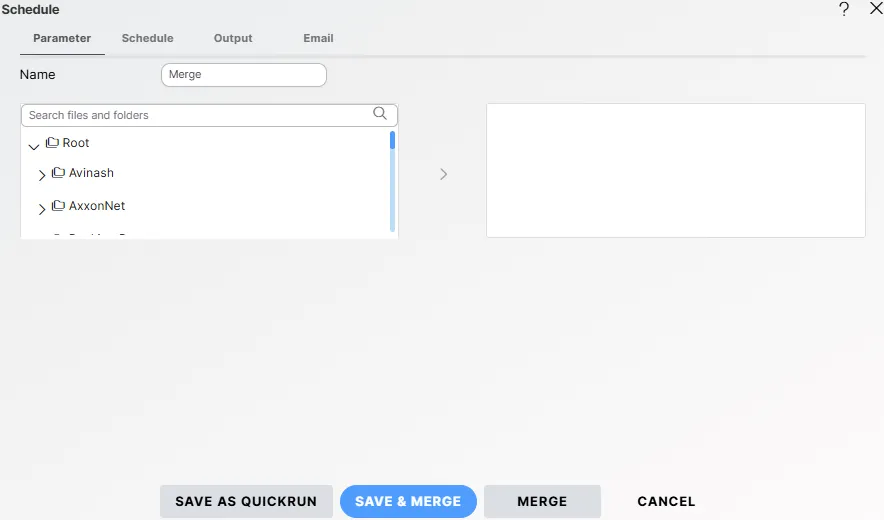
After clicking on Merge Report (using either method), the schedule screen will open.
-
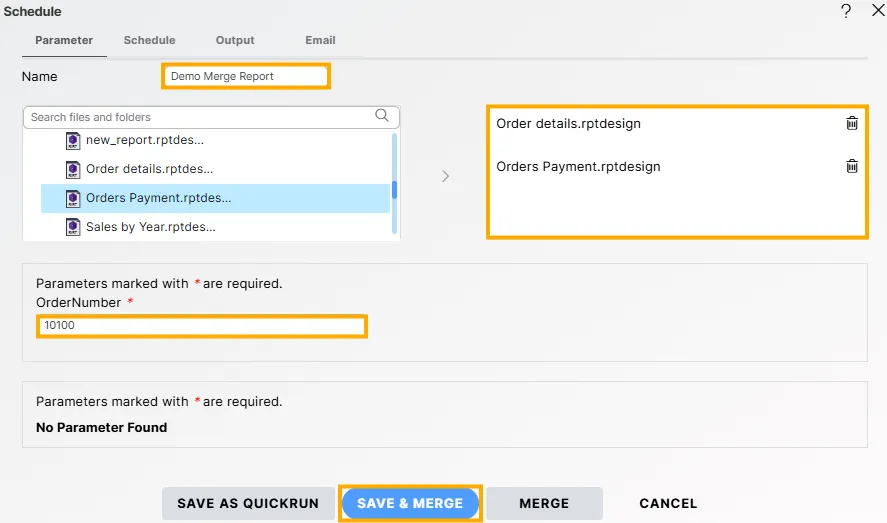
Enter a name for the Merge Report. For this example, we will use Demo Merge Report.
-
Expand the folder and select the reports you wish to merge.
For this example, select Order details.rptdesign and Orders Payment.rptdesign. -
Click the
 icon after selecting both reports. If any parameters are required, enter the values accordingly.
-
Click on the SAVE & MERGE button.
-
The newly created Demo Merge Report will now appear in the List View under Merge Reports.

-
To schedule the Merge Report, go to the Schedule section:
-
Double-click on Demo Merge Report.
-
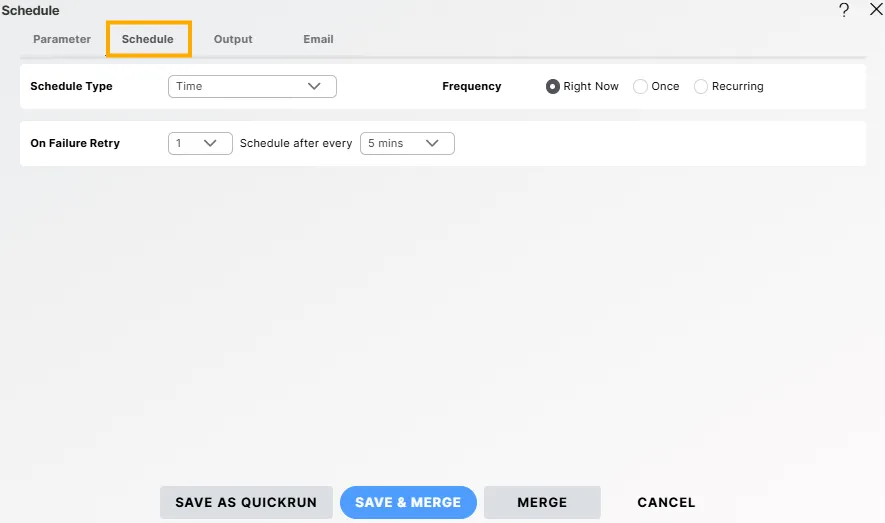
Open the Schedule tab and fill in the details as shown below:
- Schedule Type: Time
- Frequency: Right Now
- On Failure Retry:
-
Retry Count: 1
-
Retry Interval: 5 mins
-
-
The Right Now option runs the merge immediately after saving.
-
You can also choose Once or Recurring for scheduled merges based on your requirements.
-
-
For additional help, click the
 icon to access application help documentation.
 -
If you wish to cancel the creation process, click the Cancel button next to Merge, or use the
 icon next to the icon next to the
  icon.
icon. -
In this way, you can successfully create and manage Merge Reports in the application.