Upload
Upload is used to upload files from a computer into AIV server. Files may be dataset, reports, dashboards, excel, csv, JSON or any report templates. regardless of section, upload works same way in all the section.
Objectives
Objective of this document is to show how to upload report file in AIV.
Prerequisites
For this example we are using the Customers details report. download sample report from Here.
Upload Report: This video contains information regarding how to upload report in AIV.
- In AIV Users can upload the reports in the following format.
I. BIRT file extension : rptdesign
II. JASPER file extension : jasper
III. PENTHAHO file extension : prpt
IV. HTML file extension : HTML
aiv_xlsx, doc, pdf, ppt, qrun, xls, xlsx, csv,txt,xml,phtml and many more by clicking on the Upload icon.
Steps to follow
Follow below steps to learn how to upload files in AIV
-
Click on Hamburger
 Icon.
Icon.
-
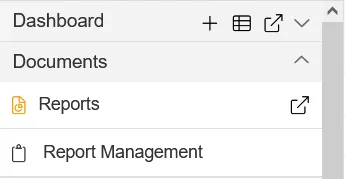
Go to the Documents and Click on Reports
 .
.
-
Click on the upload icon
 on the toolbar located at the bottom of the report page, As shown in the figure below:
-
On clicking the Upload
 icon, the following screen will be displayed.
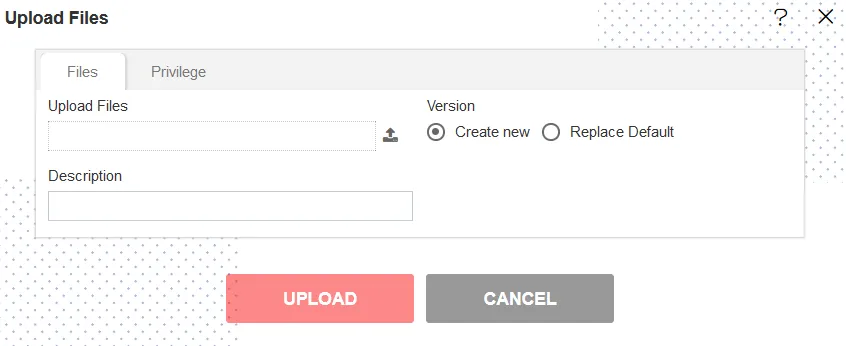
-
Click on
 & select Customers details from your system.
-
Click on the open button (in your system FIle Upload screen) & your Upload Files pop-up in AIV will look as given in the image below:
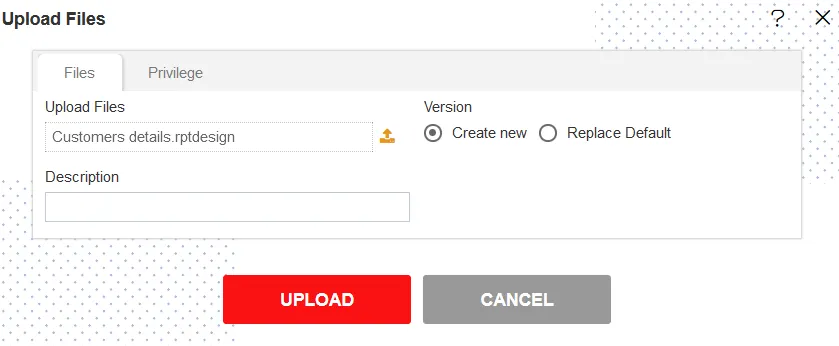
-
If the report already exists on the AIV application, the user has an option to replace the default report or to create a new report using the version
 option as shown above.
 -
Furthermore, the user can also provide an optional description for reference, in the description text area as shown in the figure above.
-
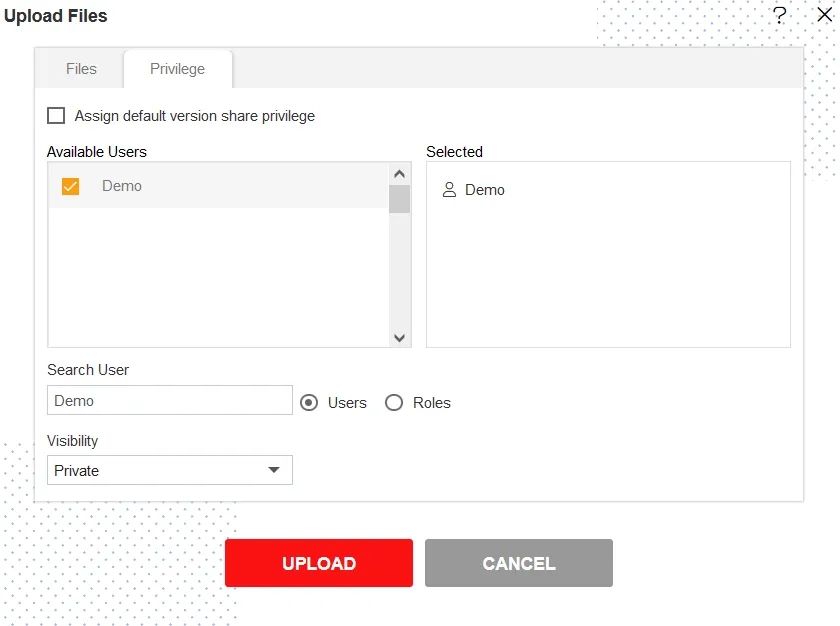
There is also an option to hide the visibility to certain users using the privileges tab as shown in the figure below:
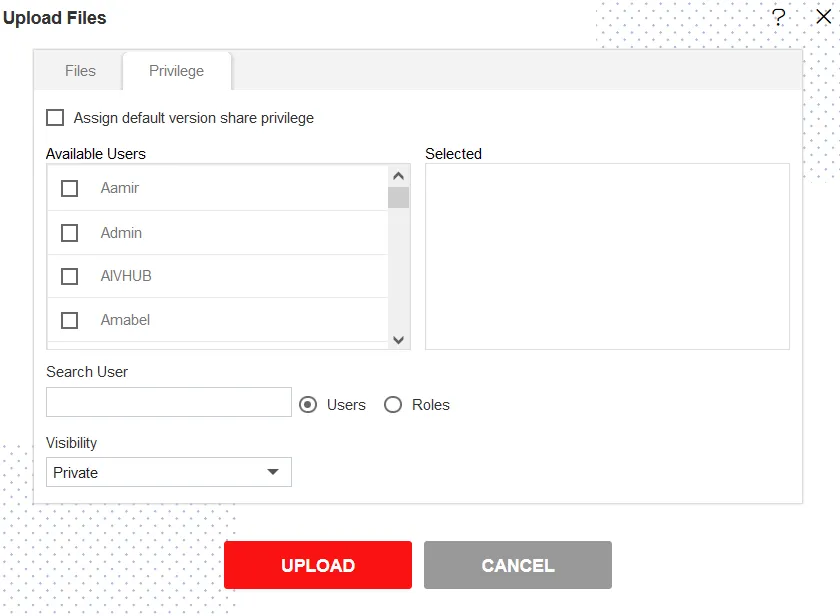
-
In case of working with any new version of the report, you can assign the default version share privileges by checking the checkbox. For instance, if there are three versions of the same report and a new version is to be created on that report, the default share privileges can be applied to that report.
-
The user can select other users with whom the uploaded report will be shared from the list of available users or search them in the search user bar.
-
Just as in the case of users, the user can assign default share privileges to different user/ roles or can select the user/ roles from the Available list of user/ roles. They can also search for user/ roles in the Search Role bar.
-
Visibility is used to mention who all can view the report and is of the following three types:
- Private: It means only the current user / actual owner can view the file.
- Internal: It means all the users within the organization can view the file.
- Public: It means anyone can view the file.
-
The user can select the visibility from the drop-down menu as shown above.
-
In case of any further help, the user can click on the
 icon to access the AIV help documents.
 -
Finally, to upload the report, click on the upload button. If the user is not satisfied and wants to cancel the upload request, he can do this by clicking on the cancel
 button next to upload
  icon.
icon. -
Click on the Upload button.
-
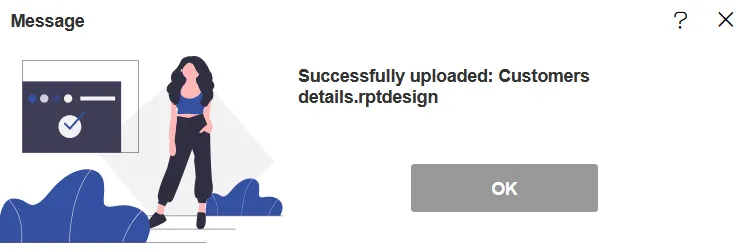
It will display an uploaded message, As shown in the figure below:
-
Now you can see the uploaded report Customers details, As shown in the figure below:

To understand in detail about the types, click on the following links:-