Bulk Report Sharing
Introduction
This document provides information on the business scenario of sharing the same report with multiple users in bulk using report bursting.
Report Bursting is employed when multiple reports need to be generated and shared with relevant users at specific predefined time periods.
Prerequisites
-
For this example, the Customer CSV.ds dataset and Top 5 Customers.rptdesign report is used.
-
Download the required sample files from the link report.zip
-
Upload Customer CSV.ds to the Dataset Section and Top 5 Customers.rptdesign to the Report Section.
-
Refer to this link for detailed steps on uploading files in the application.
Objective
The objective of this document is to provide step-by-step information on how to generate and share the report in bulk (to many users).
Use Case
Let’s consider a scenario in XYZ Organization where the reporting team needs to send specific reports to every employee. The organization has 1000 employees, and the team is required to share the same report with all 1000 employees every week or month. While it is relatively easy to generate and share reports for 1 or 2 employees, doing so for 1000 employees manually becomes extremely difficult and time-consuming.
By leveraging Report Bursting functionality, the team can effortlessly share the same report with all 1000 employees in just one click. Additionally, this process can be automated by utilizing the scheduling options available in AIV.
The report being utilized contains details of the top customers. To share the report with employees, all user information needs to be gathered in a dataset. In this scenario, we have the Customers dataset, which includes user names and email IDs.
Steps to Follow
Follow the steps below to perform bulk report sharing using report bursting:
-
Go to Hamburger
 icon > Documents > Report Bursting.
 -
You will see the Report Bursting page, which prompts you to select a Dataset and a Mapping from the dropdown.
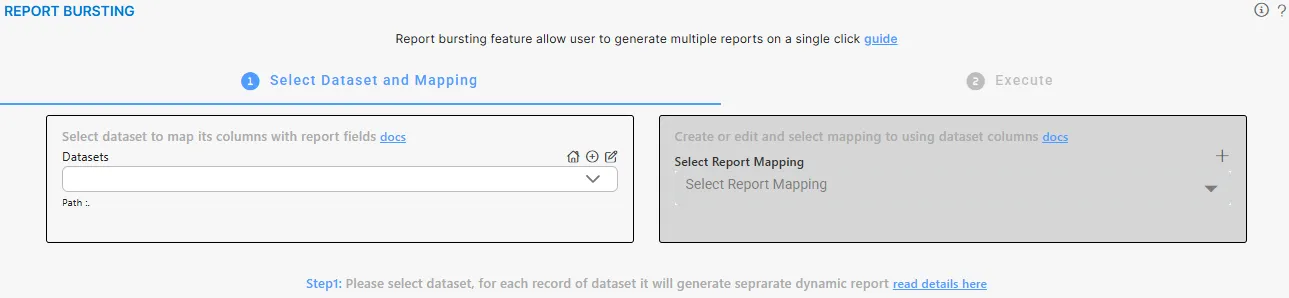
Select Dataset
The dataset should be chosen based on the type of report selected. In this case, we will select a dataset that contains the list of users to whom the report will be sent.
You can also create or edit a dataset from this screen using the icons located at the top-right corner of the dataset section.
Select Dataset: Customers (Create or select a dataset based on the report parameters, ensuring that the dataset contains unique values.)
Learn more about creating datasets.
Create Mapping
If you are creating a mapping for the first time and no mappings exist, the Select Report Mapping dropdown will be empty. Once a mapping is created, or if mappings already exist, they will appear in this dropdown.
If you have previously created mappings using the selected dataset, those mappings will appear in the Mapped list, while other mappings will be shown under the Not Mapped list, as illustrated below:
Steps to Create a Mapping in Report Bursting
-
Select the Customer CSV.ds dataset from the dropdown.

-
To create a new mapping for the selected dataset, click the
 icon in Select Report Mapping. The following page will open:
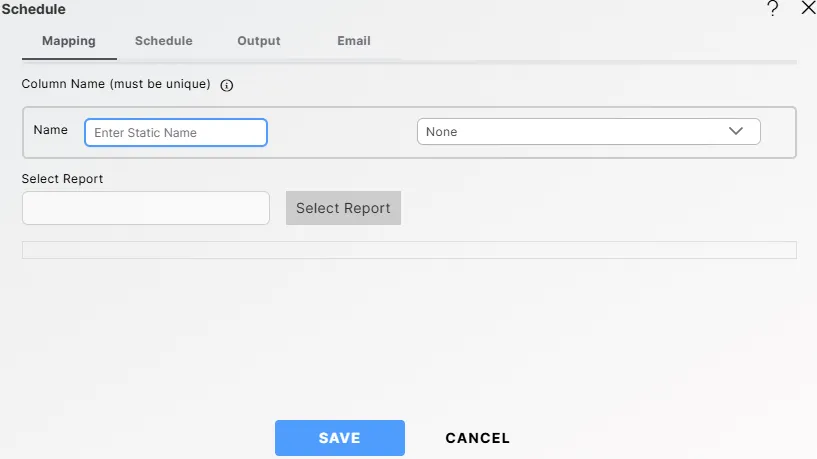
-
Enter the following details in the Mapping tab:
-
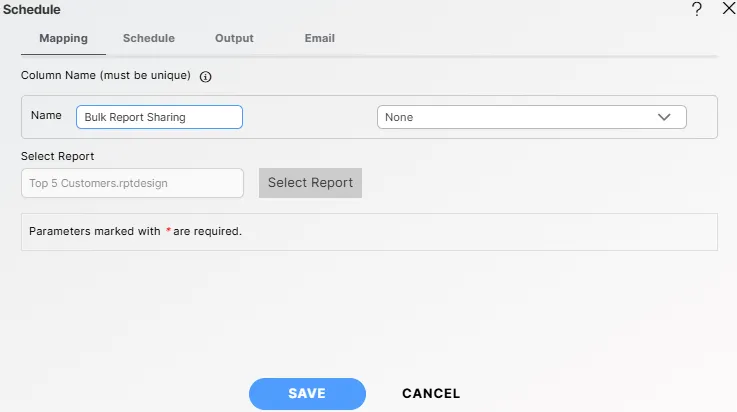
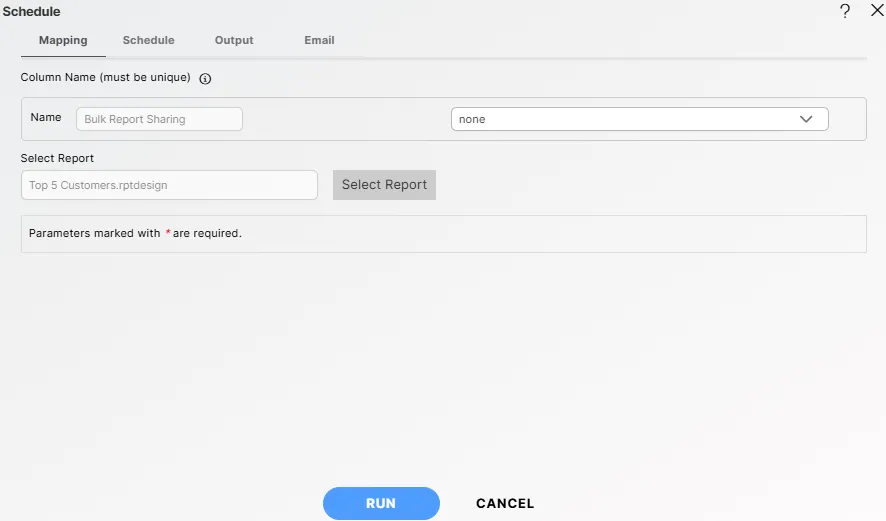
Enter the Name (e.g., Bulk Report Sharing — you can add any name as required).
-
Select the Column Name from the dropdown (e.g., None).
-
Click Select Report and choose the report file (e.g., Top 5 Customers.rptdesign — select any report as per requirement).
-
-
Click the
 button, and a message saying Created Successfully will be displayed.
Select mapping
-
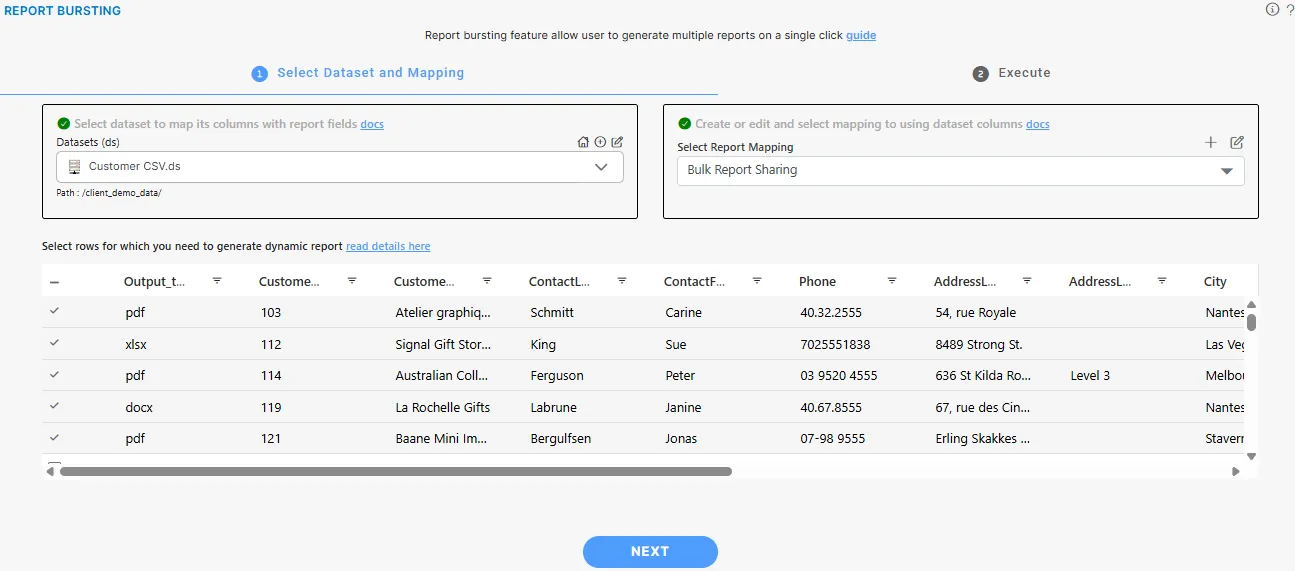
Go to the Select Report Mapping dropdown.
-
Select the Bulk Sharing Report mapping from the Not Mapped list.
-
The customer dataset details will appear in the grid view.
-
Select the customers for whom you want to generate and share the report, for example, five Customer Numbers as shown in the image below:
-
Click on the
 button to go to the Execute page.
Execute Page Options
There are two options to run this mapping:
1. Asynchronous Report Bursting
In Asynchronous Report Bursting, you can run the report on a recurring schedule.
Steps to schedule Asynchronous Report Bursting
-
Click the Schedule button to set up recurring execution.
-
In the Parameter Tab, enter the following:
-
Name: Bulk Report Sharing
-
Column Name: none
-
Select Report: Top 5 Customers.rptdesign
-
-
Enter the following details in the Schedule dialog box:
-
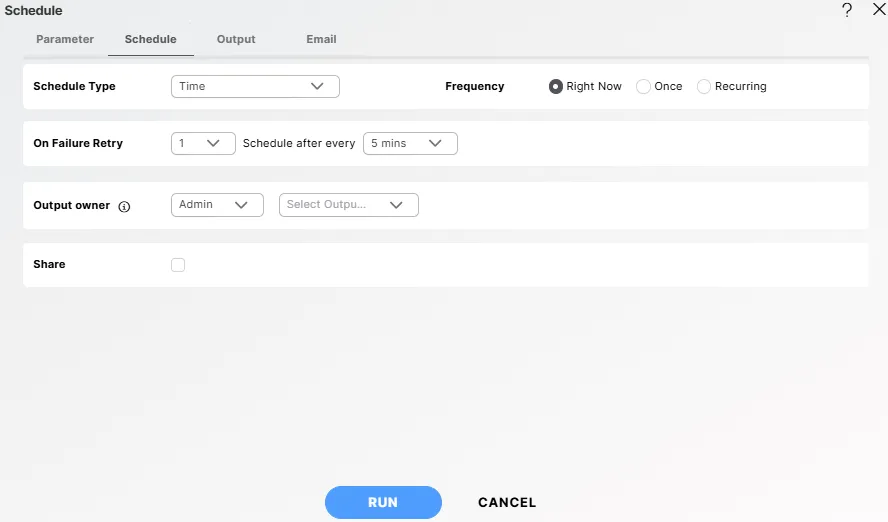
Schedule Type: Time
-
Frequency: Right Now
-
Output Owner: Admin
-
Output: Select from the dropdown (optional)
-
Share: Enable if you want to share the generated report with users or roles (optional)
-
-
In the Output Tab, enter the following:
-
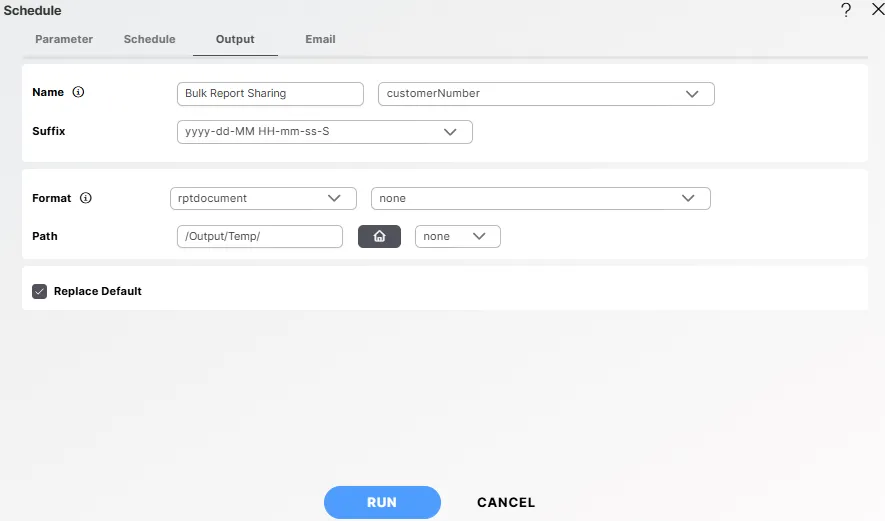
Name: Bulk Report Sharing (Enter a name as per your requirement). Choose the customerNumber column from the dropdown.
-
Suffix: yyyyddMM_HH-mm-ss (optional)
-
Format: rptdocument (Select the format in which you want to generate the output from the dropdown menu)
-
Path: /Output/Temp/ (specify the delivery path on your computer where the copy of executed reports will be stored)
-
-
Click on the
 button and a confirmation message will appear.
-
Click on the Hamburger
icon. Then, go to the Documents section and click on Report Bursting  icon, as shown in the figure below:
-
Click on Last Updated to view your mapping.

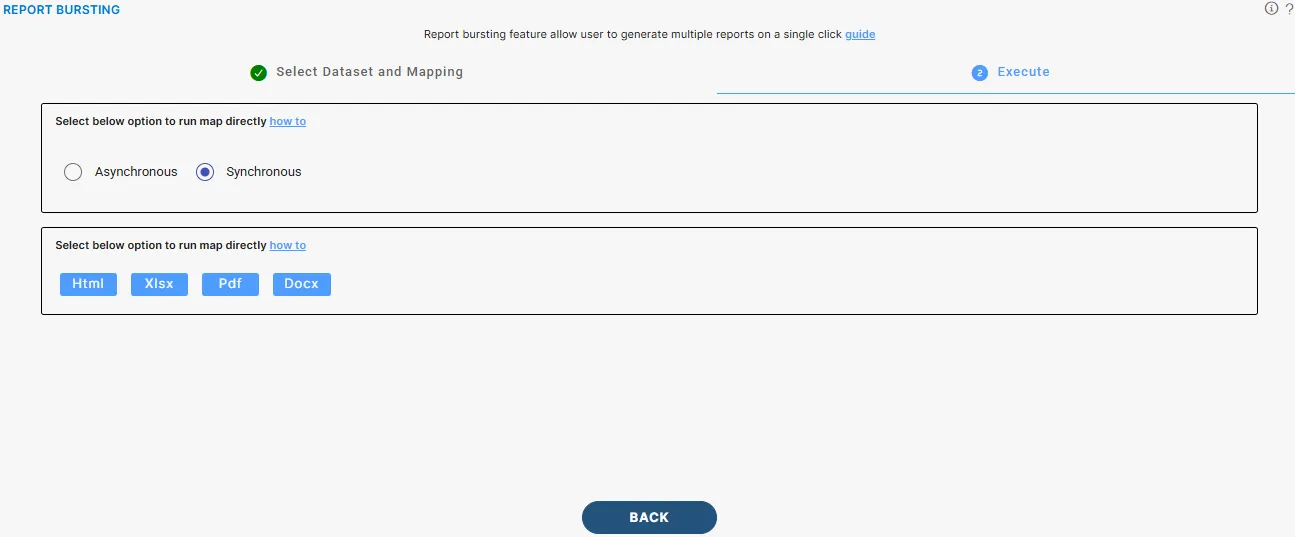
2. Synchronous
In Synchronous Report Bursting, the report is generated and downloaded immediately.
-
Select the Synchronous radio button.
-
Choose the desired output format. Click on the PDF button (in this example) to start the report bursting process immediately.
-
Open the Request section to monitor the status of your request.
