User Specific Reports
This document provides information on how to generate user-specific reports using Report Bursting. In user-specific reports, each user receives only the data they are authorized to access and cannot view another user’s data.
Objective
The objective of this document is to explain how to generate user-specific reports using Report Bursting.
Prerequisites
-
For this example, the OrderDetails.ds dataset and Order details.rptdesign report is used.
-
Download the required sample files from the link report.zip
-
Upload Customer CSV.ds to the Dataset Section and Top 5 Customers.rptdesign to the Report Section.
-
Refer to this link for detailed steps on uploading files in the application.
Use Case
Report Bursting is used when multiple reports must be generated and shared with relevant users at a predefined time.
Consider a scenario where we have a BIRT report that displays order details for a given order number.
This report contains a parameter for the order number. When executed manually, it prompts the user to enter a valid order number and then returns order details for that input. Generating reports for one or two customers manually is simple—you can run the report from the Reports section and share the output manually.
However, if you need to share order details with all customers on a weekly or monthly basis, generating each report manually becomes extremely time-consuming.
For example, if we need to generate and share 1000 order detail reports, manual generation is not practical.
To automate this process, we can use Report Bursting.
In Report Bursting:
- We prepare a dataset containing all customer order numbers.
- We map this dataset to the Order Details Report.
- When executed, Report Bursting fetches each order number one by one from the dataset.
- It generates individual reports for every order number available.
- Reports can be shared in different formats for different users with a single click.
- Using the email functionality, each customer can receive their report directly in their inbox.
In this scenario, we demonstrate Report Bursting using the Order Details Report, along with a dataset containing order number information. We then map the dataset with the report to automate the report generation process.
Follow the steps below to get hands-on experience with the Report Bursting functionality
-
Go to Hamburger
 icon > Documents > Report Bursting.
 -
You will see the Report Bursting page, which prompts you to select a Dataset and a Mapping from the dropdown.
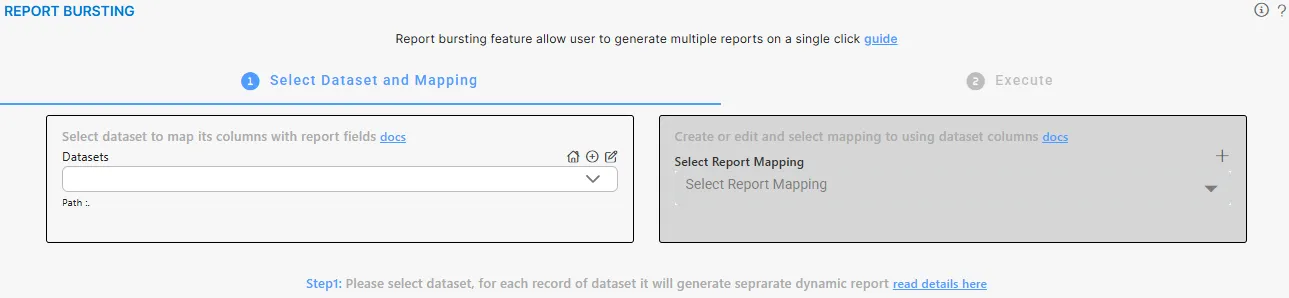
Click here to know more about Create dataset.
-
If no mappings exist, the Select Report Mapping dropdown will be empty; once mappings are created, those linked to the selected dataset will appear under the Mapped list, while all others will be shown under the Not Mapped list.
-
Select the orderDetails.ds dataset from the dropdown.

-
To create a new mapping for the selected dataset, click the
 icon in Select Report Mapping. The following page will open:
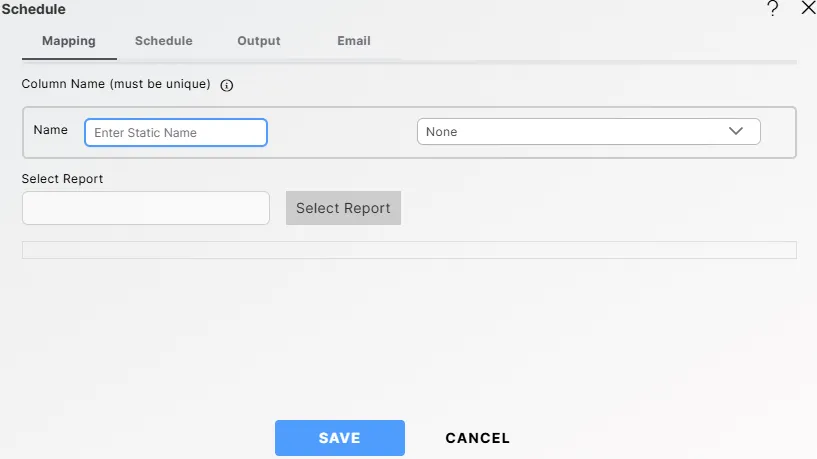
-
Enter the following details in the Mapping tab:
-
Enter the Name (e.g., User Specific Report — you can add any name as required).
-
Select the Column Name from the dropdown (e.g., None).
-
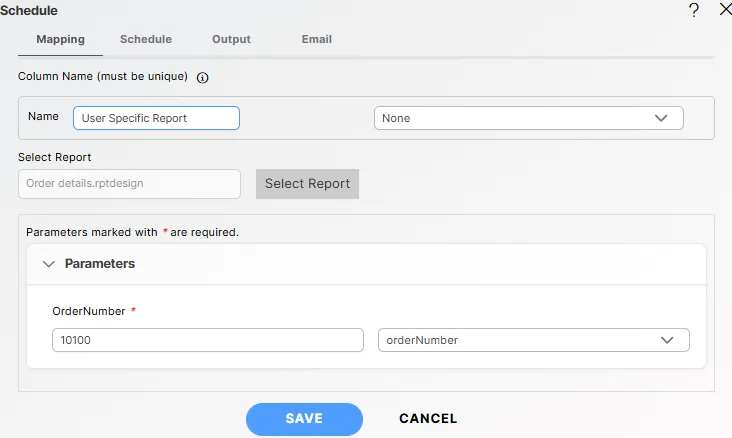
Click Select Report and choose the report file (e.g., Order details.rptdesign — select any report as per requirement).
-
For the OrderNumber parameter, select the corresponding dataset column (e.g., orderNumber), such as the value 10100.
-
-
Click the
 button, and a message saying Created Successfully will be displayed.
-
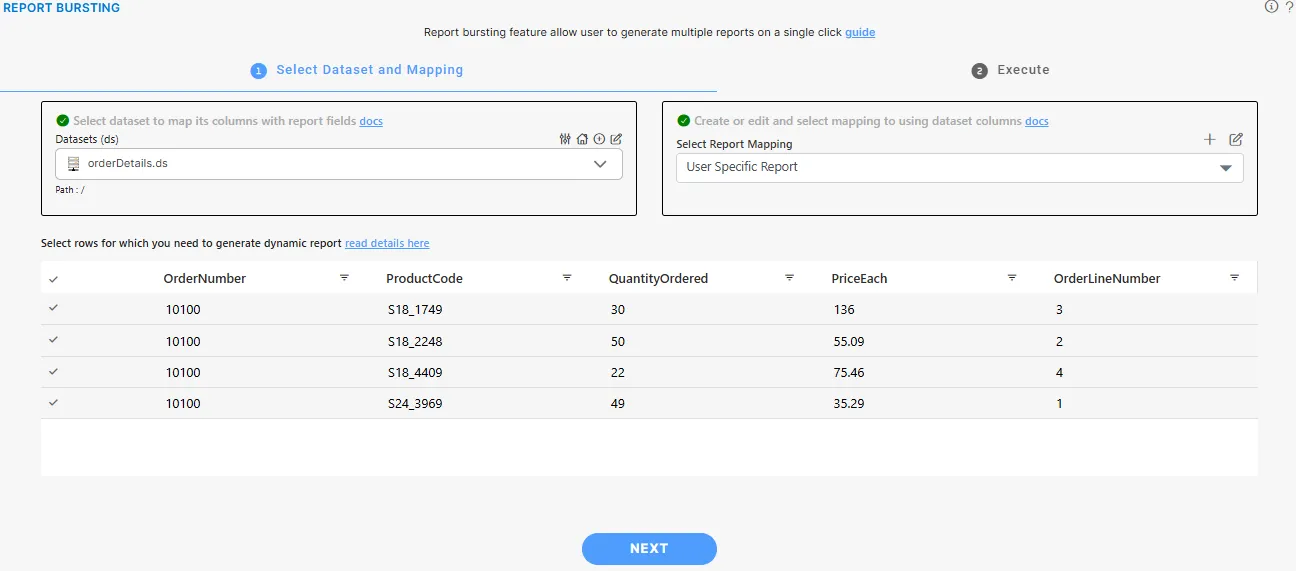
Go to the Select Report Mapping dropdown.
-
Select the User Specific Report mapping from the Not Mapped list.
-
The customer dataset details will appear in the grid view.
-
Select the customer order number for whom you want to generate and share the report; for example, select the order number 10100.
-
Click on the
 button to go to the Execute page.
 -
Select the Synchronous radio button.
-
Choose the desired output format. Click on the PDF button (in this example) to start the report bursting process immediately.
