Connecting a Datasource in AIV
In this document, you will learn the step-by-step process of connecting a Datasource to the AIV (Active Intelligence Visualization) platform. Connecting a datasource is the first and most essential step before creating datasets and building visual dashboards (VIZ).
AIV supports a wide range of datasources, including cloud and on-premise databases like PostgreSQL, MySQL, SQL Server, Google Sheets, and many more. Once connected, AIV enables you to build powerful datasets and visualizations from your live or static data sources.
What You’ll Learn:
- How to navigate to the Datasource section in AIV
- How to add a new datasource
- Configuration steps and required credentials
- Testing and validating your connection
Connecting a Datasource in AIV
This section explains how to connect a datasource in the AIV platform. Connecting to a datasource is the foundational step that allows you to build datasets and create meaningful visualizations (VIZ).
Step 1: Navigate to the Datasource Section
- Click on the hamburger icon in the top-left corner of the AIV interface to open the main menu.
- The sidebar will appear — expand the Master Data section.
- Click on Datasource to open the Datasource management page.
Step 2: Create a New Datasource
-
Click the
 Create button located on the bottom toolbar.
 -
This will open the Connect to Datasource page:
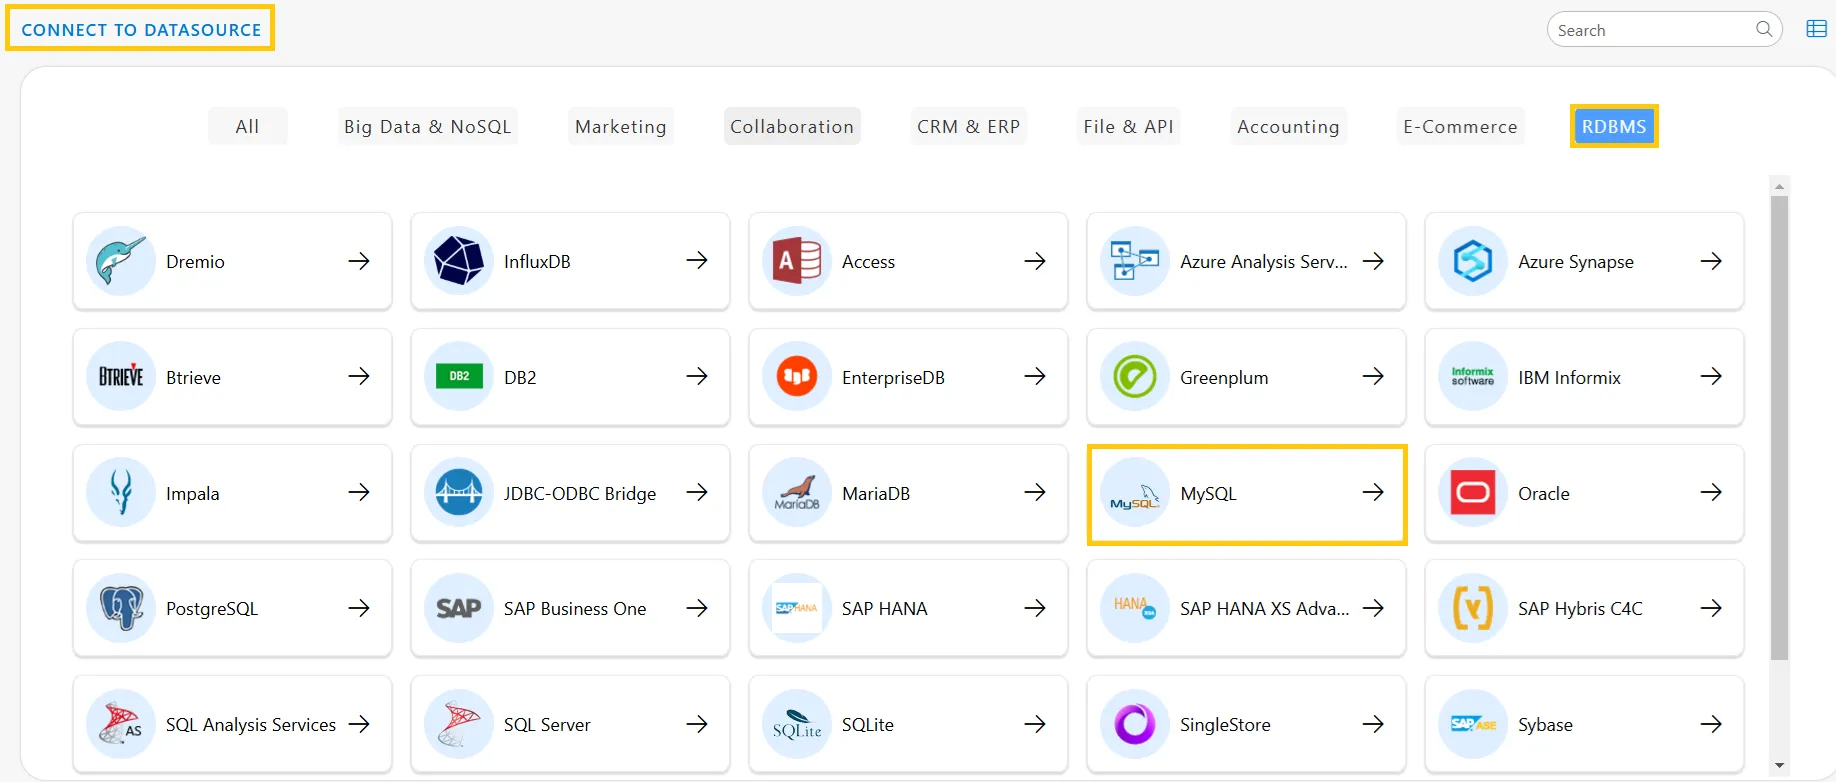
Step 3: Select Your Datasource Type
Choose the datasource you want to connect to (e.g., MySQL, PostgreSQL, SQL Server, etc.).
For this example, we will connect to a MySQL datasource and name it Sample SQL, which stores information for AIV. When MySQL is selected, a Database Connection dialog appears:
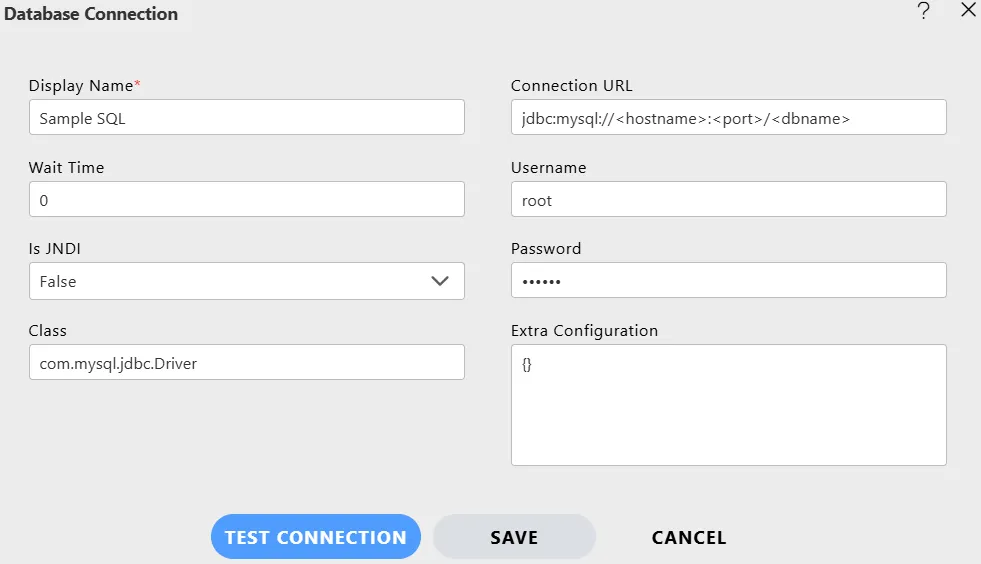
⚙️ Configuration Details
Wait Time Configuration
The Wait Time refers to how long the application waits to acquire a connection before timing out.
🔹 Recommendation: Set Max Wait Time to
0to pause the requesting thread until a connection becomes available. This reduces server overhead by avoiding tracking the wait time for each request and improves performance.
JNDI Configuration
JNDI (Java Naming and Directory Interface) is used to configure connections via external application servers.
🔹 For most cases in AIV, keep JNDI set to
Falseunless you are managing your connection through an external container or server.
JDBC Driver Configuration
The JDBC Driver enables Java-based applications like AIV to connect to databases using standard SQL.
AIV supports multiple JDBC drivers out of the box (MySQL, PostgreSQL, etc.), and the correct driver is automatically selected based on your chosen datasource type.
Connection URL Configuration
The Connection URL is a formatted string that contains all necessary information for AIV to locate and connect to your database instance.
Example:
jdbc:postgresql://localhost:5432/aiv
🔹 The URL typically includes:
- Database type
- Host address
- Port number
- Database name
Username and Password Configuration
Provide valid database credentials:
- Username: The user ID used to connect to the database.
- Password: The corresponding password for authentication.
🔐 Credentials should have read/write access to perform data operations in AIV.
✅ Final Step: Test & Save the Connection
- After entering all required information, click Test Connection.
- If the test is successful, click Save to store the datasource configuration.
- You can now move on to creating datasets based on this connection.
More features of Datasource as follows:
Datasource Introduction
Edit Datasource
Delete Datasource
Custom Datasource
Data EndPoints Datasource
More features of Master Data as follows:
Create Datasource Mapping
Create Dataset
Group Dataset
Create Parameter
Create Pipeline