Cdata Cloud Connection
CData Connect Cloud is a consolidated connectivity platform that links applications to a broad ecosystem of real-time data sources through consistent, standards-compliant interfaces. CData Connect Cloud provides tools to access data seamlessly from any system, anywhere.
With CData Connect Cloud, you can unify access to all of the cloud applications, databases, APIs, and services across an organization.
CData Cloud Connect with AIV Steps:
Step 1: Sign Up/Login at CData Cloud Portal
- Begin by signing up or logging in to the CData Cloud Portal.
Click to reach CData Cloud Portal
Step 2: Add a Connection
-
On the left-side menu, select the “Connections” option.
-
On the right side, click the “Add Connection” button.

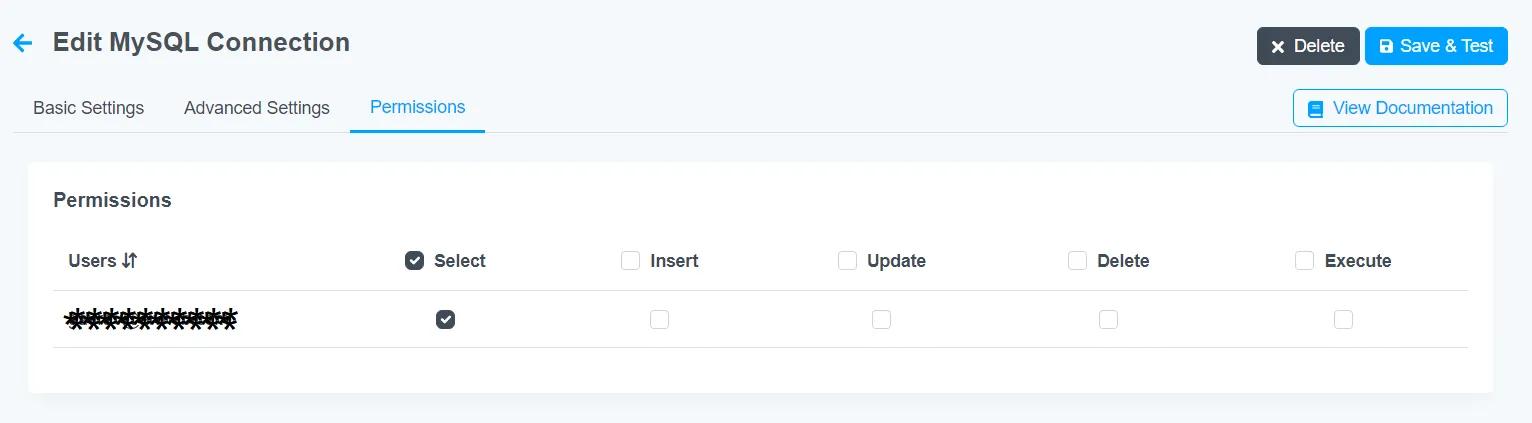
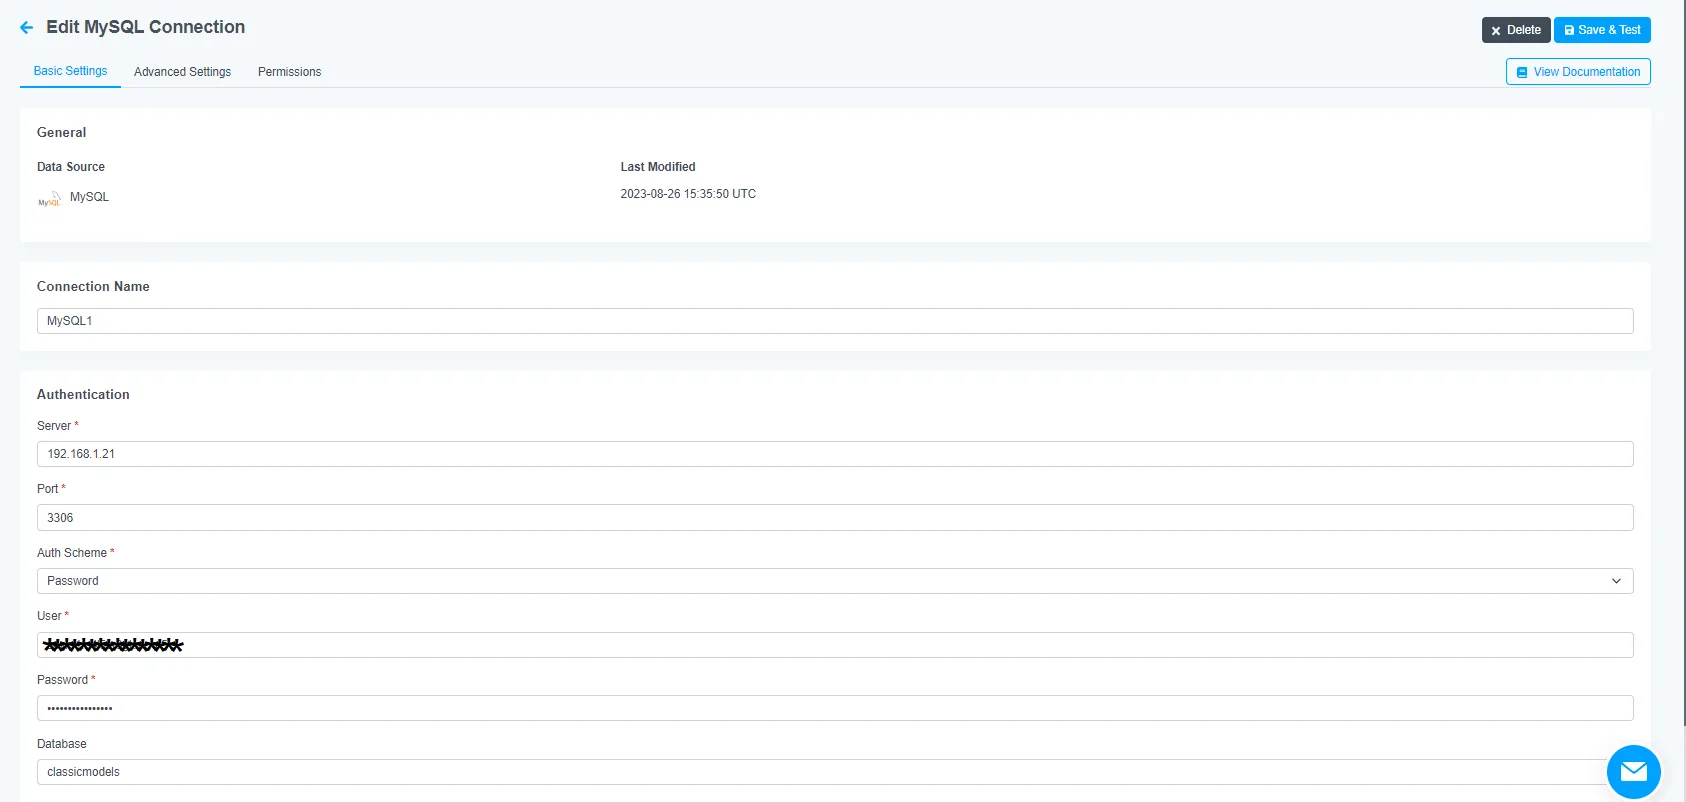
Step 3: Choose MySQL Connector
- Search for the MySQL connector and select it.
Step 4: Configure Connection
-
Fill in all the required fields as per your specific requirements.
-
Click “Save & Test” to verify the connection.
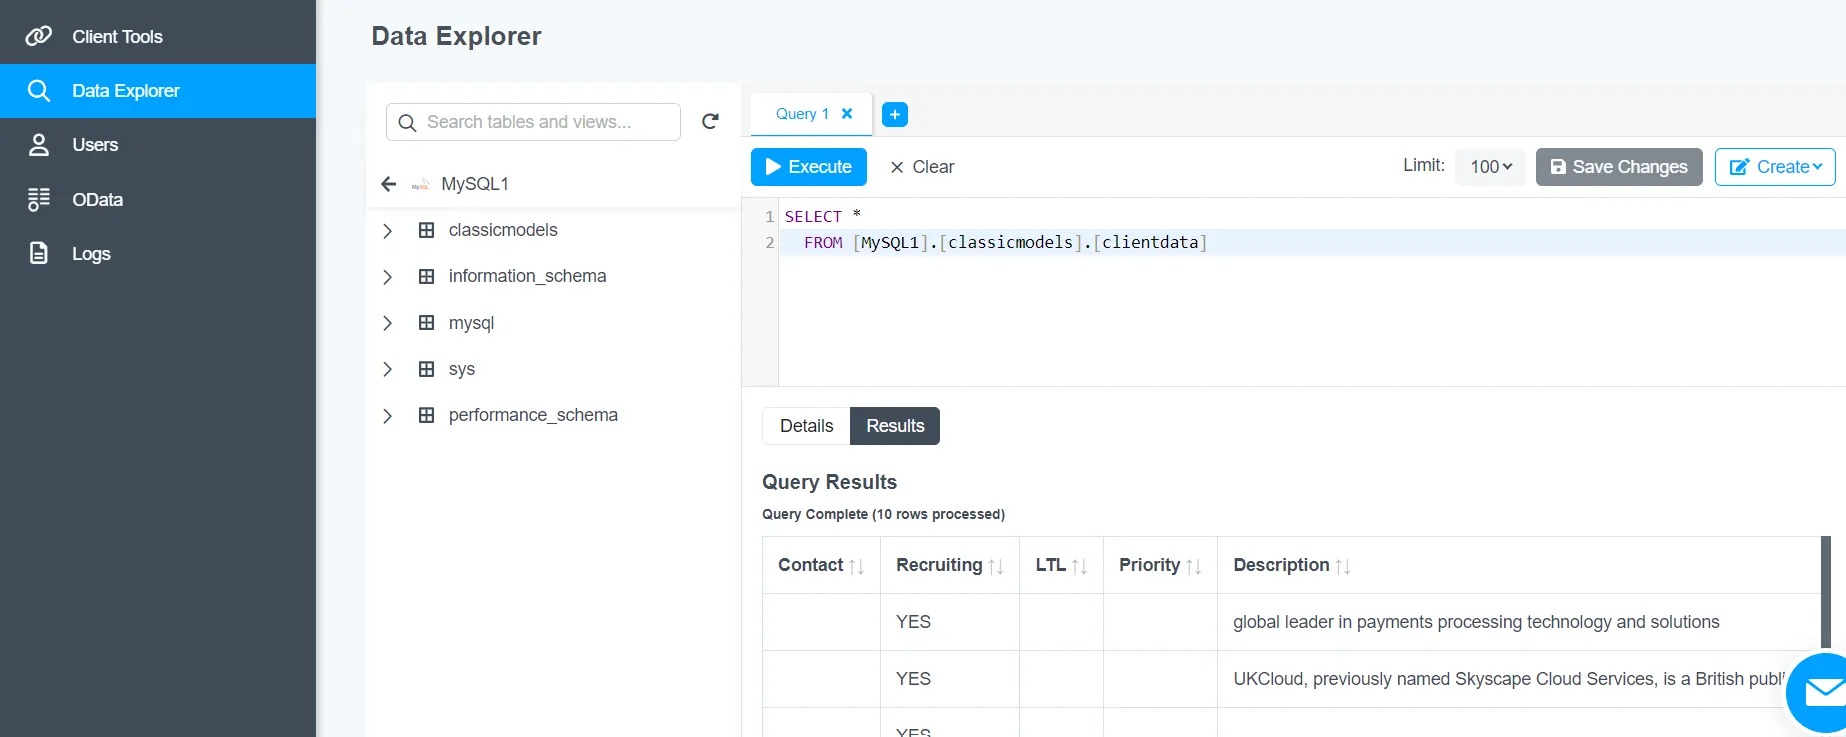
Step 5: Explore Data
-
Once the connection is successfully created, go to the “Data Explorer” tab.
-
Write and execute a query to check if the desired data is retrieved.
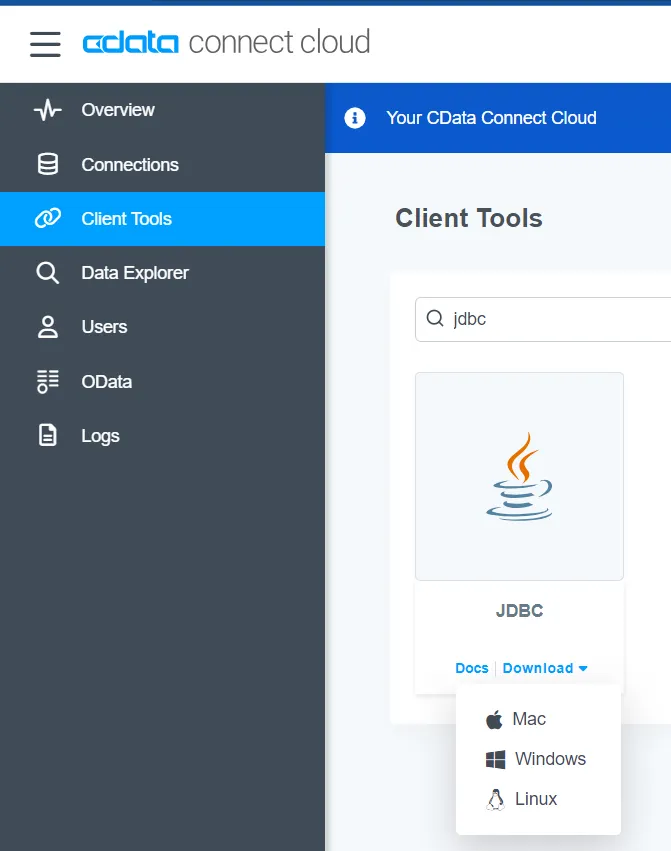
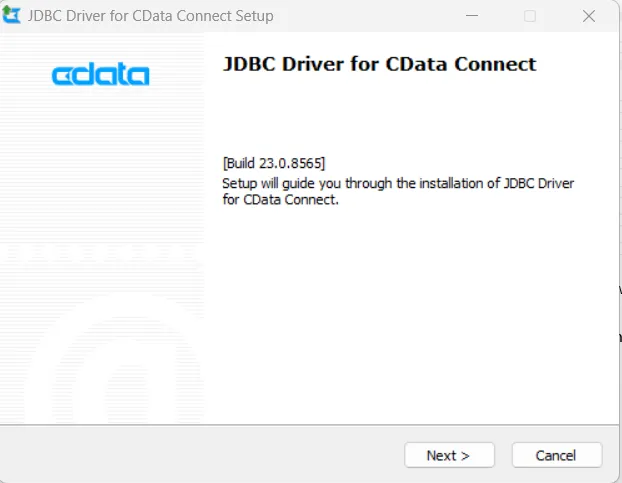
Step 6: Download JDBC Driver
-
Navigate to “Client Tools” and search for JDBC.
-
Download the JDBC driver compatible with your environment.
Step 7: Install JDBC Driver (Windows)
-
For Windows users, the downloaded file will be named “JDBCDriverforCDataConnect.exe.”
-
Double-click the file to install it.
Step 8: Copy JDBC Driver Files
-
The driver will be installed at “C:\Program Files\CData\JDBC Driver for CData Connect.”
-
In the “lib” folder, locate “cdata.jdbc.connect.jar” and “cdata.jdbc.connect.remoting.ini.”
-
Copy both files and paste them into your application’s lib folder, alongside other JAR files. Step 9: Generate Access Token
-
To connect to the connections created in CData Cloud, you need to generate an access token.
-
In the CData Cloud application, click on “Settings” in the top-right corner.

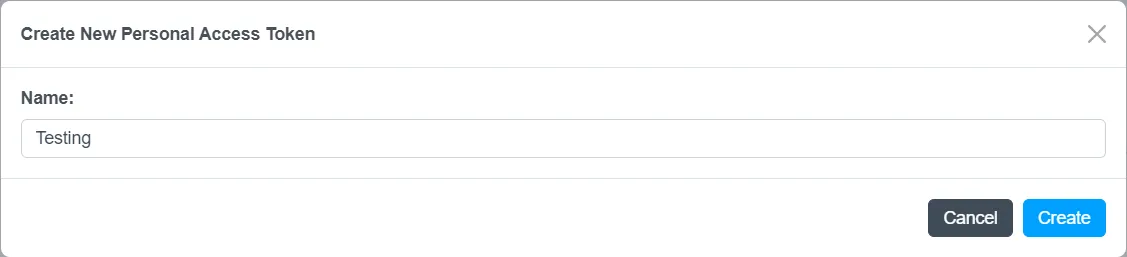
Step 10: Create Access Token
-
Navigate to the “Access Tokens” tab and click on “Create PAT” (Personal Access Token).

Step 11: Name the Token
-
In the dialog box that appears, give the access token a name, such as “Testing.”
-
Click “Create” to generate the token.
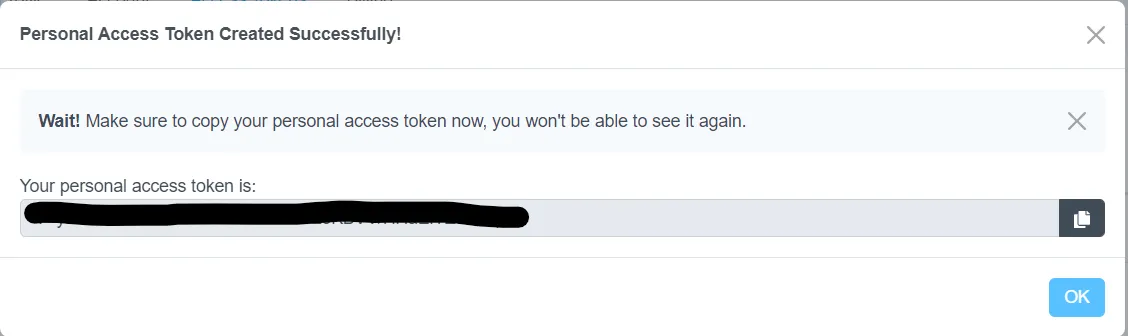
Step 12: Copy the Token
-
Make sure to copy the generated access token as it won’t be visible again.
Step 13: Configure AIV Application
-
Start your AIV application and create a MySQL connection.
-
Fill in the required fields with the following information.
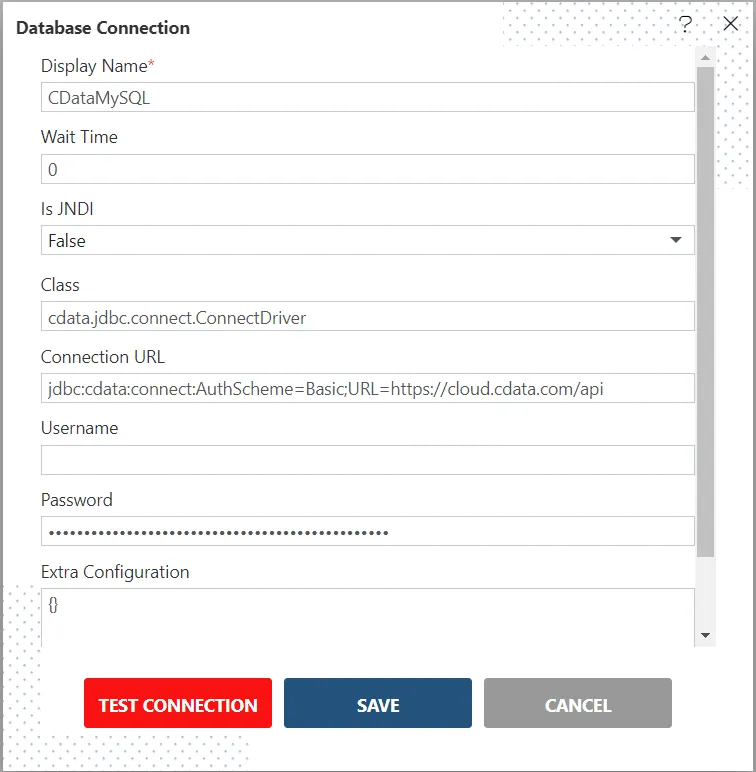
Step 14: Test Connection
-
Test the connection, and if it is successful, save it. Step 15: Use the Data Source
-
You can now use the configured data source to create datasets. (Note: When writing queries, include the connection name from CData Cloud, as well as the database name and table name. For example: “SELECT * FROM MySQL1.classicmodels.clientdata.“)
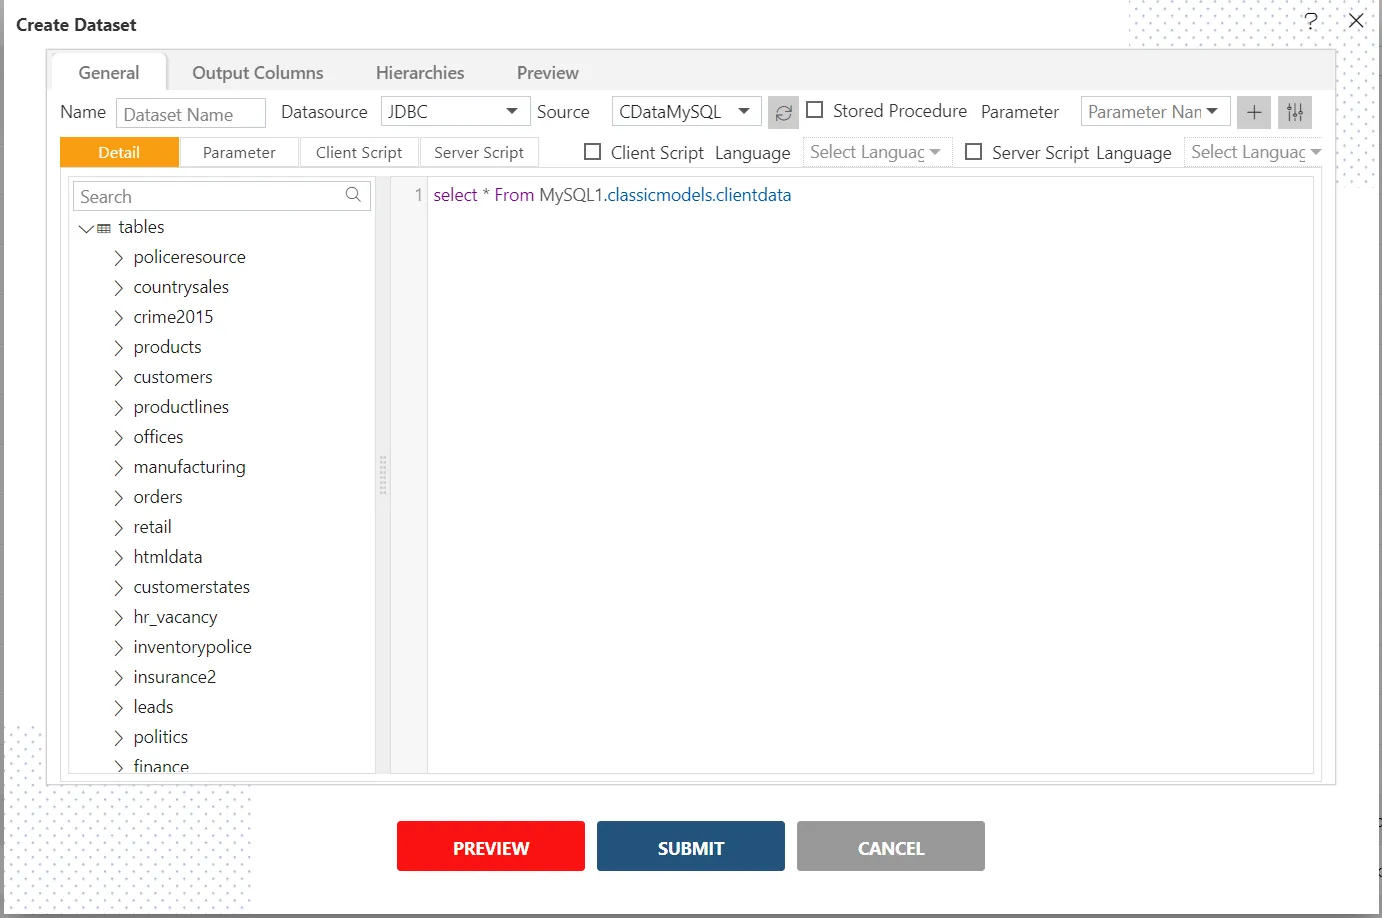
Step 16: Test and Save Dataset
- Finally, test and save your dataset.