Webhook Overview
A webhook is a mechanism that allows one application to send real-time data to another whenever a specific event occurs. It’s essentially a lightweight API event-driven communication. Webhooks are widely used to notify systems of updates, trigger workflows, or integrate services without requiring the recipient to constantly poll the server. A Webhook ID is a unique identifier assigned to a webhook, typically by the service or application managing the webhook
Two Methods to Create a Webhook
Method 1: By using the Webhook in the AIV application.
-
Click on the
 menu and navigate to the Master Data section, then select Webhook.
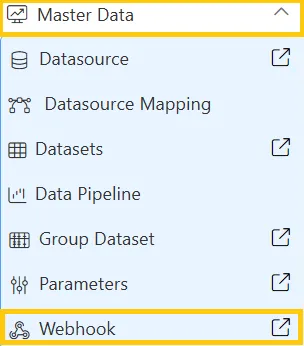
-
This action will take you to the Webhook page. Click the Create Webhook button to initiate the creation of a new webhook.
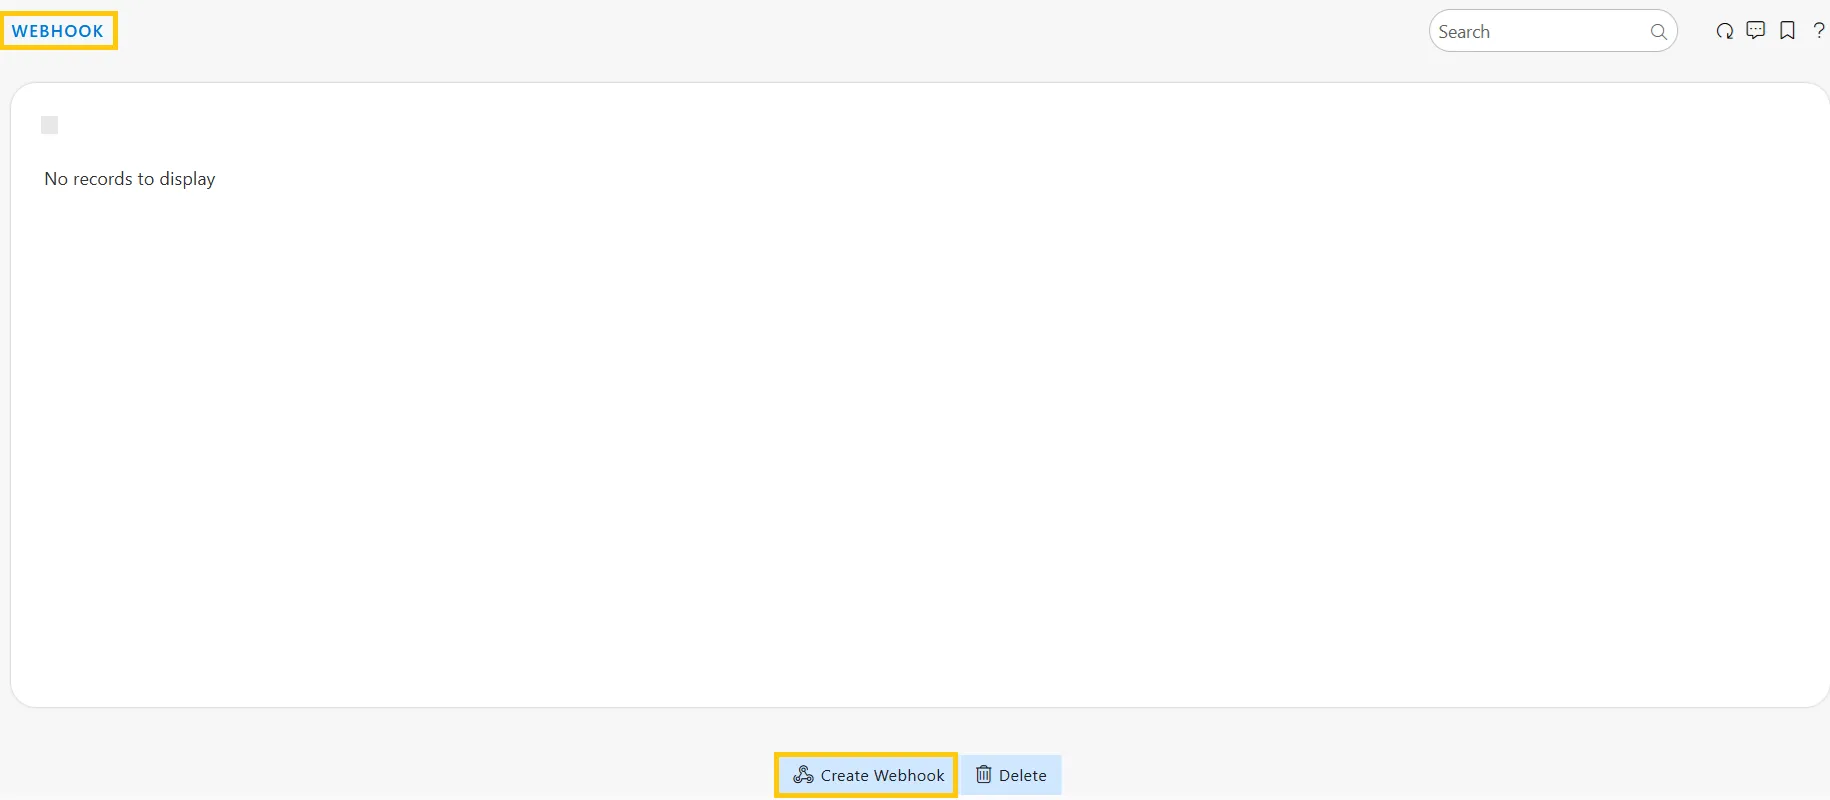
-
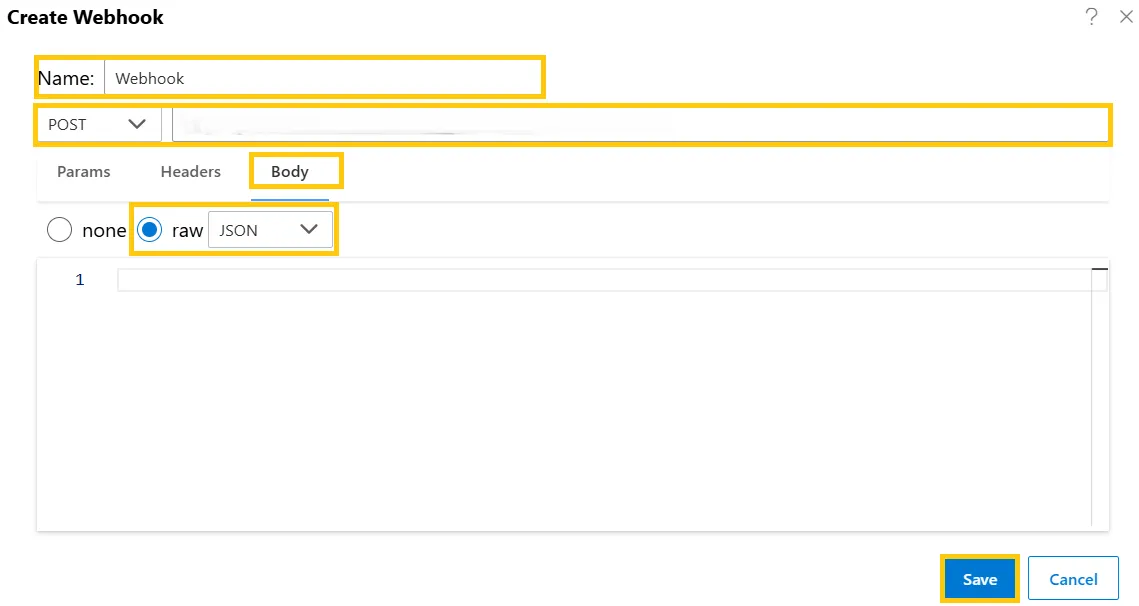
Once you click on the Create Webhook button, a dialog box will appear as shown below:
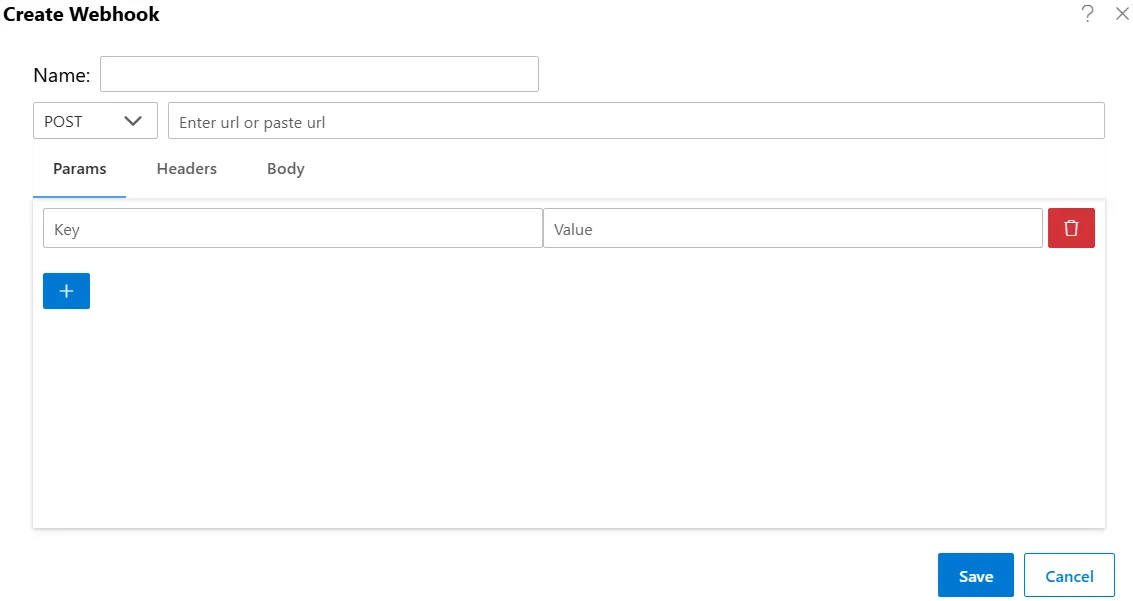
-
Enter the following details in the Create Webhook dialog box:
-
Name: Provide any name you wish to assign.
-
POST: Enter the desired URL.
-
Headers: Add the necessary key and value pairs.
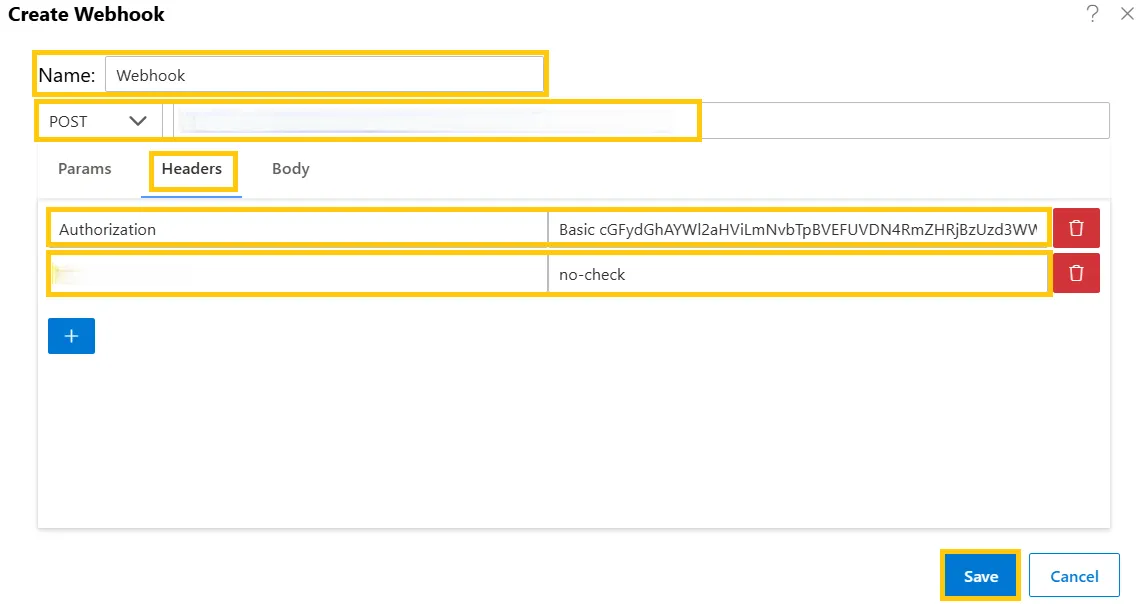
-
Body:
-
Select either the None or Raw radio button.
-
If you select Raw, choose the appropriate type from the dropdown list.
-
-
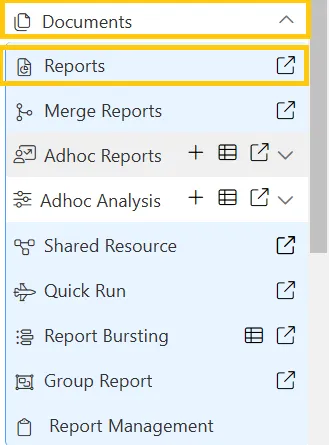
Click the Save button, then navigate to the Document section and click on the Report tab.
-
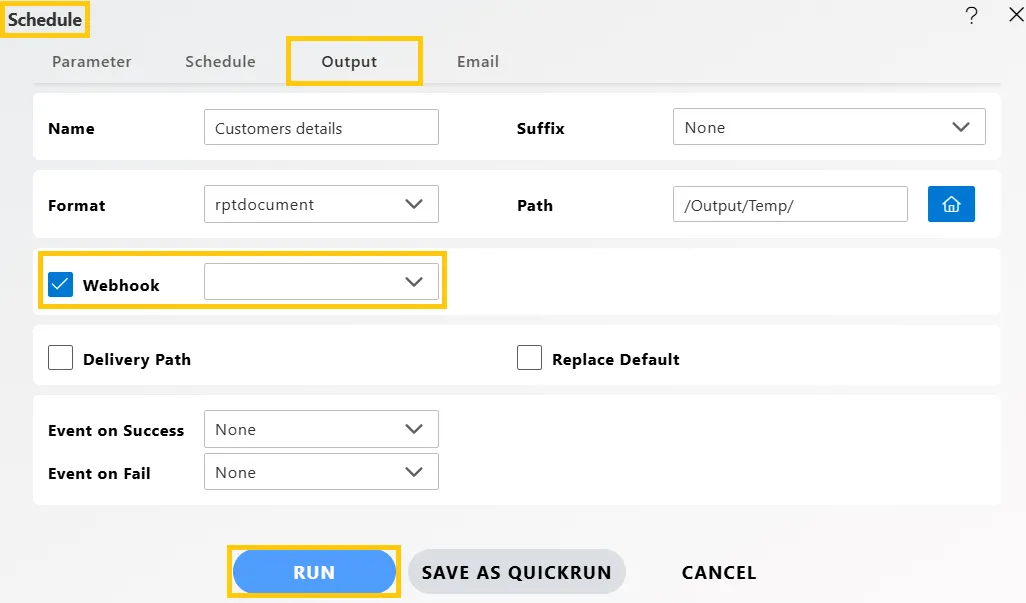
As depicted below, when you double-click on any report from the Reports page, the Schedule dialog box appears. Navigate to the Output tab, tick the checkbox for Webhook, and select any webhook from the dropdown list.
-
Click the Run button to view the output, as shown below:

-
When you click on Run, you can inspect the output and retrieve the webhook ID, as shown below:

Method 2: By using the Postman
-
Click on the
 menu and navigate to the API Key section. An API Tokens page will appear, as shown below:
-
In the API Tokens section, enter Name and Days fields, then click on the Create API Token button.
-
Once you click on the Create API Token button, the details will be added to the table.
-
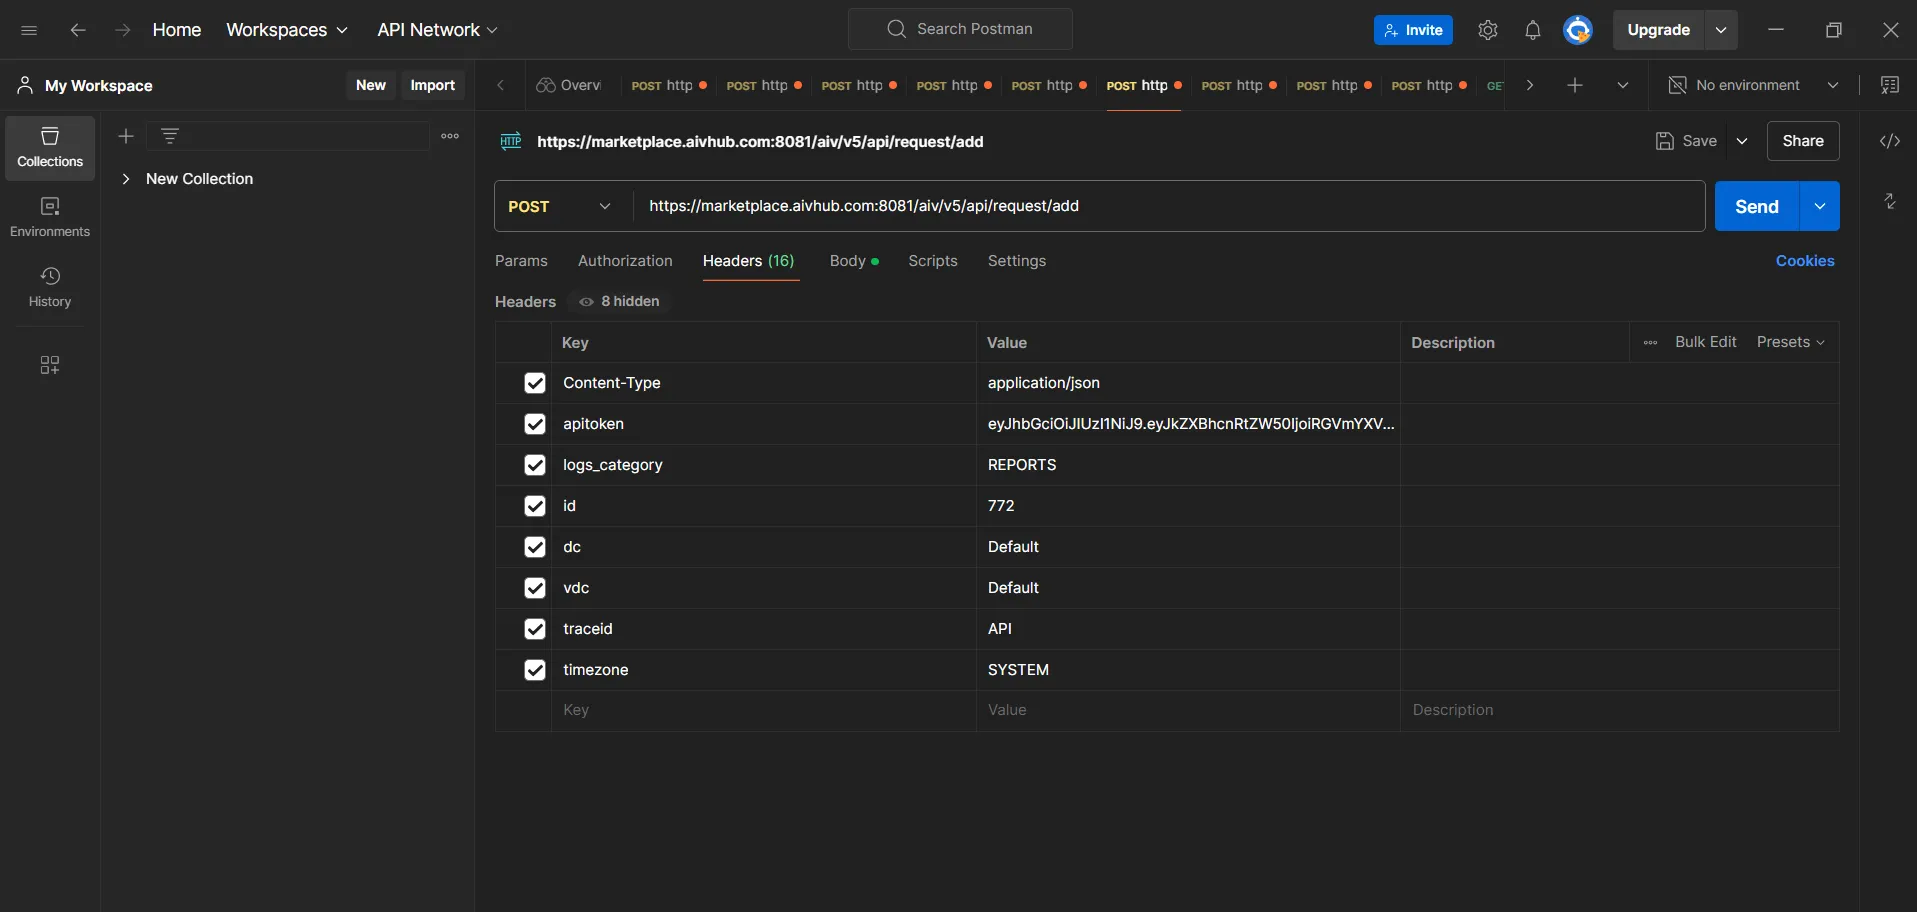
Enter the following details in the Postman:
-
Name: Provide any name you wish to assign.
-
POST: Enter the desired URL.
-
Headers: Add the necessary key and value pairs.
-
When you click on Body, you can inspect the output and retrieve the webhook ID, as shown below:

-
Body:
-
Select either the None or Raw radio button.
-
If you select Raw, choose the appropriate type from the dropdown list.
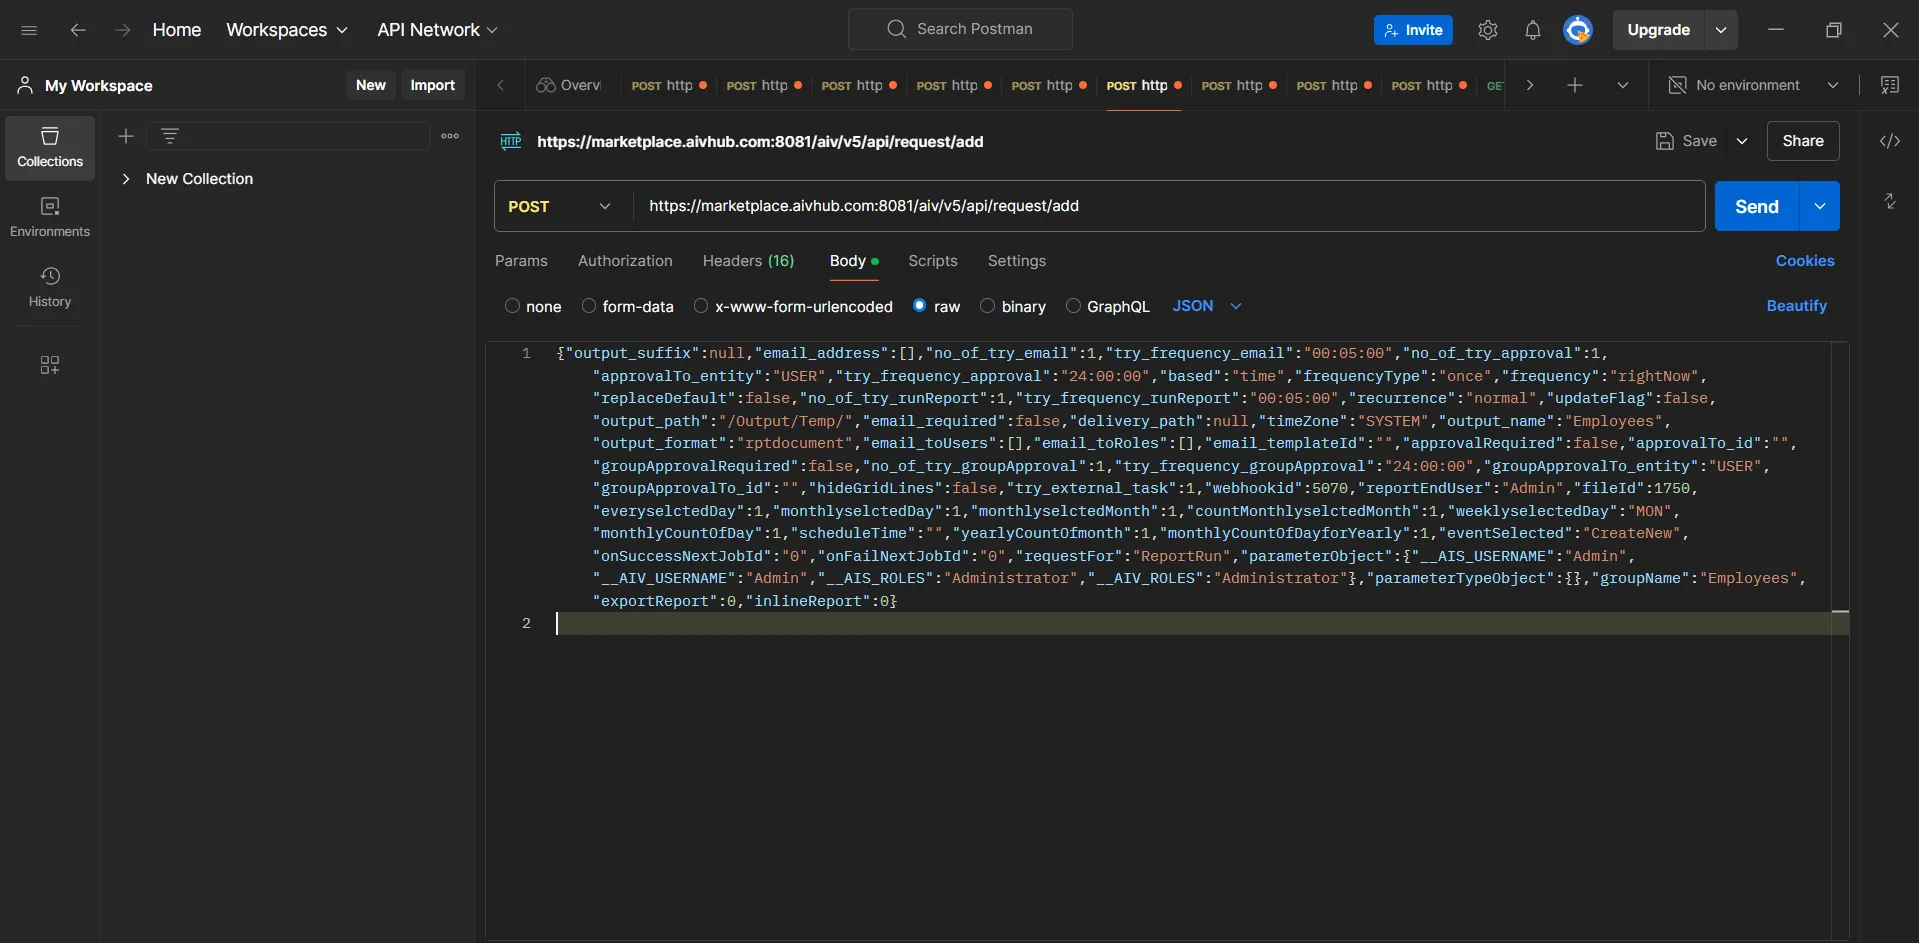
-
-
Click on the Send button to receive the output, as shown below:
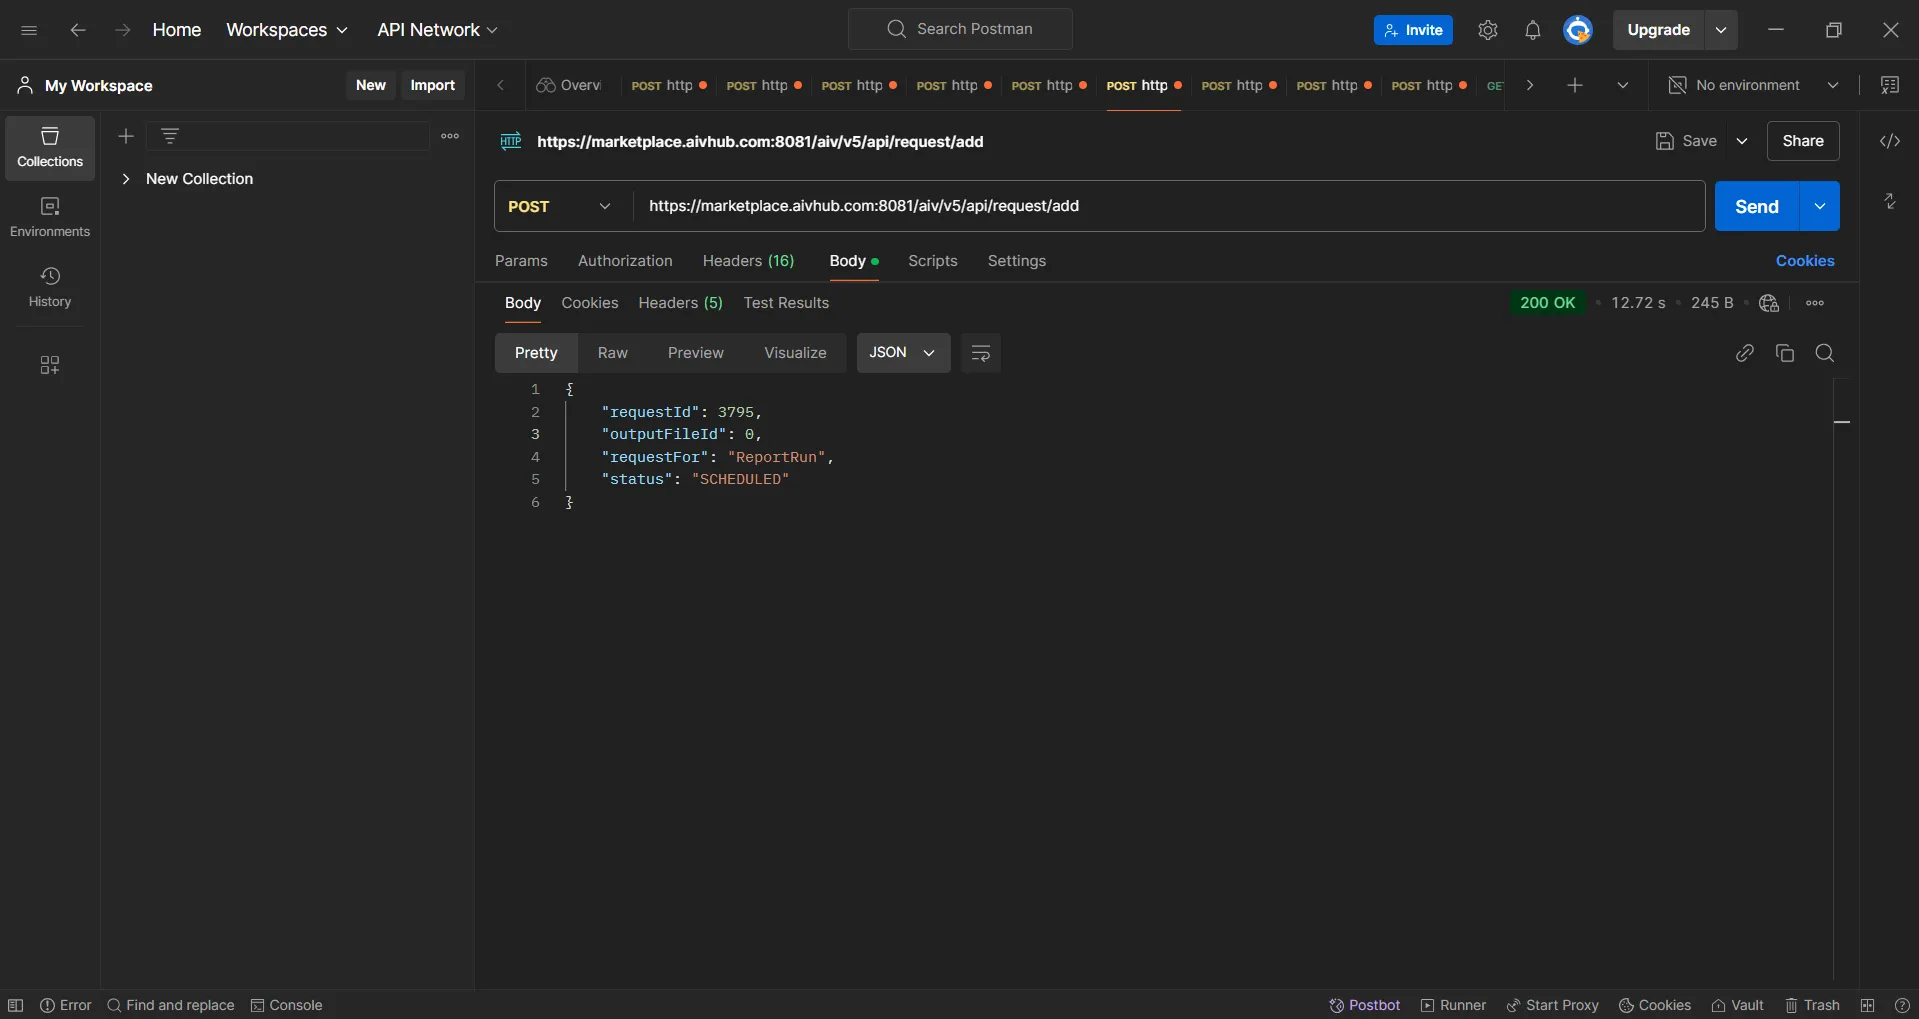
-
After clicking the Send button, the output will appear, as shown below:

Third party integration apps using webhook
Slack
-
Log in to Slack and create an account if you don’t have one.
-
Create a workspace by selecting Create a new workspace and providing necessary details.
-
Go to Slack API, click Your Apps, and create a new app in your workspace.
-
Open your terminal and type ng http to start the Angular app (if needed).
-
In your app settings, go to Slash Commands and click Create New Command.
-
Define the command, ensuring it starts with a / (e.g.,/mycommand).
-
In OAuth & Permissions, add the required scopes like chat
and commands. -
Add channel details and ID for the slash command to be used in specific channels.
-
Install other apps by clicking on Apps in the sidebar and browsing the directory.