Alert section
This Document Explains the creation and usage of alerts. There are 2 ways one can create alerts, one is from Request>Alert section and second is from ellipses options of any widget in edit mode. Follow below steps to learn the steps to create alert from alert section.
- Login to AIV using valid credentials
- Go to alert section from Hemberger menu
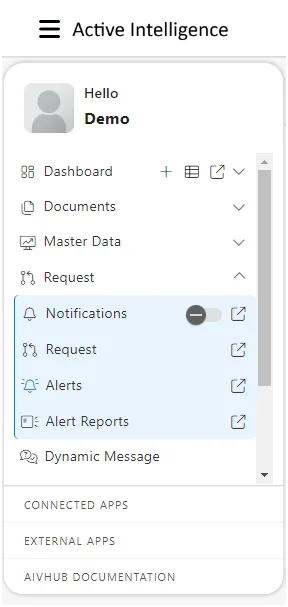
- Alerts can be created in two ways: either by using the right-click context menu or through the options available in the footer menu.
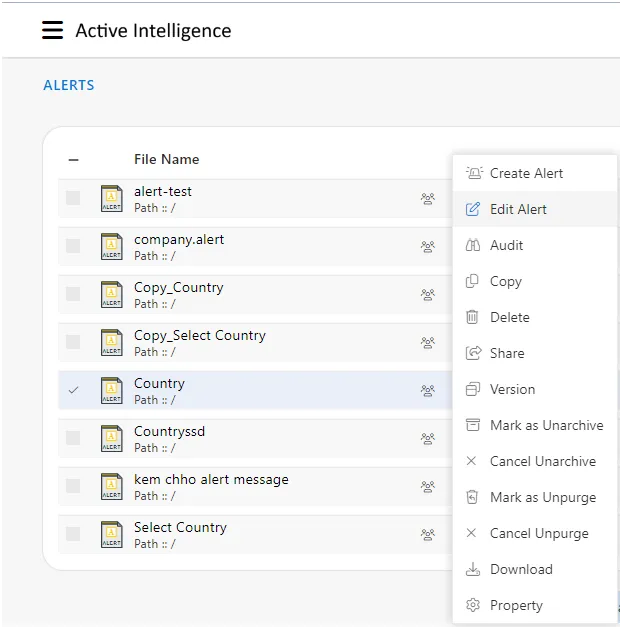
- Select ‘Create Alert’ from any available option, and a window will appear prompting you to provide details such as Alert name, description, and Alert type, as illustrated in the image below.
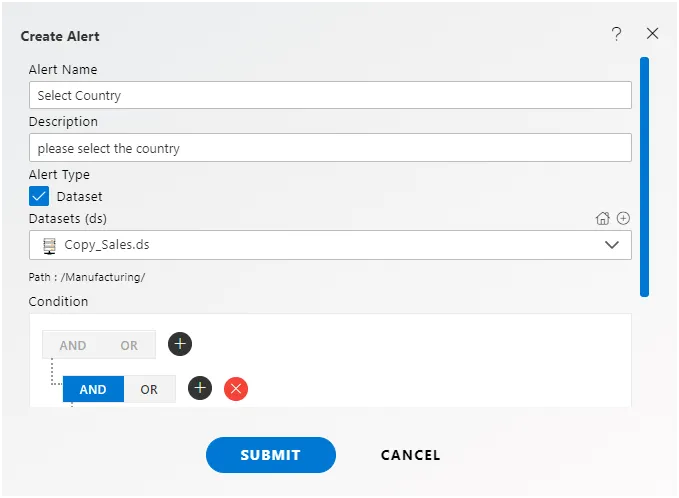
Certainly, to explain the purpose of each field in a form or interface, we need specific details about the fields you're referring to.You provide the names or descriptions of the fields.
Alert Name : The purpose of the field “Enter the name you want to give to your alert” is to allow the user to provide a distinctive and recognizable name for the alert they are creating. This name serves as an identifier for the alert within the system, making it easier for users to manage and differentiate between multiple alerts. It is a required field, emphasizing the necessity of assigning a unique name to the alert for organizational and reference purposes.
Alert Type : The field “Alert Type” being set as “user-defined” by default indicates that the system is configured to allow users to create their own custom alerts. This means that users have the flexibility to define the criteria, conditions, and parameters that trigger the alert. The default setting of “user-defined” reflects the platform’s openness to user customization, empowering them to tailor alerts according to their specific needs and preferences.
Description : Enter any information you want to provide to other users in Description(optional).
Dataset : In the context of AIV, the “Alert Type” when selecting a dataset typically refers to specifying the nature or category of the alert being created. It provides a way to classify alerts based on their purpose, behavior, or the type of information they are designed to monitor. This classification can help organize and manage alerts within the system.
For example, common alert types might include:
User-Defined Alert :
Allows users to create custom alerts with specific conditions and criteria.
System Alert :
Pre-defined alerts or system-generated alerts that come with predefined conditions.
Threshold Alert :
Alerts triggered when a certain threshold or limit is crossed, such as reaching a specific value.
When selecting a dataset and setting the alert type, users can choose the most suitable category based on the purpose of the alert they are creating. This classification helps in better organization, understanding, and management of alerts within the AIV system.
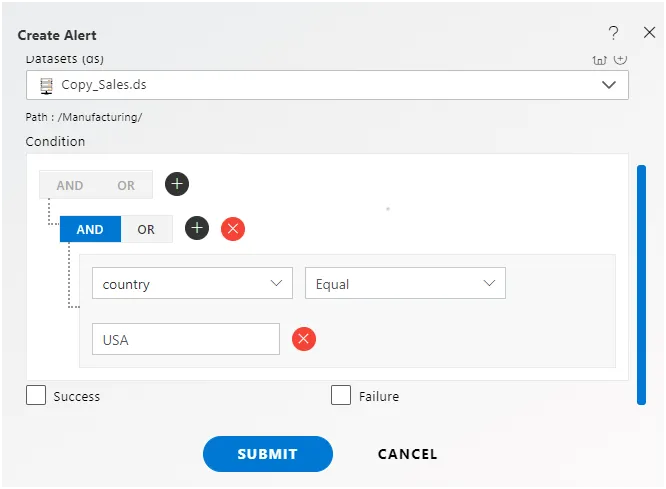
- After selecting the dataset, the condition box becomes active. If you wish to apply filters to monitor specific dataset values, such as monitoring ‘USA’ country, you can apply the condition here, as depicted in the image above.
- To include multiple conditions, utilize the ’+’ icon within the condition section.

- At the bottom, two checkboxes, namely Success and Failure, are available. These options come into play when users intend to initiate specific events upon the success or failure of the applied alerts on the dataset. For instance, selecting the event to trigger on success leads to the availability of the ‘Next’ button, guiding you to the event page, as illustrated in the image below.
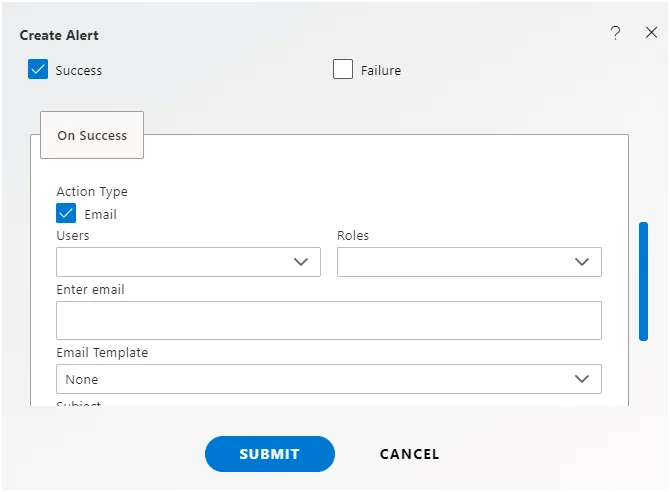
- The page below is the Event page, where the user needs to select the type of event they want to trigger.
- As of now, the only added event is the email event. This event, upon activation, will send an email to the selected user when a match case is found.
- When you choose the ‘Email’ radio button, it will prompt you to select users or roles to whom you want to send the success email. You can directly pick from the user or role dropdown if the user is available in AIV. Alternatively, if the user is not part of AIV, you can provide their email by entering it in the ‘Enter email’ box and hitting enter.
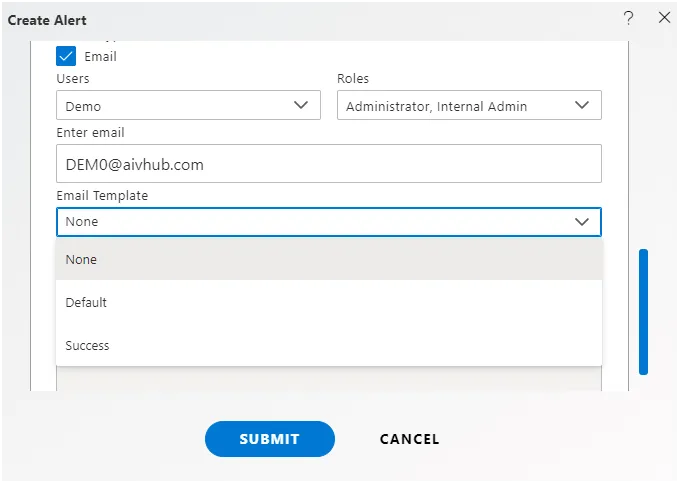
- Next, select Email template
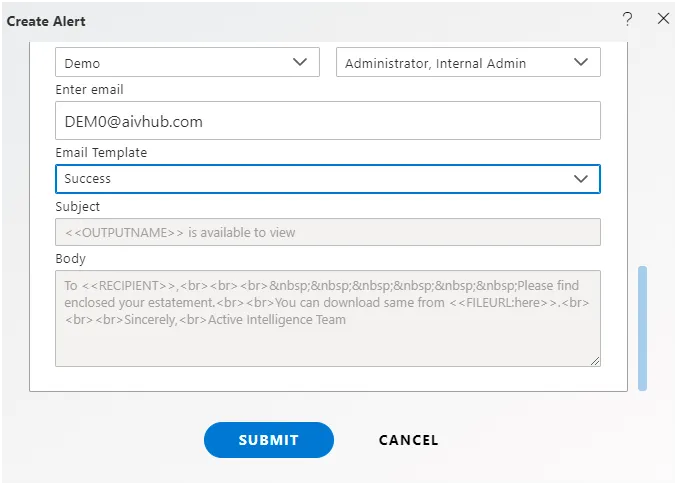
- Click ‘Submit’ to create the alert. Upon successful submission, you will receive a ‘Alert Created Successfully’ message.

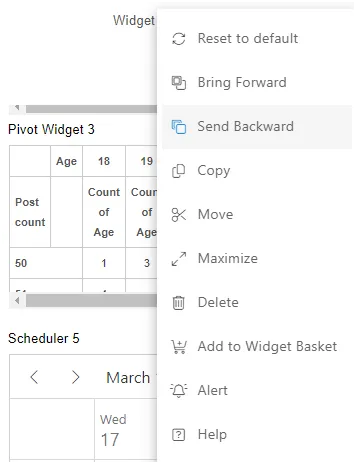
- An alternative method to create an alert is by using the ellipsis options in widget edit mode.