Notification - Message
Notification Message: This video provides a tutorial on utilizing the Message Section in AIV. Learn how to effectively use this feature for communication and collaboration within the AIV system.
- This document is dedicated to exploring the functionalities of the Message Section in AIV, a feature designed for internal communication. Discover how this tool allows users to send internal messages within the application, facilitating seamless communication among users.
- log in to the AIV application with your credentials & go to the Report section which was located at Documents section of aiv.
![]()
- User needs to select the Instant Message icon at the top right corner of the report section as shown below :
![]()
- Now the user will be able to see the Instant Message screen in the window as per below:
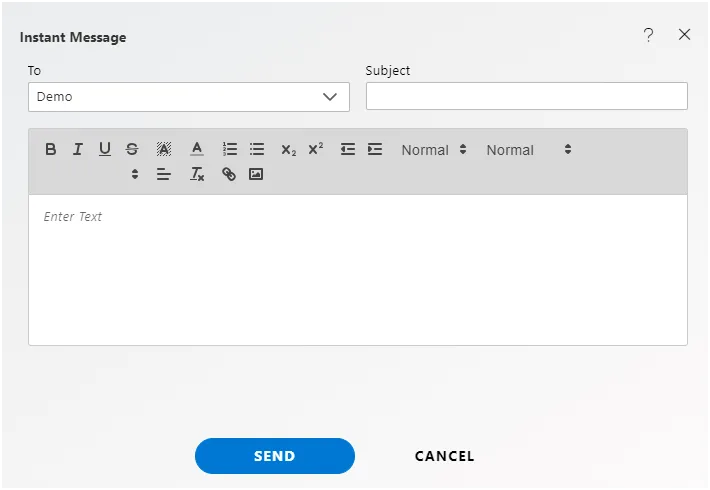
- In the To option user can select to which person he wants to send the message.
- In the Subject option write down the subject line related to the message you are sending.
- Use can also format the message by using these options shown below:

- For Example a user sends a message to another person Demo regarding approval, then the user can write a message like below:

-
Then click on the Send button.
-
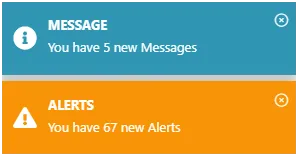
The demo user will get the message instantly & it will pop up at the top right corner of the screen as below.

NOTE : The provided information explains that the mentioned pop-up notification will be displayed only if the user has enabled alerts. Users have two methods to enable or disable alerts: through the notification section using a toggle button and from the Request section
- This statement indicates that when the demo user clicks on the pop-up message, it will open a screen as depicted below. The content or details of the screen are not explicitly described in the given text, but it implies there is a specific interface or content that will be revealed upon clicking the pop-up message..
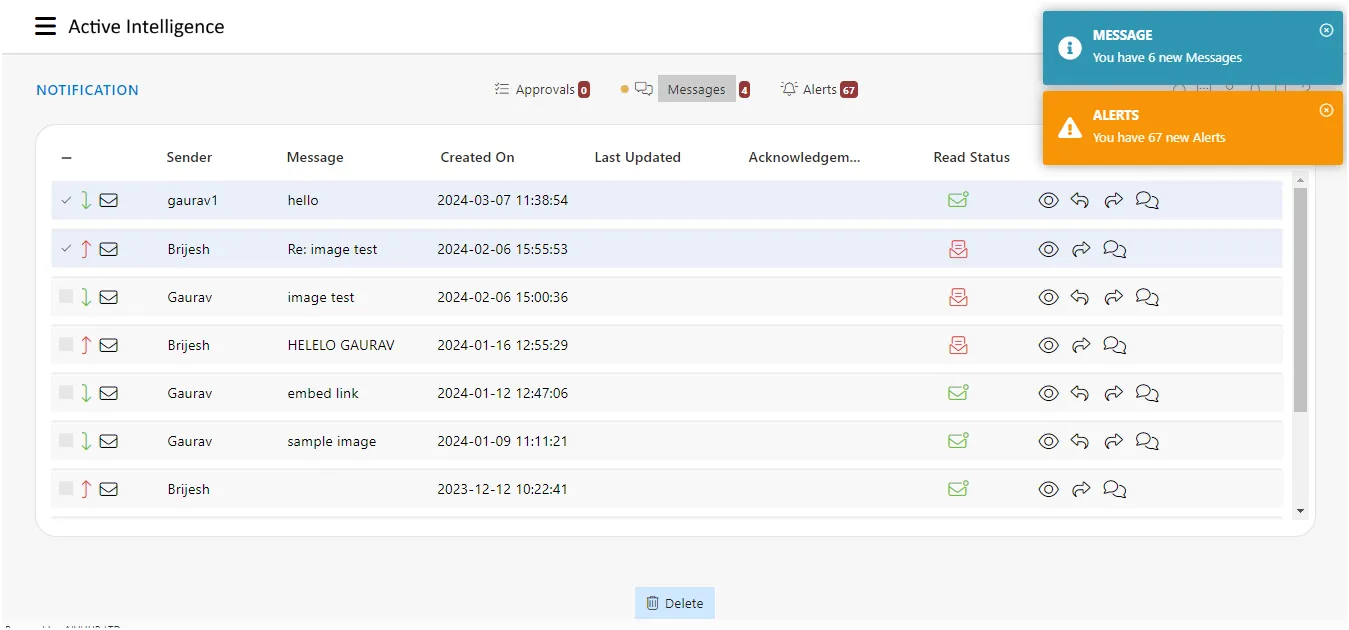
-This instruction advises that if alerts are not appearing, users should navigate to the Notification section and switch to the Message section. It suggests that checking the Message section might help locate or address any issues with alerts that are not being displayed.

-
Click on the Messages Section as shown in the image above:
-
It will show the received message at the top.
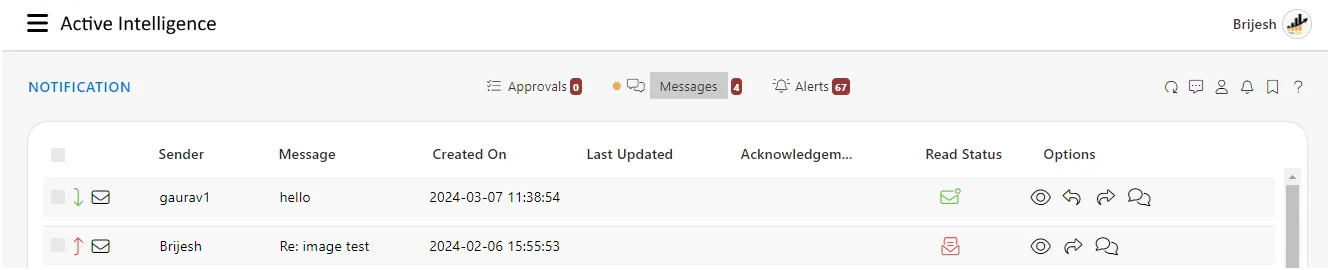
- Then Demo user can do the operations as given below:
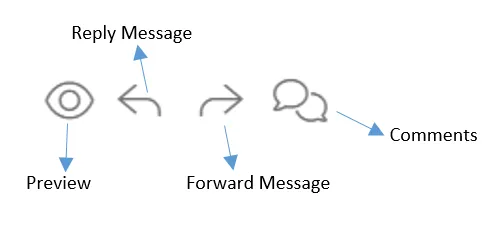
Preview: by using this option user can preview the received message. After previewing the message, the read status is changed to red from green. Reply Message: The user can reply to the received message. Forward Message: The user can forward this message to another user. Comments: The user can add comments to the message. (When a receiver/sender user add a comment on a message, it will pop up on the sender/receiver screen too)
14.when the user clicks on a message, they will be presented with two options.
The instructions elaborate on the two options available to the user when clicking on a message:
- Mark As Read :
By selecting this option, the user can change the status of the message to “Read” without opening and viewing its contents.
- Delete :
By choosing this option, the user can delete the selected message, removing it from the message section. These options provide users with flexibility in managing their messages by enabling them to mark messages as read or delete them directly.