AIV SSO
AIV allows a single sign-on option, enabling integration with third-party applications as a unified solution. In this exercise, you will learn to implement a simple single sign-on code that validates users against a CSV file.
AIV allows for configuring external security, eliminating the need to redefine users and roles within the AIV application. To use external security, you need to implement a Java interface.
In this document, you will learn to implement simple single sign-on and external security mechanisms that validate users against a CSV file. The sample project file for SSO and external security can be downloaded from the link below.
The required data files include:
(a.) AIV SSO jar file.
(b.) External Security jar file.
(c.) SSO and External security project files.
- Download the files and extract them into your local storage folder. You will find two folders within the extracted files.
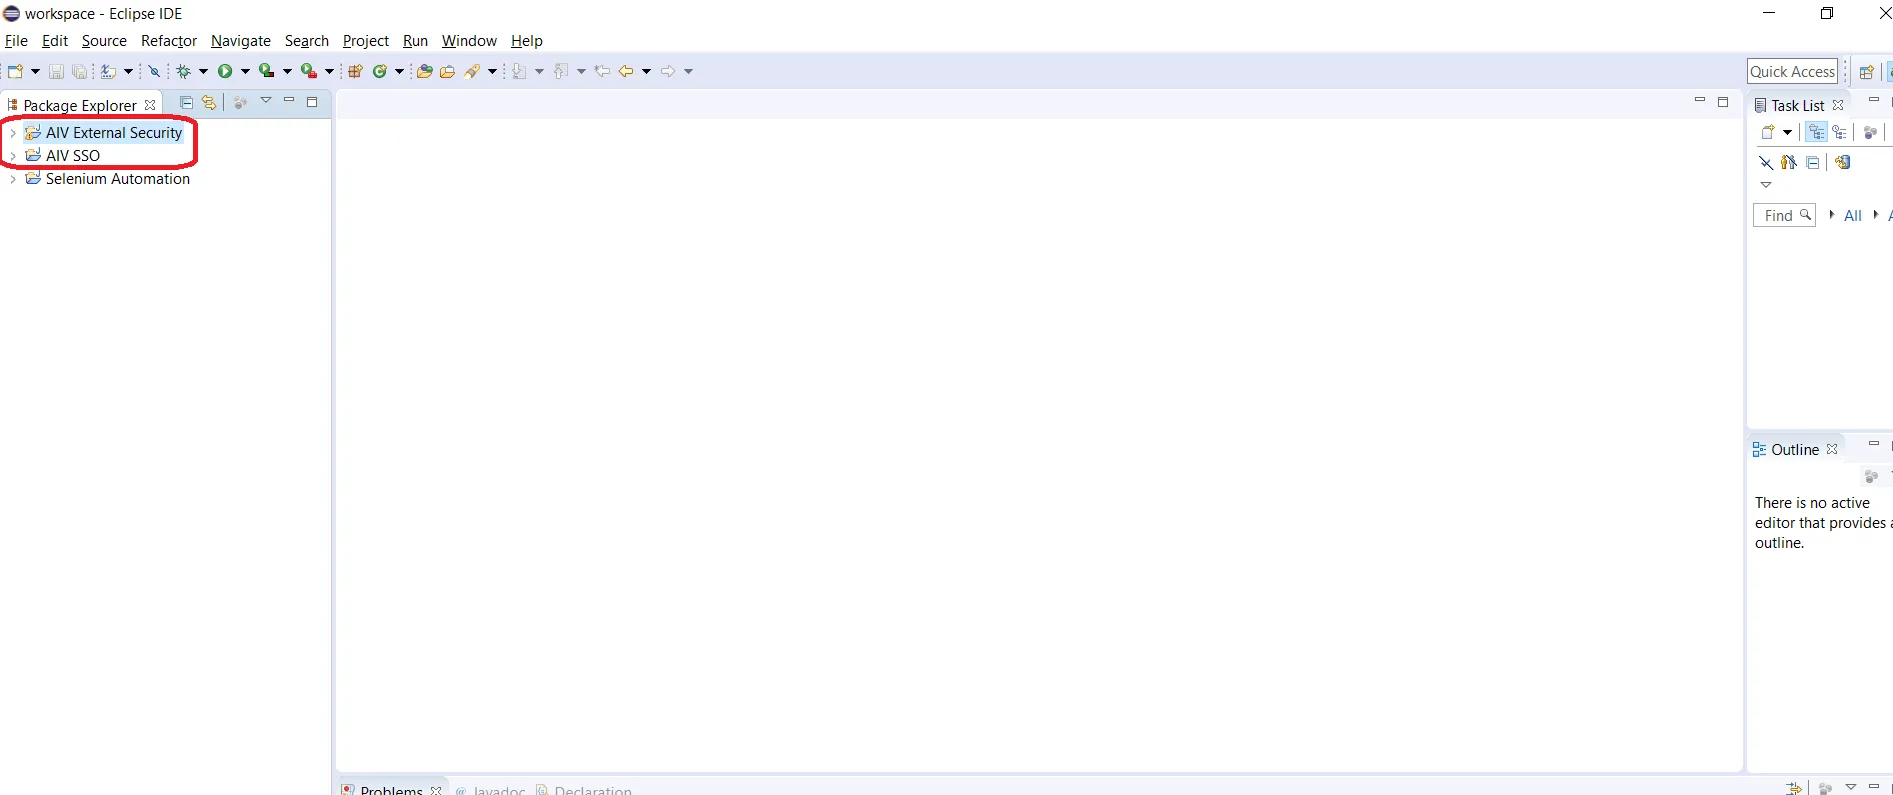
- AIV External Security
- AIV SSO
- To make path changes in the sample project, follow these steps after importing both projects into Eclipse:
-
Importing Projects :
Open Eclipse IDE. Navigate to “File” > “Import” > “General” > “Existing Projects into Workspace”. Click on “Next”. Choose the root directory where you extracted the projects. Both projects should appear in the list. Ensure both projects are selected. Click on “Finish” to import.
-
Making Path Changes:
Once imported, locate the files or configurations where path changes are necessary. Update the paths according to your local environment. This might involve modifying file paths in configuration files, properties files, or any other relevant places within the projects. Ensure that all necessary paths are updated to reflect the correct locations in your local environment.
-
Build and Test :
After making the necessary path changes, build both projects to ensure that they compile without errors. Test the functionality to ensure that the projects work as expected in your local environment. By following these steps, you should be able to successfully import the projects into Eclipse and make the required path changes.
- The steps to expand the AIV external security project and the files folder :
-
Expand AIV External Security Project :
In Eclipse, locate the AIV external security project within the project explorer. Click on the arrow icon next to the project name to expand it.
-
Expand Files Folder :
Once the AIV external security project is expanded, you should see a folder named “files” within the project structure. Click on the arrow icon next to the “files” folder to expand it.
-
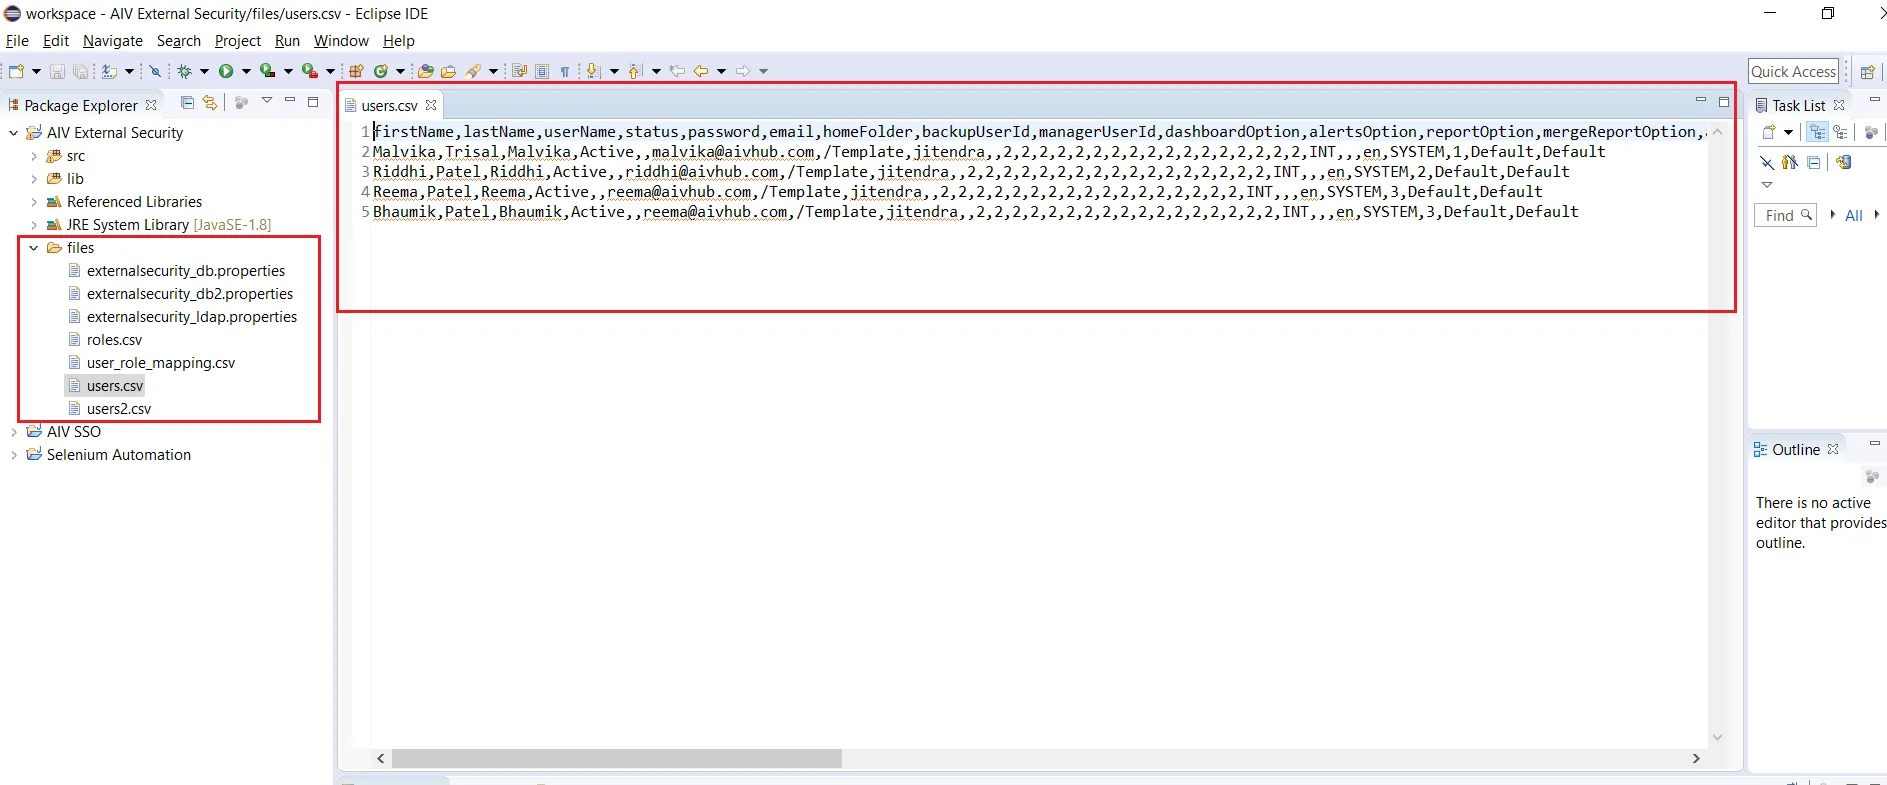
View CSV Files and Properties Files :
Inside the “files” folder, you should see CSV files containing user, role, and user-role mapping sample information. Additionally, there may be other “.properties” files that will be used if the user data resides in a database. You can double-click on these files to view their contents and make any necessary changes if required. By following these steps, you should be able to expand the AIV external security project and access the files folder containing CSV files and other properties files within Eclipse.
- The guidance on updating the path of CSV files in the project. Here’s a summary of the steps :
-
Expand the “src” Folder :
Navigate to your project directory in Eclipse. Expand the “src” folder to reveal the source files of your project.
-
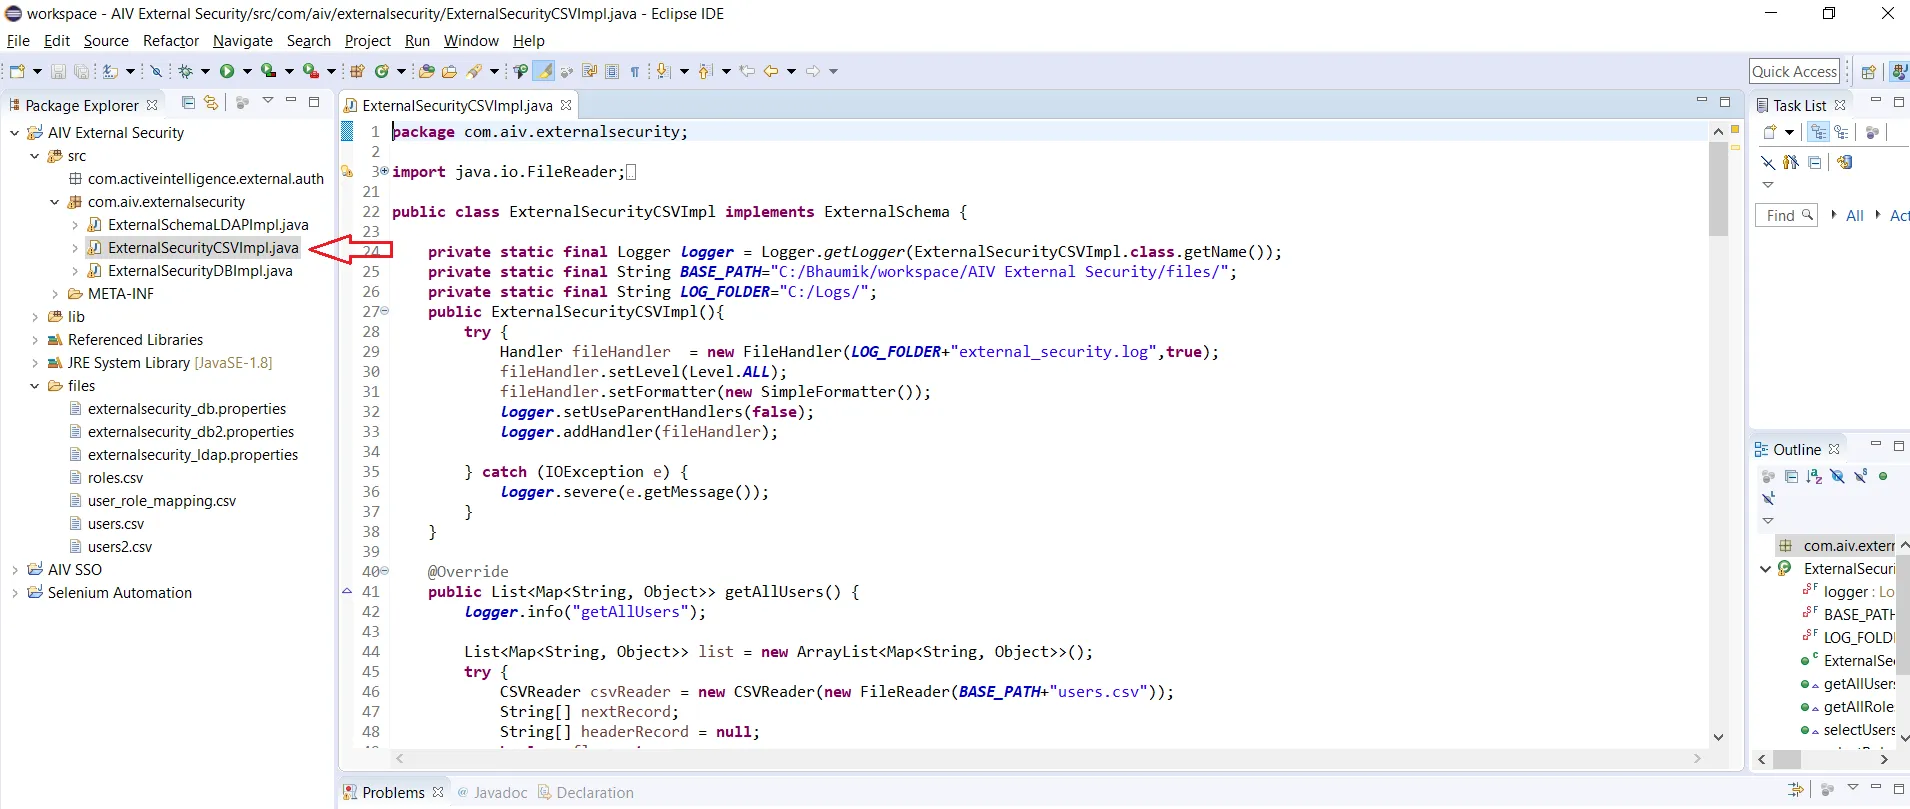
Open the “ExternalSecurityCSVImpl” Class :
Locate the “ExternalSecurityCSVImpl.java” class file within the “com.aiv.externalsecurity” package. Double-click on the file to open it in the code editor.
-
Modify the CSV File Paths :
Within the “ExternalSecurityCSVImpl” class, locate the variables or sections of code where the paths to the CSV files are specified. Update the file paths according to your desired file locations or directory structure. Ensure that the paths are correctly pointing to the CSV files in your system.
-
Save Changes :
After updating the file paths, save the changes made to the “ExternalSecurityCSVImpl” class file. By following these steps, you can successfully update the path of the CSV files in your project according to your requirements.
-
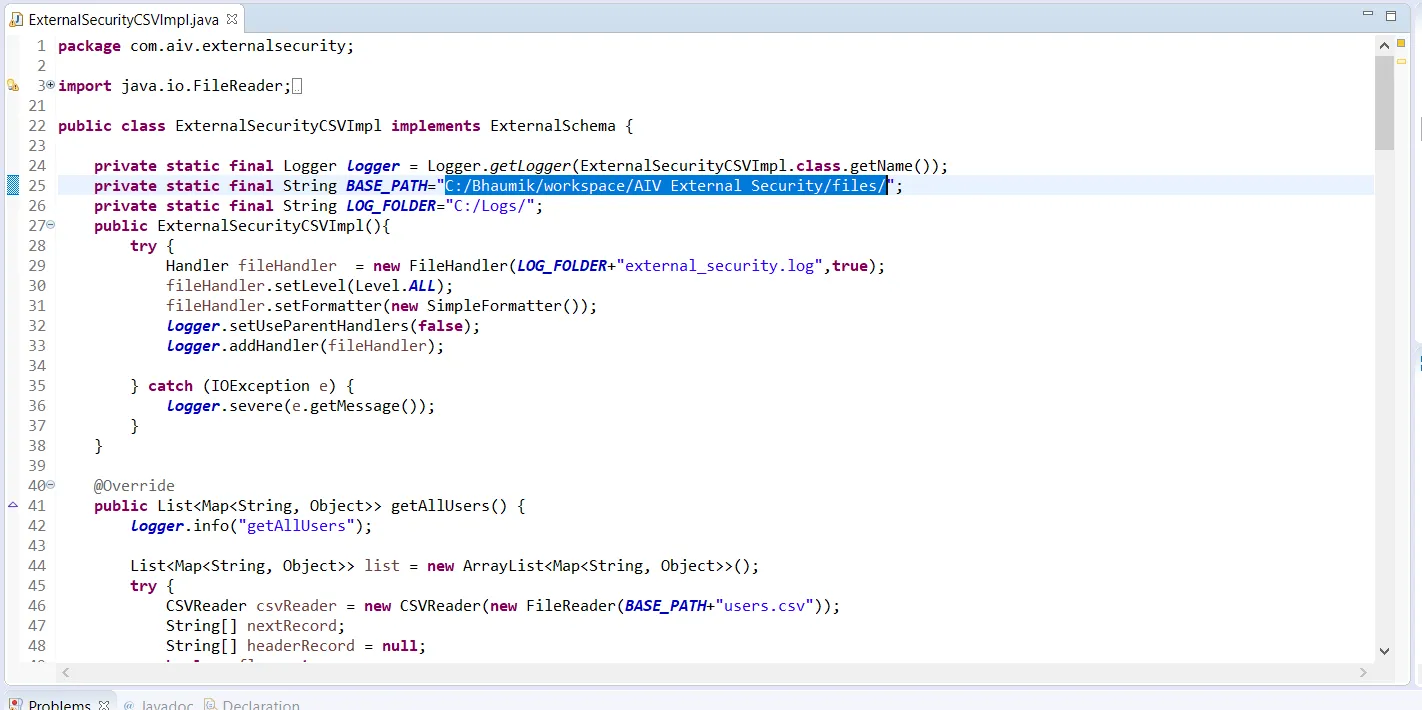
Provide path of csv files here at variable BASE_PATH as shows in below image,
-
To provide a valid path to store log files in the AIVSSOImpl class, follow these steps:
Locate the AIVSSOImpl class file within your AIV SSO project folder. Open the AIVSSOImpl class file. Search for the section where the path for storing log files is defined. Replace or modify the existing path with the valid path where you want to store the log files. For example, if you want to store log files in a directory named “logs” within your project folder, you might set the path like this:
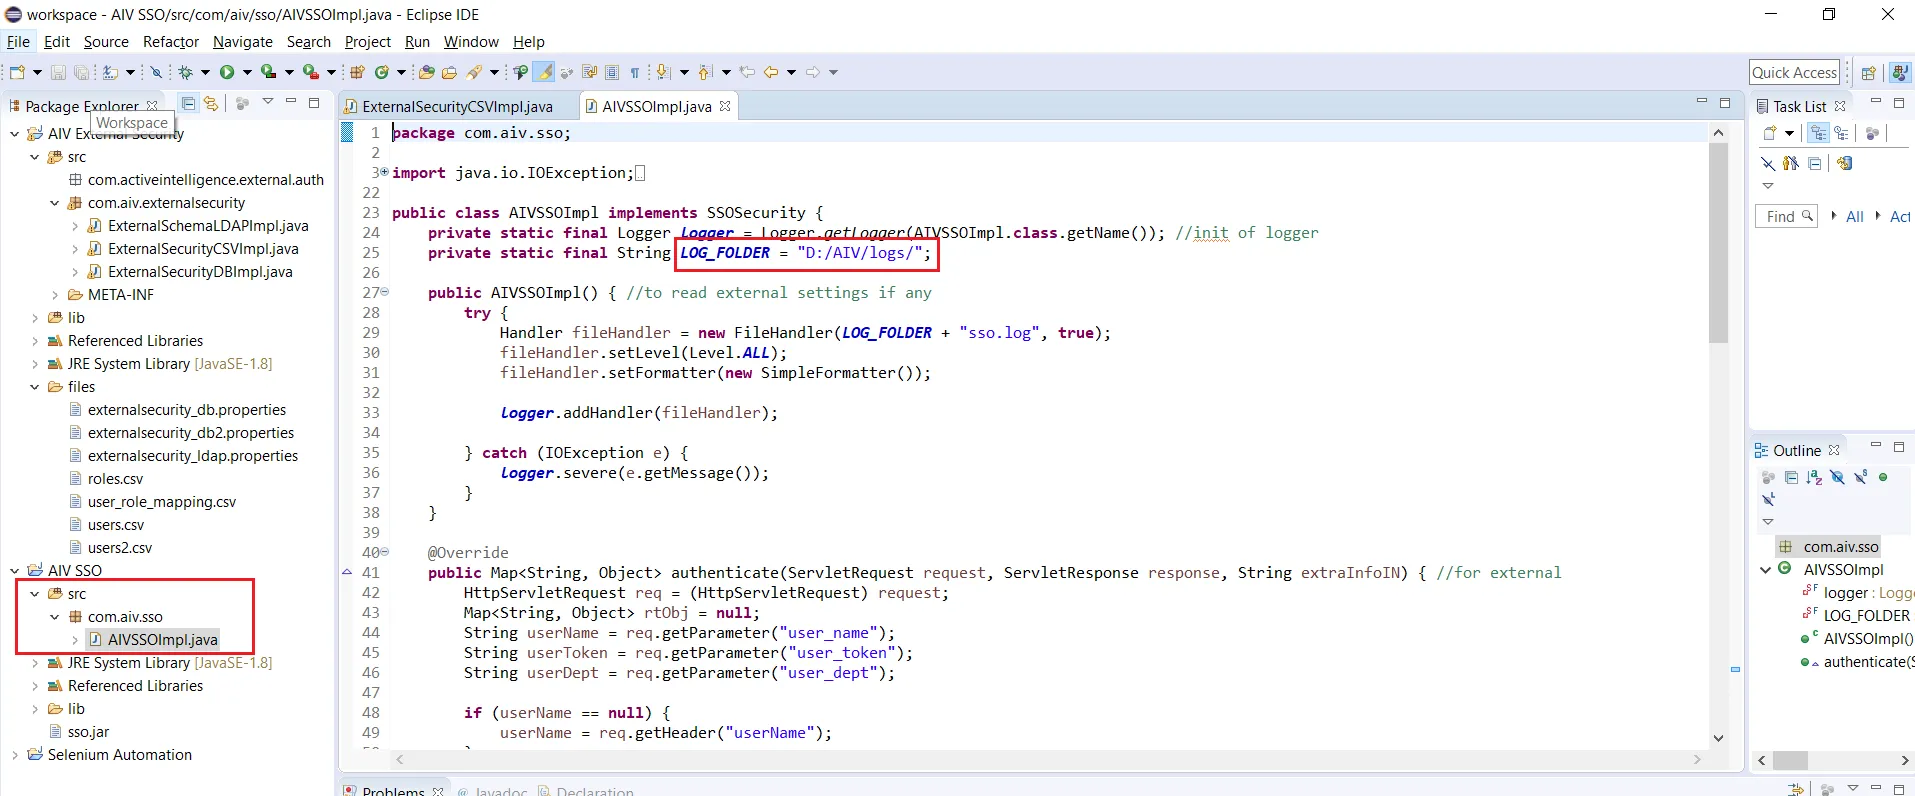 Adjust the path according to your project’s directory structure and requirements. After making the necessary changes, save the class file.
NOTE: Please find Code explanation of SSO class given on below link: https://aivhub-my.sharepoint.com/:w:/p/bhaumik/EVaMgMuirUJBj6XweLqYQUYBiJnDzMOsp3I3MsfqXBj4gg?e=9ntH5k
Also Please find code explanation of External security project on below link: https://aivhub-my.sharepoint.com/:w:/p/bhaumik/EXb3it4RMIZEiEDBIfpO9z8BerPZyncBKtsBjbatvQ1oXA?e=ejCiKL
-
To save the modified class file as a JAR file and export it to local storage, you’ll typically follow these steps using an integrated development environment (IDE) like Eclipse or IntelliJ IDEA :
Open your IDE and navigate to the project containing the modified class file. Make sure the class file is saved with the changes you’ve made. In your IDE, locate the option to export the project as a JAR file. This option is often found under the “File” menu. Select the appropriate export option, such as “Export as JAR” or “Export to JAR file”.
Follow the export wizard prompts to specify the file name, destination folder, and any other necessary settings.
Once you’ve configured the export settings, proceed with the export process. After the export is complete, navigate to the destination folder where the JAR file was saved.
Verify that the JAR file containing the modified class is saved in your local storage. The specific steps may vary slightly depending on your IDE and its version, but these general instructions should help you export the modified class file as a JAR file and save it to your local storage.
-
Do the same with external security, export AIV External security project as jar file and store it in local storage.
-
In order to use it, you need enable SSO and External security from AIV Configuration page.
-
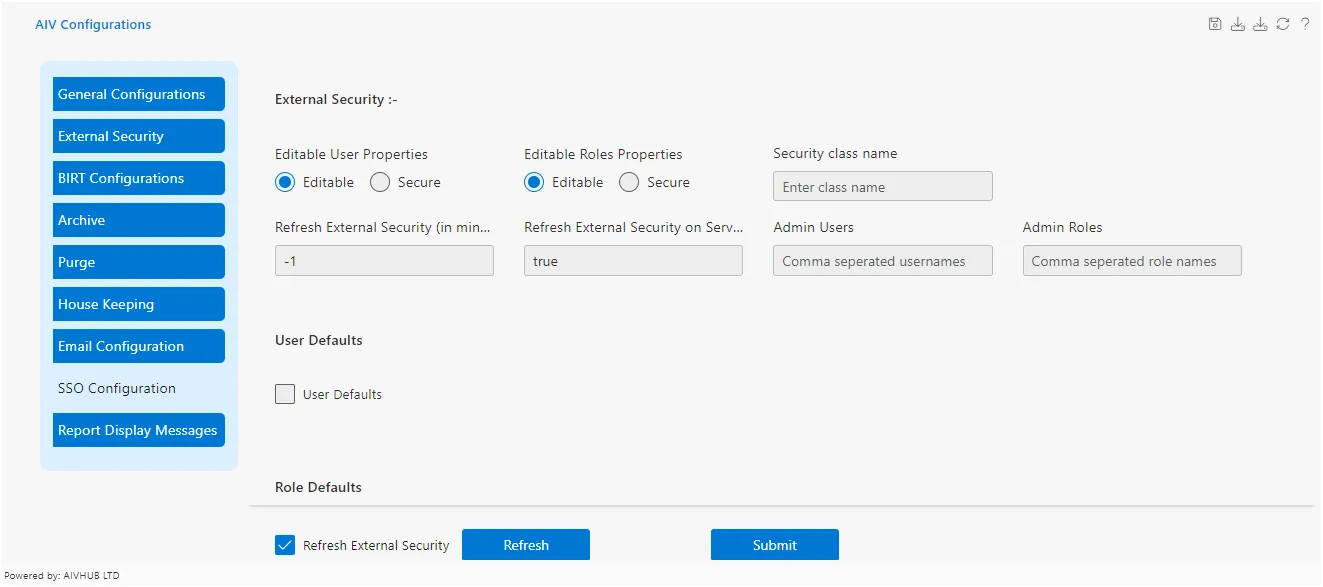
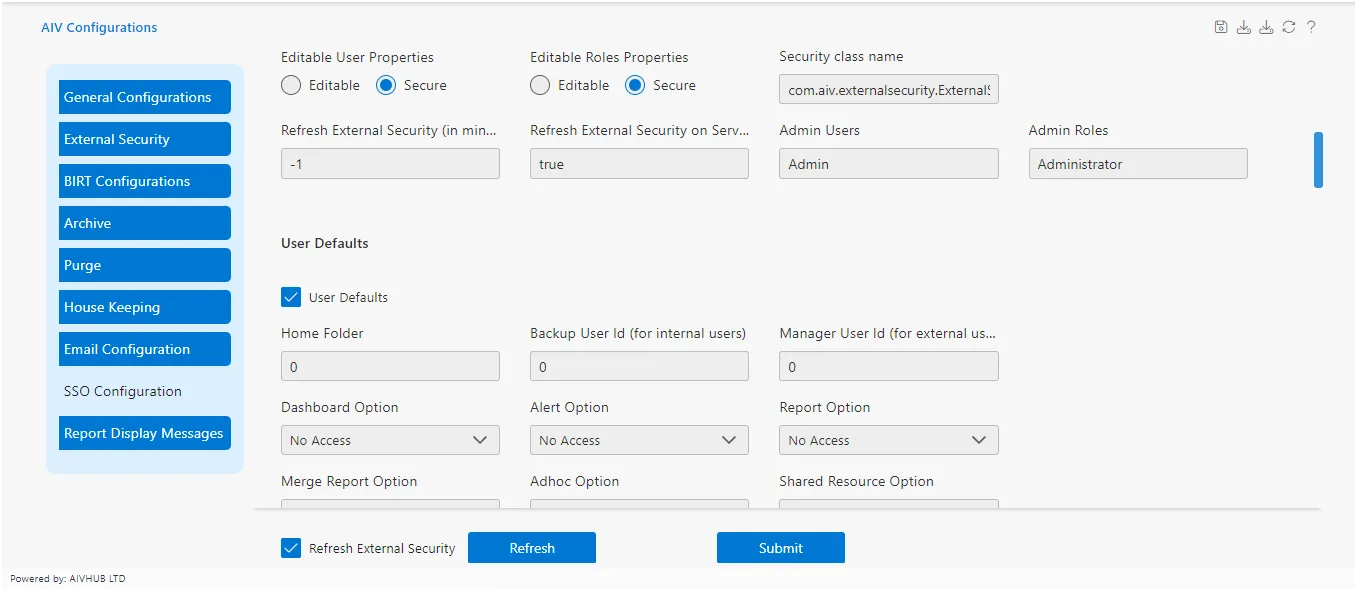
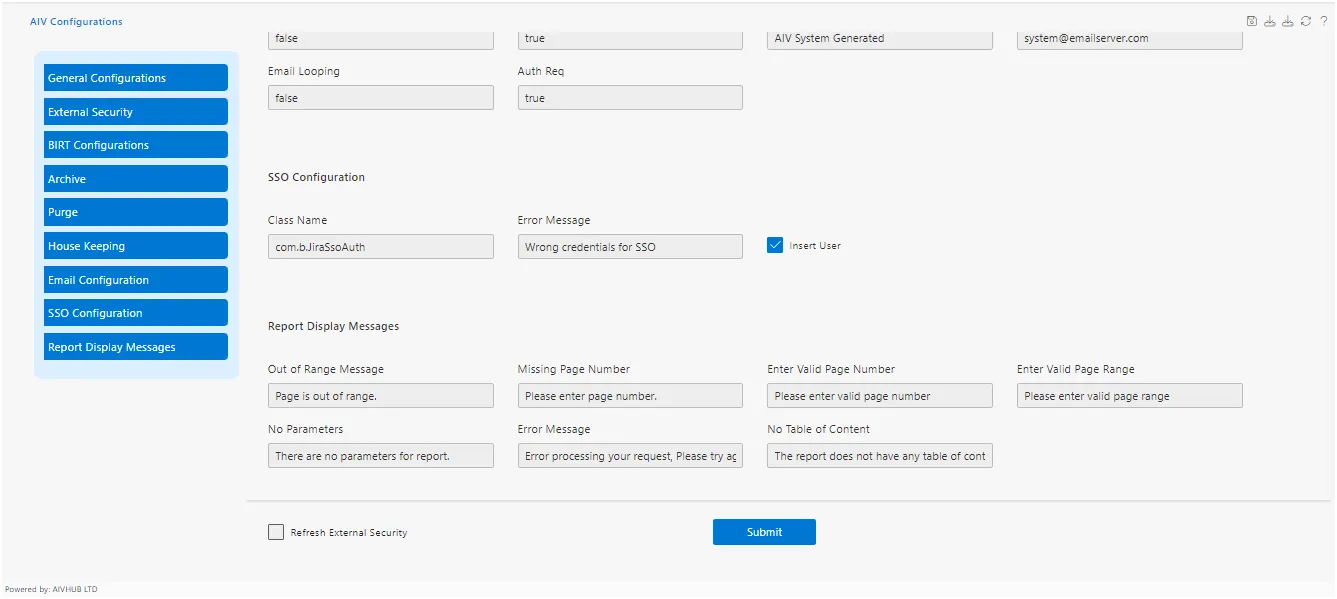
Click on Hamburger menu and Go to Administration à AIV Configuration section, Click the checkbox of External Security, as shown in figure.
-
Select the Secure Radio Button of Editable User Properties and Editable Roles Properties.
-
Enter in Security class name: com.aiv.externalsecurity.ExternalSecurityCSVImpl
-
Enter in Admin Users: Admin
-
Enter in Admin Roles: Administrator
-
Select the Check box of User Defaults and Roles Defaults, as shown in figure.
-
Paste External Security & SSO JAR File into location [C:\AIV\apache-tomcat\webapps\aiv\WEB-INF\lib].
-
To enable SSO Configuration settings in AIV, you would typically follow these steps:
(a) Locate the SSO Configuration checkbox in the AIV interface.
(b) Click on the checkbox to enable SSO Configuration settings.
(c) Once enabled, the SSO Configuration settings should become accessible within the AIV interface. If there are specific configuration options or settings you need to adjust after enabling SSO Configuration, they should be available for modification within the AIV interface.
If you have any further questions or need assistance with specific settings, feel free to ask!
-
Enter in class name: com.aiv.sso.AIVSSOImpl, as shown in figure. [It impairments SSO Jar File class path]
-
Restart the AIV, Open AIV\apache-tomcat-8.5.57\bin Double-click on Shutdown Windows Batch file.
-
When the shutdown Windows Batch file finish it’s Execution, Find start-up Windows Batch file, double-click on start-up file.
-
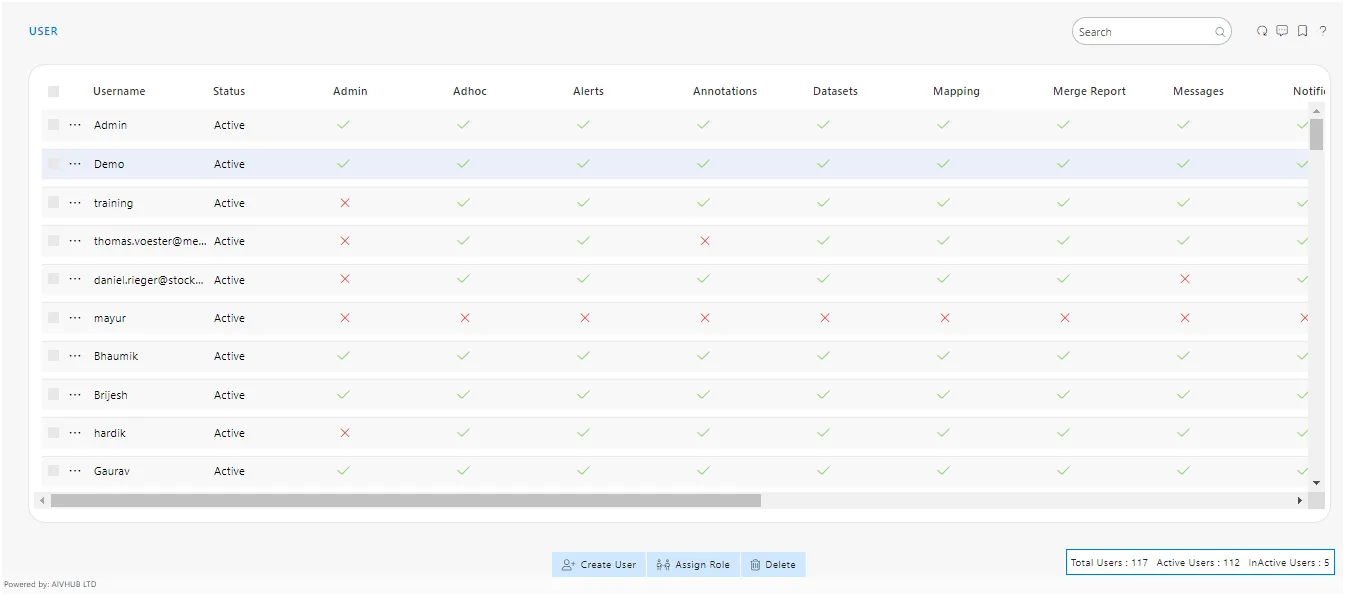
Once server started, Login into AIV, Go to Administration User section you will find some new users added into AIV. As shown in figure.