Schedule Reports by Time-Recurring
Schedule Reports by Time Recurring is used to run your report multiple times within an hour, day, week, month, or year. By using this document user will know how to Schedule Reports using Recurring.
Objective
Schedule Report using Recurring
Prerequisites
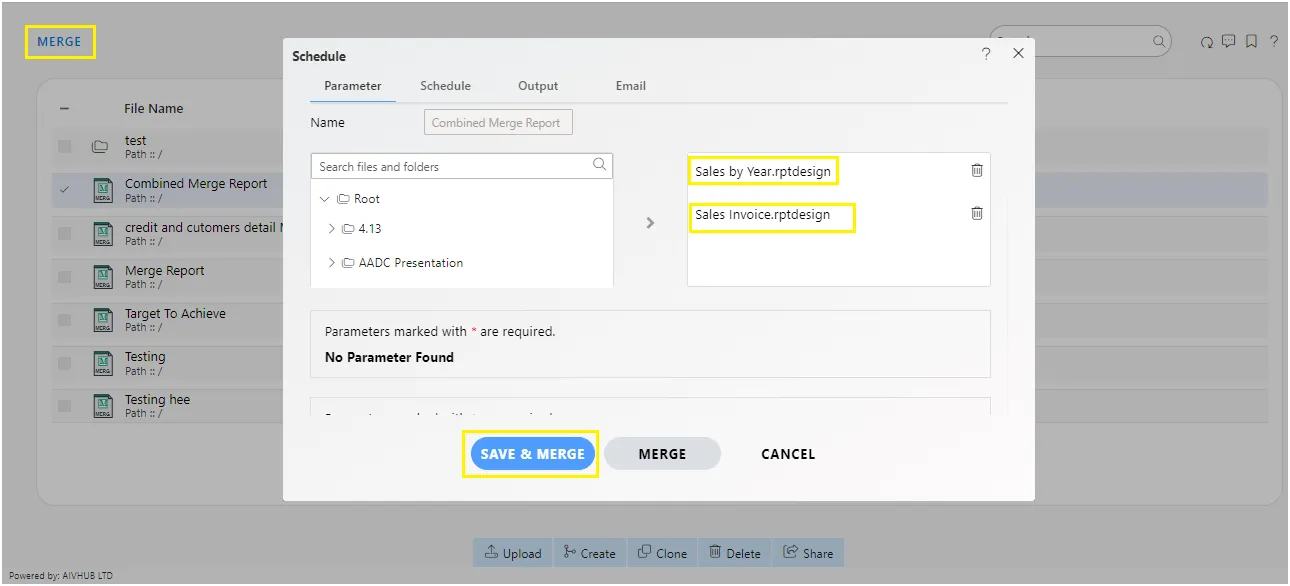
For this example Demo Merge Report used.
Download merge_report.zip file from link given merge_report.zip
Upload Combined Merge Report.merge report from downloaded zip file to Merge Report Section. Refer this link to see how to upload files in AIV. Use same procedure to upload both of the files.
Steps to Schedule Merge Report with Recurring
-
We will be using Combined Merge Report.merge in this example.
-
There are two ways in which user can schedule the report.
I. By right-clicking on desired report & select Edit from the context menu.
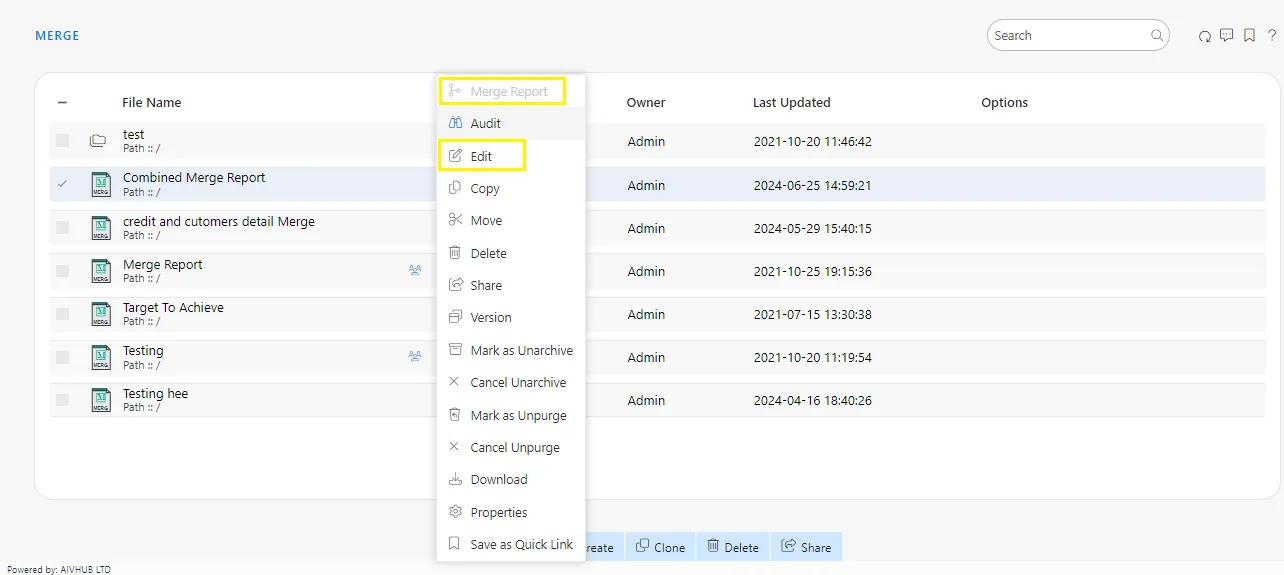
II. By double clicking on desired report.
-
By opening the Merge Report, from one of the methods mentioned above user will see the window as below:
-
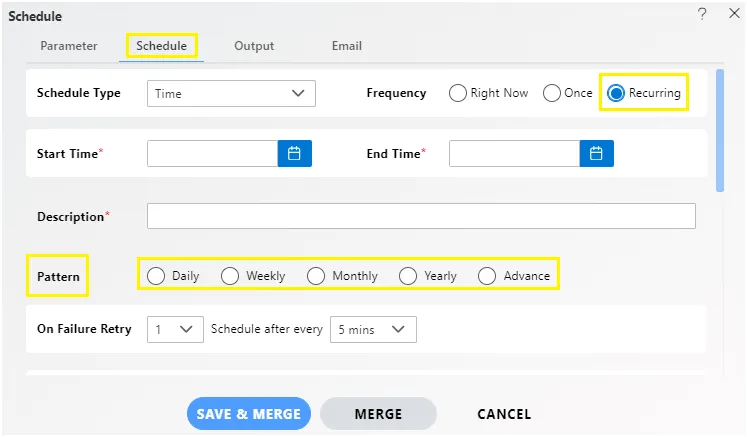
Go to the Schedule tab & By default, Schedule Type will be Time else select schedule type time from the drop-down menu & select Recurring in the frequency as shown:
-
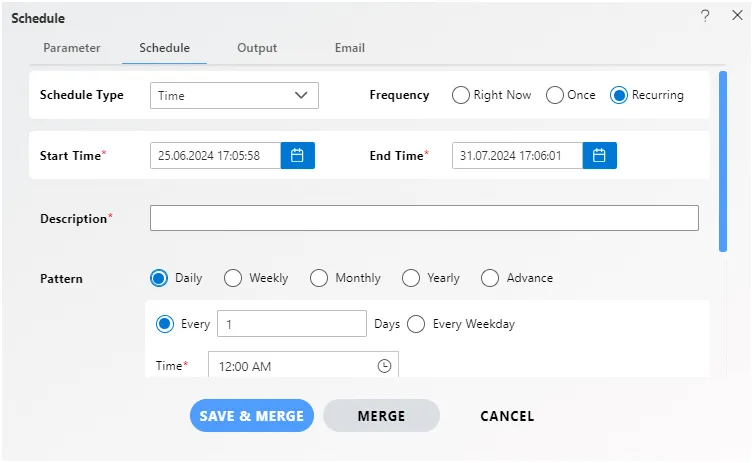
Mention the start time & end time by clicking on the
 icon in Start & End Time box.
 -
Provide an optional description for your reference in the Description text box.
-
Now, you have to mention recurrence patterns which can be daily, weekly, monthly, yearly or advanced.
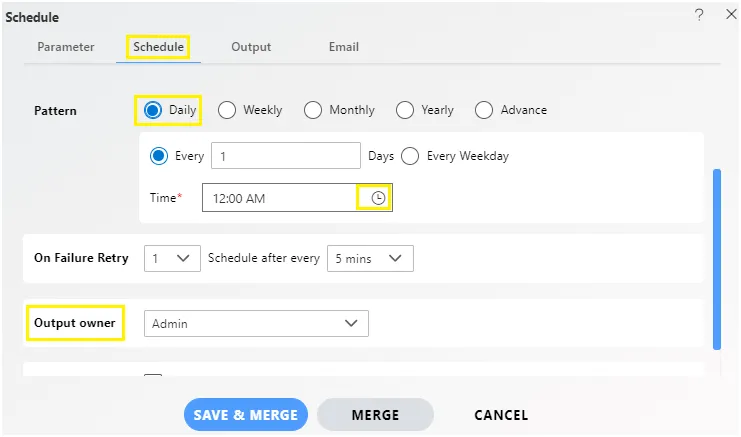
Recurring - Daily
-
In Daily, you can mention the report to recurring after a specified number of days or to schedule every weekday at a specified schedule time.
Recurring - Weekly
-
You can specify report to run weekly on specified day/days as follows:-

-
Here we have mentioned that the report will run on every Thursday and Saturday at the scheduled time.
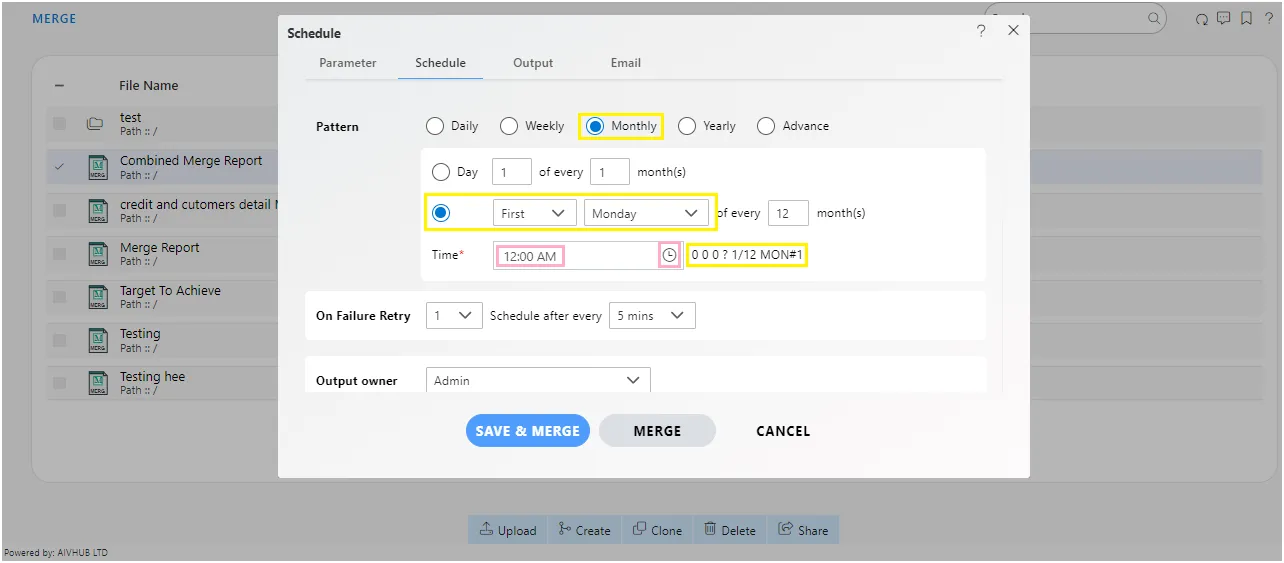
Recuring - Monthly
-
In the below figure, we have mentioned that the report will run every first day each month at a scheduled time till the end time, or you can mention like First Monday of every month as mentioned in image below.
Recurring - Yearly
-
For yearly recurrence, you can specify that the report will run every year on January 1 at the scheduled time. Alternatively, you can choose the first Monday of every February at the scheduled time until the end time, as shown below:

-
The first function contains the month dropdown and date textbox. Here, the user can select the required month and date for scheduling. Before proceeding further, the user should select the time of scheduling.
-
The second function requires the user to select the weekday and month for recurring the report. Here, the week allows the user to select the first, second, third, or fourth occurrence of the chosen weekday.
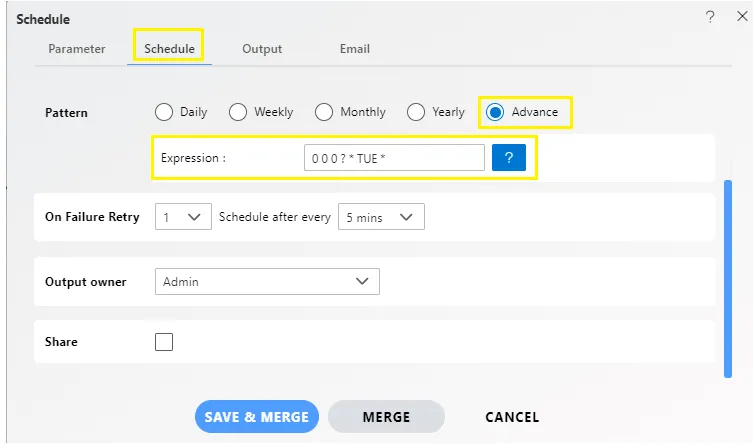
Recurring - Advanced
-
You can also specify a recurrence pattern to schedule reports as follows:
-
To understand in detail expressions of this type, click on, which will guide you in detail about how to use these expressions.
-
You can also specify how many times the report should be re-executed in case of failure and the interval from the drop-down menu shown in the figure. For instance, in our case, the report will be executed twice in case of failure within 5 minutes.
-
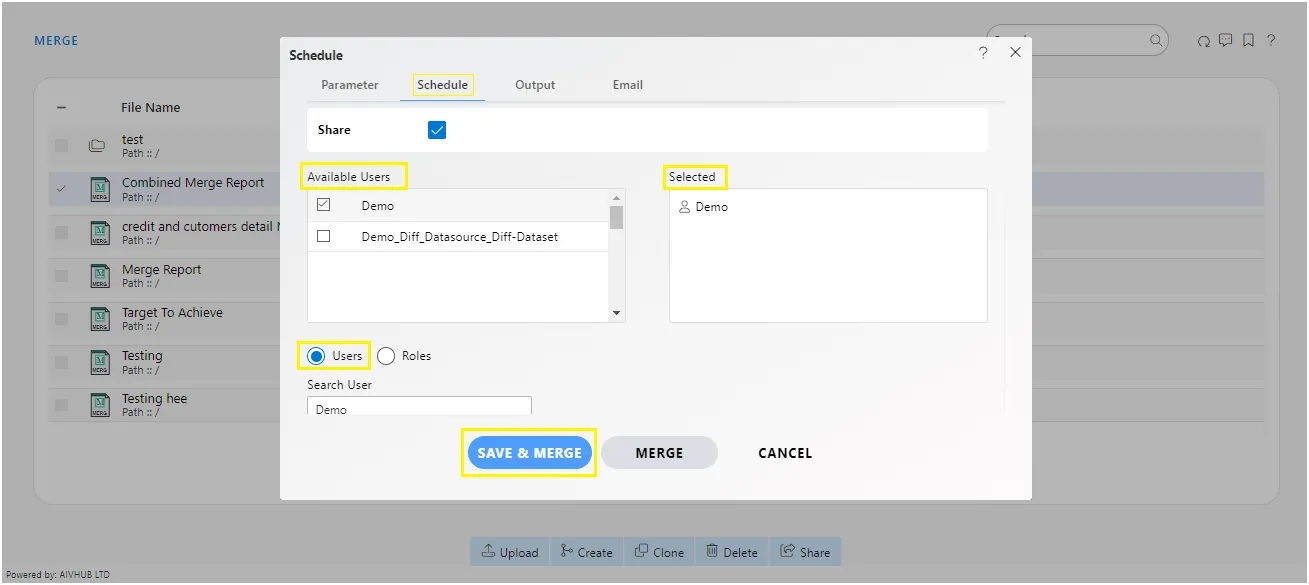
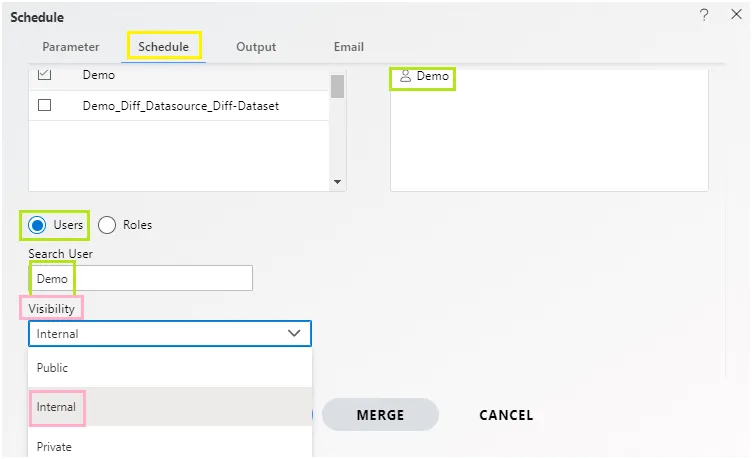
Click on Share in case you want to share the report with other users/user roles.
-
Here the Visibility is kept Internal for this example.
-
If you want your report to be approved before sending it to other users, then check Approval Require.
-
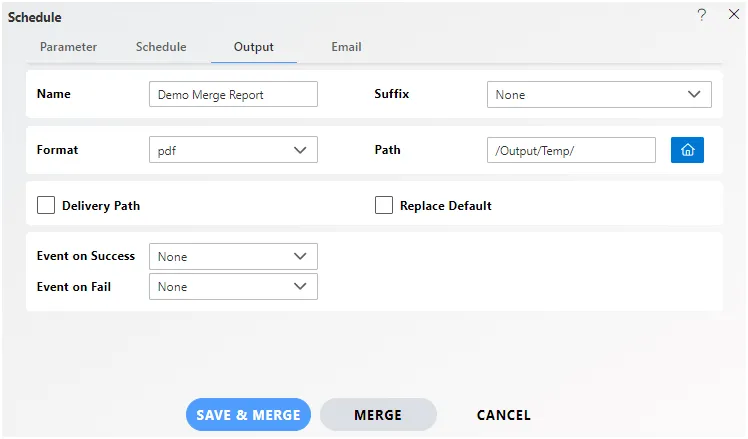
To specify the output, go to the output tab as follows:-
-
Enter the name by which you want to schedule the report in the Name text area. Also provide a suffix if required, it is optional.
-
Select the format in which you want to generate the output from the drop-down menu. We have selected pdf for our example.
-
You can also specify an event on the success/failure of the report which will trigger an event and execute all the waiting for event reports. Click here to know more in detail about Event Schedule.
-
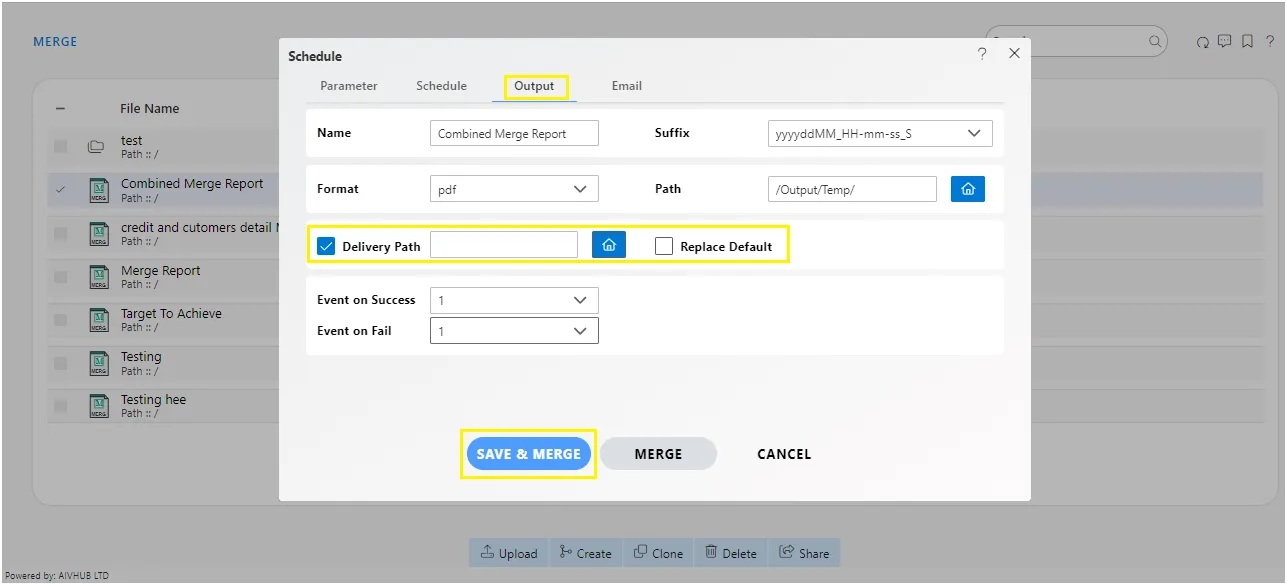
You can also specify the delivery path on your computer where the reports will be downloaded/ send email to other users as follows:
-
Select the users and the roles from the drop-down menu.
-
Enter your email address/addresses to which you want to send the report via email.
-
Select a template from the drop-down, we have selected the Default template for our example.
-
Click on
 or
or
 icon to schedule the report.
 -
In case of any further help, the user can click on the
 icon to access the AIVHUB help documents.
 -
If the user is not satisfied and wants to cancel the schedule request, he can do this by clicking on the cancel button next to the merge icon or by clicking on
 icon next to the
icon.
icon next to the
icon. -
The merge report is scheduled and the user can see the schedule request in the Request section of the AIV application. Click here to know more in detail about request section.
-
Request section displays all the reports that have been completed, running, waiting for events or scheduled. In case of report failure, the error is also displayed on this page.