Overview
Introduction
The document widget provides the user to create the document and also add the word documents on the dashboard, the document can import from outside the dashboard. It provides all the modern document functionalities to the user.
Steps to add the document widget
-
Login in the AIV 6 with your credentials.
-
Click on the hamburger icon and click on the dashboard.
-
Add the dashboard using the Plus icon, From create dialog box, add name of the dashboard, then click on the create button.
-
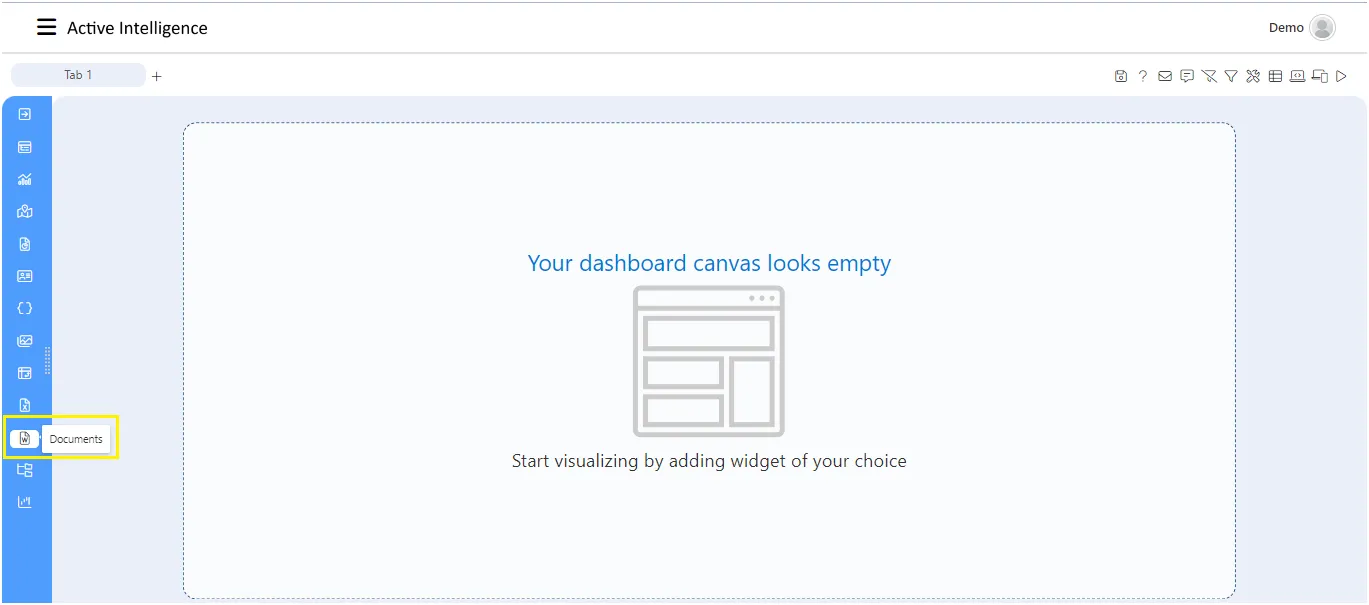
After getting into the dashboard, click on the document icon from the left-vertical menubar, as shown in the figure below:

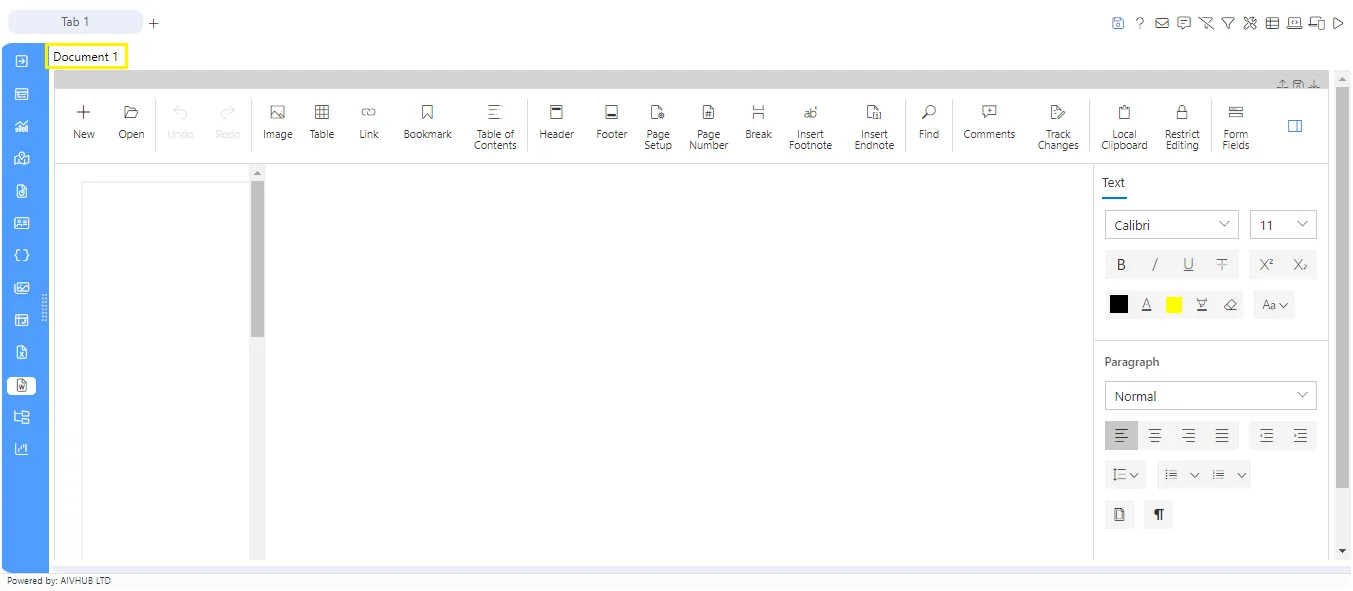
- The document widget look like the figure below:

- As per the above figure, the document widget have the two type of the control menu,* 1. Top menubar and 2. Side menubar.*
- The Top menubar displays the essential features of the document widget, which are easy to use.

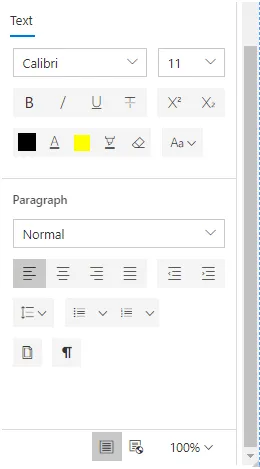
- The Side menubar displays the sub-feature of the essential features.

Overview of the essential features of the document as below:
1. NEW:
The new button provides the new page, as we click on the new button the new page appears in the layout of the document widget.
2. OPEN:
To open feature let us to open any of the document from the outside of the application, as we click on the open button it let us open the outside documents in the layout.
3. UNDO/REDO:
The Undo and Redo features let you remove or repeat single or multiple typing actions, but all actions must be undone or redone in the order you did or undid them.
4. IMAGE:
The Image feature let us to open the image files in the document widget. we can open any size or any shape of the image we required.
5. TABLE:
The Table feature let us to create the table in the document, it provide the feature to add the required nunmber of rows and column we required.
6. LINK:
Document widget supports hyperlink field. You can link a part of the document content to Internet or file location, mail address, or any text within the document.
7. BOOKMARK:
Bookmark is a powerful tool that helps you to mark a place in the document to find again easily. You can enter many bookmarks in the document and give each one a unique name to identify easily.
- Document widget provides built-in dialog to add, delete, and navigate bookmarks within the document. To add a bookmark, select a portion of text in the document. After that, jump to the location or add links to it within the document using built-in hyperlink dialog. You can also delete bookmarks from a document.
8. TABLE OF CONTENTS:
The table of contents in a document is same as the list of chapters at the beginning of a book. It lists each heading in the document and the page number, where that heading starts with various options to customize the appearance.
The table of contents provides an overview into your document so your readers can go right to a section of interest. you can start by putting headings(Heading 1, Heading 2) at each section you want in table. document widget can then create standard tables of contents with the heading text and page position, which you can use as is, or customize extensively. You can also create a table of contents manually, entering the titles and page numbers yourself.
9. HEADER & FOOTER:
Document widget supports headers and footers in its document. Each section in the document can have the following types of headers and footers:
- First page: Used only on the first page of the section.
- Even pages: Used on all even numbered pages in the section.
- Default: Used on all pages of the section, where first or even pages are not applicable or not specified.
10. PAGE SETUP:
The page setup provides the feature to add the page margins, page layout and types of paper like letter, Tableid, Legal, Statement, Executive, A3, A4, A5, B4, B5 etc. The page setup contains three sections like:
-
Margins: On the margin, the Left and right page margin defines the gap between the document content from left and right side of the page respectively. Top and bottom page margins defines the gap between the document content from header and footer of the page respectively. Portrait and Landscape options provide the page layout
-
Paper: The Height gives the height to the page of the document page and Width gives the width to the page of the document page, The page type transform the page from normal to the letter, Tableid, Legal, Statement, Executive, A3, A4, A5, B4, B5 etc type of the page.
-
Layout:
11. PAGE NUMBER:
The page number provides the page number on the required page in the document widget, user can get the page number wherever required.
12. BREAK:
The break provide the break in the page of the document widget, you can choose the place you want to place the break in the page. it has two types 1. Page Break 2. Section Break.
13. INSERT FOOTNOTE & ENDNOTE:
The Footnotes and endnotes are both ways of adding extra bits of information to your writing outside of the main text. You can use footnotes and endnotes to add side comments to your work or to place other publications like books, articles, or websites.
14. FIND:
This provides the options to search for a portion of text in the document. After search operation is completed, the search results will be displayed in a list and options to navigate between them. The current occurrence of matched text or all occurrences with another text can be replaced by switching to Replace tab. This pane is opened using the keyboard shortcut CTRL+F.
15. COMMENTS:
Document Editor allows you to add comments to documents.
16. TRACK CHANGES:
Keep the track of the changes made in the document.
17. LOCAL CLIPBOARD:
Document widget takes advantage of system clipboard and allows you to copy or move a portion of the document into it in HTML format, so that it can be pasted in any application that supports clipboard.
Copy: Copy a portion of document to system clipboard using built-in context menu of document editor.
Cut: Cut a portion of document to system clipboard using built-in context menu of document editor.
Paste: Due to limitations, you can paste contents from system clipboard as plain text in document editor only using the CTRL + V keyboard shortcut.
18. RESTRICT EDITING:
Restrict only makes the document read only for the users. the restrict edit provide the feature of the edit, and provide the right to edit for exceptional users. you can add the end number of users to it.
19. FORM FIELDS:
Form field provide the feature to add the textbox, checkbox and dropdown in the document widget, user can add these at anywhere at required place in the document.
20. UPDATE FIELDS:
Document Editor provides support for updating bookmark cross reference field
The text formatting features:
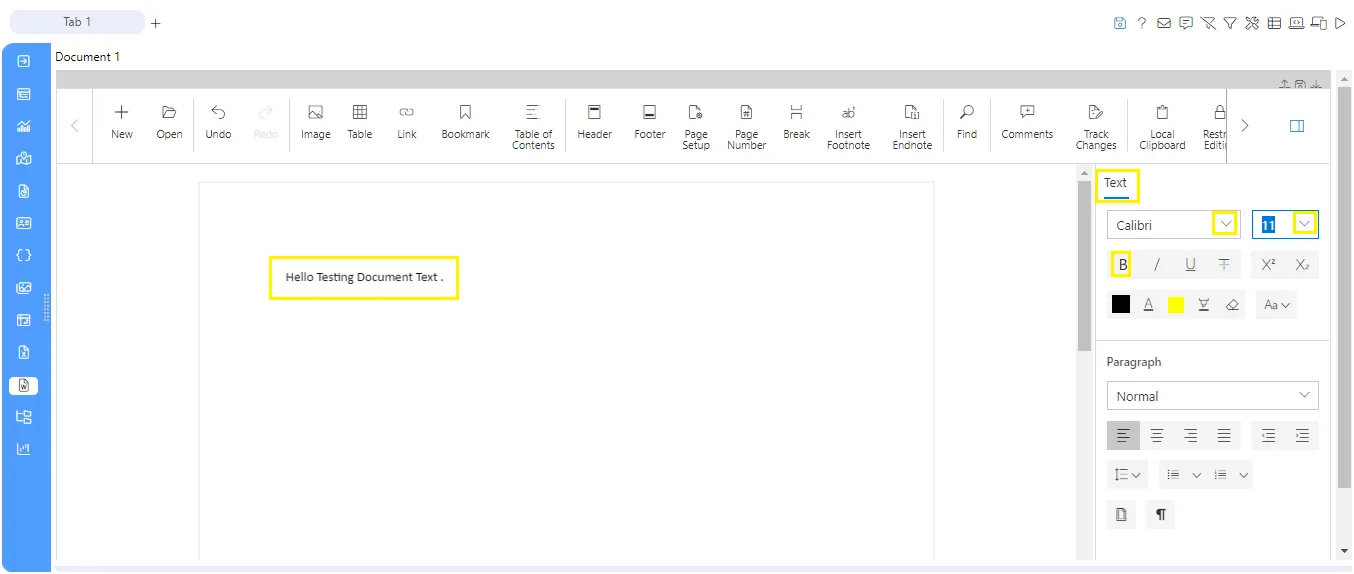
Document widget provides several formatting options for text like bold, italic, font color, highlight color, and more. This section describes how to modify the formatting for selected text in detail..png)

Font family
The font family dropdown enables the user to add the variety of the font styles in the document widget, To apply the font style user can click on the dropdown and select the font-style.
Bold
To edit select the text and click on the bold button to see the bold text effect. use the Ctrl+B shortcut to bold the text.
Italic
To see the italic effect select the text and click on the italic button then you will able to see the italic effect in the text. use the Ctrl+I shortcut to italic on the text.
Underline
To see the underline on the text, select the text and click on the underline button to get the effect. use the Ctrl+U shortcut to underline in the text.
Strikethrough property
Strikethrough is primarily used to mark text that is mistaken or to be removed. to add the strikethrough effect on the text just select the text then click on the strikethrough icon.
Superscript property
Superscript is a formatting property where text or characters are raised above the baseline and reduced in size to signify their position as an exponent, index, or footnote. It’s often used for mathematical expressions (e.g., x²), chemical formulas (e.g., H₂O), or citations (e.g., ¹).
Subscript property
Subscript is a formatting property where text or characters are lowered below the baseline and reduced in size to denote their position as a subscript, typically used in chemical formulas, mathematical expressions, or footnotes. Examples include chemical formulas like H₂O or mathematical expressions like CO₂.