Report Management
Overview
The Report Management process enables users to create, configure, and execute data mappings to generate actionable reports. By following a step-by-step workflow, users can define datasets, schedule report generation, and customize output formats. The intuitive interface ensures seamless navigation, from adding widgets to linking parameters and executing mappings for comprehensive reporting.
steps to create and execute mapping
-
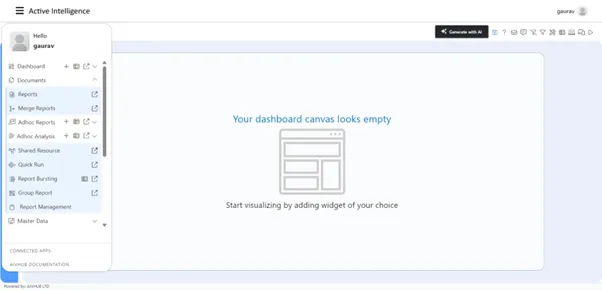
Navigate to Report Management: Navigate to the Report Management within the Document section, as shown in the figure below.
-
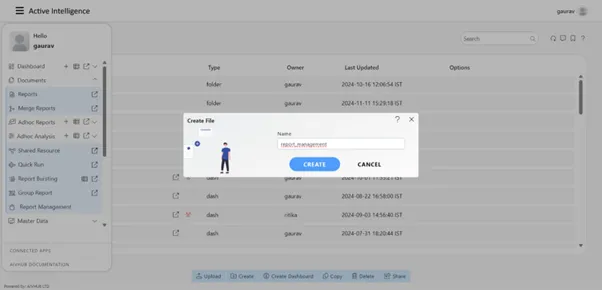
Create a New Report File: In the Create File dialog box, enter the desired name: report_management and click on the Create button.
-
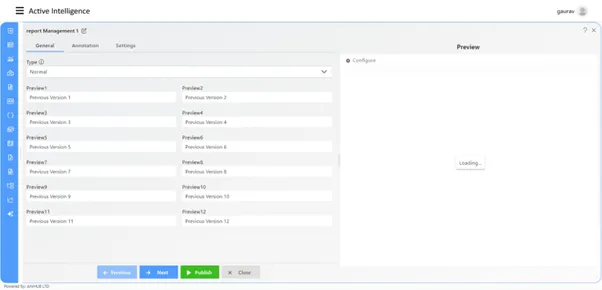
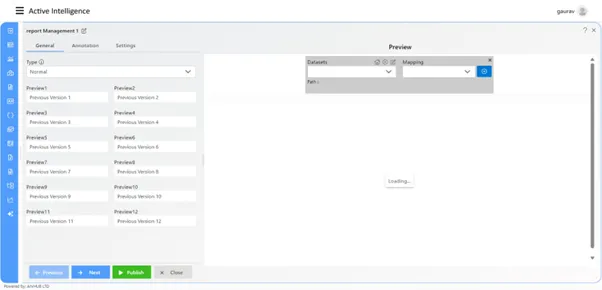
Then You will be directed to the dashboard, where the Report Management widget will be displayed, as shown in the figure below.
-
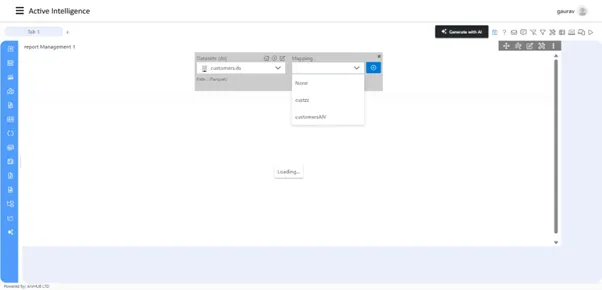
Configure the Report Management Widget: Click on the Configure icon in the preview window of the Report Management widget. In the preview area, you will see the Dataset and Mapping dropdown menus.
-
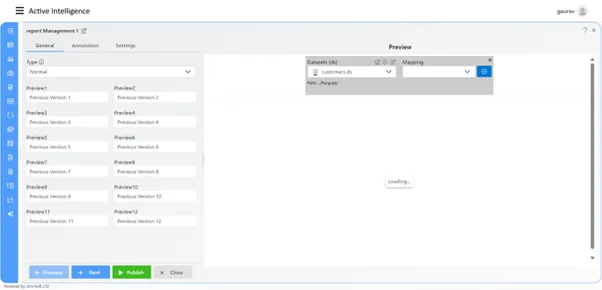
Select Dataset and Create Mapping: Select the dataset named customers.ds. To create a mapping, click on the Plus icon next to the Mapping dropdown.
-
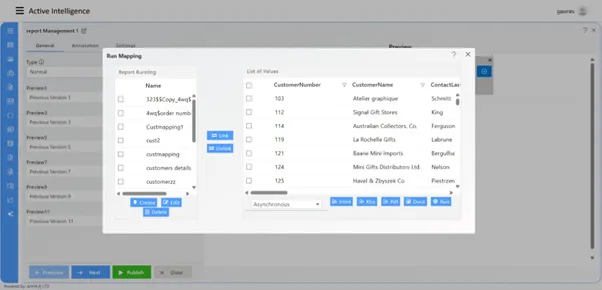
Create Mapping: The Run Mapping dialog box will appear. Click on the Create button to proceed with creating the mapping.
-
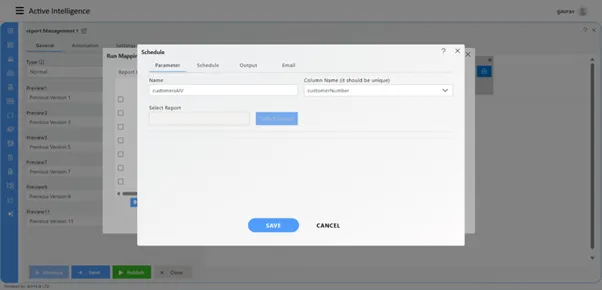
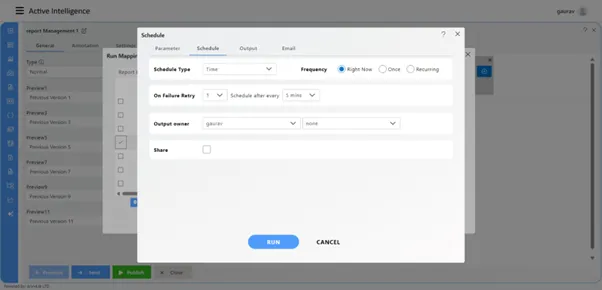
In the Schedule dialog box, go to the Parameter tab and:
-
Add the name: customerAIV.
-
Select the unique column name: customerNumber.
-
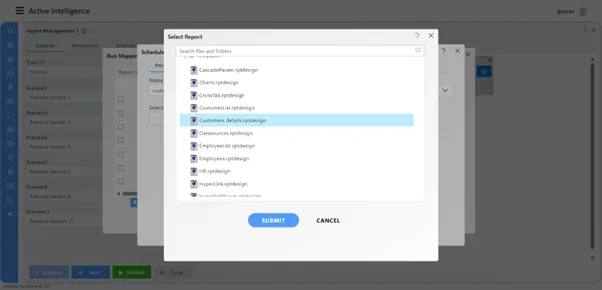
Choose the report file: Customer details.rptdesign.
-
Then, click on the Submit button.
-
-
Set the schedule frequency to Right Now. Navigate to the Output tab, and change the output format from rptdocument to PDF.

-
Click on the Save button to save the mapping.
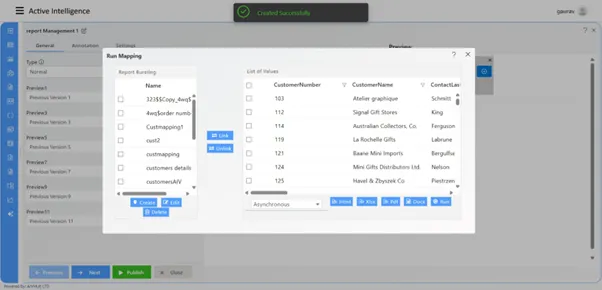
-
From the list of mappings, select the desired mapping. Then, in the List of Values, select the customer numbers, such as 103, 112, or 114.
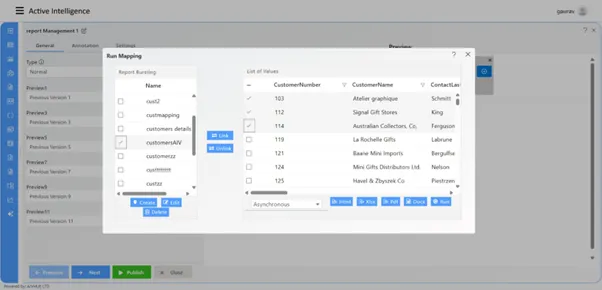
-
Click on the Link button to associate the selected customer numbers with the customerAIV mapping.
-
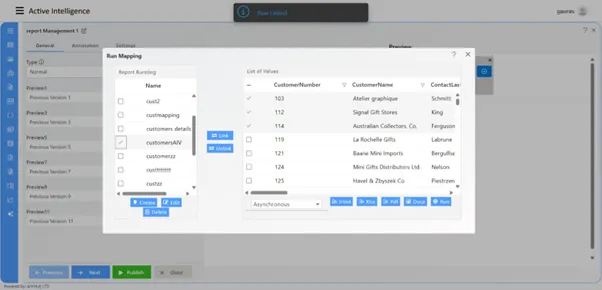
After linking, click on the Run button to execute the mapping.
-
During execution, the Schedule dialog box will appear. In the dialog box:
- From Parameter tab: Select the column name as customerNumber.
- Keep the other properties as default.
- Then, click on the Run button.
-
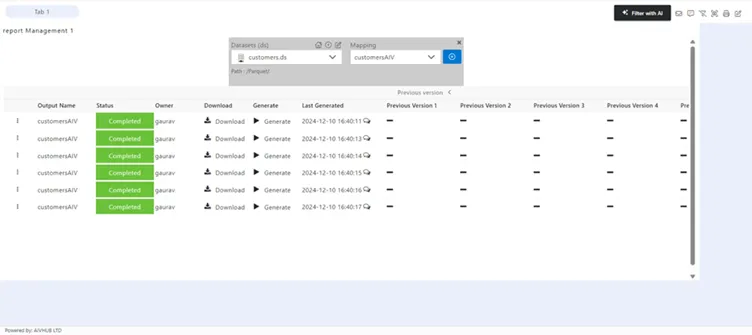
Close the Run Mapping dialog box. Select dataset customers.ds if it appears empty, select the linked mapping, and you will see the list of scheduled reports.
-
From the list of the reports, click on the Generate button to execute the required report, as user click on the generate butto the report preview version will appear in the list.
-
Every time user clicks on the generate button the preview version will be updated in the list.
-
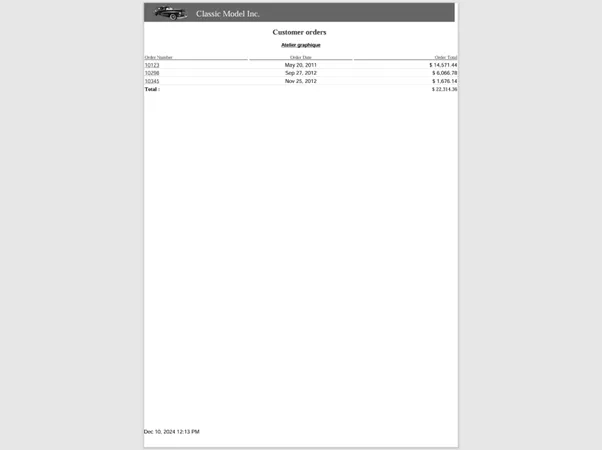
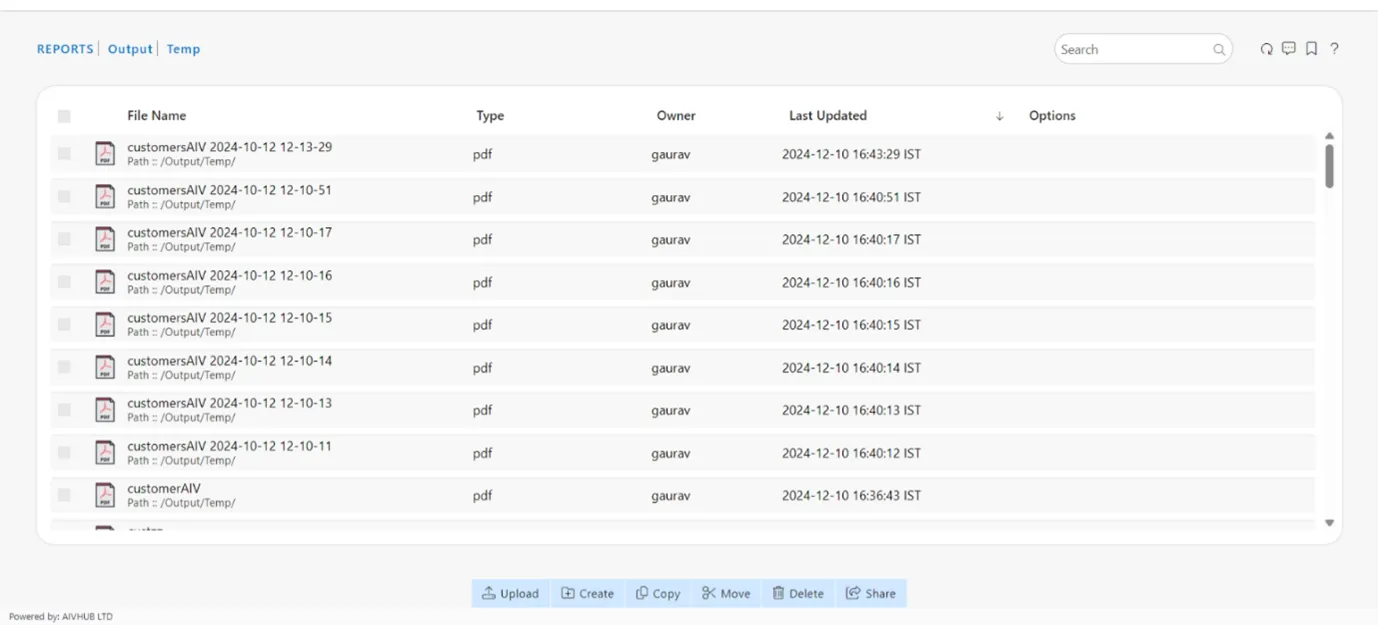
User can find the scheduled report in the report sections > output folder, where the report output saved in the format of the pdf selected format from the mapping
-
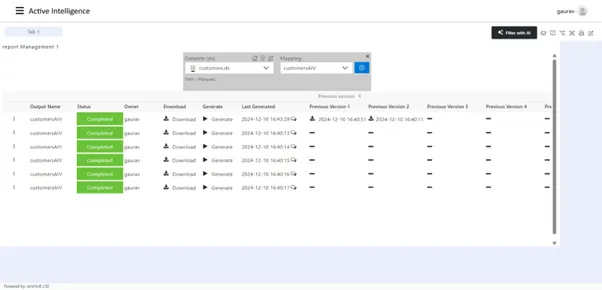
Double click on any of the scheduled report and the report output will be available in the next tab of the browser.