Schedule Reports by Event
The Schedule Reports by Event feature allows users to automatically schedule a report to run whenever a specific event is triggered. This functionality supports event-based scheduling, enabling reports to be executed seamlessly as part of workflow automation.
This document explains how to schedule a report using event-based scheduling.
Benefits:
- Enables automatic execution of reports based on specific events.
- Supports workflow automation, reducing manual intervention.
- Ensures timely and accurate report generation.
- Improves efficiency and consistency in reporting processes.
Schedule Reports by Event: This video explains how to schedule report by event within the application.
Objective
To schedule a report using event-based scheduling.
Prerequisites
-
For this example, the reports used are Order details.rptdesign and Orders Payment.rptdesign.
-
Download the required sample files from the link create_event.zip
-
Upload Order details.rptdesign and Orders Payment.rptdesign to the Report section under the Root folder.
-
Refer to this link for detailed steps on uploading files in the application.
-
Use the same procedure to upload both reports.
Steps for Event Scheduling
-
In this example, we will use Orders Payment.rptdesign.
-
There are two ways to open a report for scheduling:
I. By clicking on the desired output format icon (for example: rptdocument, XLSX, DOCX, PDF, etc.), as shown below.

These icons allow you to directly schedule the report in the selected format.
II. Double-click the desired report name to open it for scheduling.
-
After opening the Orders Payment report using either method, the Parameters tab will open by default.
-
Parameters Tab
- Use the Parameter Tab to provide the required input values for generating the report.
- Parameters marked with an asterisk (*) are mandatory.
- After entering all parameters, click the Schedule tab.
-
Schedule Tab
I. In Schedule Type, select Event from the dropdown list to schedule the report based on an event trigger.
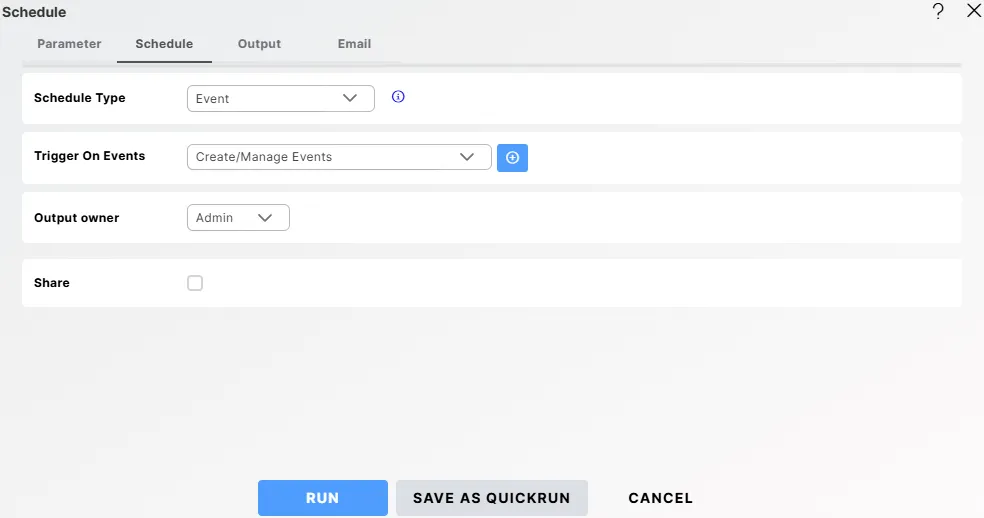
Click on
 to view additional information about events.
Call Event Externally.

To call an event externally, a REST request must be sent from outside.

Request Url: https://aiv.test.oneaiv.com:8086/rest/event/trigger
The URL must include the following headers:
owner: The owner of the event.
For example: owner = 'Admin'

number: The event number.
For example: number = 123

deptCode: Your department code.
For example: deptCode = 'Default'.

The request type must be a GET request.
II. If the event is not yet created, click the
 icon next to Trigger On Events to open the dialog box, as shown below.
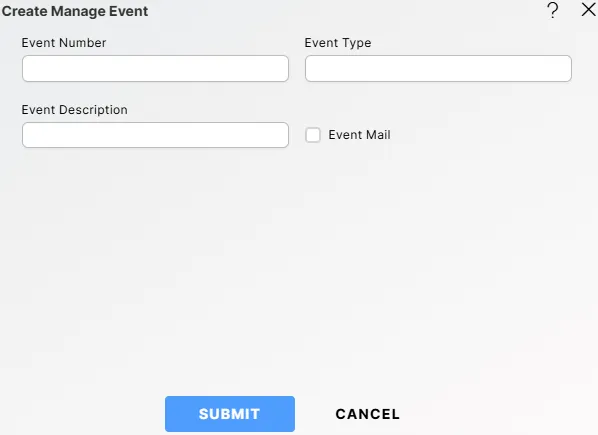
III. Fill in the Event Details
Field Description Event Number A unique number to identify the event. Event Type Enter the type of event in the textbox (e.g., Report, Email). Event Description A short description of when or why the event is triggered. 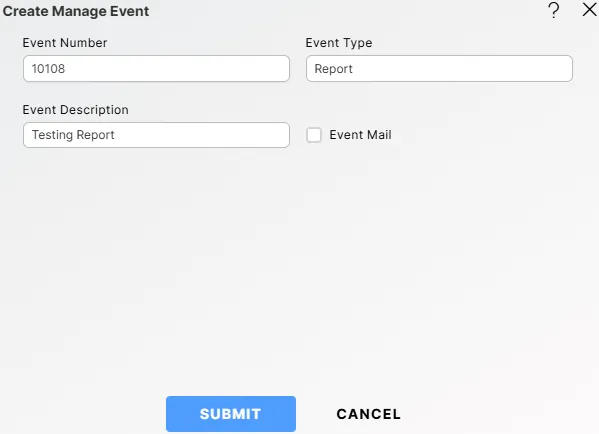
IV. Configure Email Notification (Optional): Enable the Event Mail checkbox if you want to send an email notification when the event is triggered. Once enabled, the following fields will appear:
Field Description Users / Roles Select users or roles who should receive the report. Enter Email* Enter one or more email addresses separated by commas. This is a mandatory field. Email Template Choose an email template.
Options:
• None – No template
• Default – System default layout
• Success – Template for successful executionsSubject Email subject line. Body Custom email message. V. Click
 button to create the event. A confirmation message will appear.
VI. Now, from the Trigger On Events dropdown, select the event you just created.
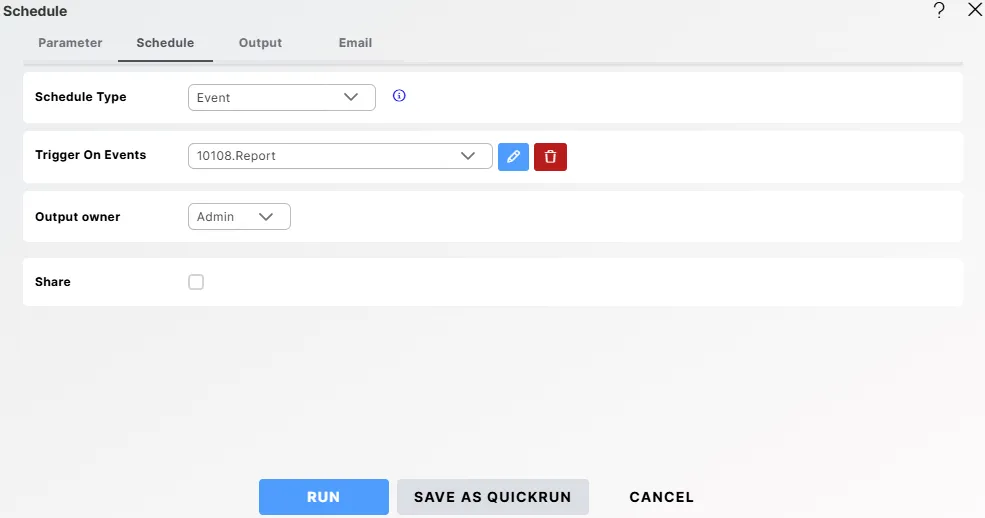
VII. In Output Owner, select the user who will own the generated report output, which will be created at the specified output path after execution.
VIII. In Share, enable this checkbox to share the scheduled report with other users or roles. This allows you to choose Users/Roles, search for specific users or roles, set visibility levels (Private, Internal, Public), view all available users or roles, and select who should have access to the scheduled report.
- Users / Roles – Choose whether to share the report with specific Users or Roles.
- Search User – Search for specific users or roles
- Visibility – Set the visibility level for the scheduled report:
- Private – The report remains hidden from recipients, even if the containing folder is shared.
- Internal – The report is visible only to internal users of the organisation.
- Public – The report is visible to all users without restrictions.
- Available Users or Roles – Displays all users or roles in the system. Select one or more users or roles by checking the boxes beside their names.
- Selected – Displays the list of users or roles who will have access to this scheduled report.
-
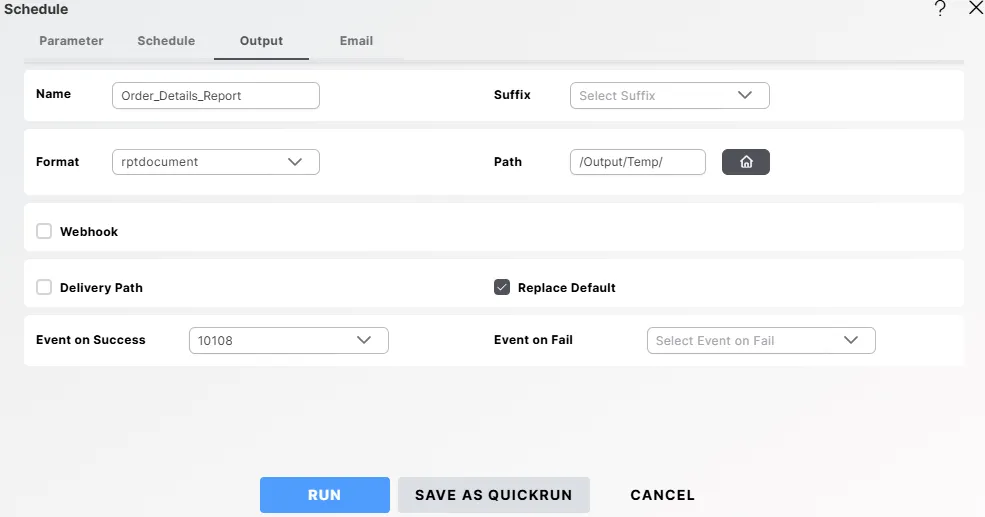
Go to the Output tab, set the Name as Orders_Payment_Report.

-
Click
 button. A confirmation message will appear.
-
Go to Hamburger
 icon > Request Section > Requests.
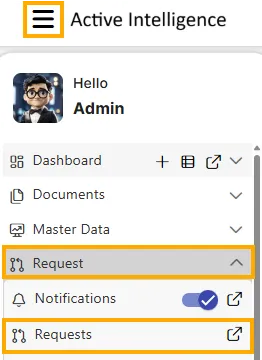
-
Navigate to Waiting for Event. You will see the report listed there.

-
You can trigger an event with another report as follows:
I. Open the report Order Details.rptdesign, go to the Schedule tab, and select Once in the Frequency option.

II. Go to the Output tab and set the Name as Order_Details_Report. Under Event on Success, select the event you created earlier (in this example, 10108). For Event on Failure, select None.
III. Click
button. A message will appear.
-
When the Order_Details_Report is executed at the scheduled time, it automatically triggers the Orders_Payment_Report. The generated files for both reports will be available in the output path configured during scheduling (in this case, output/temp).