Introduction
The Schedule Tab is used to define when and how a report should run. It automates report generation by allowing users to set execution times, retry options, and scheduling types.
By default, the Schedule Type is set to Time, and users can select different Frequency options to determine when the report will execute.
Objective
To understand how to configure the Schedule Tab to define when and how a report should execute.
Prerequisites
-
For this example, the report used is Order details.rptdesign.
-
Download the required sample files from the link report.zip
-
Upload Order details.rptdesign to the Report Section under the Root folder.
-
Refer to this link for detailed steps on uploading files in the application.
Steps to Configure the Schedule Tab
-
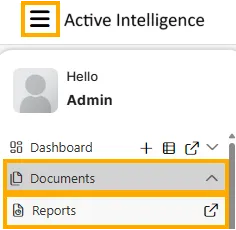
From the Hamburger menu, navigate to Documents -> Reports.
-
Open the desired report (for example, Order details) by double-clicking it.
When you open the report, the first screen displayed will be the Parameter Tab. -
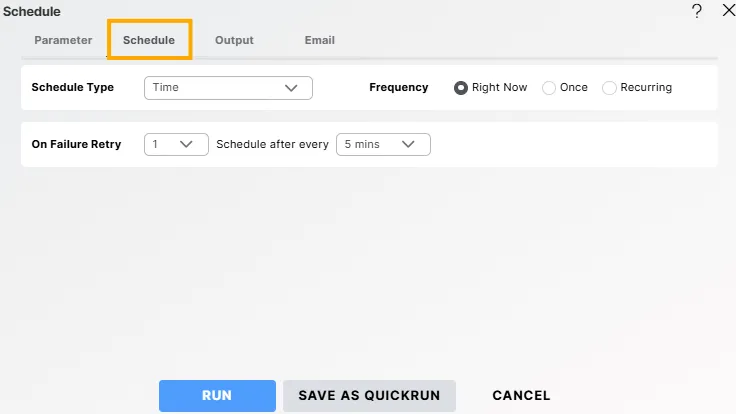
After entering the required parameters, click on the Schedule Tab to define when and how the report should execute.
-
In the Schedule Tab, configure the following options as per your scheduling needs:
Field Description Schedule Type Select the scheduling mode. Options include:
• Time – Schedule the report based on a defined time (Right Now, Once, or Recurring).
• Event – Runs the report when a predefined event occurs.Frequency Defines when the report should run:
• Right Now – Executes the report immediately.
• Once – Runs the report a single time at a scheduled date and time.
• Recurring – Executes the report repeatedly at a defined interval (e.g., hourly, daily, weekly).On Failure Retry Specifies how many times the system should retry execution if the report fails. Options: 1, 2, or 3 retries. Schedule After Every Determines the retry interval in case of a failure. Options include 5 mins, 10 mins, 15 mins, 30 mins, or 60 mins. -
Once all fields are configured, proceed to the Output Tab to define how the generated report will be stored or delivered.
Next Steps
After configuring the schedule, proceed with the next tabs to complete the report setup: