Report Bursting mapping Guide
This document contains information about Create, Edit, and Delete Report mapping functionality in Report Bursting. This document has step-by-step information on how to use mapping in Report Bursting and will show one use case example.
Mapping is a way to bind datasets with a report and report parameters in order to achieve report bursting. It is a mechanism using which we are joining a dataset with a report and saving it in a Mapping file. While we execute report bursting, this mapping will take one by one-row data from the dataset and inject it in to report one by one and this is how multiple reports are being generated with a single click. Mapping is the heart of report bursting.
Objective
The objective of this document is to guide the user on how to Create, Edit, and Delete Report Mappings.
Prerequisites
-
For this example, the Customer CSV.ds dataset and Top 5 Customers.rptdesign report is used.
-
Download the required sample files from the link report.zip
-
Upload Customer CSV.ds to the Dataset Section and Top 5 Customers.rptdesign to the Report Section.
-
Refer to this link for detailed steps on uploading files in the application.
Steps to Create a Mapping in Report Bursting
-
Go to Hamburger
 icon > Documents > Report Bursting.
 -
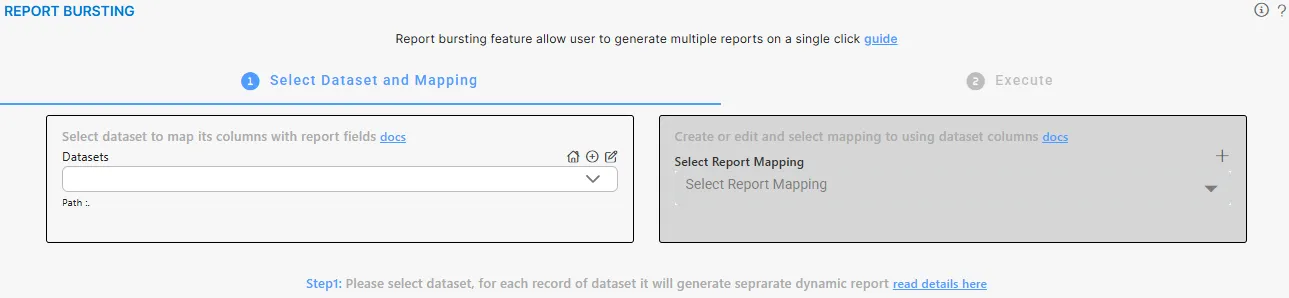
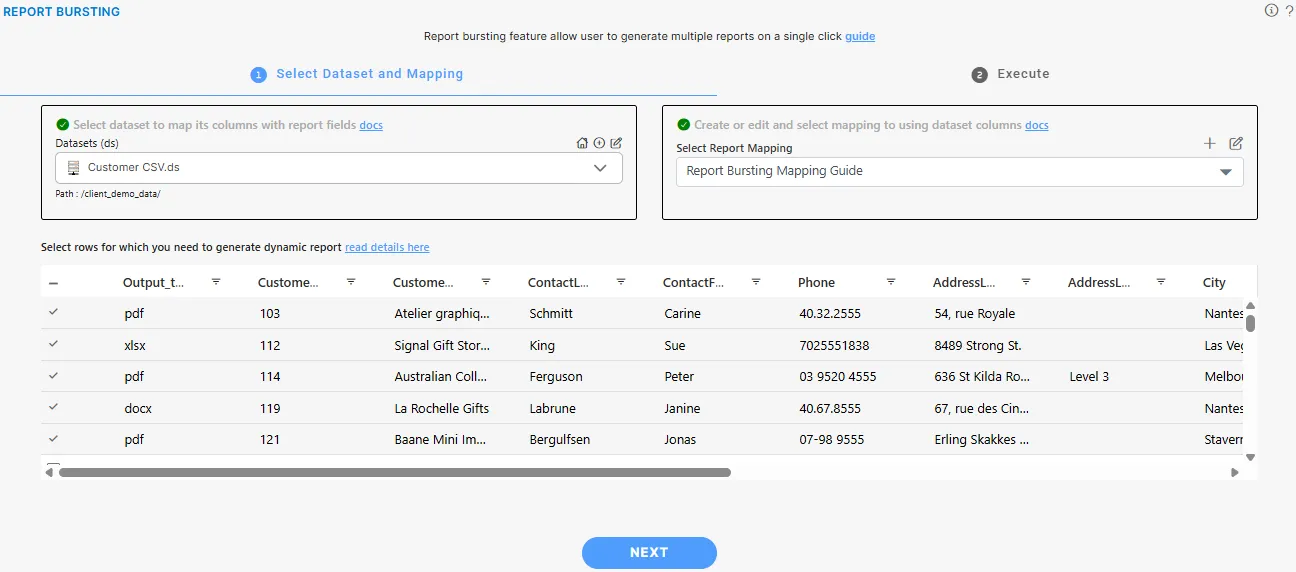
You will see the Report Bursting page, which prompts you to select a Dataset and a Mapping from the dropdown.
Click here to know more about Create dataset.
-
If no mappings exist, the Select Report Mapping dropdown will be empty; once mappings are created, those linked to the selected dataset will appear under the Mapped list, while all others will be shown under the Not Mapped list.
-
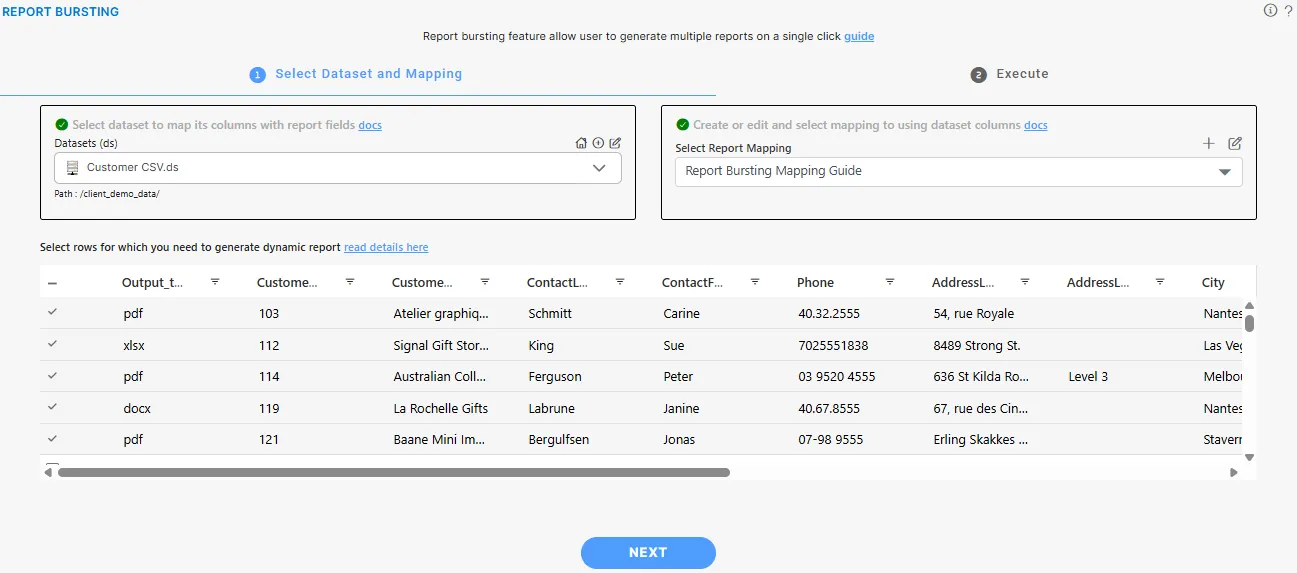
Select the Customer CSV.ds dataset from the dropdown.

-
To create a new mapping for the selected dataset, click the
 icon in Select Report Mapping. The following page will open:
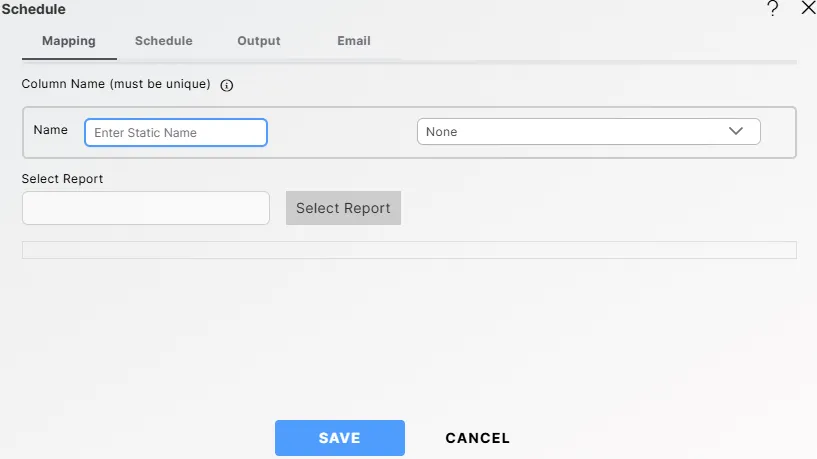
-
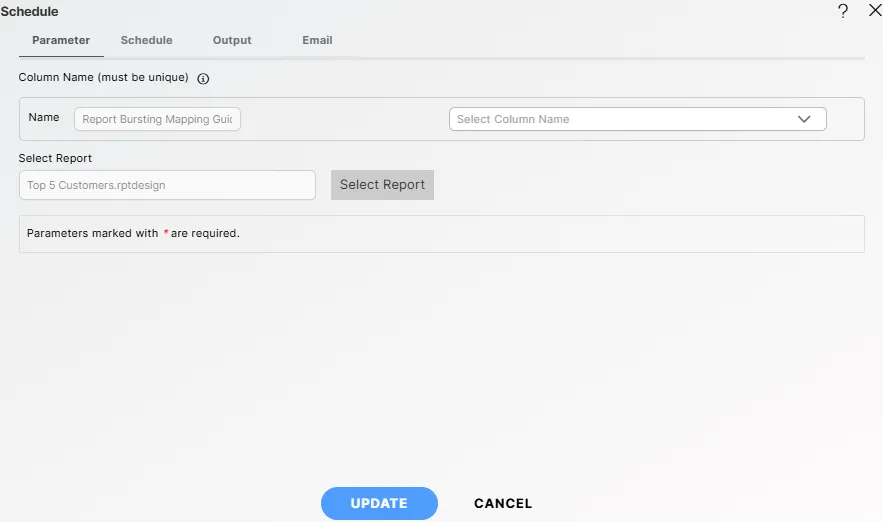
Enter the following details in the Mapping tab:
-
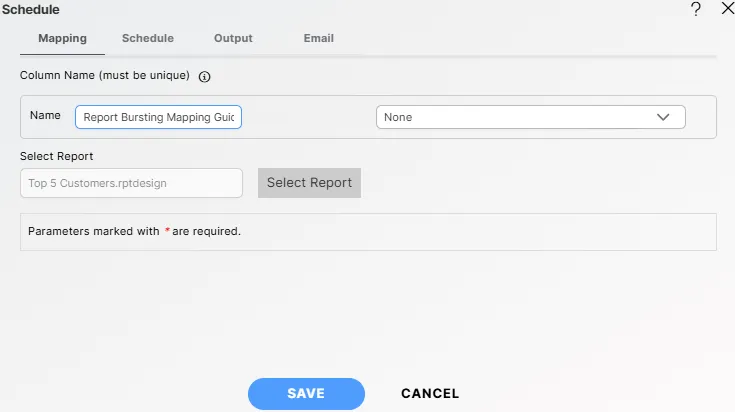
Enter the Name (e.g., Report Bursting Mapping Guide — you can add any name as required).
-
Select the Column Name from the dropdown (e.g., None).
-
Click Select Report and choose the report file (e.g., Top 5 Customers.rptdesign — select any report as per requirement).
-
-
Click the
 button, and a message saying Created Successfully will be displayed.
-
Go to the Select Report Mapping dropdown.
-
Select the Report Bursting Mapping Guide mapping from the Not Mapped list.
-
The customer dataset details will appear in the grid view.
-
Select the customers for whom you want to generate and share the report, for example, five Customer Numbers.
Edit Mapping
-
There are two ways to edit mapping in the application:
I. Double-click on the mapping you want to edit.
II. Right-click on the mapping you want to edit in the list view and select Edit Mapping.

-
After clicking on Edit Mapping (using either method), Schedule dialog box will open.
-
In the Parameter tab, the Column Name should match the customer name column (as we selected customerName in the dropdown), and you can change the report if needed.

-
In the Output tab, select the customerName from the dropdown so that the name appears according to the selected customer.

-
Click on the
 button, and it will display the message Updated Successfully.
-
Select the customers for whom you want to generate and share the report, for example, five customerName.
-
Click on the
 button to navigate to the Execute page.
 -
Select the Synchronous radio button and choose the desired output format, then click on the PDF button (in this example) to start the report bursting process immediately.

-
Once the reports are generated, they will be downloaded to your machine in a zip file. Go to the download location, extract the zip file, and inside the folder you will find the PDF files named according to the customer names you selected.

Delete Mapping
-
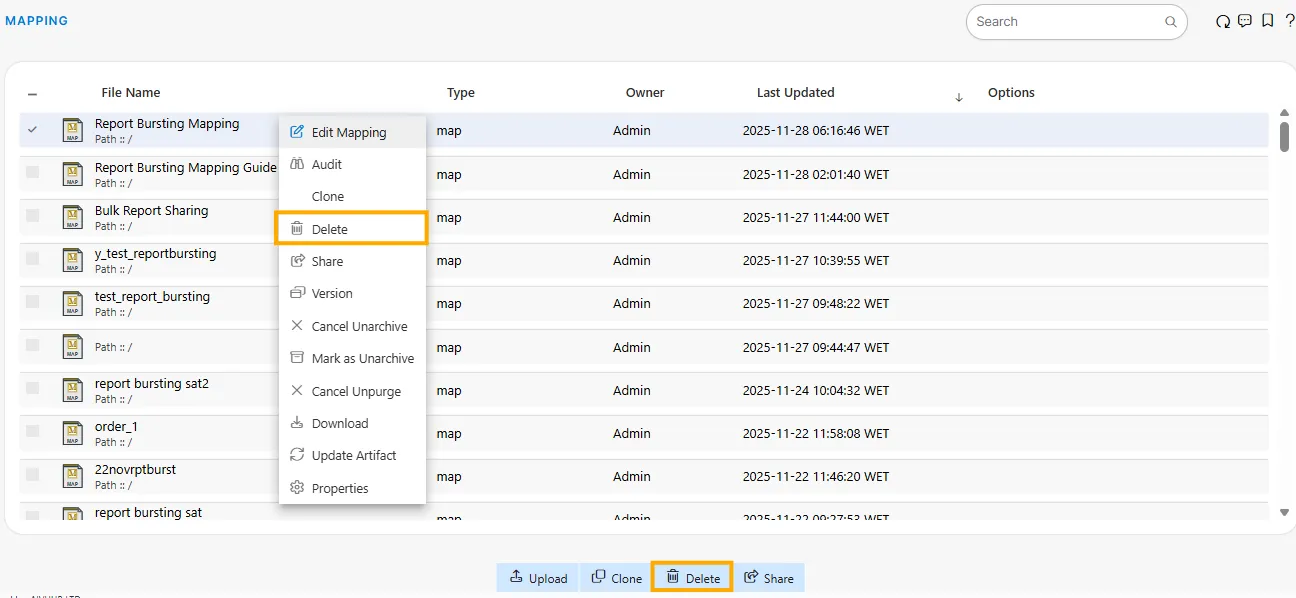
There are two ways to delete mapping in the application:
I. Click on the
 icon next to the clone icon in the bottom toolbar.
II. Right-click on the mapping you want to delete in the list view and select Delete.
-
After clicking on Delete (using either method), a Delete dialog box will open. If the mapping has multiple versions, you can choose whether to delete only the current version or all versions of that mapping.

-
Click on the
 button and it will display the message Deleted successfully.