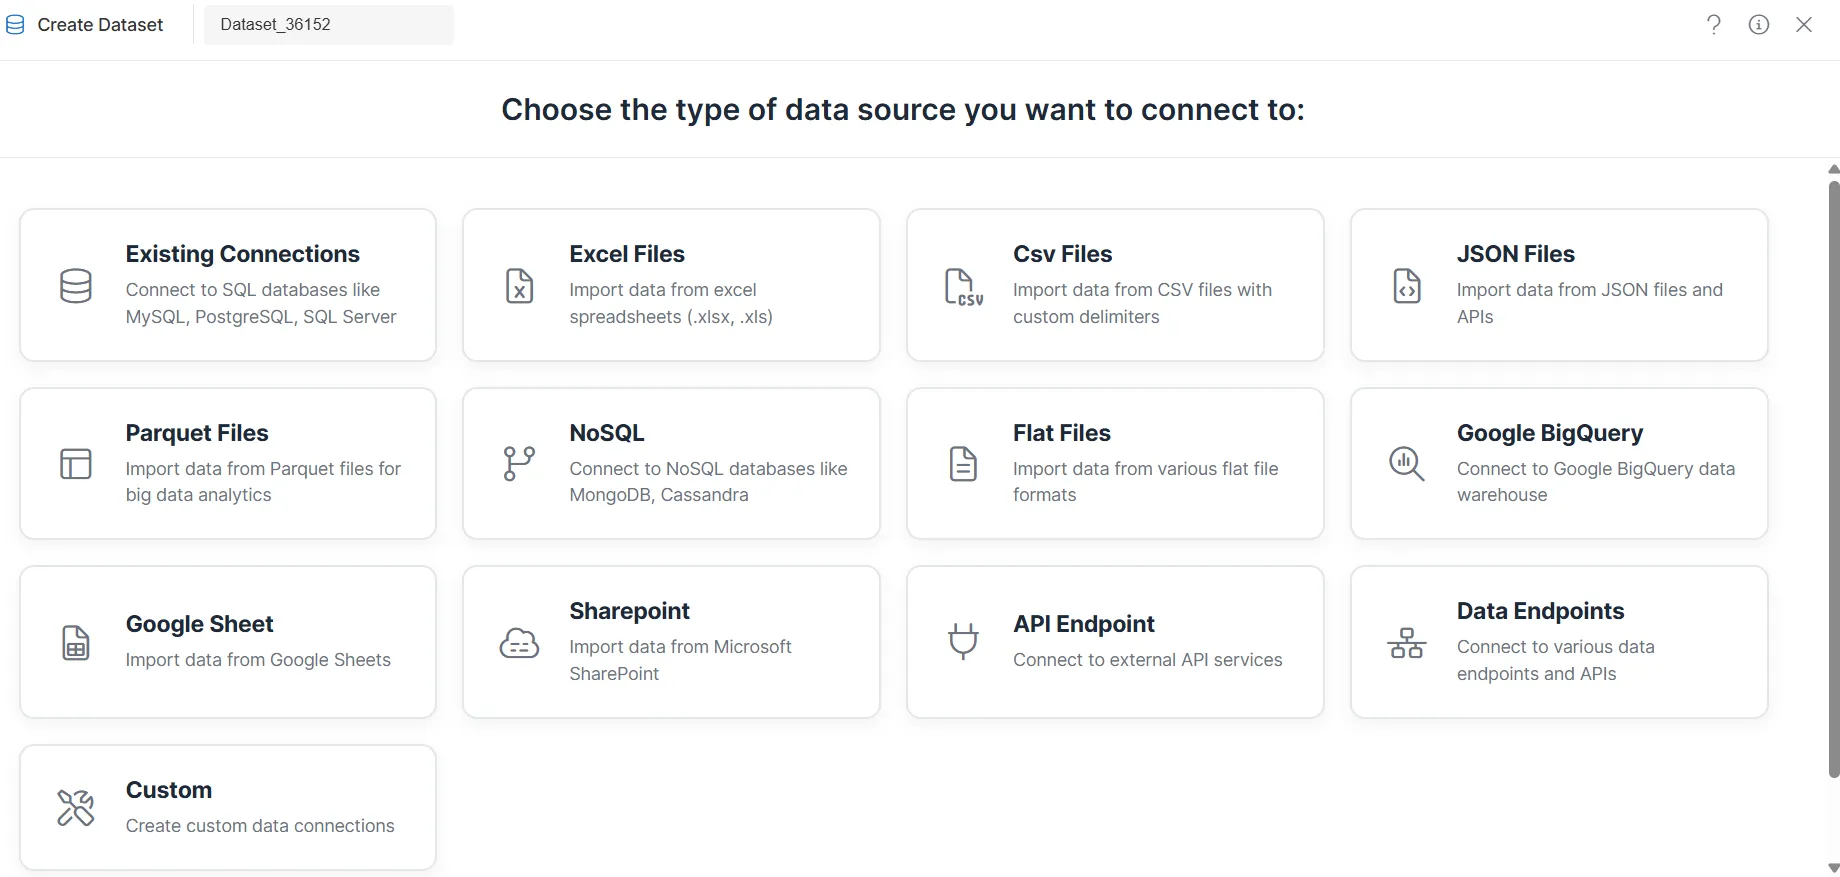
Connection Selection Tab Terminology
The Connection Selection tab is the second step in the Create Dataset workflow. After you choose a data source type, this tab guides you through selecting or configuring the specific connection or file that will supply data for your dataset.
This tab helps you:
- Connect to existing database connections, cloud sources, or file-based data
- Filter and search available connections when many are configured
- Create new connections when no suitable datasource exists
- Upload or select files for Excel, CSV, and JSON sources
- Proceed to query or configuration based on the selected source type
Refer to the dataset creation guide to navigate to the Data Source Selection step and then access the Connection Selection tab.
Connection Selection by Source Type
The options and steps on the Connection Selection tab depend on the data source type you selected in Step 1. The following sections describe each workflow.
1. Database and Connected Sources
Purpose
This workflow applies when your data comes from a relational database, NoSQL store, or a connected cloud or endpoint service. You either select an existing connection or create a new one.
Applies To
- Existing Connections (JDBC, MySQL, PostgreSQL, Oracle, SQL Server)
- NoSQL
- Google Sheets
- Google BigQuery
- SharePoint
- Data Endpoints
Steps
-
The system displays all configured connections for the selected source type.
-
Use the Search Bar to filter connections by name or type.
-
Select an existing connection (for example, SampleDB from the list of available database connections).
OR
-
If no suitable connection exists, click Create Datasource to configure a new connection.

-
Click the selected datasource (for example, SampleDB).
-
The system navigates to Step 3 – General Tab (Query Configuration).
Key Points
- Only connections compatible with the chosen data source type are shown.
- Search helps when many connections are configured.
- Creating a new datasource may require connection details and credentials.
2. Excel, CSV, and JSON
Purpose
For file-based sources (Excel, CSV, JSON), you provide the actual file either by uploading it or by choosing a previously uploaded file.
Steps
-
Click the Upload button and select a file from your local machine, or drag and drop the file into the upload area.

OR
-
Select a previously uploaded file (for example, retail_sales.csv) from the list.
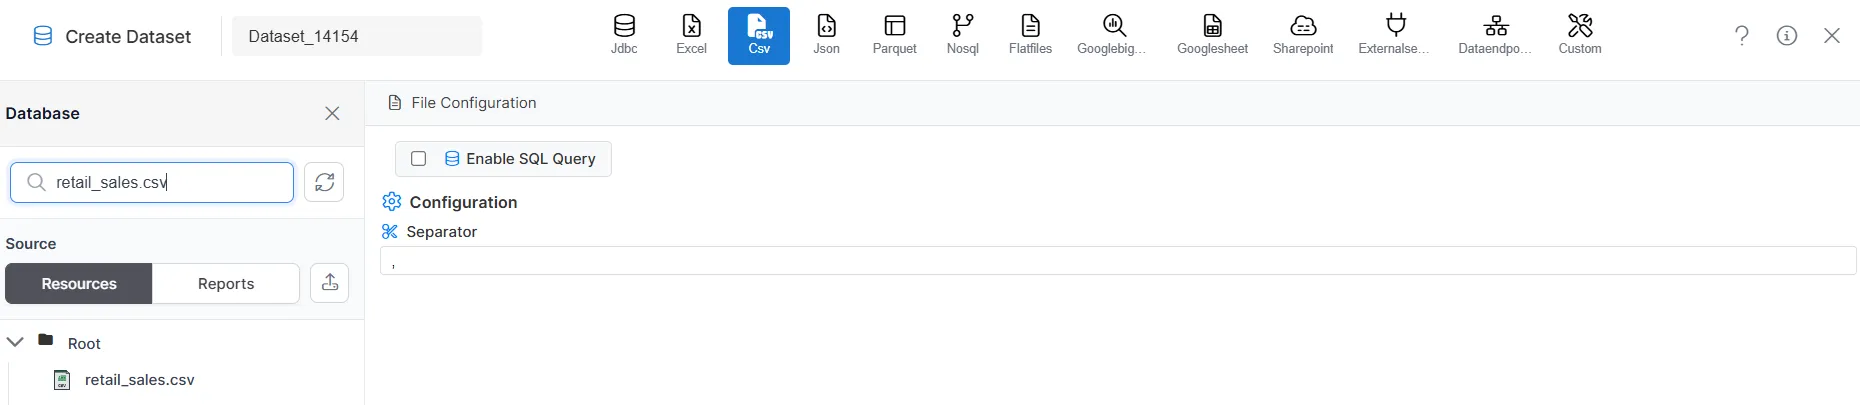
-
Click the selected file (for example, retail_sales.csv) to proceed to Step 3 – General Tab (Query Configuration).
Key Points
- Supported formats include Excel (
.xlsx,.xls), CSV, and JSON. - Uploaded files are retained for reuse in other datasets.
- Ensure the file structure and encoding match your expectations before proceeding.
3. Parquet
Purpose
When Parquet is selected as the data source type, no separate connection or file selection step is required on this tab. The system takes you directly to query configuration.
Behavior
The system opens Step 3 – General Tab directly, where you can write a SQL query to retrieve and transform Parquet data.
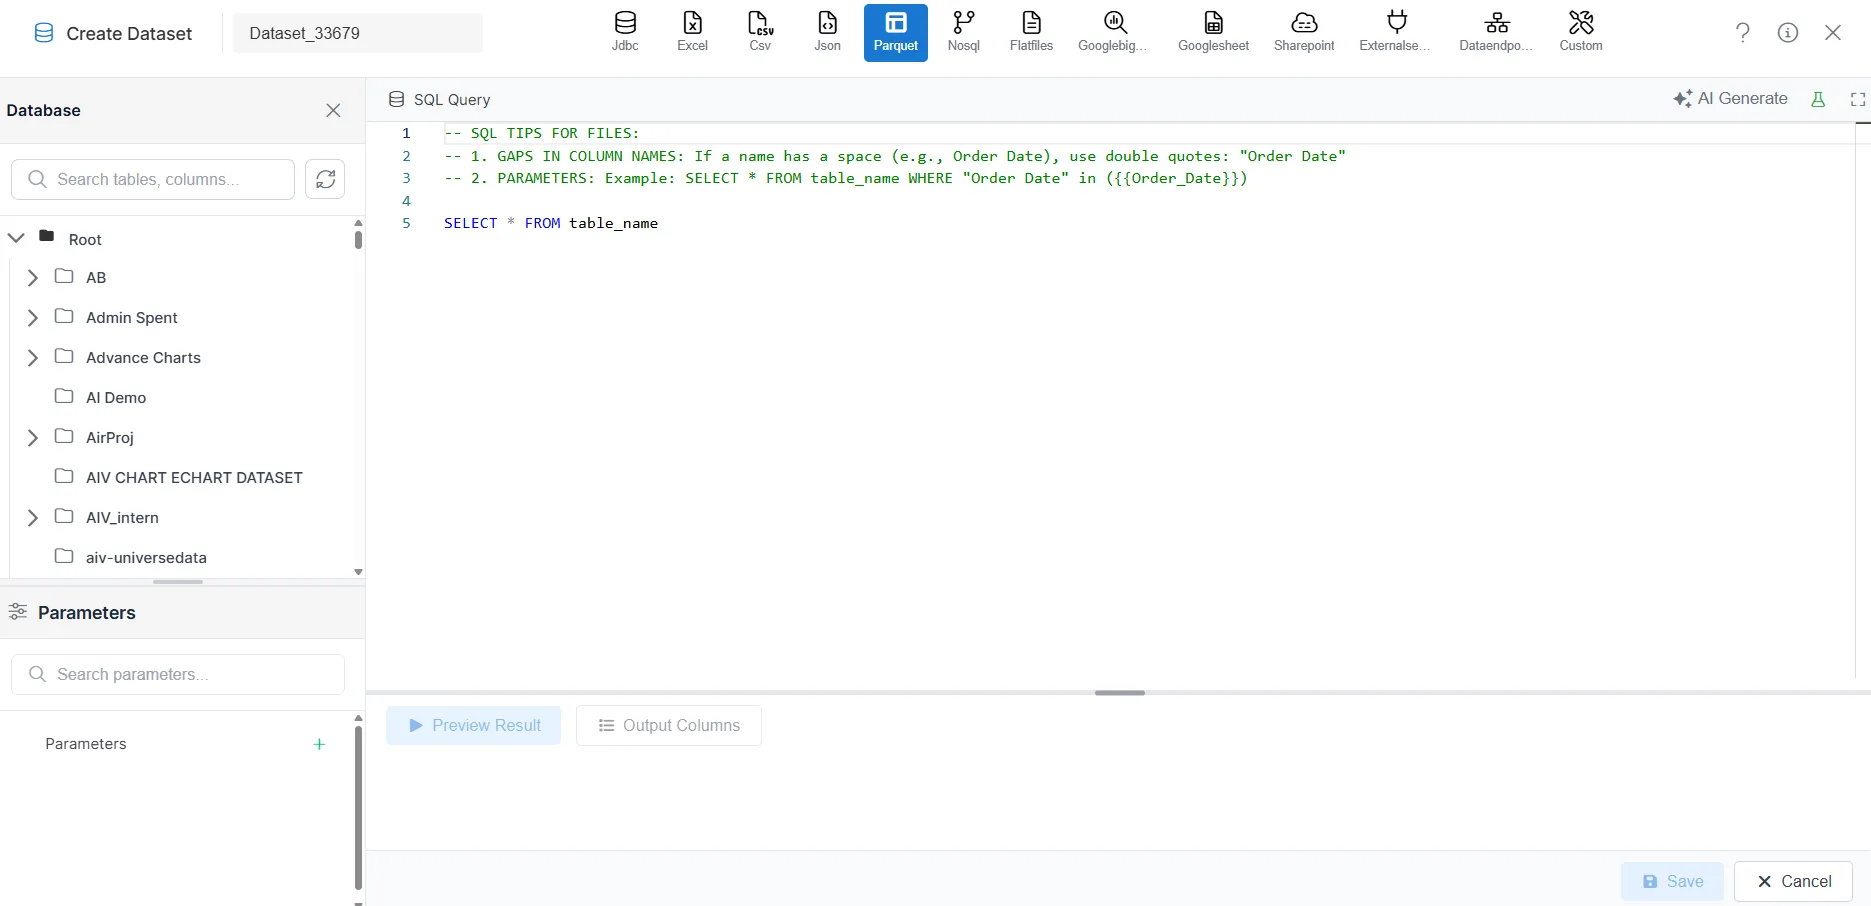
Key Points
- Parquet sources are configured at the query level in the General Tab.
- Ensure Parquet storage or catalog connection is available as per your environment setup.
4. Flat Files (Manual Entry Only)
Purpose
When Flat Files is selected, the system skips connection selection and opens the data editor so you can enter or paste structured data manually.
Behavior
The system opens the data editor in Step 3 – General Tab, where you can type or paste structured data in formats such as CSV, Excel, TSV, PSV, or JSON.
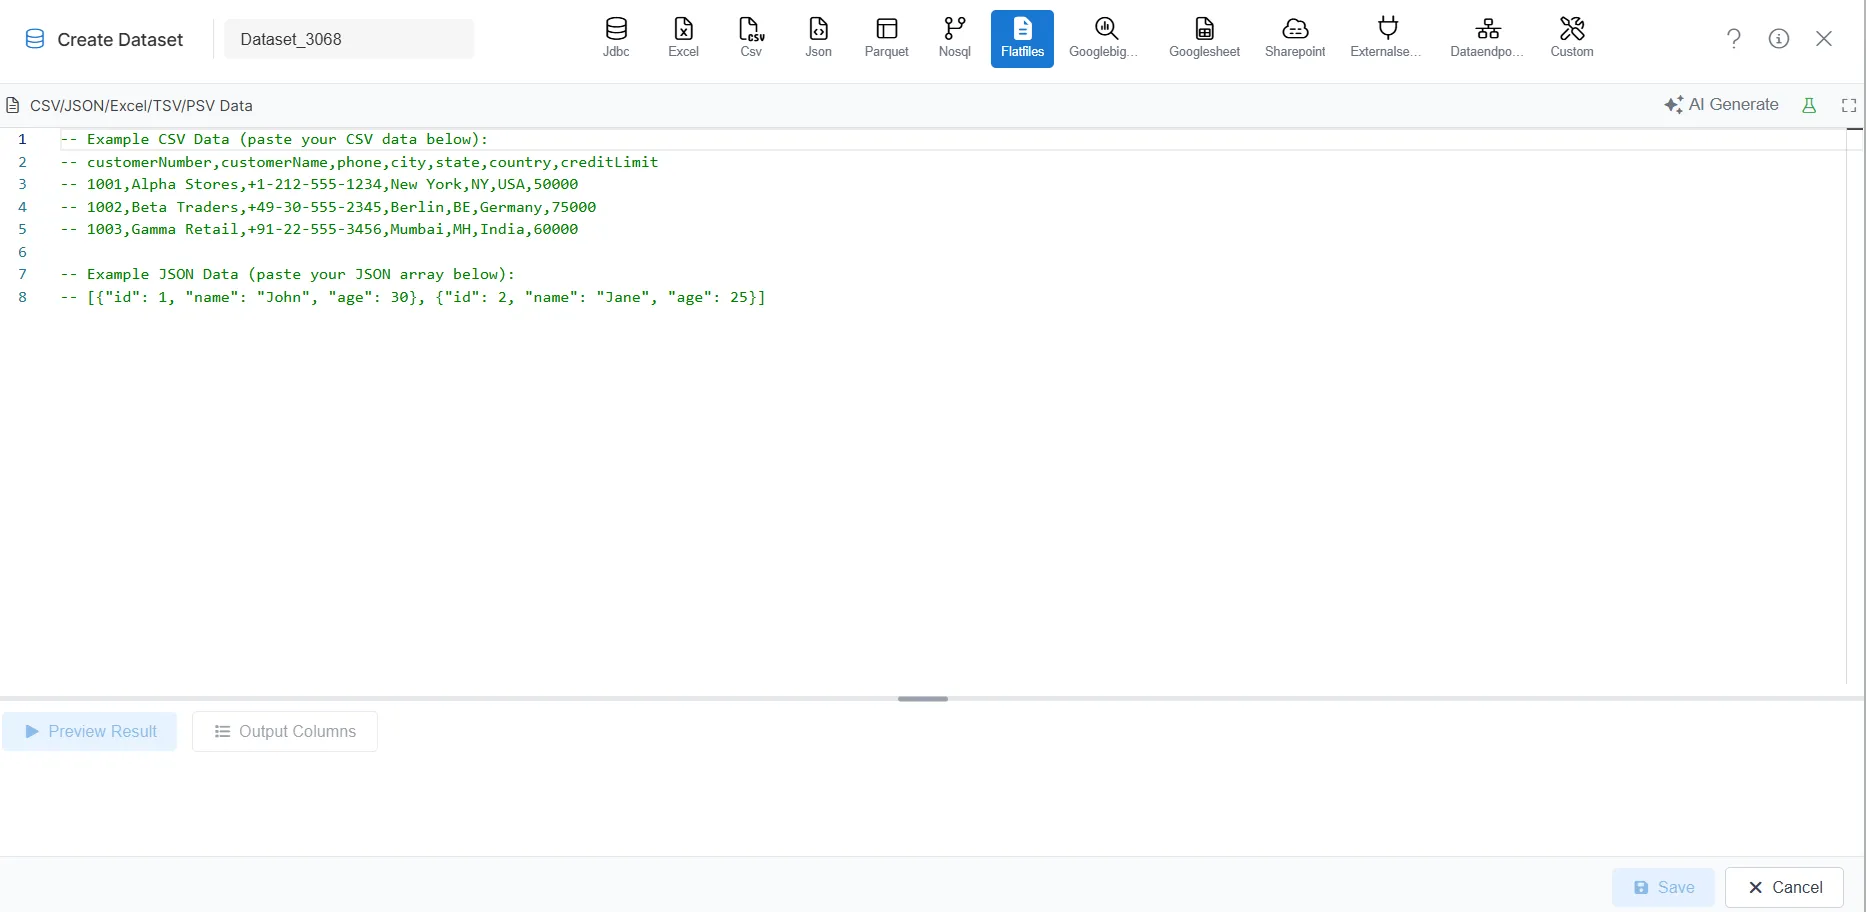
Key Points
- Ideal for small, ad-hoc datasets or quick prototyping.
- Data is entered or pasted directly; no file upload or connection is required.
- Ensure column separators and structure match the chosen format.
5. API Endpoint
Purpose
When API Endpoint is selected as the data source type, the system takes you directly to the configuration screen where you define how the API will be called.
Behavior
The system opens Step 3 – General Tab, where you configure API details such as URL, HTTP method, headers, parameters, and request body.
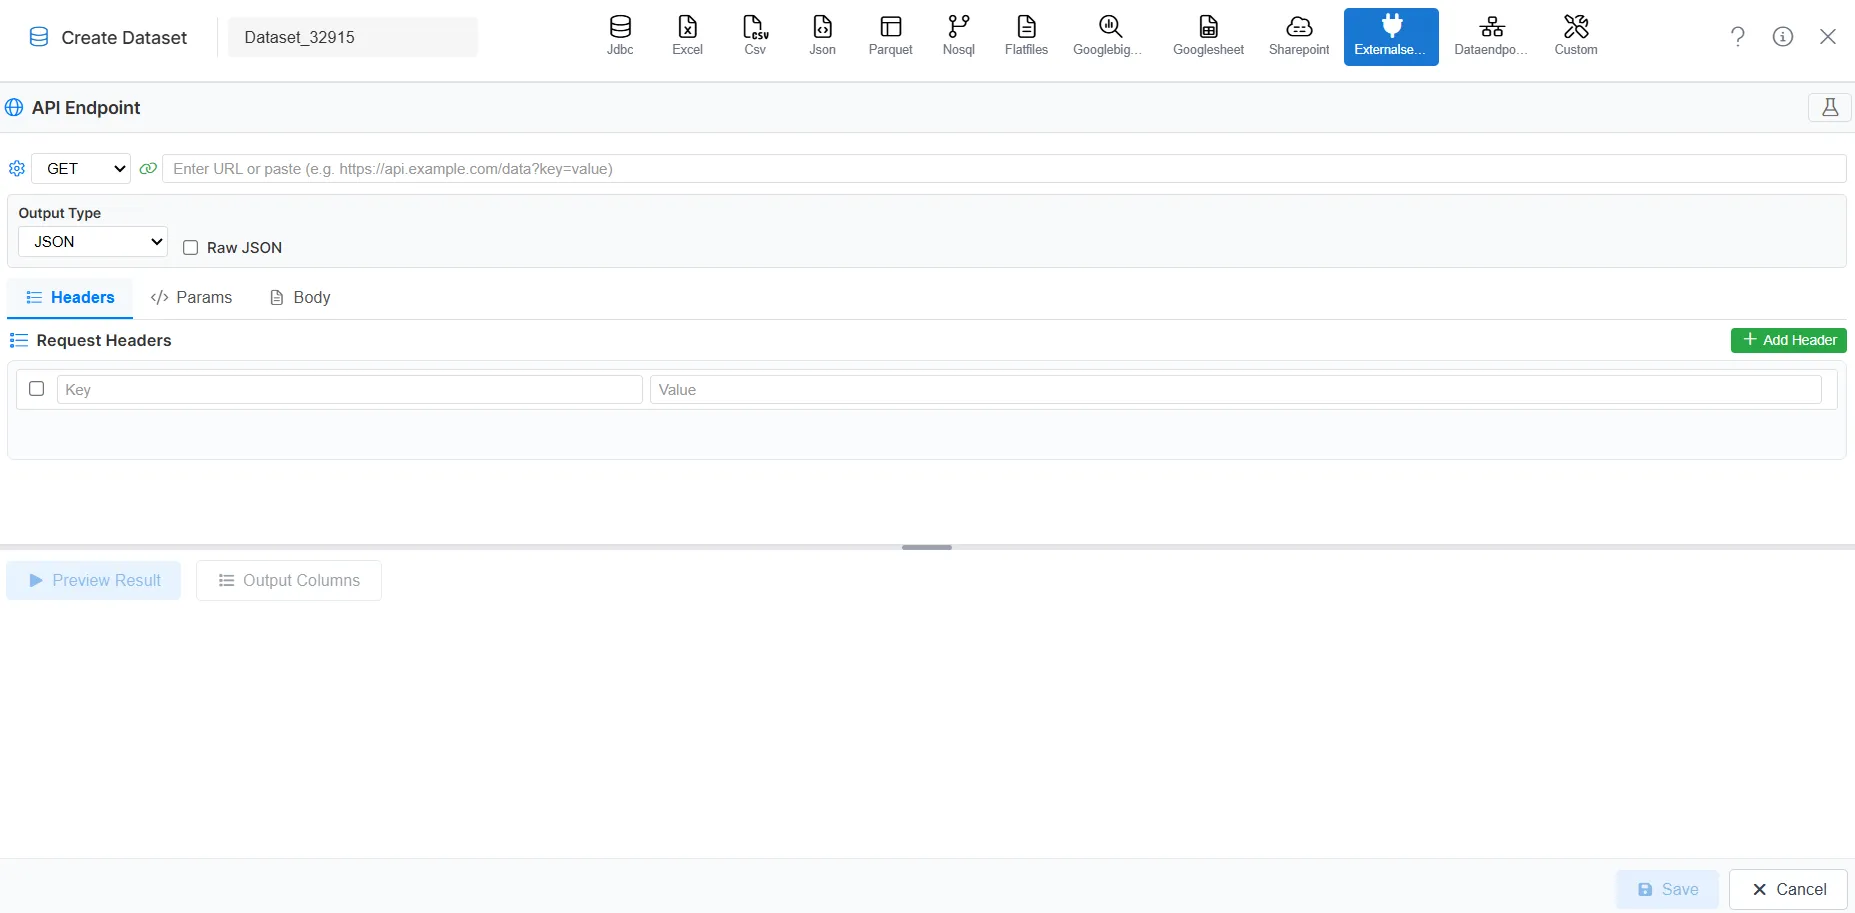
Key Points
- No pre-configured connection is required; API details are entered in the General Tab.
- Have the API documentation (URL, method, auth, parameters) available before configuring.
- Use Preview or test options to validate the API response before saving the dataset.
Summary
The Connection Selection tab ensures that you:
- Select or create the right connection for database and connected sources
- Upload or choose the correct file for Excel, CSV, and JSON
- Proceed appropriately for Parquet, Flat Files, and API Endpoint without extra connection steps
By completing this step correctly, you set the foundation for configuring queries and output in the General and Output Columns tabs.