Datasource MongoDB
This document provides step-by-step instructions for connecting MongoDB to your web application using both MongoDB Compass and a data integration platform.
Prerequisites
Before connecting to MongoDB, ensure you have:
- MongoDB Compass installed (for GUI management).
- Valid connection credentials (username, password, host, port).
MongoDB Compass Setup
This section covers the complete MongoDB setup using MongoDB Compass, including creating connections, databases, collections, and importing data.
Step 1: Create Connection in MongoDB Compass
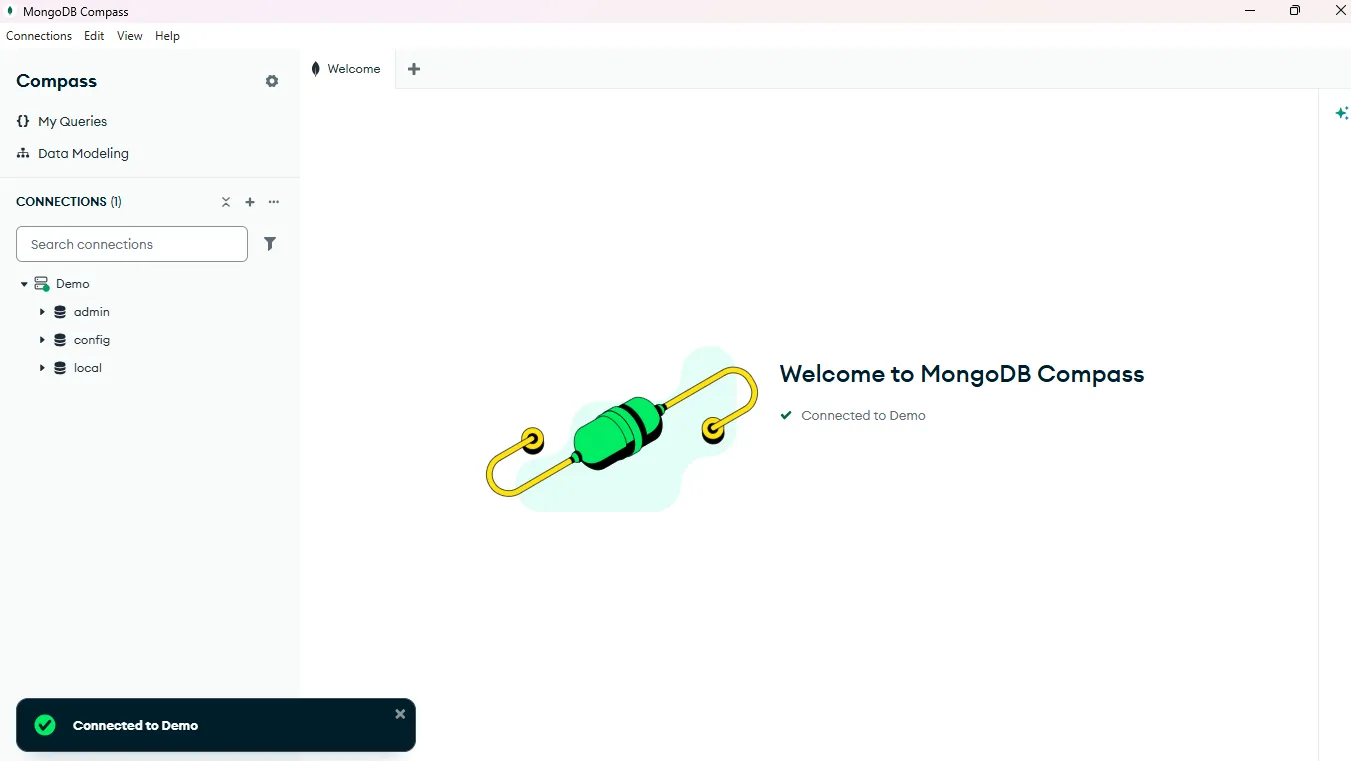
1.1 Launch MongoDB Compass
-
Open MongoDB Compass application.
-
You’ll see the Welcome screen with options for
My Queries,Data Modeling, and theConnectionspanel.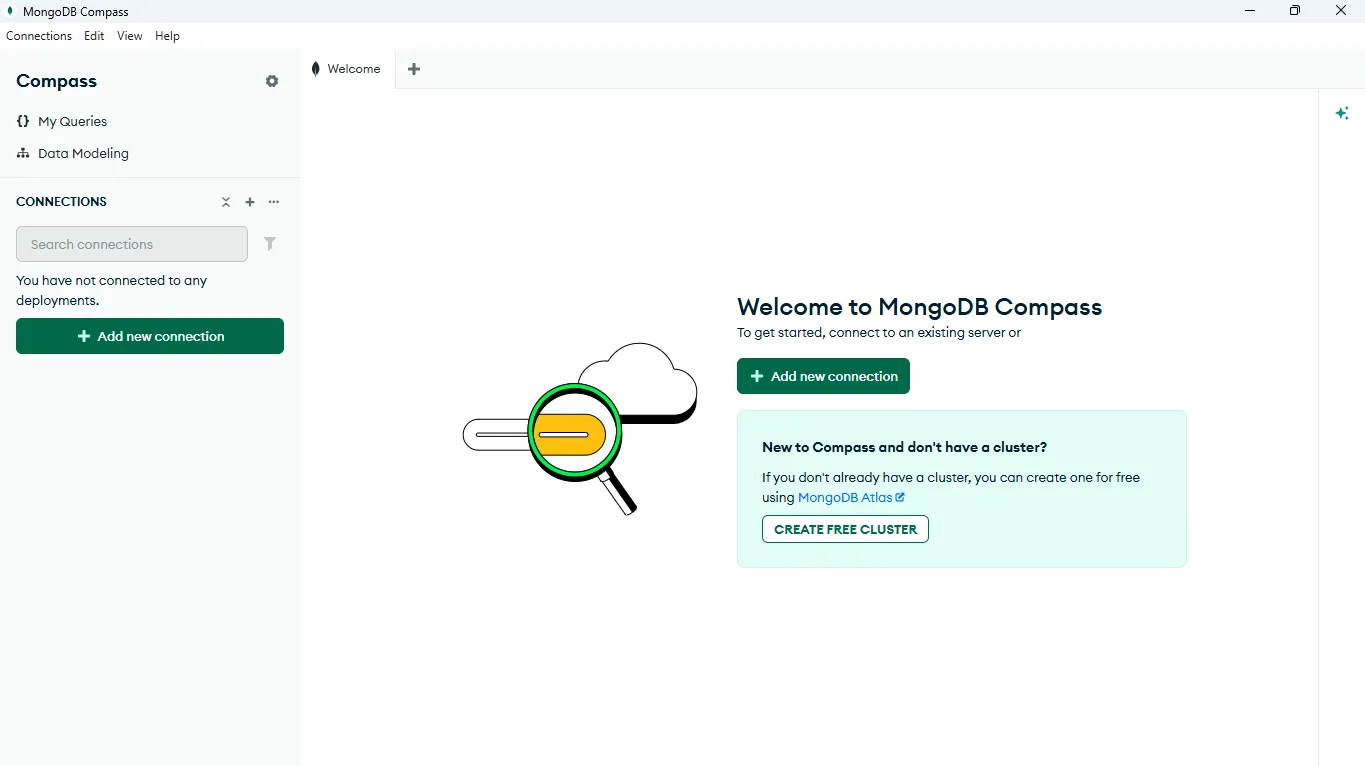
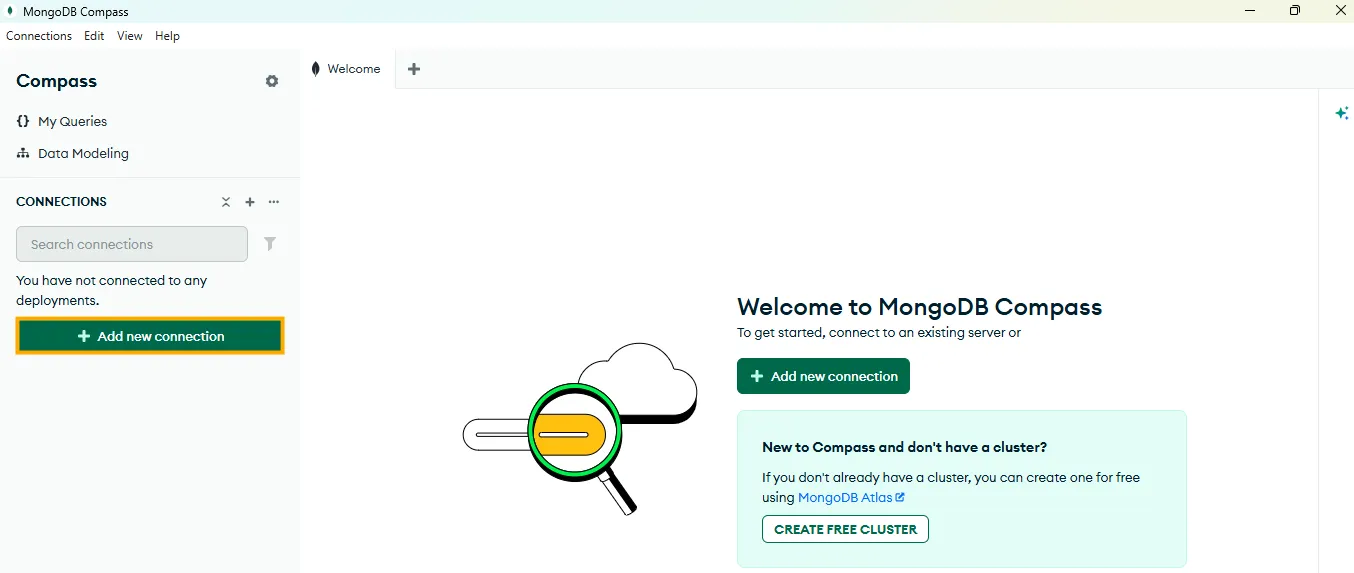
1.2 Add New Connection.
-
Click the “Add new connection” button (green button in the Connections panel).
-
The New Connection dialog will appear.
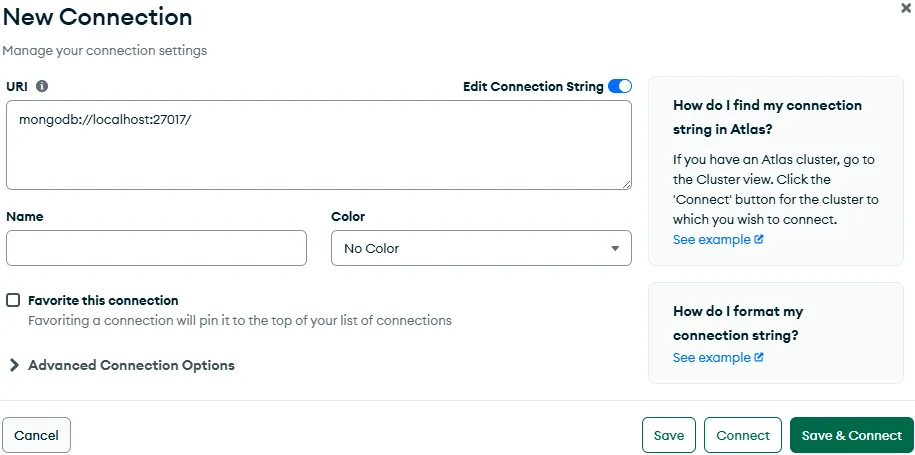
1.3 Configure Connection String
You can connect using the Connection String URL format:
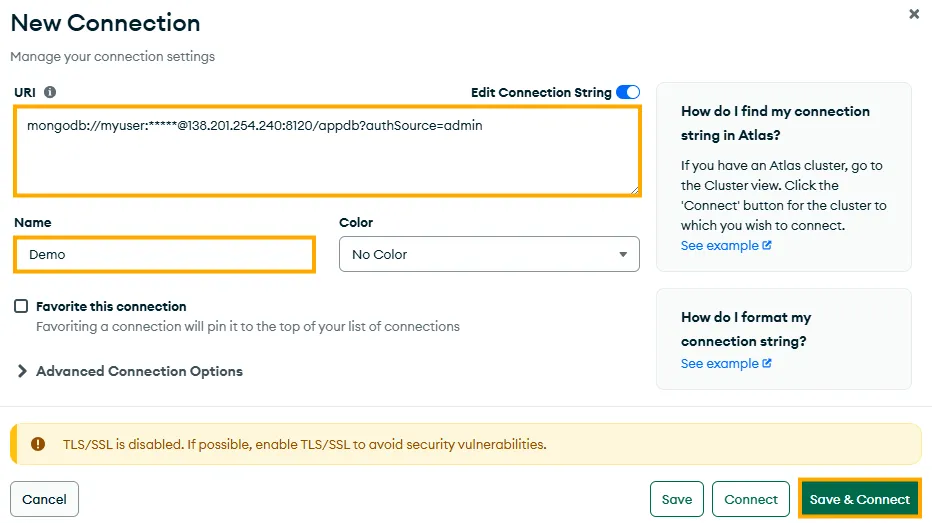
mongodb://[username]:[password]@[host]:[port]/[database]?authSource=[authSource]Example:
mongodb://myuser:*****@138.201.254.240:8120/foodApp?authSource=adminConnection Parameters:
- Username:
myuser - Password: Your secure password
- Host:
138.201.254.240 - Port:
8120 - Database:
foodApp(optional in connection string) - Auth Source:
admin(authentication database)
1.4 Connection Settings
Fill in the following fields:
- URL: Your complete MongoDB connection string.
- Name: A friendly name for this connection (e.g., “Demo”).
- Color: Optional color coding for organization.
- Favorite: Check to pin connection to top of list.
1.5 Establish Connection
- Click “Save & Connect” to save and establish connection.
- Or click “Connect” to connect without saving.
- Wait for the success notification: “Connected to Demo”.
1.6 Verify Connection
After successful connection, you should see:
-
Your connection listed in the Connections panel with count:
CONNECTIONS (1). -
Available default databases:
admin,config,local. -
Success message at the bottom: ”✓ Connected to Demo”.
Step 2: Create Database and Collection
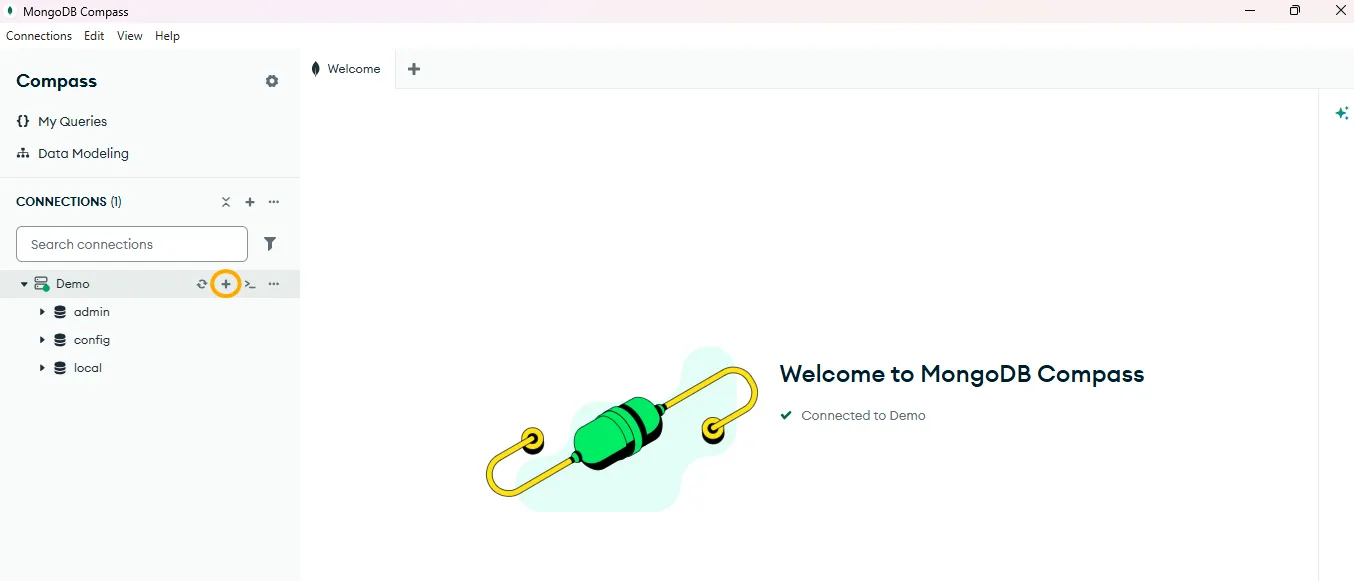
2.1 Create New Database
-
Locate your connected server in the left panel:
Demo -
Hover over the connection name and click the ”+“(Create Database) button that appears
-
In the “Create Database” dialog, enter:
-
Database Name:
foodApp -
Collection Name:
swiggy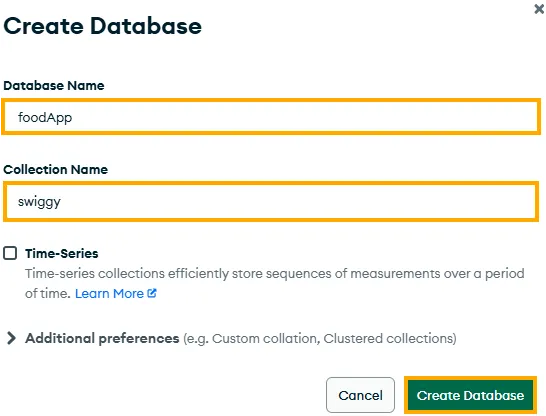
-
2.2 Verify Database Creation
After creation, you should see:
-
New database
foodAppin the left panel under your connection -
Collection
swiggynested under thefoodAppdatabase -
Database hierarchy:
Demo→foodApp→swiggy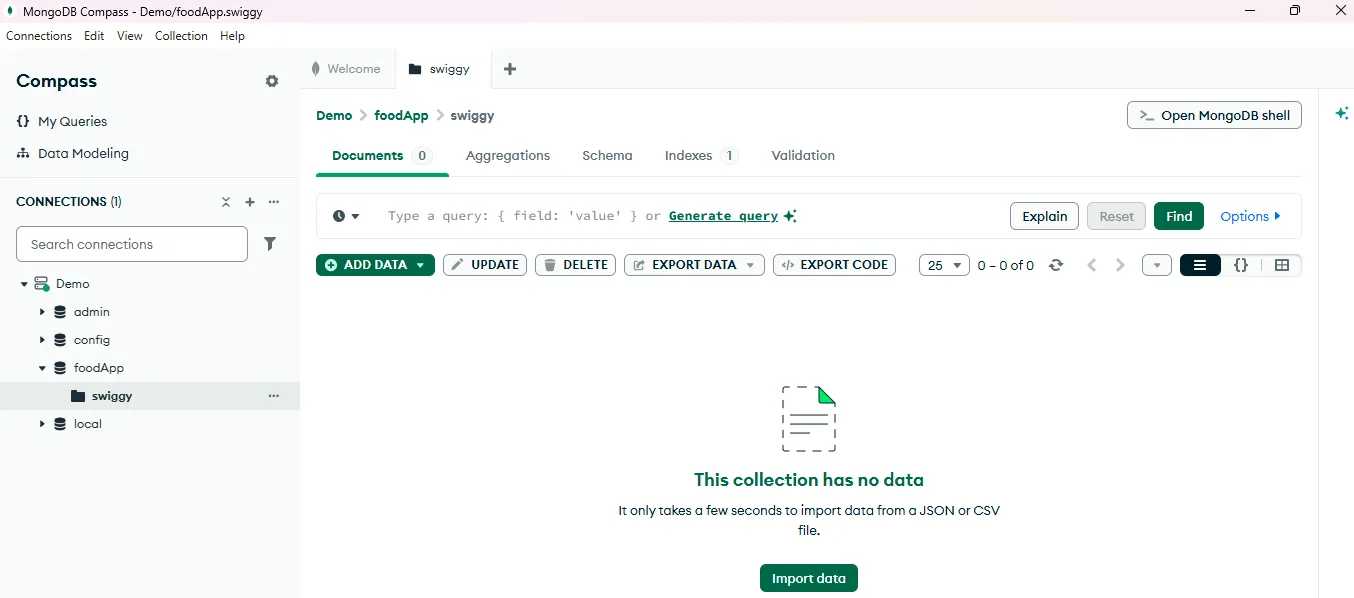
Step 3: Import Data to Collection
3.1 Import CSV File
-
Click the “ADD DATA” dropdown button (green button) and select “Import JSON or CSV file”.
-
Alternative: Click the “Import data” button in the center of the empty collection view and select your CSV file from your local machine.
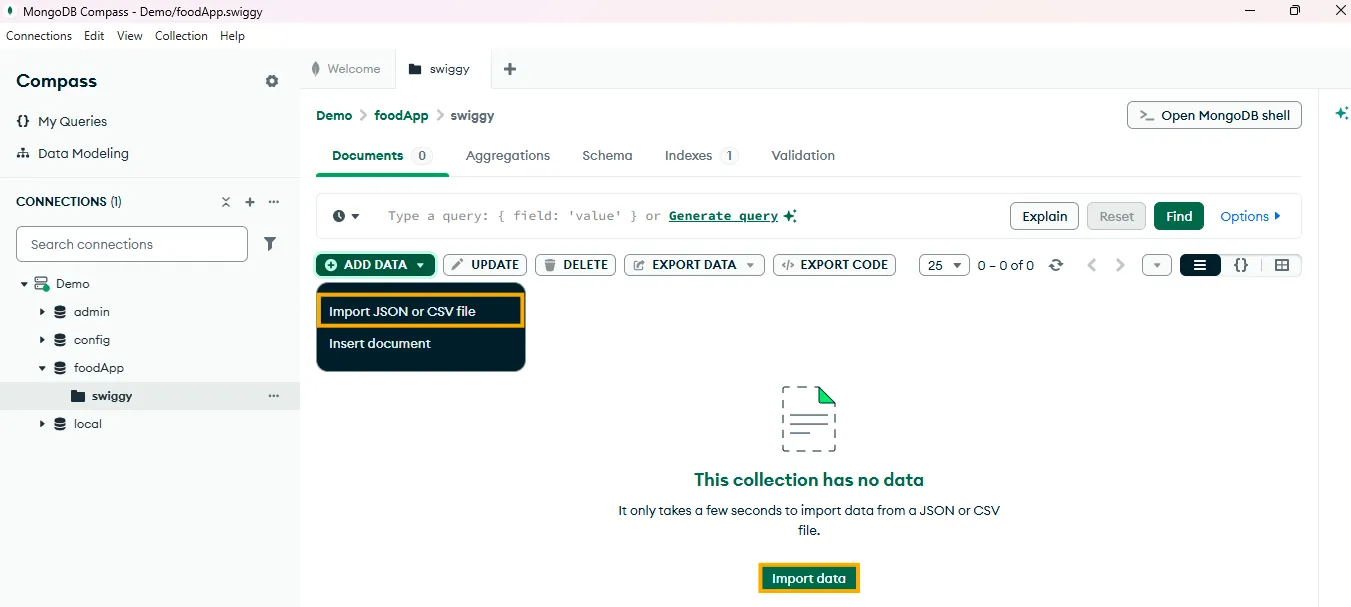
-
In the Import dialog, verify the destination collection (for example,
foodApp.swiggy). -
Click the file selection area and choose your CSV file (for example,
SwiggyData.csv). -
Confirm that the filename appears as Import file:
SwiggyData.csv.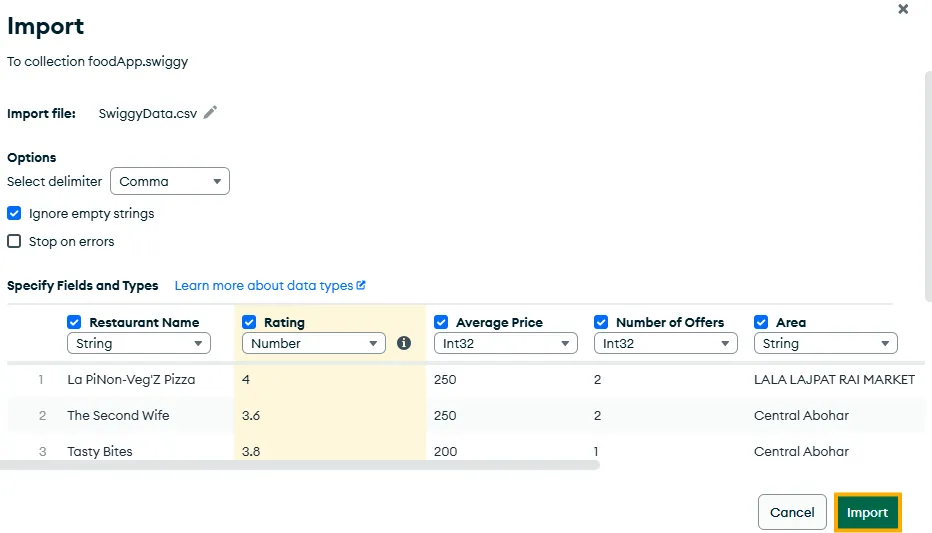
Field Type Selection:
- Each field has checkboxes to include/exclude
- Dropdown to select data type (String, Number, Int32, etc.)
- Preview of sample data shown for verification
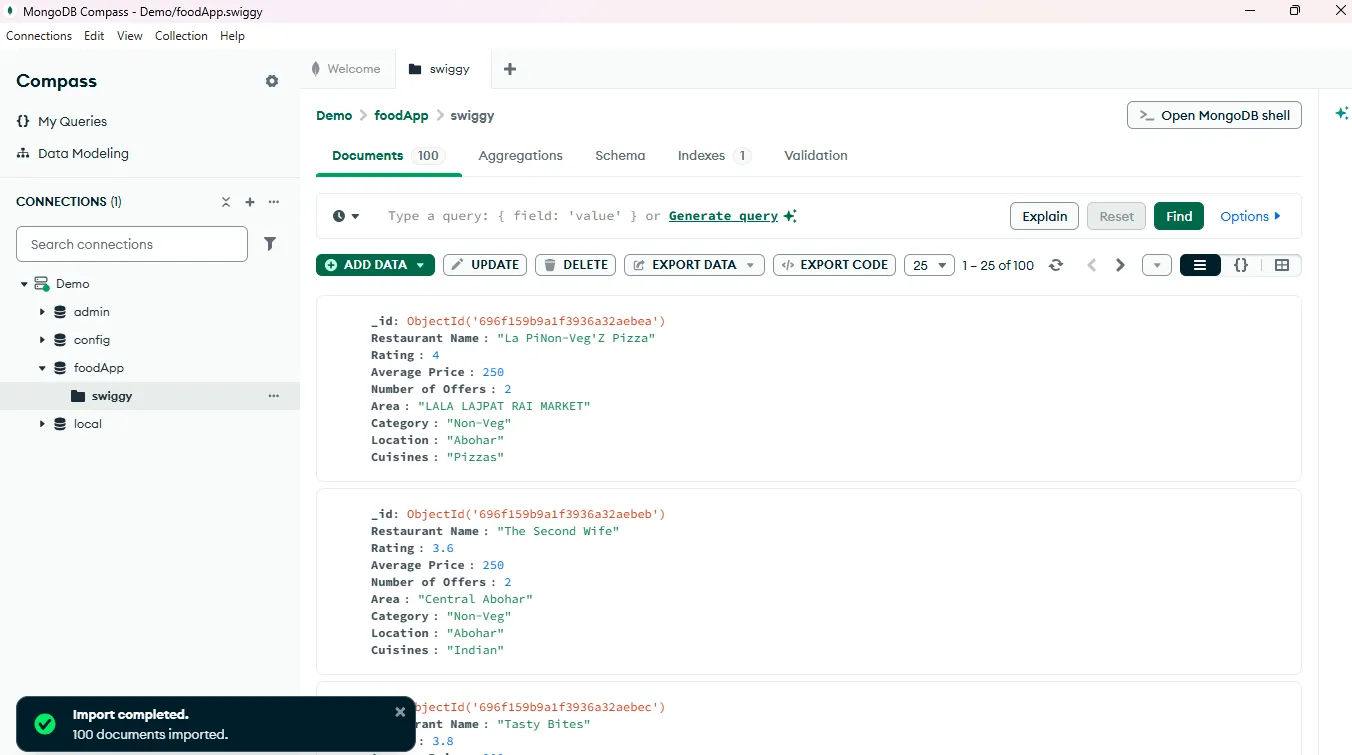
3.2 Execute Import
-
Click “Import” button (green button at bottom right).
-
Wait for the import process to complete.
-
Success notification will appear: ”✓ Import completed. 100 documents imported.”
Web Application Integration
Now that you have set up MongoDB Compass with your data, you can integrate it with your web application.
Step 4: Configure Data Source in Web Application
Access Data Source Panel
-
Navigate to your web application’s admin panel.
-
Go to Master Data → Datasource.
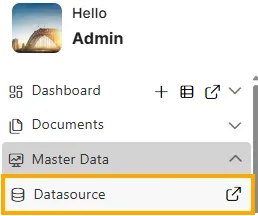
-
Click “Create” button.

Select MongoDB Connection
-
Click on the “MongoDB” option from the data source types.

-
Fill in the MongoDB Database Connection form:
Display Name: foodApp
Connection URL: mongodb://138.201.254.240:8120/foodApp?authSource=admin
Username: myuser
Password: ******
Wait Time: 0
Is JNDI: False
Class: mongodb.jdbc.MongoDriver
Extra Configuration: {}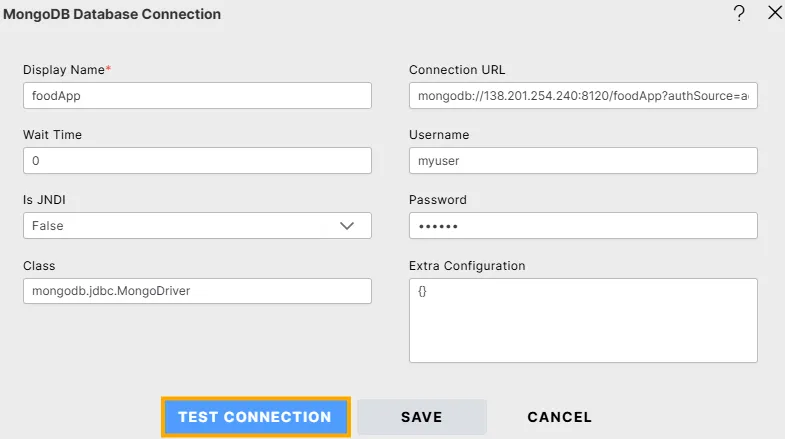
-
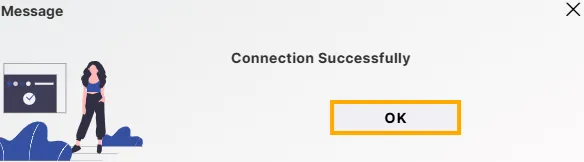
Click “TEST CONNECTION” to verify.
-
Upon success, you’ll see “Connection Successfully” message.
-
Click “SAVE” to store the configuration
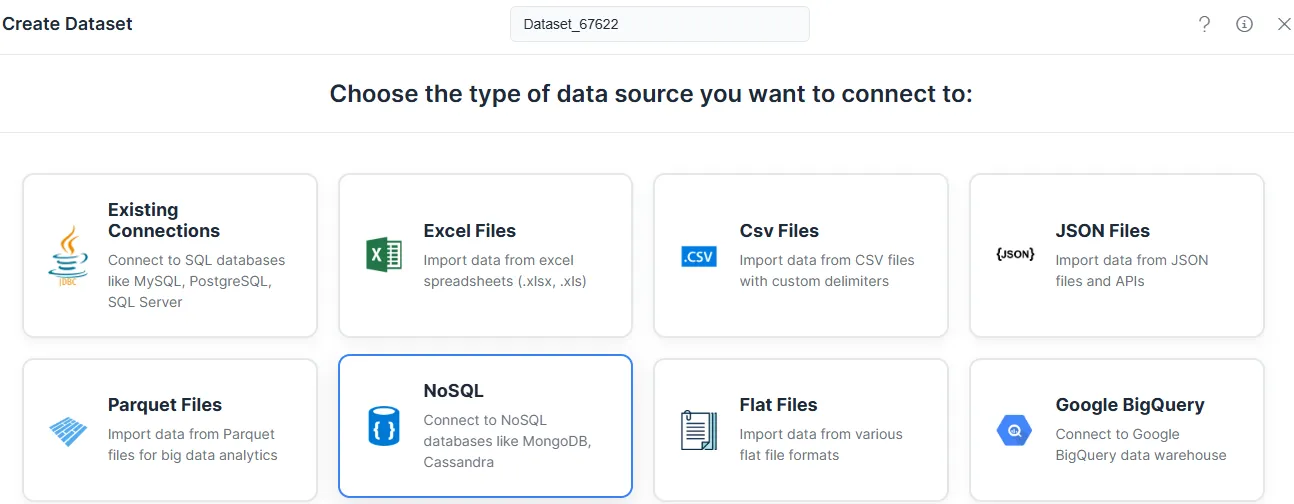
Step 5: Create Dataset and Choose Data Source Type
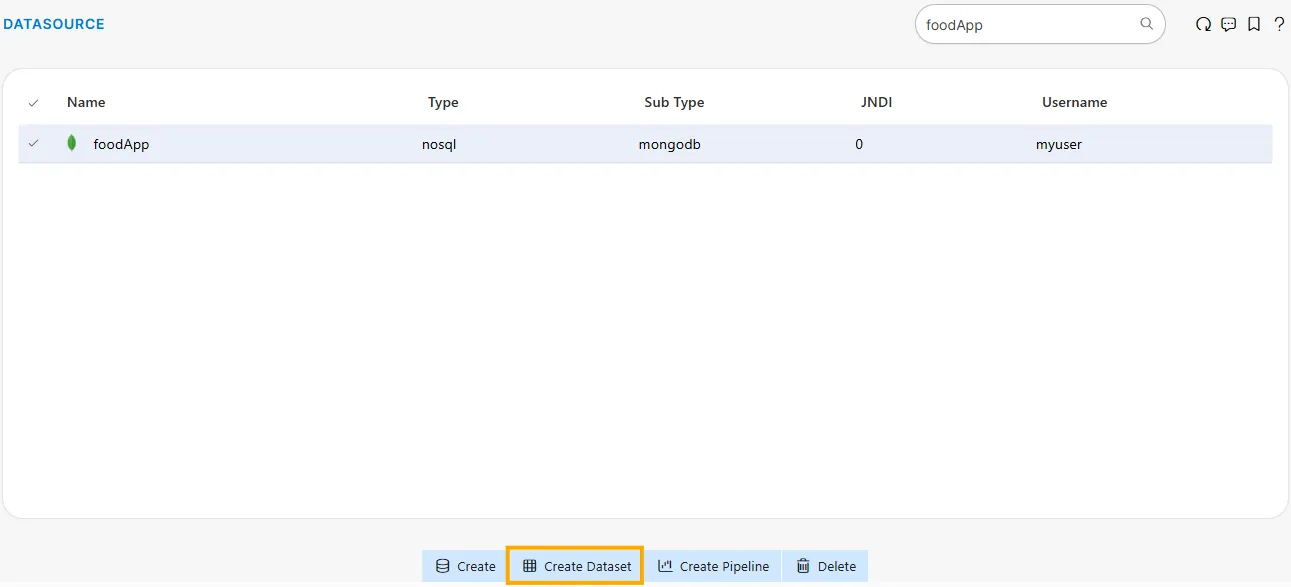
-
Return to the Datasource list page, verify that your MongoDB connection (foodApp) is listed, select it, and click the “Create Dataset” button.
-
Click on the “NoSQL” option (highlighted with blue border)
5.1 Upload or Select Files
Choose between two tabs:
- Upload New Files - Upload fresh data files
- Select Existing Files - Use already configured collections ✓
-
Click the “Select Existing Files” tab
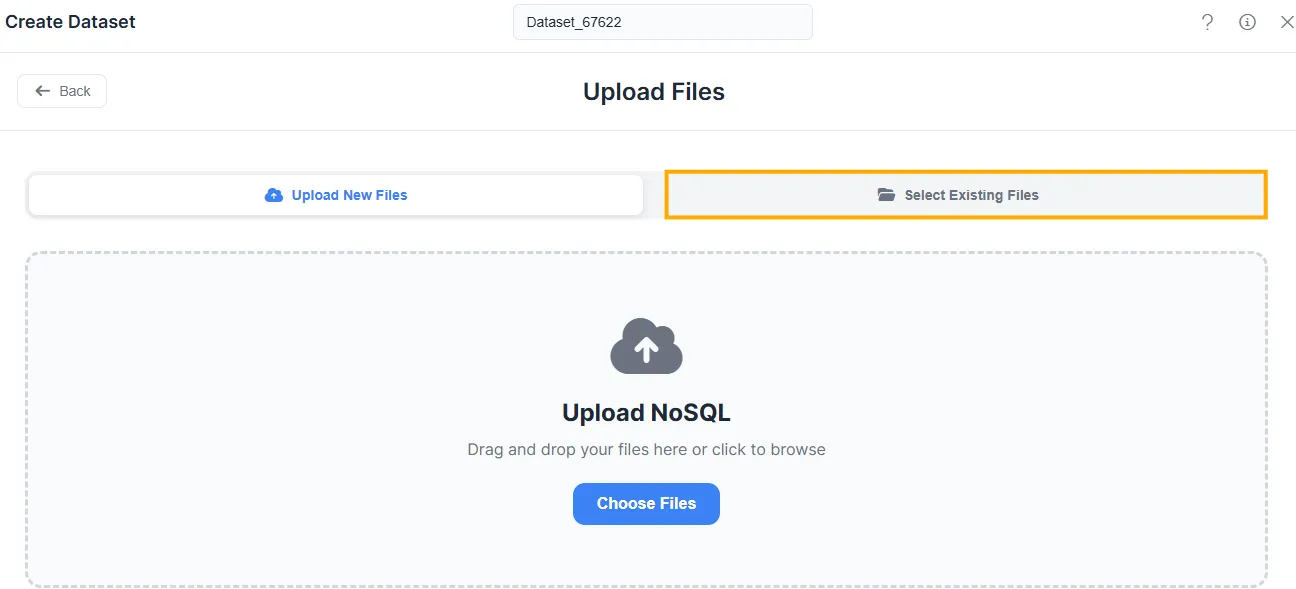
-
This allows you to work with existing MongoDB collections
5.2
- Enter dataset name in the field at top:
foodAppSwiggy - Default name format:
Dataset_67622(auto-generated) - Use a descriptive name that reflects the data purpose
Step 6: Write MongoDB Query
6.1 Access Query Editor
In the Create Dataset interface, you’ll see:
-
Top toolbar with data source type icons (Existing Connections, Excel, CSV, JSON, Parquet, NoSQL, etc.)
-
The left panel shows the Database section with your connection (
foodApp), while the main panel displays the MongoDB Query Editor.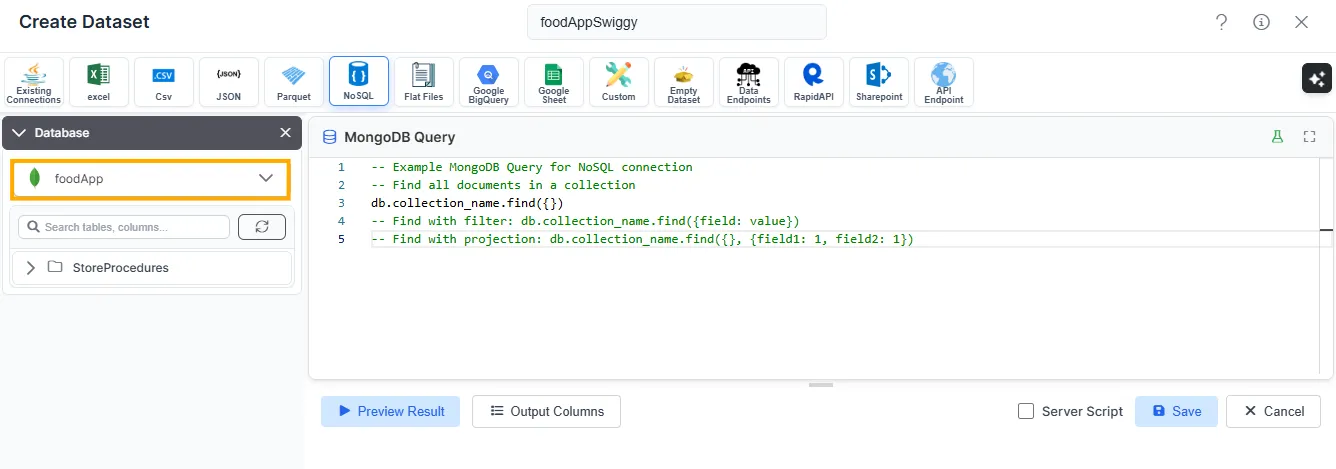
6.2 Example MongoDB Queries
The query editor provides example queries:
// Example MongoDB Query for NoSQL connection
// -- Find all documents in a collection
db.collection_name.find({})
// -- Find with filter: db.collection_name.find({field: value})
// -- Find with projection: db.collection_name.find({}, {field1: 1, field2: 1})
6.3 Write Your Query
Common queries for your swiggy collection:
1. Find All Documents:
db.swiggy.find({})2. Find with Filter (Rating >= 4):
db.swiggy.find({ Rating: { $gte: 4 } })3. Find by Area:
db.swiggy.find({ Area: "Central Abohar" })4. Sort by Rating (Descending):
db.swiggy.find({}).sort({ Rating: -1 })5. Limit Results:
db.swiggy.find({}).limit(10)6.4 Test and Save Query
- Write your MongoDB query in the editor.
- Click “Preview Result” button to test the query.
- Review the output to ensure it returns expected data.
- Click “Save” button to store the dataset configuration.
- Or click “Cancel” to discard changes.
6.5 Additional Options
- Output Columns: Click to view/modify which columns are included
- Dataset name shown at top:
foodAppSwiggy