Filter Widget
Introduction
Add dynamic filters to control data across multiple widgets. Available filter types:
- Text Input
- Dropdown
- Multi-select
- Radio Buttons
- Checkboxes
Filters can be linked to various data sources and widgets to enable interactive, real-time filtering across dashboards.
Purpose
The filter functionality ensures that dashboards are not static. Instead, they enable:
- Custom views: Narrow down data to a specific selection (e.g., Veg vs Non-Veg).
- Interactivity: Allow users to interact with charts and tables.
- Efficiency: Quickly locate insights without editing datasets.
Steps to Add a Filter
-
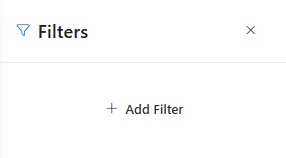
Open the Filter Panel Click on the Filter icon located on the top right side of the dashboard.

-
Add a New Filter
Click Add Filter.
-
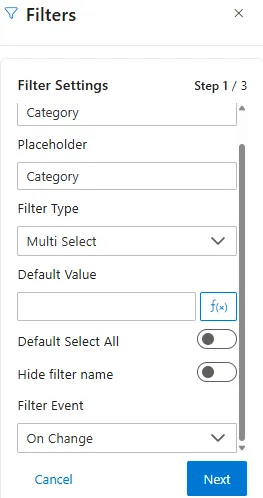
Configure Filter Settings (Step 1/3)
Setting Description Example Use Filter Name Internal name of the filter. CategoryPlaceholder Display text shown inside the dropdown before selection. “Select Category” Filter Type Choose the type of filter from available options. Multi Select → allows multiple options Default Value Pre-populated value (can use script via fx).Default to “Veg” Default Select All Toggle ON to select all values by default. Show all categories initially Hide Filter Name Toggle ON if you don’t want the filter name displayed above it. For clean layout Filter Event Defines when the filter applies:
- On Change: Apply instantly after selection.
- On Click: Apply only after pressing the Apply button (useful with multiple filters).Example: Use On Click for dashboards with multiple filters Click next to proceed.
-
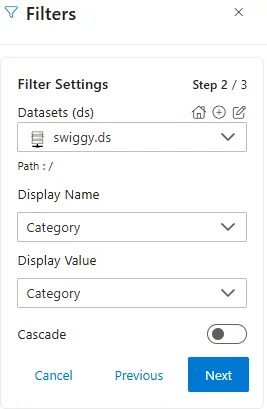
Configure Data Binding (Step 2/3)
Setting Description Example Use Dataset Select the dataset linked to the filter. swiggy.dsDisplay Name Column shown in dropdown to the user. Category → “Veg” / “Non-Veg” Display Value Backend column used to apply the filter. Category Cascade (toggle) Enable if this filter depends on another filter. City → Locality relationship Parent Filter Select the parent filter if cascade is ON. City filter → Parent for Locality Link with Column/Parameter Map filter to dataset column or a global parameter. Category column
Click Next.
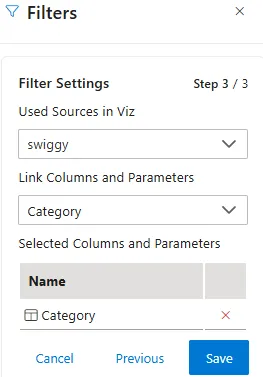
- Resource Linking (Step 3/3)
- Choose resources (charts/tables) where this filter will apply.
- Link the filter with columns and parameters in those resources.
This ensures the filter dynamically updates only the relevant widgets.
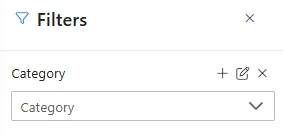
- Add and Manage the Filter
-
Click the Plus (+) icon to add the filter to the dashboard.
-
Edit -> Reconfigure filter settings.
-
Remove -> Delete the filter from dashboard.
Filter Types
Choose from a variety of filter types depending on your use case:
- Text Box → Enter free text values (e.g., search by restaurant name).
- Dropdown → Select a single option from a list.
- Multi Select → Pick multiple values at once.
- Radio → Choose exactly one option from a set.
- Checkbox → Allow multiple selections using checkboxes.
- Date Time → Pick both date and time together.
- Date → Choose only a specific date.
- Time → Select only a time value.