BIRT 4.13 Installation Guide
This document provides a step-by-step guide to installing BIRT 4.13 (Business Intelligence and Reporting Tools).
Objective
This guide outlines the prerequisites and steps required to install the BIRT 4.13 Report Designer for creating and designing reports in AIV.
1. Prerequisites
Before installing BIRT 4.13, ensure your system meets the following requirements.
1.1 Java Runtime Environment (JRE) / JDK
BIRT 4.13 is built on modern Eclipse platforms and requires Java 17 or higher.
- Recommended Version: OpenJDK 17 or Oracle JDK 17.
- Verification: Open your terminal or command prompt and type:
java --version2. Download Options
There are two primary ways to install the BIRT Designer:
- All-in-One Designer (Recommended): A pre-configured Eclipse IDE with BIRT plugins already installed.
- Update Site: Installing BIRT into an existing Eclipse installation.
3. Installation Steps (All-in-One)
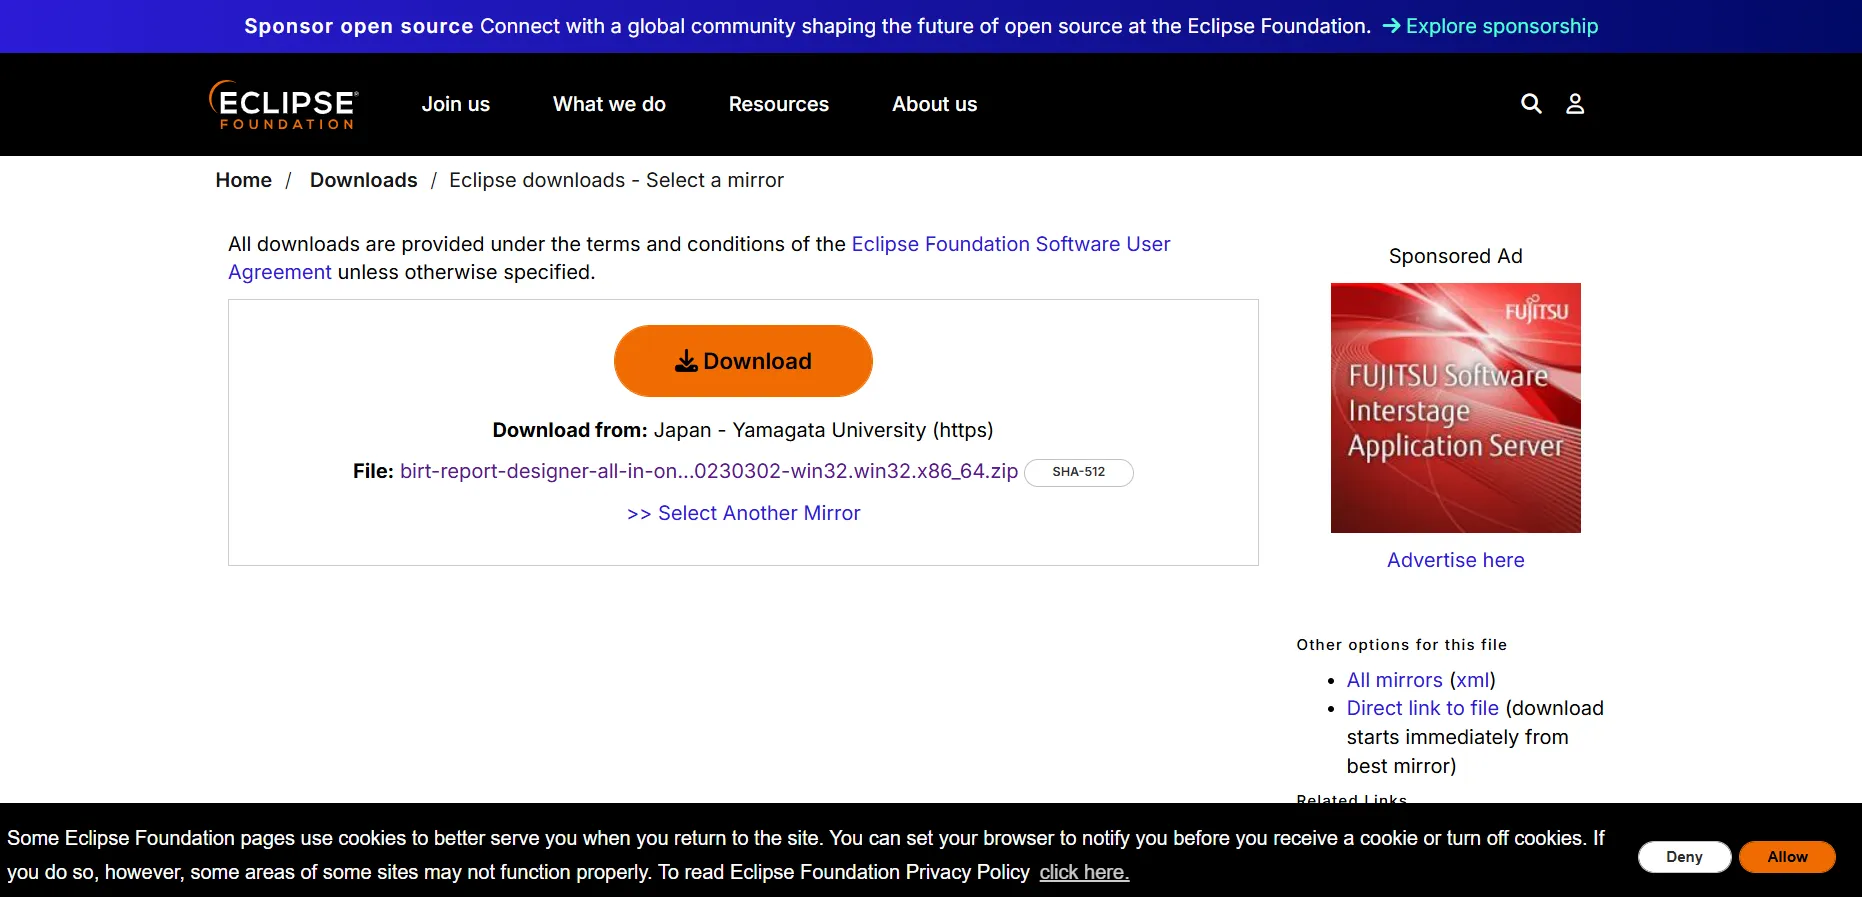
Step 1: Download the Package
-
Go to the Eclipse BIRT downloads page: Download BIRT 4.13 All-in-One (Windows x64)
-
Click the Download button to download the package.
Step 2: Extract the Files
-
Once the download is complete, locate the downloaded file:
birt-report-designer-all-in-one-4.13.0-20230302-win32.win32.x86_64.zip -
Right-click on the downloaded file and select Extract All or use your preferred extraction tool.
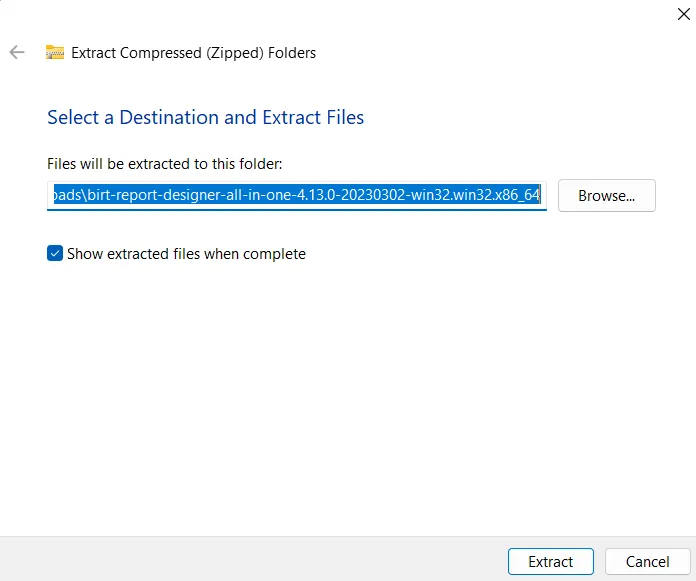
-
Select a destination folder where you want BIRT to reside (e.g.,
C:\BIRT_4.13orC:\eclipse). -
Click Extract to extract all files.
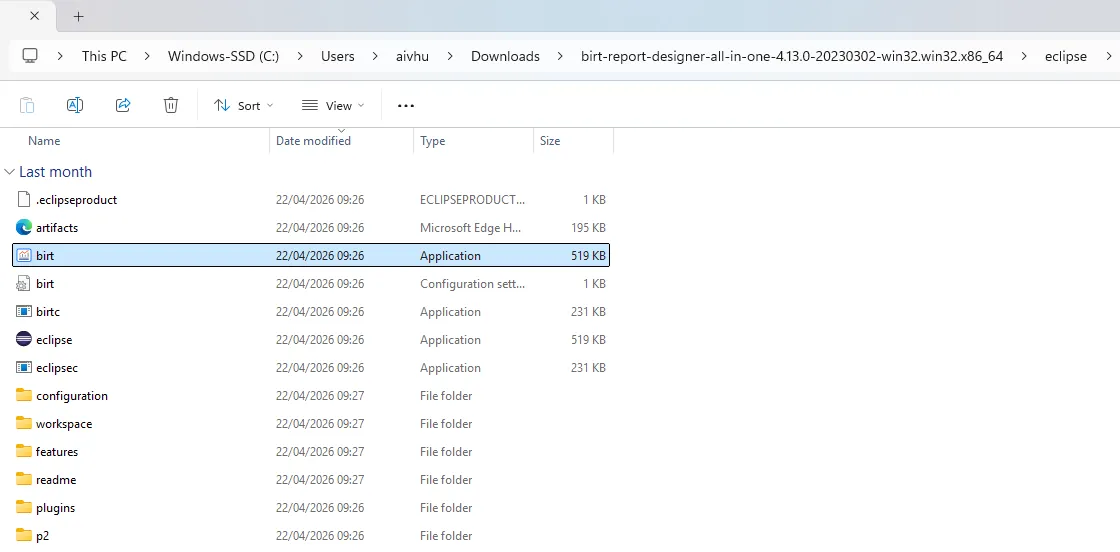
Step 3: Launch BIRT
-
Navigate to the extracted folder and locate the eclipse.exe (Windows) or eclipse (Linux/macOS) executable.
-
Double-click on birt to launch BIRT.
-
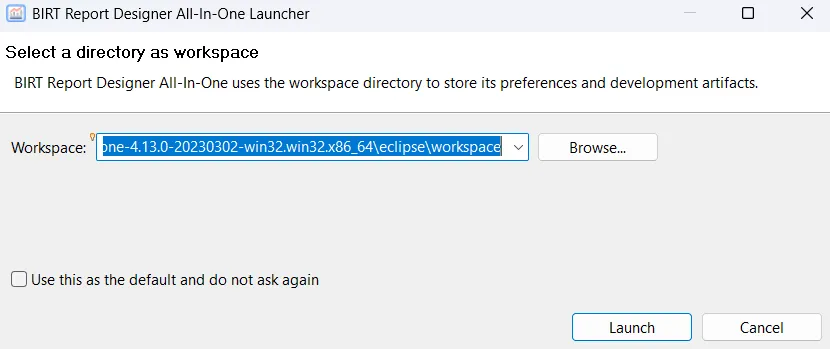
The BIRT Report Designer All-In-One Launcher dialog will appear.
-
Select a Workspace directory when prompted. This is where your report files (
.rptdesign) will be stored.- The default workspace path will be shown (e.g.,
birt-report-designer-all-in-one-4.13.0-20230302-win32.win32.x86_64\eclipse\workspace) - You can click Browse… to select a different location
- Optionally, check Use this as the default and do not ask again to skip this dialog in future launches
- The default workspace path will be shown (e.g.,
-
Click Launch to start BIRT.
Step 4: BIRT Opens Successfully
Once Eclipse opens, you will see the BIRT Report Designer interface:
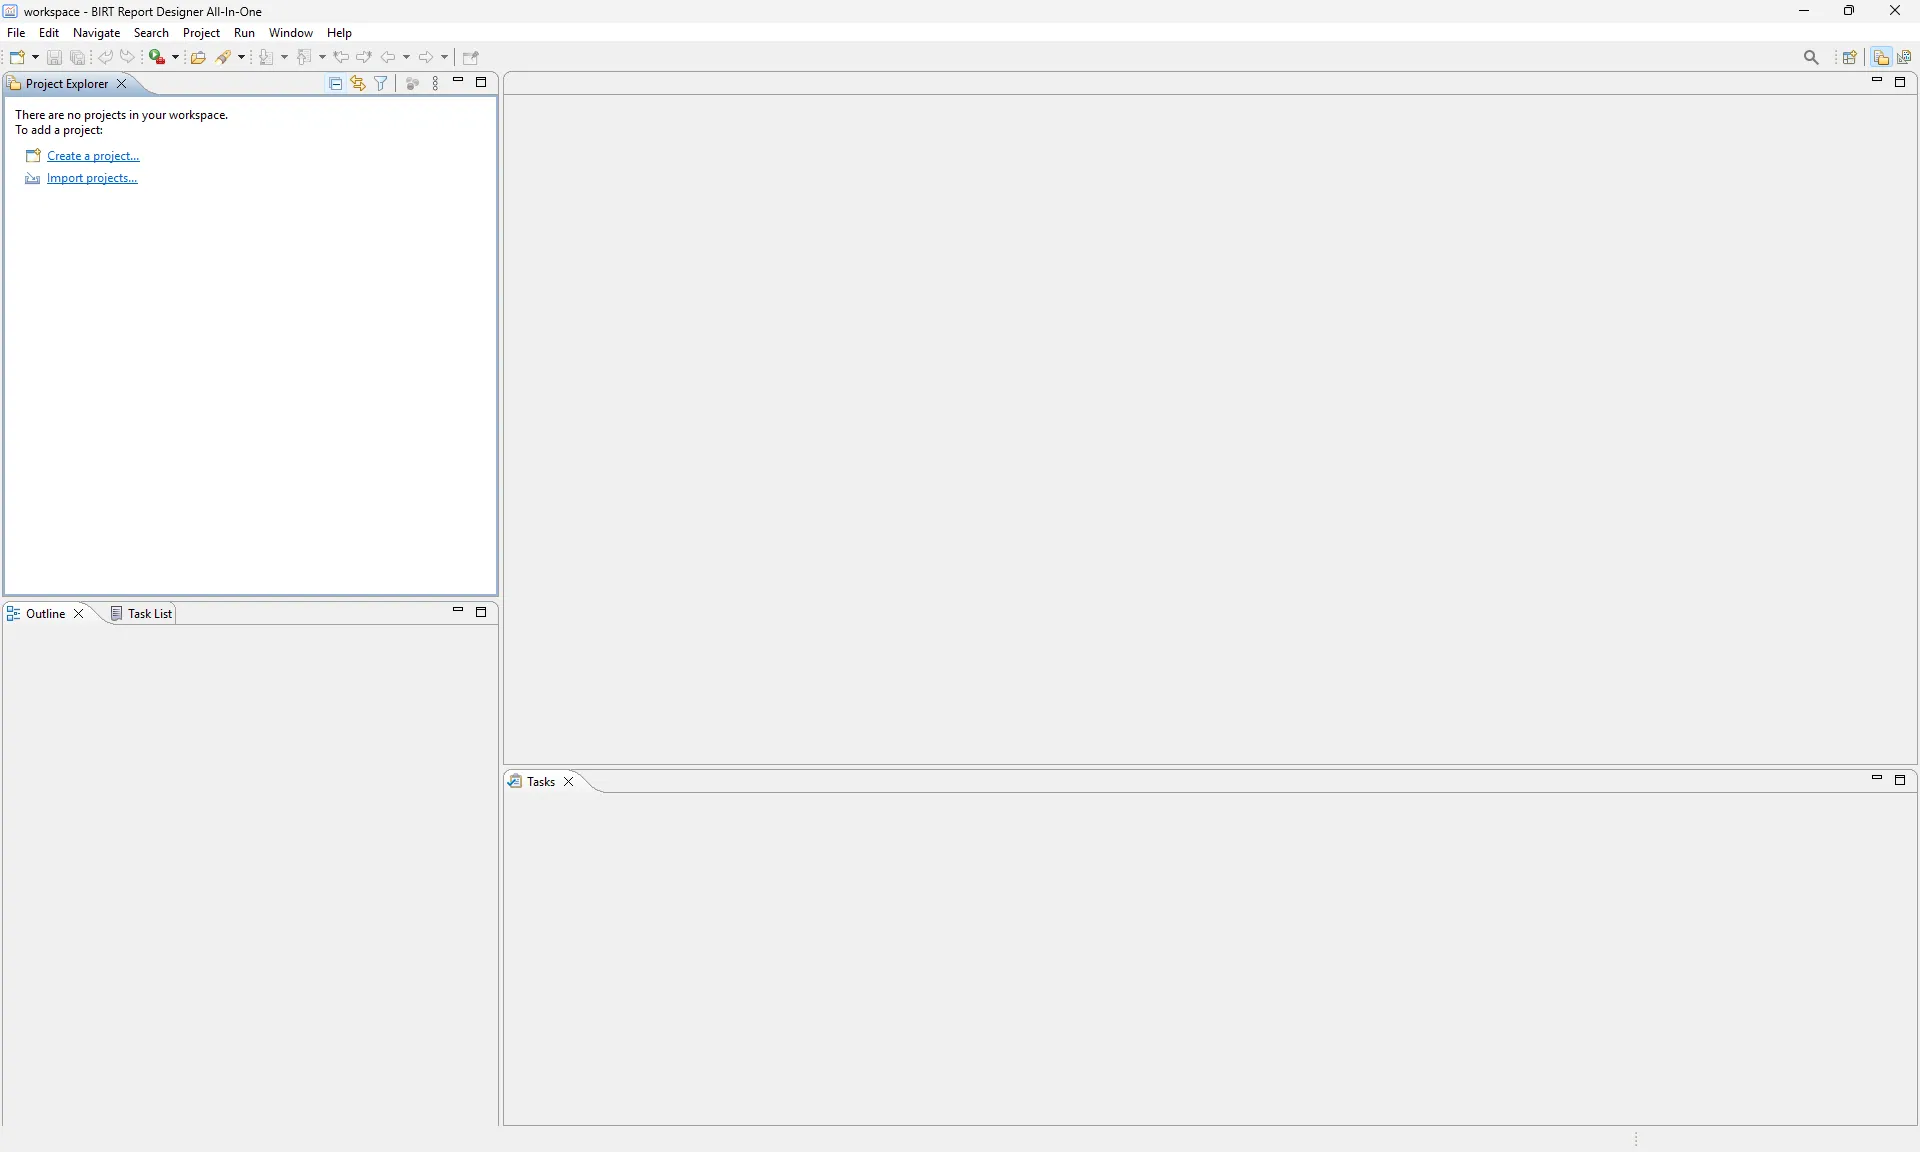
The interface includes:
- Project Explorer on the left side
- Data Explorer and Resource Explorer tabs
- Property Editor, Problems, and Error Log tabs at the bottom
- Main workspace area in the center
4. Verifying the Installation
To ensure BIRT is working correctly:
-
Go to File > New > Project…
-
Select Business Intelligence and Reporting Tools > Report Project. Click Next and name it
TestProject. -
Right-click the project > New > Report.
-
If the report editor opens and the Palette (containing Labels, Tables, etc.) is visible on the left, the installation is successful.
5. Switching to Report Design Perspective
If you need to switch to the Report Design Perspective:
-
Go to Window > Perspective > Open Perspective > Other…
-
Select Report Design and click Open.
This perspective provides all the tools needed for creating and designing reports.
6. Creating Your First Report
To create a new report:
-
In the Project Explorer, right-click and select Create a project…
-
Choose Business Intelligence and Reporting Tools > Report Project
-
Enter a project name and click Finish
-
Right-click on the project and select New > Report
-
Enter a report name and click Finish
-
The report designer will open, and you can start designing your report using the palette tools.