AIV License Management
AIV provides two licensing systems to manage your application license:
- New License System: A modern, streamlined approach with CPU-based licensing and enhanced license management features
- Legacy License System: The traditional licensing method for backward compatibility
This guide covers both systems and provides step-by-step instructions for requesting, applying, and managing your AIV license.
Understanding License Types
New License System
The new license system offers:
- CPU-Based Licensing: License allocation based on CPU
- Online/Offline Modes: Flexibility to operate with or without internet connectivity
- Automated License Requests: Streamlined process for requesting new licenses
- Enhanced License Details: Comprehensive information about license configuration and buyer details
Legacy License System
The legacy license system provides:
- Traditional Licensing: File-based license management
- Machine ID Based: License tied to specific machine identifiers
- Manual Update Process: License updates through file upload
Accessing License Manager
To access the License Manager:
-
Log in to the AIV application with Administrator credentials.
-
Click on the
 menu in the top-left corner.
 -
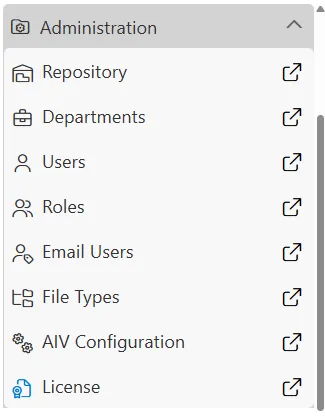
Expand the Administration section and click on License.
New License System
Understanding the License Manager Interface
When you access the License Manager, you’ll see the form with the following components:
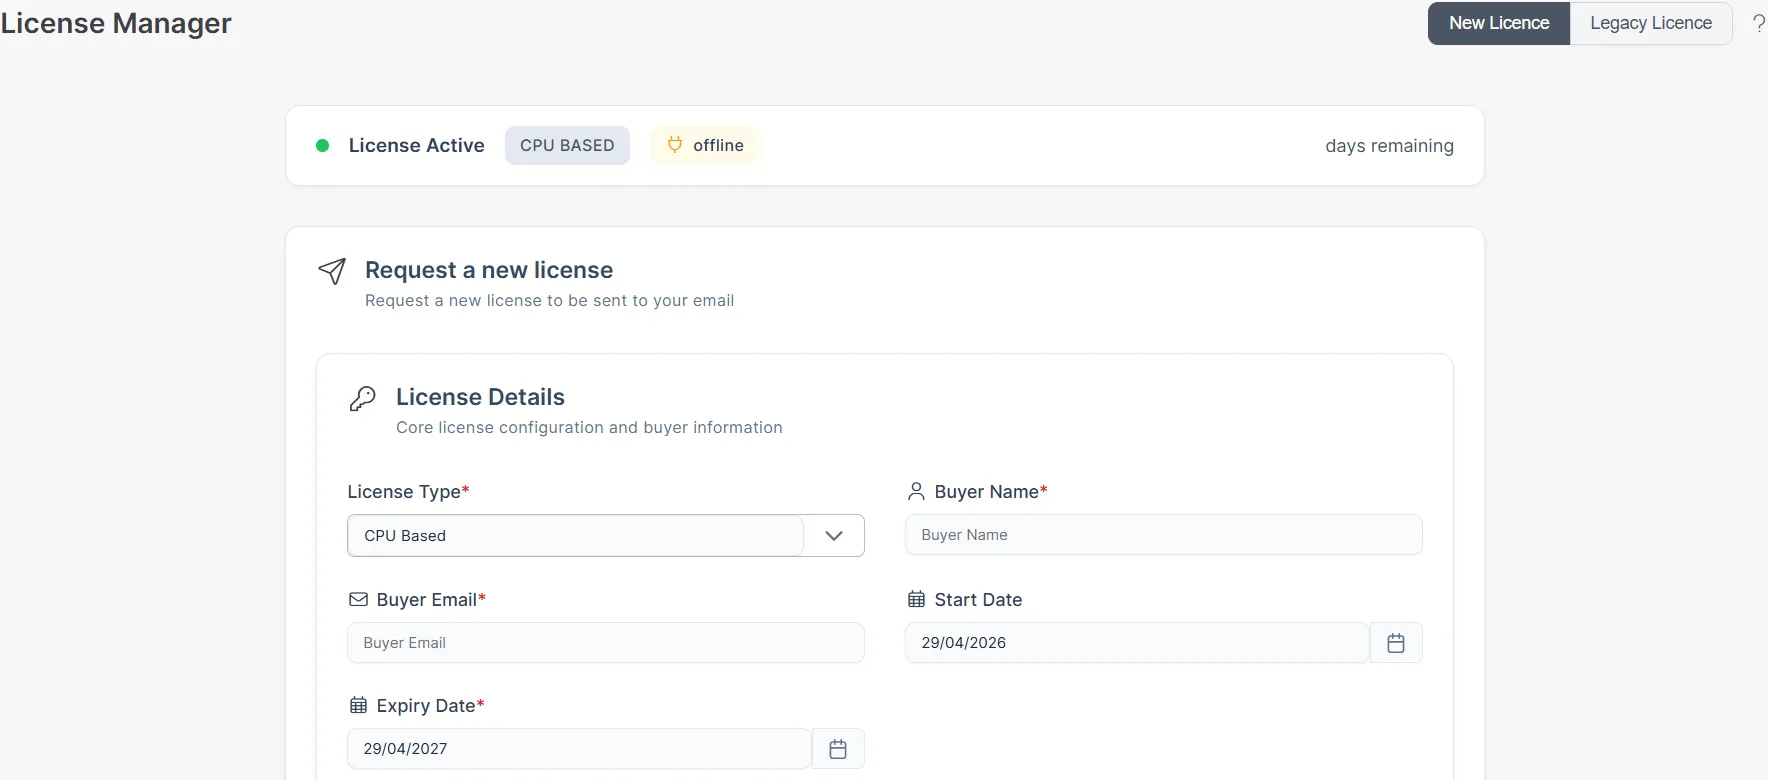
Key Elements:
-
License Status Indicator
- Green dot with “License Active”: Your license is currently active and valid
- CPU BASED: Indicates the license type (CPU-based licensing)
- offline: Shows the current license mode
-
Days Remaining: Displays the number of days left before license expiration
-
Tab Options:
- New License: Access the modern licensing system (currently active)
- Legacy License: Switch to the traditional licensing method
Filling License Details and Metadata
To request a new license, you need to provide comprehensive information in two sections:
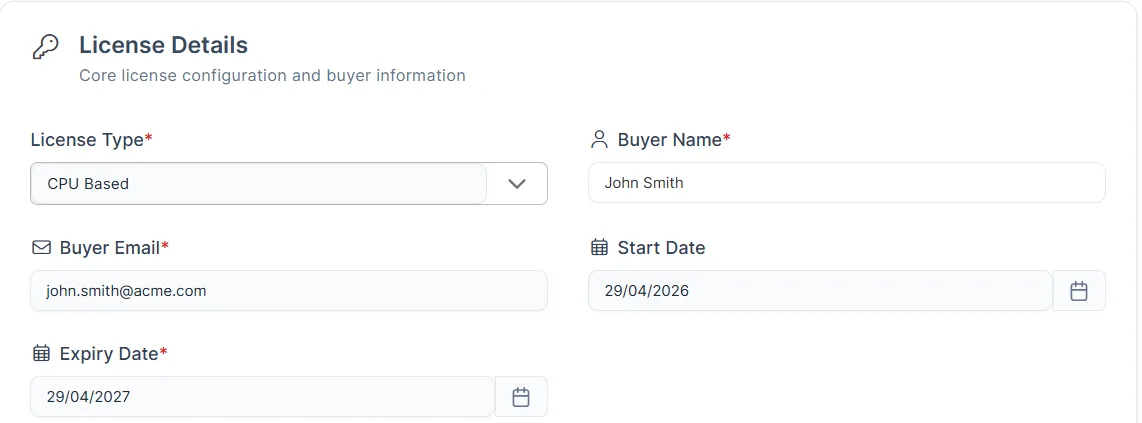
License Details Section:
This section captures essential information about the license type, buyer details, and validity period:
-
License Type* (Required)
- Select from dropdown with two options:
- CPU Based: License is based on the number of CPUs in the machine where the software is installed.
- User Based: License is based on the number of users who access AIV application.
- This determines how the license is calculated and allocated
- Example: Select “CPU Based” for server-based licensing
- Select from dropdown with two options:
-
Buyer Name* (Required)
- Enter the full name of the organization or individual purchasing the license
- This should be the official company name or individual’s full name
- Example: “John Smith”, “Acme Corporation”, “Tech Solutions Inc”
-
Buyer Email* (Required)
- Provide a valid email address where the license key will be sent
- The license key will be sent to this email after approval and payment
- Ensure this email is actively monitored
- Example: ”john.smith@acme.com”, ”admin@yourcompany.com”
-
Start Date* (Required)
- Select the date when the license should become active
- Format: DD/MM/YYYY (e.g., 29/04/2026)
- Use the calendar picker for easy selection
- Typically set to the current date or a future activation date
- Example: “29/04/2026”
-
Expiry Date* (Required)
- Select the date when the license will expire
- Format: DD/MM/YYYY (e.g., 29/04/2027)
- Example: “29/04/2027” (1 year from start date)
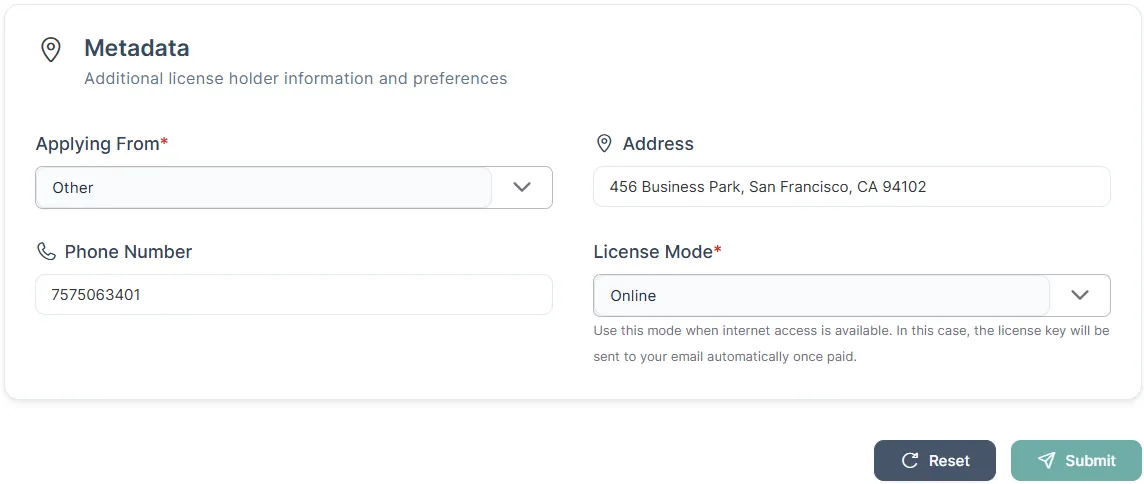
Metadata Section:
This section captures additional license holder information and preferences:
-
Applying From* (Required)
- Select from dropdown with three options:
- Azure: If you’re deploying AIV on Microsoft Azure cloud platform
- AWS: If you’re deploying AIV on Amazon Web Services cloud platform
- Other: For on-premises deployments, other cloud providers, or custom environments
- This helps the licensing team understand your deployment environment
- Example: Select “Other” for on-premises or non-Azure/AWS deployments
- Select from dropdown with three options:
-
Address
- Enter the complete business address of the license holder
- Include street, city, state/province, and postal code
- This is used for billing and official records
- Example: “456 Business Park, San Francisco, CA 94102”, “123 Main Street, New York, NY 10001”
-
Phone Number
- Provide a contact phone number for license-related communications
- Include country code if applicable
- Format: Can include spaces, dashes, or be continuous digits
- Example: “7575063401”, “+1-555-123-4567”, “91 9876543210”
-
License Mode* (Required)
- Select from dropdown with two options:
- Offline: For environments without internet access or when you prefer manual processing
- Online: For automatic processing when internet connection is available
- Note: If online mode fails due to network issues, the system automatically falls back to offline mode
- Example: Select “Online” for automatic processing or “Offline” for manual control
- See Understanding License Request Workflow for detailed workflow explanation
- Select from dropdown with two options:
Action Buttons:
- Reset: Clears all form fields and starts over
- Submit: Sends the license request for processing
All fields marked with an asterisk (*) are mandatory and must be filled before submission.
Understanding License Request Workflow
After filling in all the required details and clicking Submit, the workflow differs based on the License Mode you selected and your network conditions:
Online Mode Workflow
When you select Online mode:
- Network Check: The system checks your internet connectivity
- Successful Connection:
- If your network is working properly, the license request is sent directly to the server
- Payment Complete: License is automatically approved and sent to your email
- Payment Pending: Request moves to pending status and will be processed once payment is confirmed
- Network Issues:
- If your network is slow or not working, the system automatically downloads a
License-request.jsonfile - You must then follow the offline process (see below)
- If your network is slow or not working, the system automatically downloads a
Offline Mode Workflow
When you select Offline mode:
-
Download JSON File: After clicking Submit, a
License-request.jsonfile is automatically downloaded to your computer -
Visit License Portal: Navigate to generate license
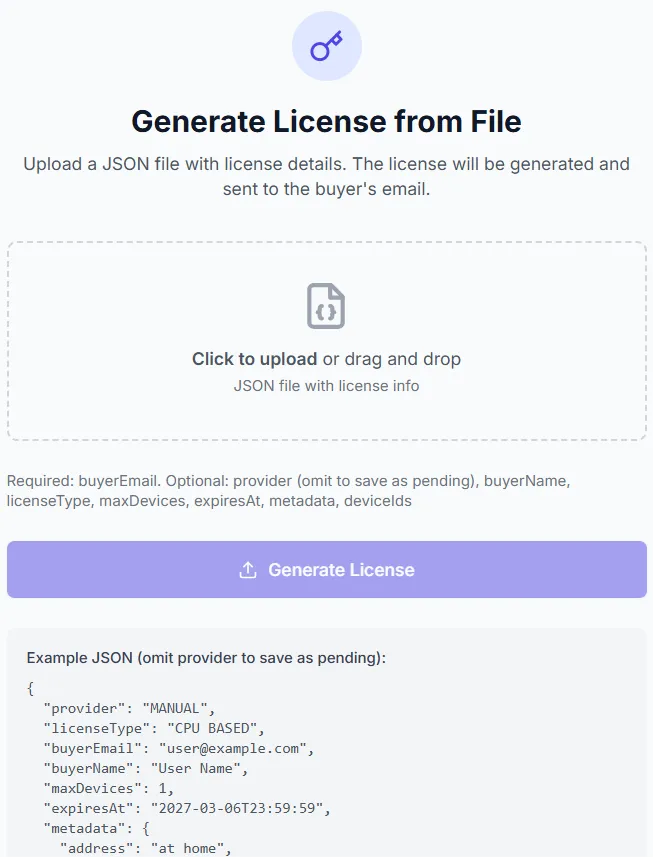
-
Upload JSON File:
- Click on the upload area or drag and drop the
License-request.jsonfile - The file contains all your license request details
- Click on the upload area or drag and drop the
-
Generate License: Click the “Generate License” button
-
Administrator Approval:
- Your request is sent to the administrator for review
- Administrator verifies the details and payment status
-
Receive License Key:
- Once approved and payment is confirmed, the license key is sent to your registered email
- This process may take 1-3 business days depending on approval and payment verification
Key Differences:
- Online Mode: Automatic processing if network is stable; falls back to offline if network fails
- Offline Mode: Always requires manual file upload and administrator approval
- Payment Status: Both modes require payment confirmation before license key is issued
Network Considerations: If you select Online mode but experience network issues during submission, don’t worry! The system will automatically download the License-request.json file. Simply follow the offline process to complete your license request.
Applying Your License Key
Once you receive the license key via email:
-
Locate the license key in the email (format:
XXXX-XXXX-XXXX-XXXX).
-
Copy the complete license key (including all dashes), paste it into the text field, and click the Apply button.
-
The system validates and activates the license immediately.
Legacy License System
Using the Legacy License Manager
For users who need to use the traditional licensing method:
-
Click on the Legacy License tab in the License Manager.
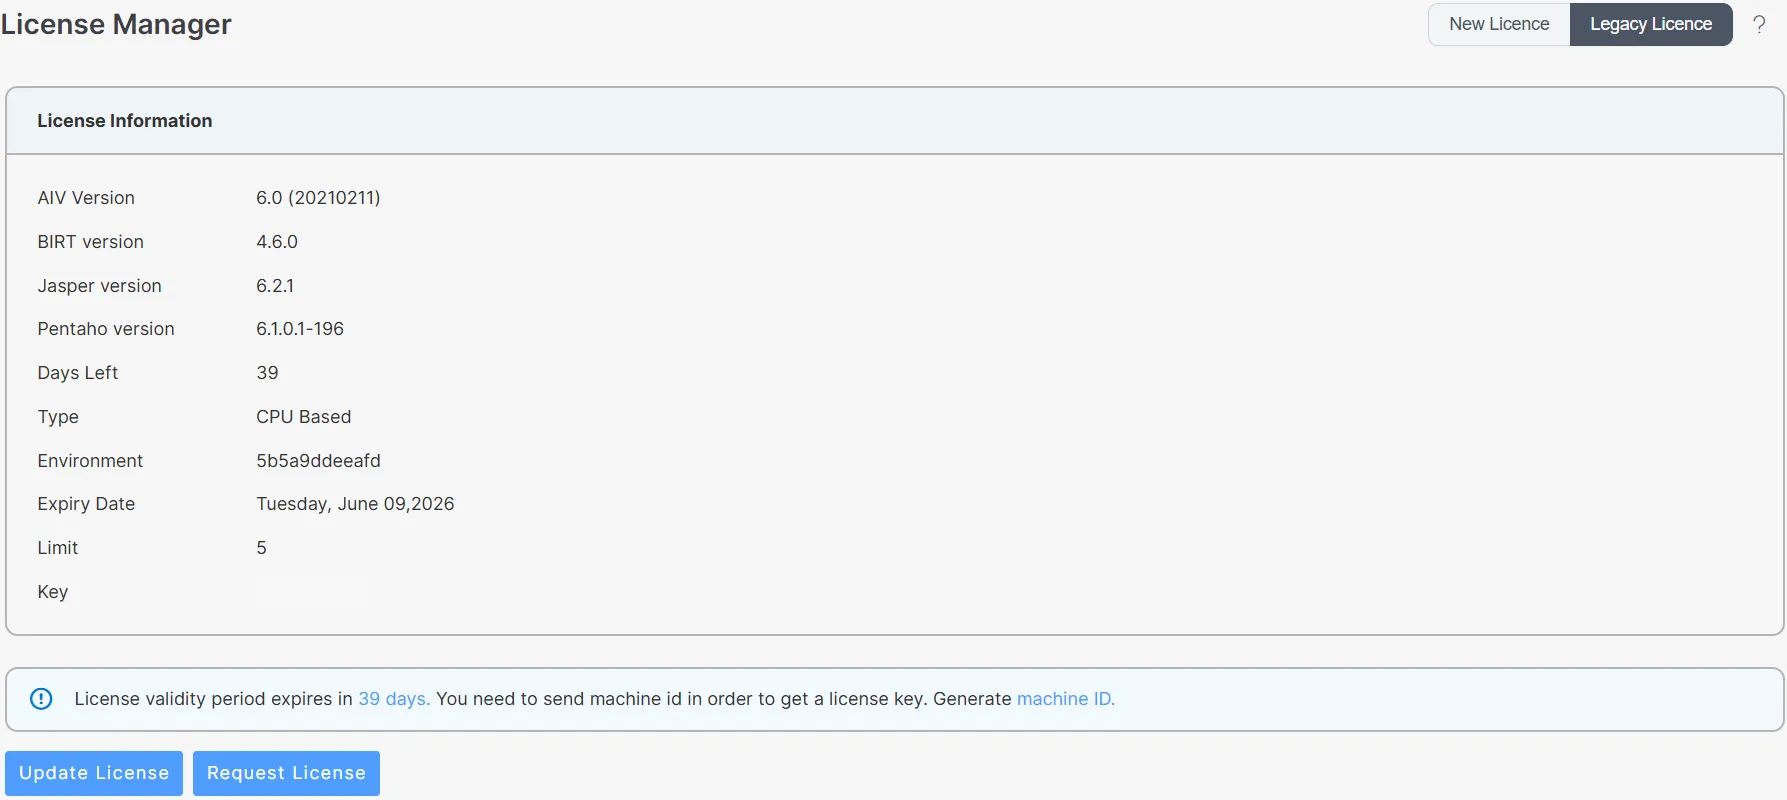
-
Click the Request License button.
-
You will be redirected to the AIVHUB license request portal.
-
Machine ID is automatically captured.
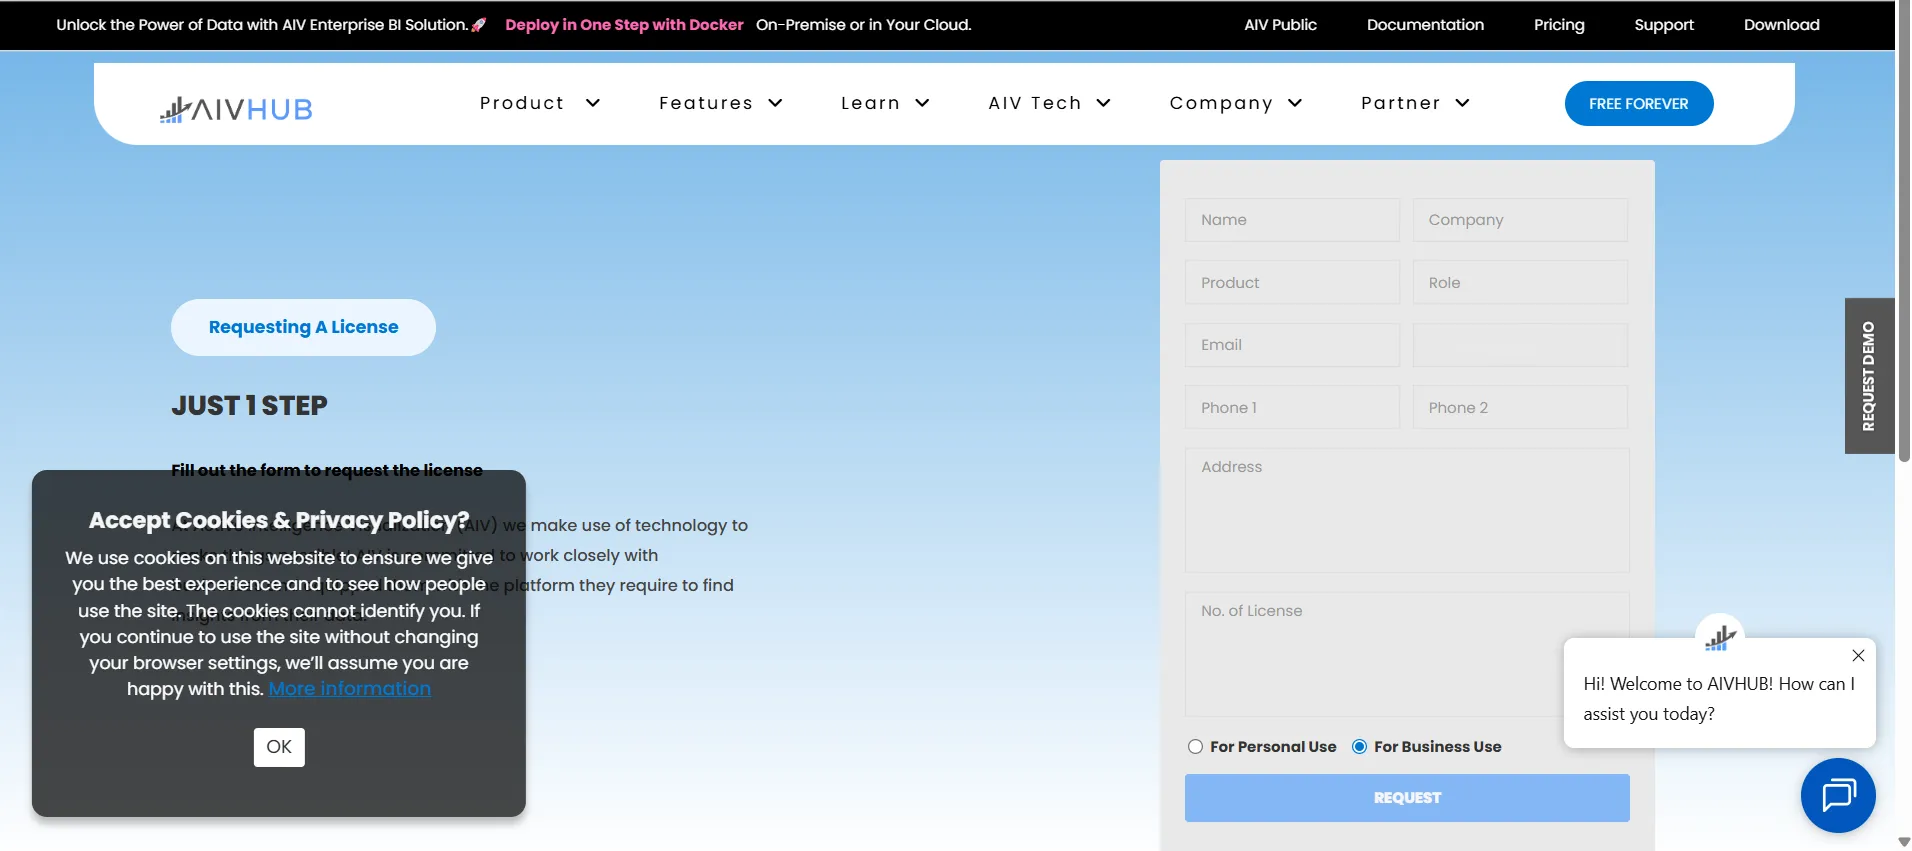
-
-
Fill in all required details in the form and click REQUEST.
-
Wait for the administrator to send you a JSON license file via email.
-
Click the Update License button in the License Manager.
-
Upload the JSON license file from your local storage.
-
The system validates and activates the new license.