Dataset Using CSV
Overview
This document guides you through the process of creating a dataset in AIV. Additionally, it explains how to create a dataset using CSV (Comma-Separated Values) files.
What is a CSV File?
A Comma-Separated Values (CSV) file is a delimited text file that uses commas to separate values. It is a plain text file that contains a list of data records, where each line represents a single record. Each record is made up of one or more fields, separated by commas.
CSV files are commonly used for exchanging data between different applications due to their simplicity and wide compatibility. The format’s name originates from its use of commas as field separators.
These files are particularly beneficial for importing, exporting, or transferring structured data across various systems or applications.
Click here to learn more about CSV files.
Objectives
Create a dataset using a CSV file.
Prerequisites
For this example, we are using the employees.csv file.
Download the csv.zip file from the link provided: csv.zip
After downloading the zip file, upload it into AIV. To learn how to add a file into AIV, follow this link.
Dataset using CSV: In this tutorial, you will learn how to create a dataset in AIV using a CSV file.
Steps to Create a Dataset Using CSV
-
Click on the
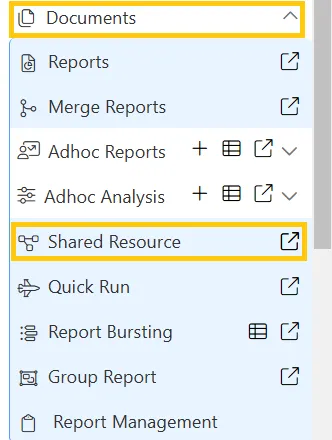
 menu in the top-left corner of the screen to open the menu. From the menu, navigate to the Documents section. In the Documents section, click on Shared Resource to proceed.
-
In the Shared Resource, click on the
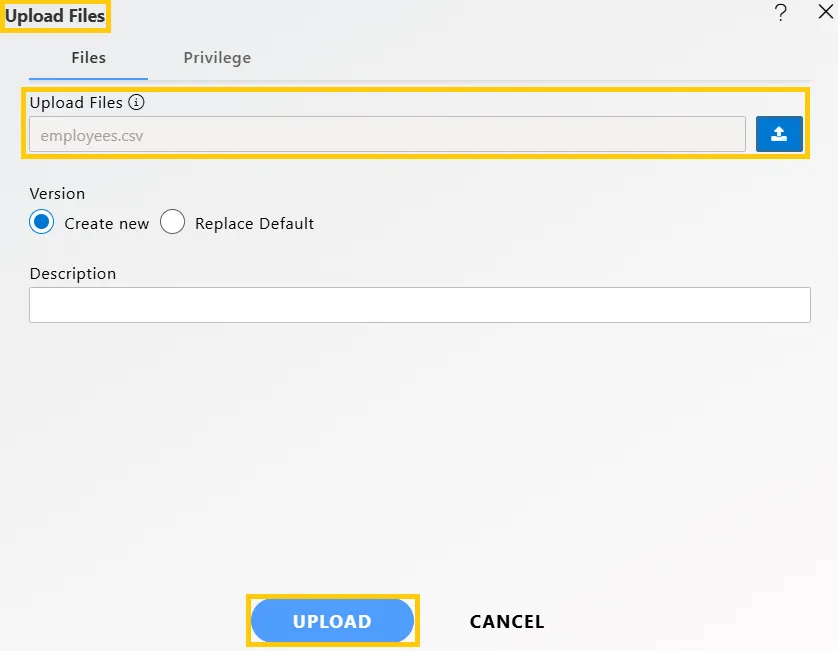
 button. When you click on Upload, an Upload Files dialog box will appear. In the dialog box, upload a CSV file, as shown below:
-
Click on the UPLOAD button, and you will see a Message, as shown below:

-
Click on the
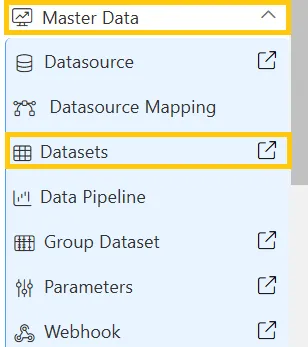
 menu, navigate to the Master Data tab. Then, in the Master Data tab, click on Datasets to proceed.
-
In the Datasets section, click on the
 button.
 -
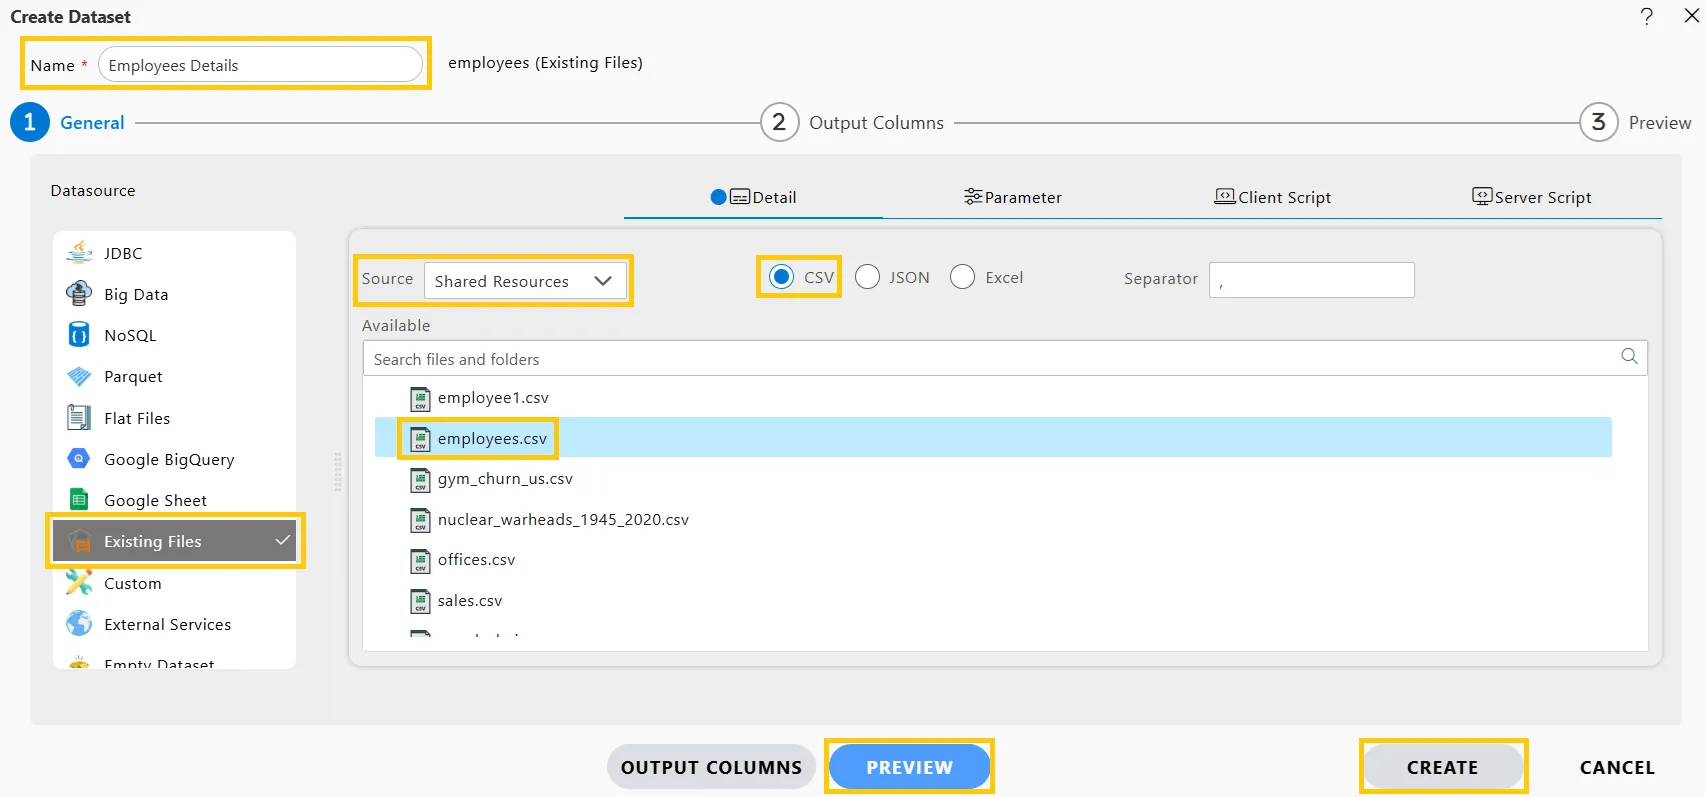
Enter the following details in the Create Dataset:
-
Name: Employees
-
Datasource: Existing Files
-
Source: Shared Resources
-
File Format: CSV
-
Select the employees.csv file in Available
-
Click on PREVIEW to view your data. After reviewing the data, click on the CREATE button to create the Employees dataset.
-
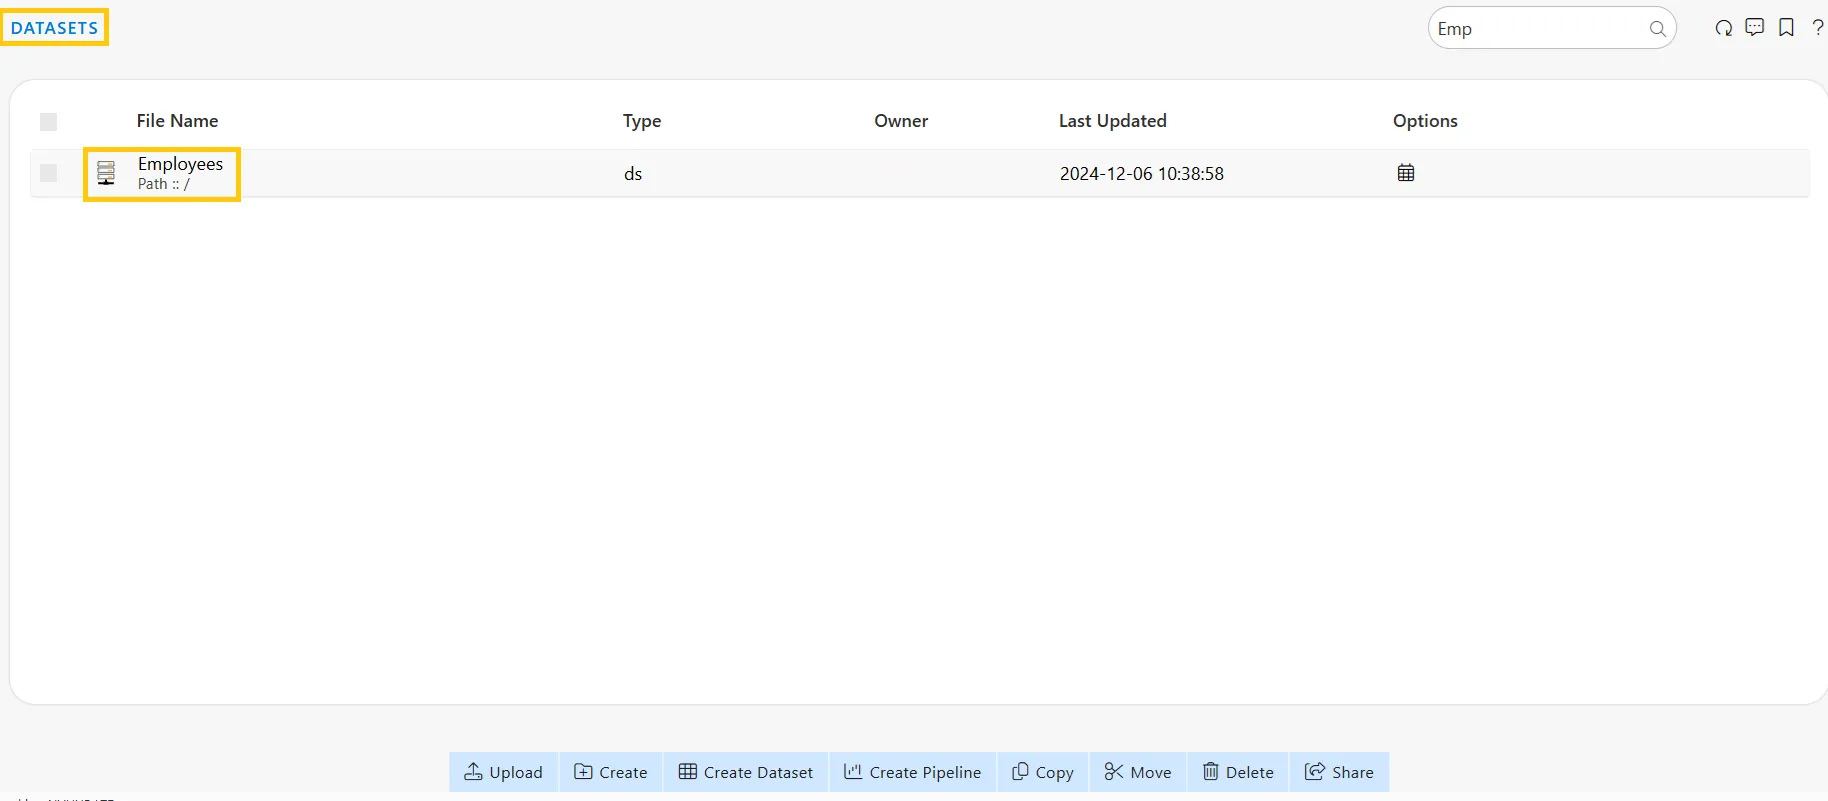
You will see the Employees dataset, as shown below:
-
Click on the
 menu, navigate to the Dashboard section, and open your dashboard. Click here to learn how to edit it.
 -
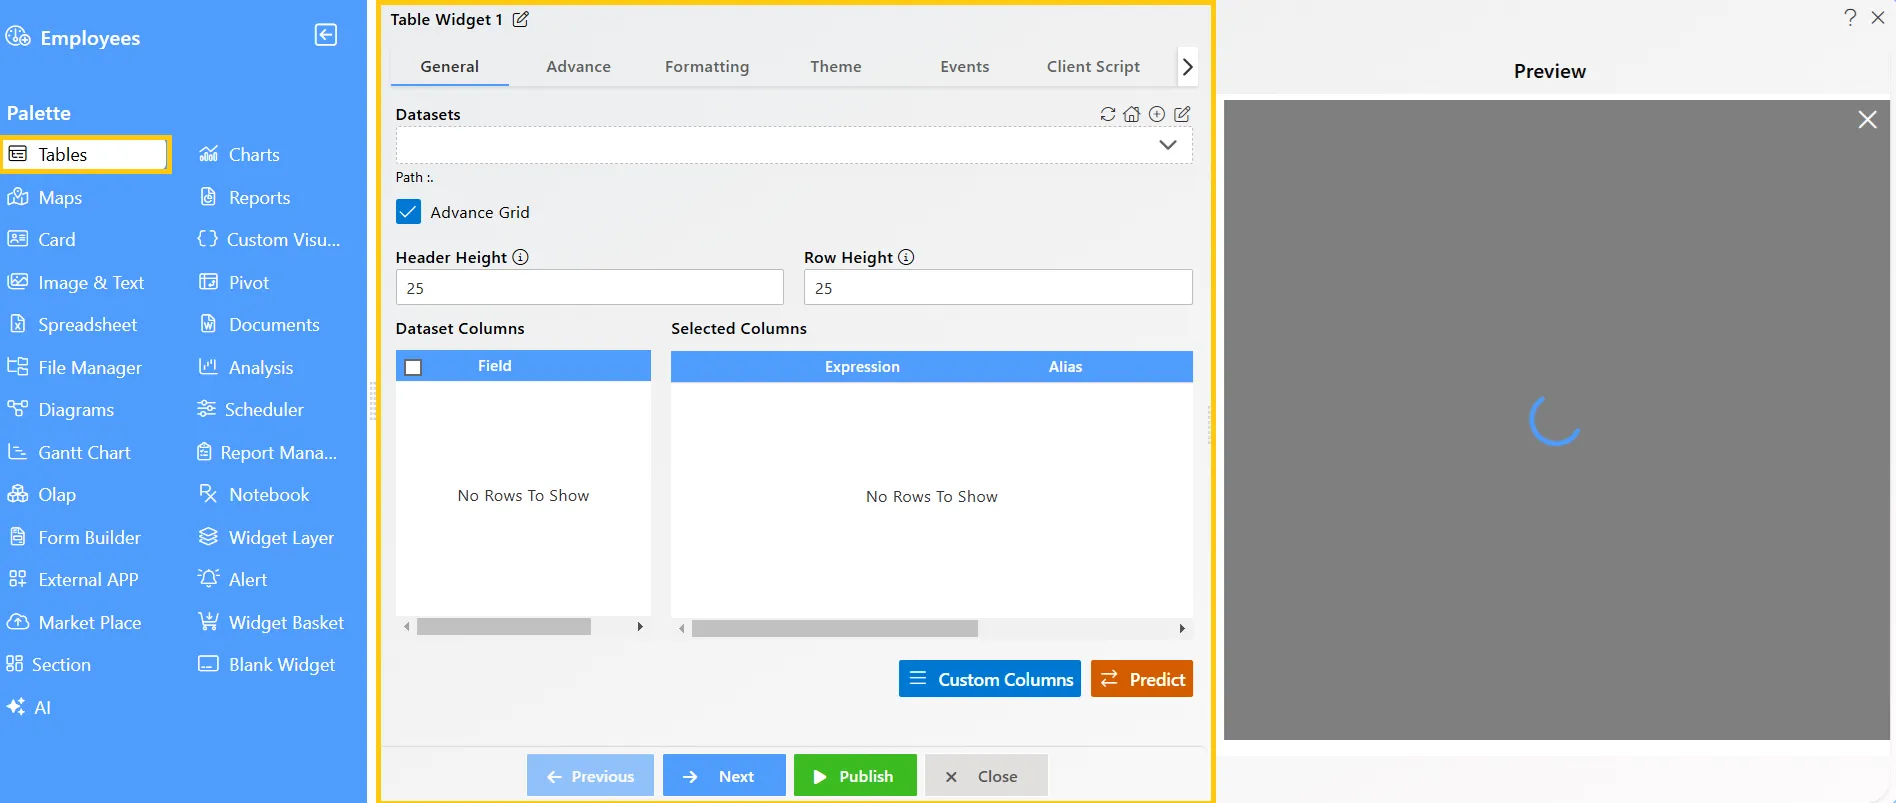
From the Left Vertical menu, click on the Table Widget icon. This action will open the Edit menu box.
-
When you click on the Table Widget icon, the widget will automatically be added to the content area of your dashboard.
-
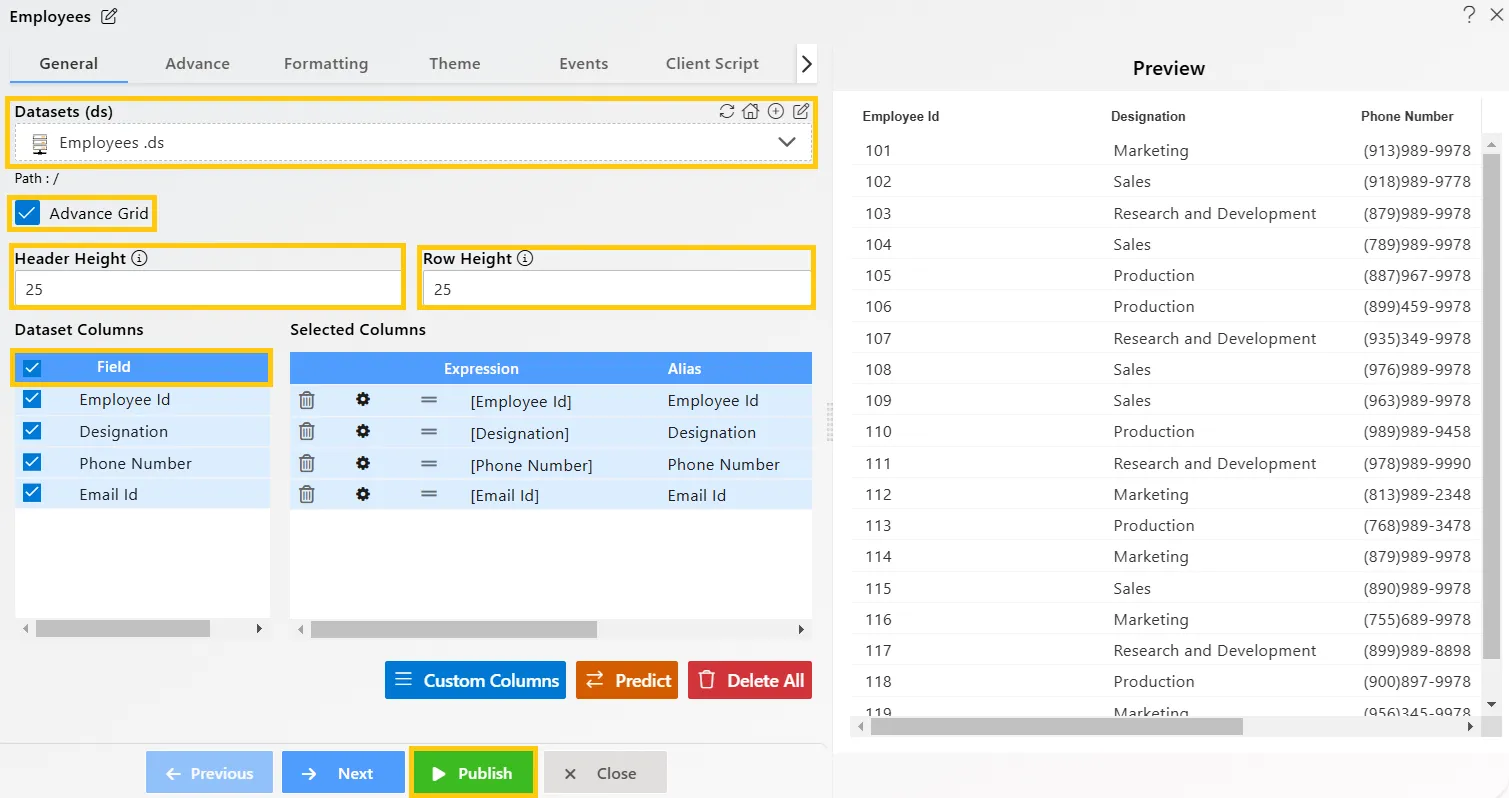
Enter the following details in the Edit menu:
-
Datasets (ds): Select Employees.ds
-
Advance Grid Checkbox: Ensure this option is checked to activate the advanced grid layout.
-
Header Height: Set to 25 for uniform header height.
-
Row Height: Set to 25 for consistent row appearance.
-
Checkmark Fields Section: Ensure all columns are selected by checking this option.
-
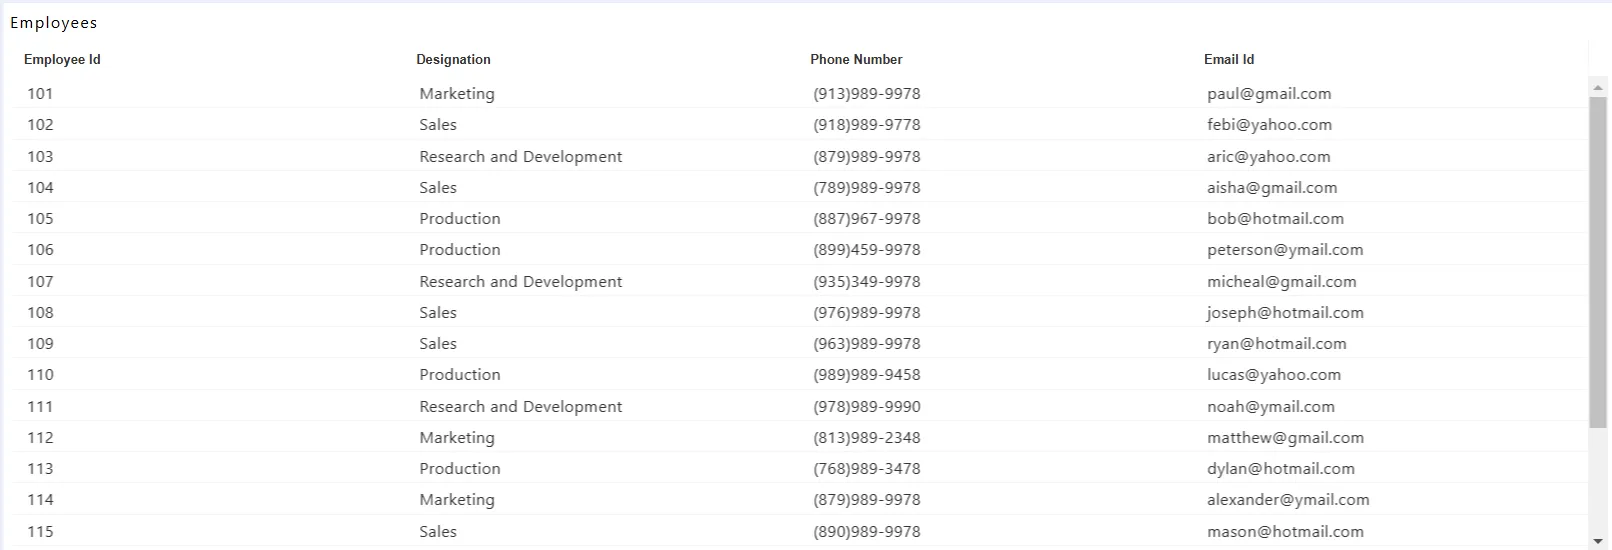
Click the Publish button, then the Preview icon, and finally click on the SAVE AND EXIT button to view the Table Widget.
-
Now, compare your Table Widget with the example shown below:
To learn more about creating a dataset using different sources, follow the links below:
Dataset using Excel
Dataset using Excel
Dataset using JSON
Dataset using Flatfiles
Dataset using External sources
Dataset using Google BigQuery
Dataset using noSQL
Dataset using Join
Dataset using Union
Dataset using Server Script
Dataset using Client Script
Dataset using Stored Procedure
Dataset using View
Dataset using Simple Query
Dataset using Drag & Drop