Role-Based Data Security Setup in AIV
Role-Based Data Security in AIV allows you to restrict data visibility based on the roles assigned to the logged-in user. By configuring security rules within a dataset, each user can view only the records they are authorized to access based on their assigned roles.
This guide demonstrates how to implement role-specific data access using the getRoles() function and dataset parameters.
Business Scenario
Assume your organization stores sales data for multiple business roles. Different roles should have access to different sets of data.
| Username | Assigned Role | Data Access |
|---|---|---|
| mayur_shah | BI Analyst | Access to BI Analyst records only |
| neel_shah | Regional Manager | Access to Regional Manager records only |
| vinitdoshi | Country Manager | Access to all records |
Users assigned the Country Manager role can view all records, while other users can only view data associated with their assigned roles.
You can replace these example roles with your own role names and customize the security logic according to your business requirements.
Prerequisites
Before starting, ensure that:
- Users have been created in AIV
- Roles have been created in AIV
- Roles have been assigned to users
- A data source is available and connected
- Your dataset contains a column that can be used for role-based security filtering
- You have permission to create datasets, visualizations, and dashboards
Step 1: Create Users
Create the users that will access the dashboard.
User Creation Guide: Create User
Create the following users for this example:
- mayur_shah
- neel_shah
- vinitdoshi
After creation, verify that all users appear in the user management section and are active.
Step 2: Create Roles
Create the roles that will be used for data security.
Role Creation Guide: Create Roles
Create the following roles for this example:
- BI Analyst
- Regional Manager
- Country Manager
After creation, verify that all roles appear in the role management section.
Step 3: Assign Roles to Users
Assign the appropriate roles to each user.
Role Assignment Guide: Assign Role
Assign roles as follows:
| Username | Assigned Role |
|---|---|
| mayur_shah | BI Analyst |
| neel_shah | Regional Manager |
| vinitdoshi | Country Manager |
After assignment, verify that each user has the correct role assigned.
Step 4: Prepare the Dataset
Your dataset must contain a field that can be used to identify which records belong to which role.
Dataset Creation Guide: Create Dataset
Example Dataset Structure:
| Employee Name | Role Name | Sales |
|---|---|---|
| John Smith | BI Analyst | 1000 |
| Jane Doe | Regional Manager | 1500 |
| Bob Wilson | Country Manager | 2000 |
For this example, the role_name column will be used to control data access.
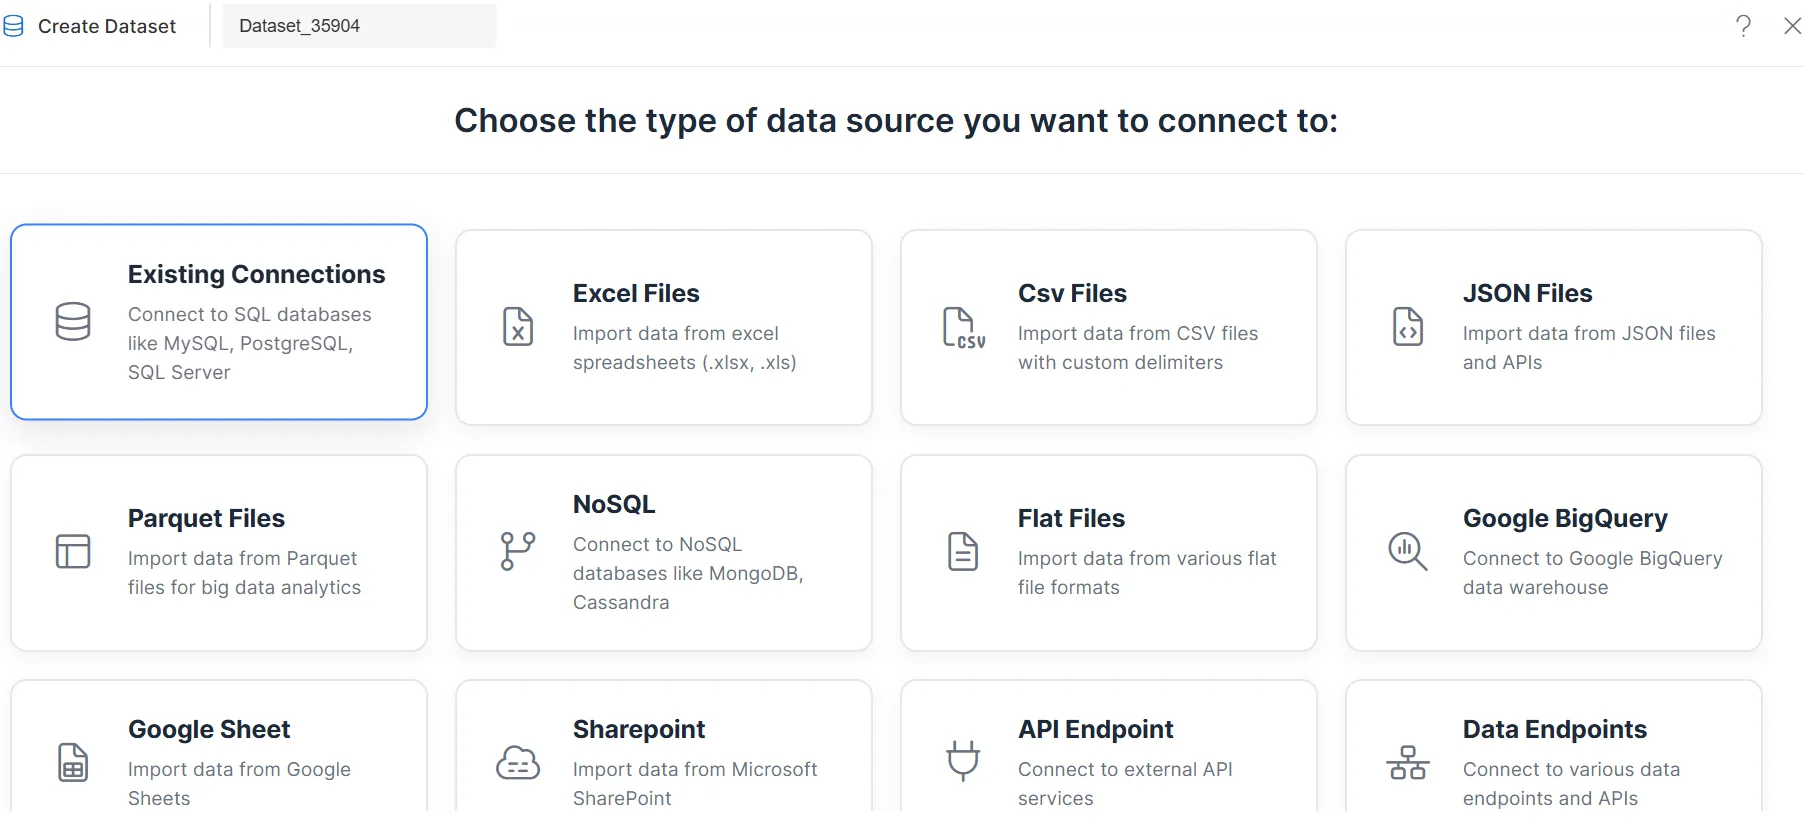
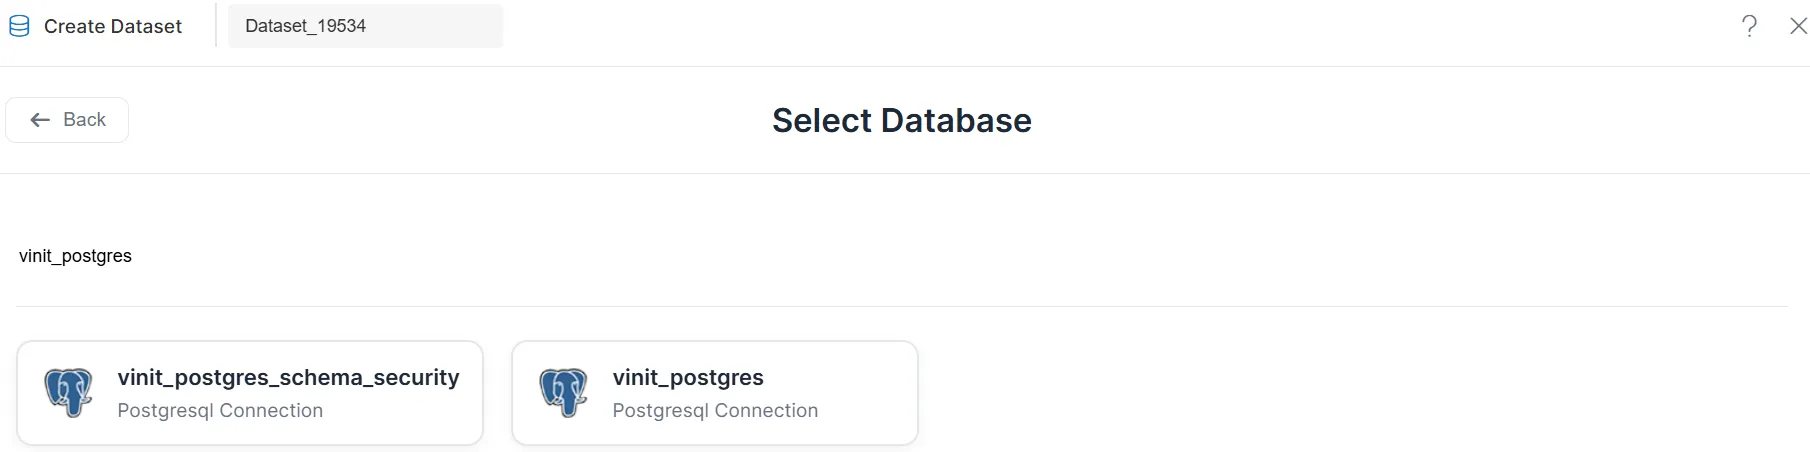
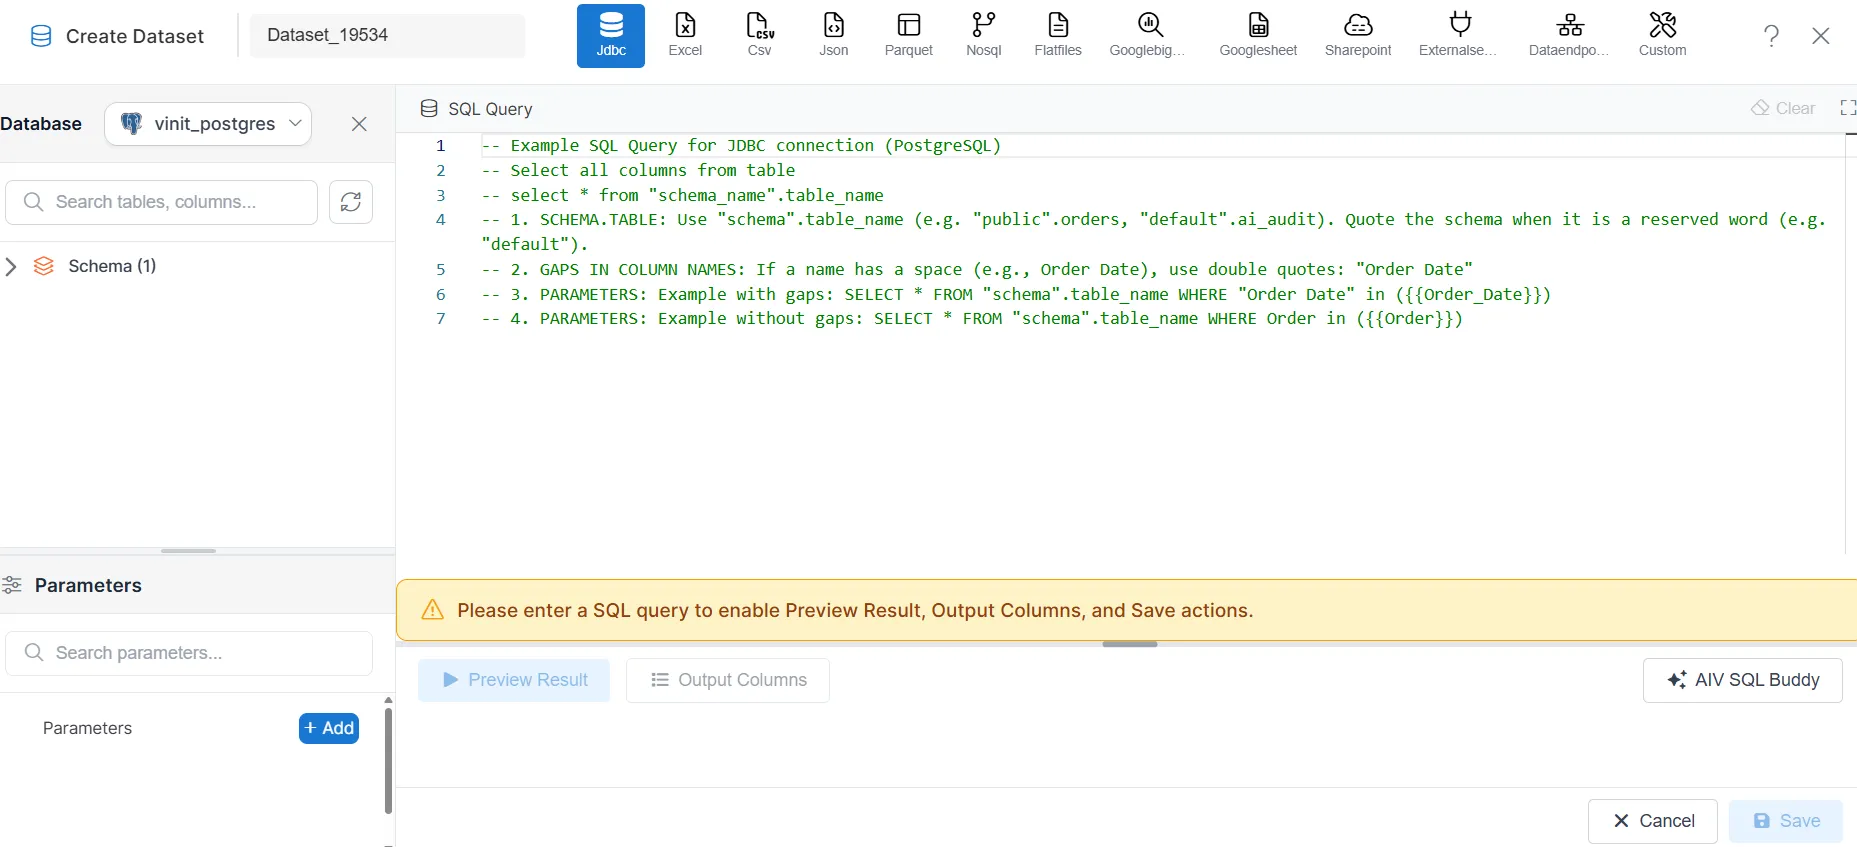
Step 5 : Create the Dataset
-
Open the
 (Hamburger Menu), navigate to Master Data → Datasets.
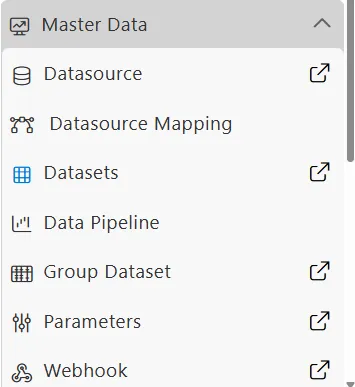
-
Select Create Dataset from the bottom toolbar.

-
Choose the required data source.
Example: Select an Existing Connections data source from the available options.
-
Select the specific database connection.
-
Open the query editor to create or edit the dataset query.
Step 6: Add Role-Based Security Logic
Apply security conditions directly within the dataset query.
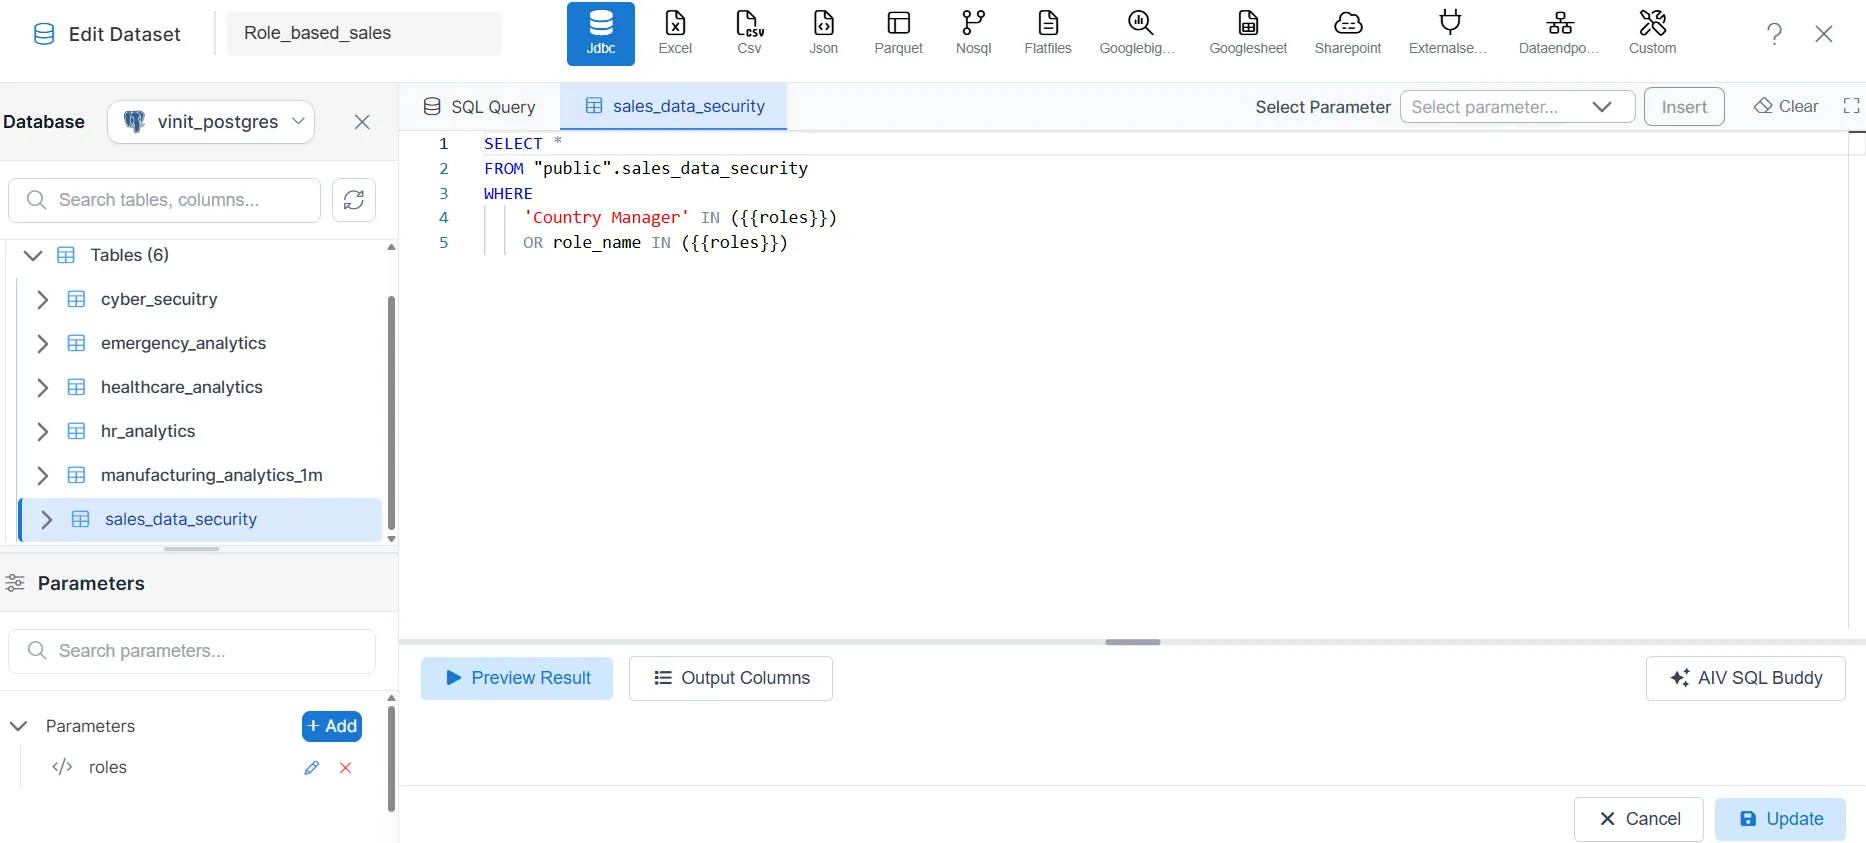
Security Query Example
SELECT *
FROM public.sales_data_security
WHERE
    'Country Manager' IN ({{roles}})
    OR role_name IN ({{roles}})
Query Explanation
The above query works as follows:
- If the logged-in user has the Country Manager role, all records are returned.
- Otherwise, only records where the role_name matches one of the user’s assigned roles are returned.
This approach ensures that:
- Country Manager role has administrative access to all data.
- Other roles see only the data associated with their specific role.
Step 7: Configure Dataset Parameters
Parameter Creation Guide: Create Parameter
After adding the security query:
-
Open the Parameters section.
-
Create or locate the parameter named:
{{roles}} -
Set the Default Value to:
getRoles()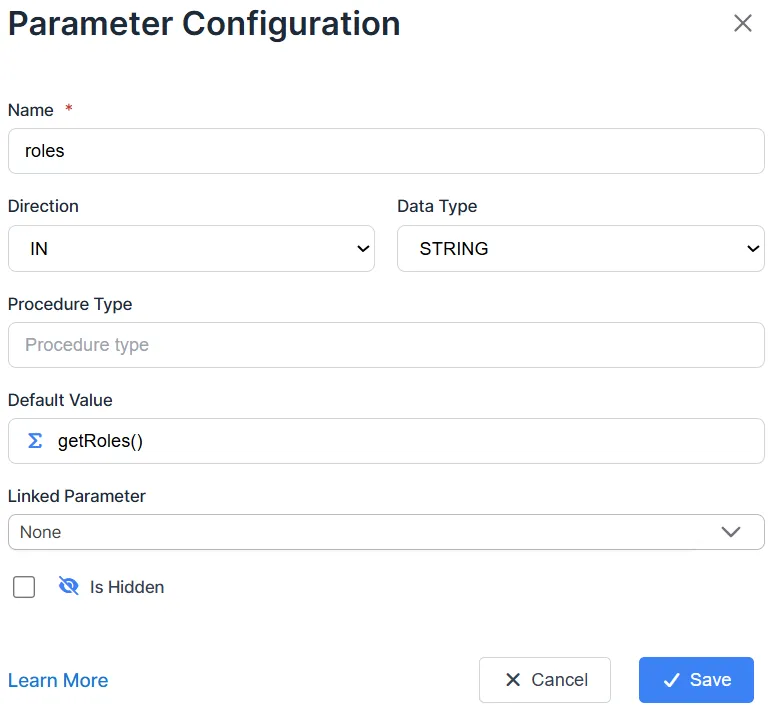
Why Use getRoles()?
The getRoles() function automatically returns the roles assigned to the currently logged-in user.
This allows AIV to dynamically apply the correct security filter without requiring manual role selection.
Examples:
- User mayur_shah →
getRoles()returnsBI Analyst - User neel_shah →
getRoles()returnsRegional Manager - User vinitdoshi →
getRoles()returnsCountry Manager
- Save the parameter.
- Preview the dataset.
- Verify that the returned data changes based on the logged-in user’s role.
Step 8: Validate Dataset Security
Before creating visualizations, test the dataset output.
User: mayur_shah
Expected Result:
Only BI Analyst data should be visible.
User: neel_shah
Expected Result:
Only Regional Manager data should be visible.
User: vinitdoshi
Expected Result:
All data should be visible (BI Analyst, Regional Manager, and Country Manager data).
Verify the following:
| User | Assigned Role | Expected Result |
|---|---|---|
| mayur_shah | BI Analyst | BI Analyst records only |
| neel_shah | Regional Manager | Regional Manager records only |
| vinitdoshi | Country Manager | All records |
If the results are correct, proceed to visualization creation.
Step 9: Create a Visualization
- Navigate to the Dashboard menu.
- Select Create Viz.
- Choose the secured dataset.
- Select the required chart type.
Example:
Create a Table Chart using the dataset Sales Role Security.
- Select the required dimensions and measures.
- Configure the chart.
- Save the visualization.
Step 10: Share the Dashboard
Share the dashboard with the required users to grant them access.
Share Guide: How to Share Dashboard
The dashboard is now available to authorized users.
Step 12: Test Role-Based Access
Log in using each user account and confirm that security is working correctly.
Expected behavior:
| User | Assigned Role | Visible Data |
|---|---|---|
| mayur_shah | BI Analyst | BI Analyst data only |
| neel_shah | Regional Manager | Regional Manager data only |
| vinitdoshi | Country Manager | All data |
Each user should see only the data permitted by the dataset security rules based on their assigned role.
Complete Security Components
| Component | Value |
|---|---|
| Dataset Parameter | {{roles}} |
| Dynamic Role Function | getRoles() |
| Security Condition | role_name IN ({{roles}}) |
| Administrative Override | 'Country Manager' IN ({{roles}}) |
Best Practices
- Use meaningful role names that match your organizational structure.
- Keep security logic inside the dataset to ensure consistent access control.
- Always validate dataset results before sharing dashboards.
- Test with multiple user accounts and roles before moving to production.
- Assign administrative roles (like Country Manager) to users who need full data access.
- Document role hierarchies and access rules for future reference.
Conclusion
Role-Based Data Security in AIV provides a powerful and flexible method for controlling data access at the dataset level.
By combining dataset parameters with the getRoles() function, AIV automatically identifies the roles assigned to the logged-in user and displays only the records they are authorized to view.
This approach helps organizations:
- Secure sensitive data based on organizational roles
- Provide role-appropriate data access
- Reduce dashboard duplication across different user groups
- Simplify security management through centralized role definitions
- Maintain consistent security rules across dashboards and visualizations
- Scale security controls as your organization grows