GitHub Authentication
Follow these steps to configure GitHub authentication in your AIV application:
-
Log in to AIV using your login credentials.
-
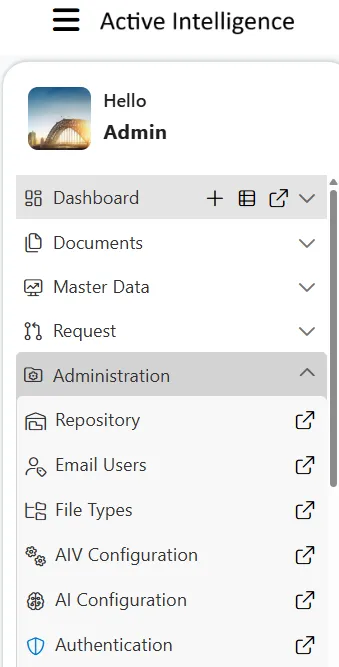
Click on the Hamburger menu (three horizontal lines) in the top left corner of the screen.
-
Navigate to the Administration section and click on Authentication.
-
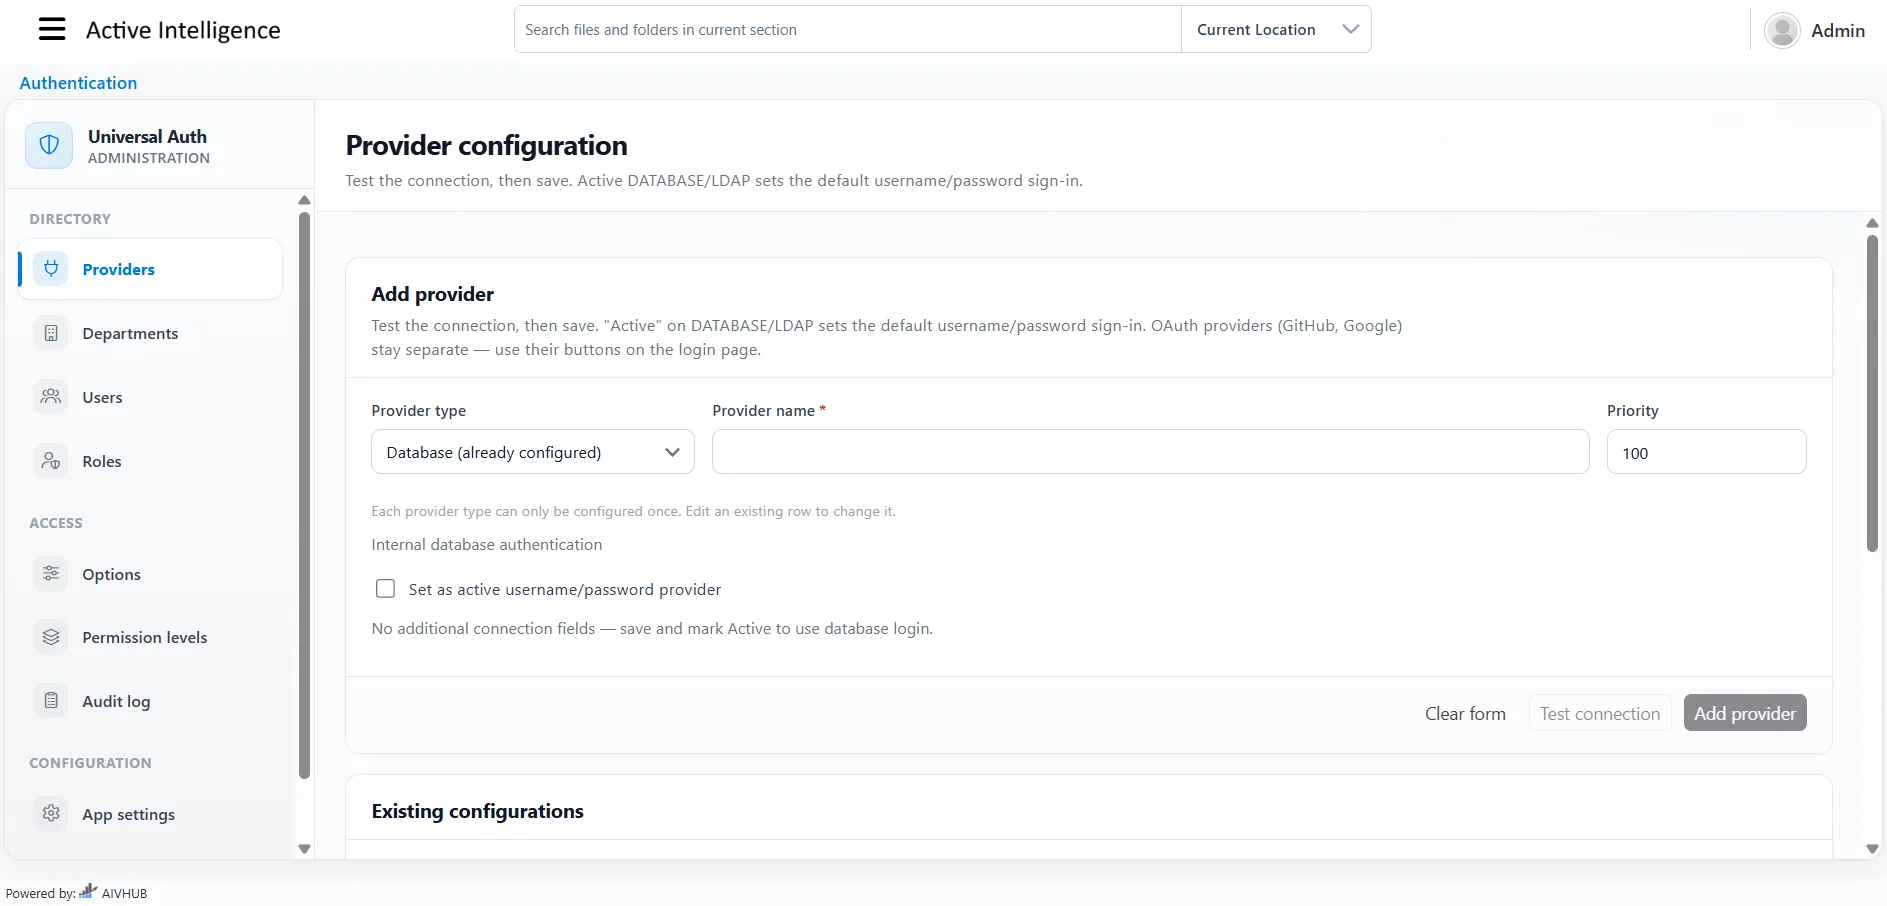
The Universal Auth Administration page will open. From the left-hand directory menu, select Providers.
-
Under the Add provider section, locate the Provider type dropdown. By default, it will be set to Database (already configured).
-
Click the dropdown and select GitHub OAuth2.
-
Fill in the following details for the new provider:
-
Provider name:
testing_github_provider(or your preferred name) -
Priority:
100 -
Make sure to check the box for Enabled (show OAuth button on login).
-
-
Once the details are filled, you will need to configure the OAuth2 application in GitHub.
Configuring OAuth2 Application in GitHub
To complete the setup, you must create an OAuth2 application within your GitHub account:
-
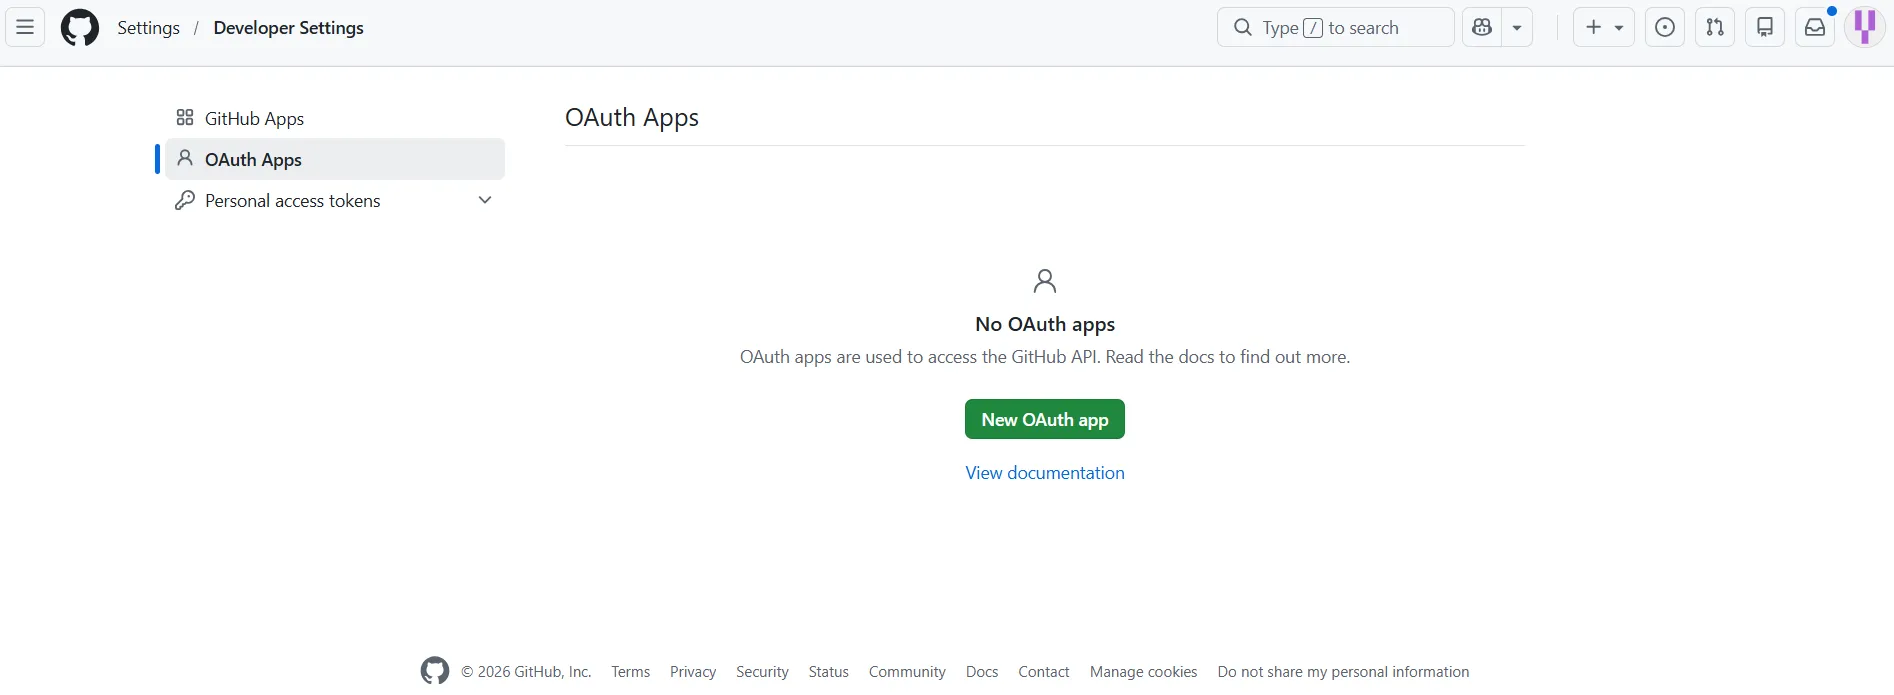
Navigate to GitHub Developer settings(GitHub → Settings → Developer settings → OAuth Apps).
-
If prompted, Log in to GitHub using your username and password.
-
Click on New OAuth App to register a new application.
-
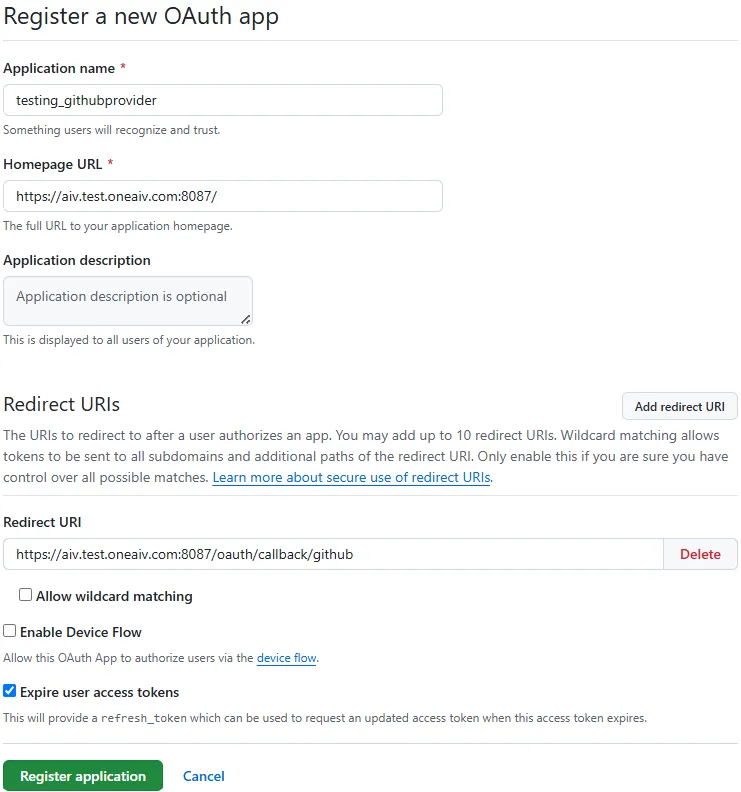
Fill in the required application details:
- Application name: Enter a name, such as
testing_githubprovider. - Homepage URL: Enter your AIV homepage URL, for example,
https://aiv.test.oneaiv.com:8087/. - Application description: (Optional) Add a description for your application.
- Authorization callback URL (or Redirect URI): Enter the callback URL for your AIV instance, such as
https://aiv.test.oneaiv.com:8087/oauth/callback/github.
- Application name: Enter a name, such as
-
Check the box for Expire user access tokens.
-
Click on the Register application button.
-
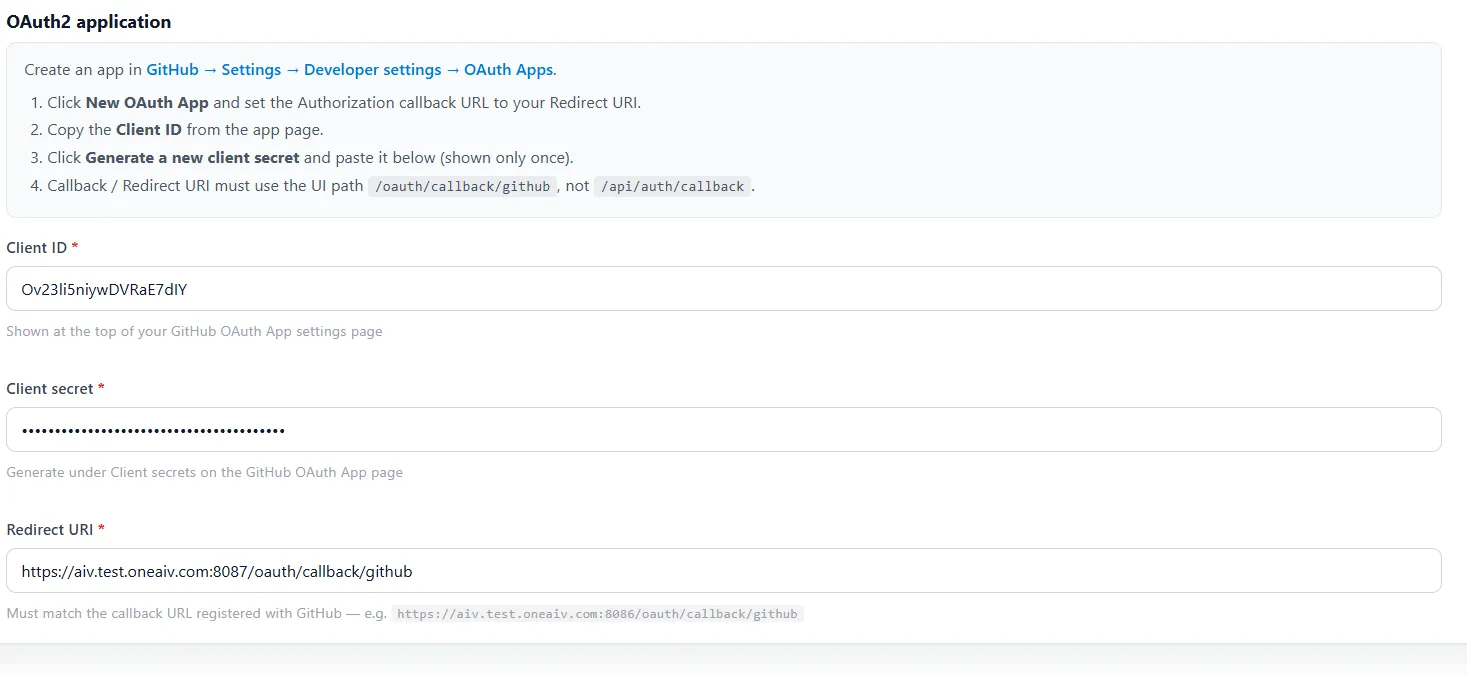
Once registered, you will be directed to the application’s page where you will see the Client ID. Copy this Client ID and paste it into the Client ID field in the AIV OAuth2 application configuration page.
-
Under the Client secrets section on the GitHub page, click on Generate a new client secret.
-
Copy the generated secret and paste it into the Client secret field in the AIV application.
-
On the same GitHub page, scroll down to find the Redirect URI. Copy this URL and paste it into the corresponding Redirect URL field in your AIV application.
-
Finally, click on the Add provider button in AIV to save and complete the configuration.
-
A success popup message will appear, and you will now see your newly created GitHub authentication provider listed as Active in the Provider configuration list.

Logging in with GitHub
Once the configuration is complete, you can test the GitHub login flow:
-
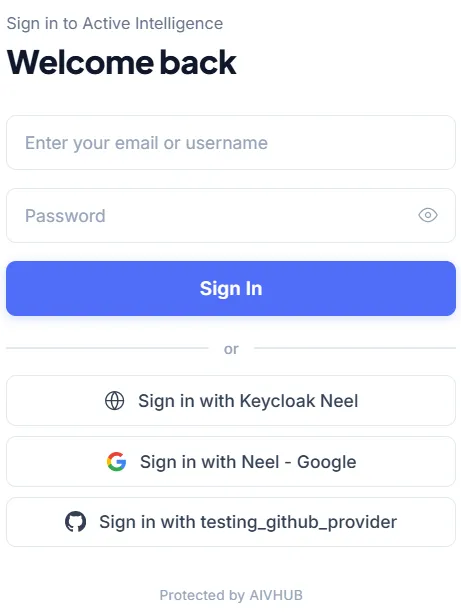
Go to your AIV login screen. You will now see a Sign in with testing_github_provider button (or the name you specified). Click on it.
-
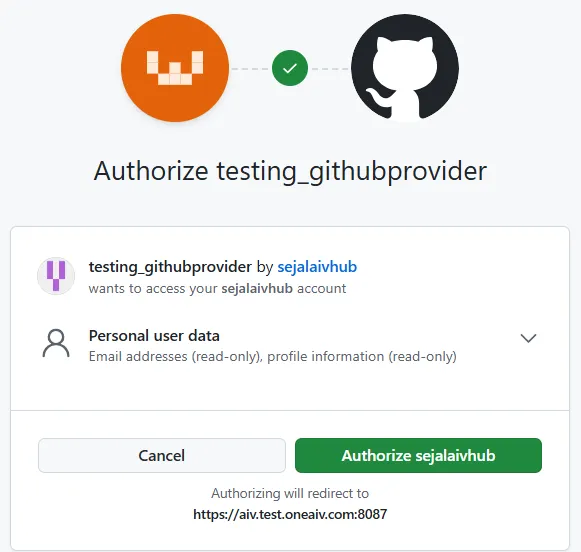
You will be redirected to the GitHub authorization page. Click on Authorize to grant AIV access to your GitHub account information.
Summary
By completing these steps, you have successfully integrated GitHub OAuth2 authentication with your AIV application. Users will now be able to securely and conveniently log in to AIV using their GitHub accounts.